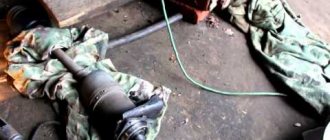
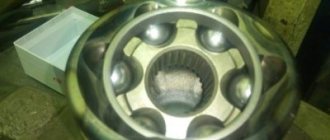
Replacing the outer CV joint of a VAZ-2110 and other domestic models does not require complex repair equipment and can be done at home. The procedure takes about two hours and consists of two stages: removing the drive, dismantling the hinge and reassembling the mechanism. The damaged boot is replaced in the same way.
In what cases do you change the hinge, and in what cases do you change the boot?
Replacement of the outer CV joint of the VAZ-2109 and the entire front-wheel drive line of the Togliatti Automobile Plant is carried out in the following cases:
- Strong crunching sound from the drive side when the wheels are unscrewed;
- Crunching noise when moving straight;
- No wheel movement when the engine is running and the gear is engaged.
Note: a hinge that is crunchy only when turning can be used for quite a long time if maintenance is carried out. The repair method is described below.
The boot is replaced if it is mechanically damaged. It is important to remember that dust that destroys the hinge can penetrate even through small cracks. Therefore, the boot is changed at the slightest suspicion of the presence of through holes in it.
Replacing the outer (external) CV joint boot Lanos - detailed instructions
The process of replacing grenade boots on Lanos, Sens and Chance is not at all difficult, as it might initially seem. If you have a set of basic tools, then you can save money on visiting a service station. To replace, you will need a special CV joint lubricant, which usually comes with the casing. Don't forget to also prepare a special circlip puller, a nail puller, and a new hub nut.
Let's look at the step-by-step process for replacing a grenade boot on a Chevrolet and Daewoo Lanos 1.5. The replacement is carried out similarly for Sens and Chance cars.
- First, we drive the car into the garage or onto a flat area, and begin to remove the wheel where the work is planned. It should be noted right away that it is impossible to replace the CV joint boot on a Lanos without removing the axle shaft. Although collapsible models of rubber casings are being produced today, they have not yet received confidence, since the issue of ensuring tightness is in doubt.
- Loosen the wheel studs. We engage first gear and unscrew the hub nut, having previously removed the metal cap.
- After loosening the hub nut, jack up the car and completely unscrew the mounting studs. We dismantle the wheel.
- We install safety supports.
- After this, you should turn the steering wheel to the side for ease of work.
- The caliper is dismantled, which is necessary to simplify the work. To remove the caliper, you need to unscrew the two hex bolts from the inside.
- The caliper is removed from its seat and hung on a wire so that it does not interfere.
- The brake disc is dismantled by unscrewing the mounting bolts using a screwdriver. It is not necessary to remove the brake disc, but in this case the replacement process becomes more complicated.
- Next we proceed to removing the ball joint. First, use a metal brush to clean the thread with the nut securing the ball joint.
- Using a wrench set to “19”, the nut securing the ball joint is unscrewed. If necessary, use WD-40 fluid.
- The ball joint is dismantled using a special puller. If you don't have a puller, then a hammer and crowbar will do. A detailed description of the process of dismantling the ball joint on Lanos is in this material.
- After removing the ball joint, you can disengage the axle shaft from the hub.
- The gear shift lever is moved to neutral.
- We clean the surface of the boot from dirt. This is done in order to prevent contamination from entering the mechanism.
- The grenade mechanism should be washed with kerosene if the boot is torn and dirt gets inside. If the casing is intact and replacement is made due to the appearance of microcracks, then there is no need to flush the separator.
- Using pliers, remove the clamps securing the casing.
- Further, the boot is pulled together in the direction of the axle axis.
- We remove excess grease to gain access to the mechanism.
- The CV joint is connected to the axle shaft using a retaining ring. To separate these parts, you need to remove the retaining ring. To do this, you will need circlip pliers that work to release them.
Retaining Ring Puller
- The photo below shows what the lock ring looks like and where it is located inside the CV joint.
- Using a puller, the locking ring is loosened and disengaged from the grenade axle shaft.
- Next, if necessary, clean and wash the CV joint mechanism. You can disassemble it and check for defects if there are appropriate reasons for this. The process of disassembling, repairing and replacing a grenade on Lanos is described in another material.
- We remove the old boot from the shaft and install a new one in its place, after first cleaning the axle shaft from dirt.
- Before seating the boot on the axle, it is necessary to put on a clamp of a smaller diameter.
- Next, a rubber boot is placed on the shaft up to the groove.
- We fix the boot with a clamp. Now you will need to use a regular nail puller.
Nail puller for deforming the clamp fastening
- A nail puller is needed to compress the clamp.
- After compressing the clamp, we begin to press the lubricant inside the CV joint. Many people mistakenly fill the inside of the boot with excess grease, which is incorrect. As the bearing operates, lubricant will fill the inside of the rubber housing.
- The grenade is mounted on the splines of the axle shaft.
- We hammer the CV joint with a hammer until it is secured with a locking ring. A characteristic click will be heard.
- We secure the boot with a clamp in the same way as in the first case.
- Next, assembly is carried out in the reverse order of removal. The only important point is that during assembly you need to tighten a new hub (half shaft) nut, so do not forget to purchase it together with the replacement casing.
This completes the process of replacing the outer boot on a Lanos car. The procedure is similar for Sens and Chance cars, as well as other brands. The process of replacing the CV joint boot is considered for a Lanos car on the left (driver's) side. Replacing the casing on the right side is performed in a similar sequence. The left and right axle shafts on Lanos differ in size. A detailed video on replacing the CV joint boot on a Lanos is shown in the video material.
Procedure for replacing CV joint and boot
Replacing the external CV joint of a VAZ, including models such as Granta and Lada Largus, begins with hanging the car on a lift or stumps. You can use jacks for this, but they must be reliable and installed on a flat, hard surface (asphalt). The hub and wheel nuts are first “torn off”. All further work can be divided into two stages: dismantling and reassembly.
Just recently, the answer to the question “is it possible to replace the boot without removing the grenade” would have been negative. But after watching a video in which this is done without much difficulty using a special device, the answer is no longer so clear.
Dismantling
After the car is hung, remove the wheel from the required side and unscrew the hub nut completely. The washer located underneath should be carefully removed and set aside.
On cars "Kalina", "Priora", the VAZ-2110, "Samara", VAZ-2115 family - replacing the constant velocity joint requires complete removal of the drive. To do this, the steering tip should be uncoiled and removed from the seat, thereby ensuring the possibility of lateral movement of the hub.
After the hub nut and tip are removed, the hinge can be removed. It is removed together with the drive. The hub is moved to the side, the drive is pryed with a pry bar from the gearbox side and pulled out. If both axles are to be removed, a mandrel of the appropriate diameter must be inserted in their place.
The removed drive is clamped in a vice, after which the hinge is knocked down with strong blows of a hammer. If the part being replaced is not the CV joint itself, but the boot, the assembly should be dismantled as carefully as possible, striking through the wooden spacer.
Note: in some cases it is possible to remove the CV joint without completely removing the drive. To do this, you need to remove its splines from the hub and try to knock the element out of its seat directly in the wheel arch with light blows. This is usually possible when replacing a new but defective unit.
Installation
Before installation, you need to clean the seat and install the boot. The boot of the outer CV joint of a VAZ-2110, 2114 and other cars is always replaced, even if the old element is intact. The hinge itself is carefully filled with the same lubricant and installed in place using a “mallet” (wooden hammer). Further assembly is carried out in the exact reverse sequence. It is necessary to check whether the threaded connections have been properly tightened, especially the hub nut. The procedure can be considered successful if the crunch that was present before the repair has disappeared, the car confidently picks up speed and turns without making any extraneous sounds.
Replacing CV joint boots on Volkswagen Passat B3-B4
FAQ VW Audi Skoda Seat
The work procedure is applicable for cars:
Volkswagen Passat B4 / Volkswagen Passat B4 (3A2) 1994 - 1997 Volkswagen Passat Variant B4 / Volkswagen Passat Variant B4 (3A5) 1994 - 1997
Volkswagen Passat B3 / Volkswagen Passat B3 (312) 1988 - 1994 Volkswagen Passat Variant B3 / Volkswagen Passat Variant B3 (315) 1988 - 1994
The information is suitable for repairing other cars as well.
An inspection of the vehicle's chassis revealed wear on the protective covers (boots) of the internal and external hinges and the left drive shaft. The covers are covered with small cracks, several tears have formed, and grease is released. Replacement of protective covers (anthers) is required.
Photo 0.
This work is quite difficult. Requires certain knowledge and skills. It is imperative to have a reliable, necessary tool. It is more convenient to perform the work on a lift or pit.
When completely disassembling and washing the hinges, wear of the component parts may be revealed and a complete replacement of the hinges may be required. In this case, it is more advisable to purchase a new hinge, which already includes a new protective cover, fixing parts and lubricant.
ATTENTION! After removing the drive shaft, you must not lower the car and roll it on its wheels and turn the wheel bearing. The bearing may be damaged.
Below we will describe the work of replacing only the protective covers (boots), with a complete washing and reassembly of the working constant velocity joints (CV joints).
1. Two protective covers (boots) were purchased, complete with the necessary fastening parts and lubricant.
Photo 1a. Outer cover (boot).
Photo 1b. Inner cover (boot).
2. The car must be put on the handbrake. The key must be in the ignition, the steering wheel is unlocked, because... the steering knuckle will need free play.
3. Loosen the wheel mounting bolts and the drive shaft fixing nut. Photo 3.
4.Raise the car, remove the wheel.
5. To secure it from twisting, screw two wheel bolts into the standard holes. Insert a screwdriver into the holes of the ventilated disc.
All “power” loads for unscrewing the hub nut have already been performed in photo No. 3. “Stopper” with a counter, ensures fixation only when the hub nut is finally unscrewed and opens. bolts securing the internal hinge to the gearbox flange, at which the load on the screwdriver is very small. Photo 4.
Photo 5. Unscrew the nut and remove the washer.
6. Clean the inner edges of the mounting bolts, the internal hinge to the box flange. Photo 6.
7. Using a long wrench with an extended “Star” attachment, unscrew these bolts. Photo 7.
8. To disconnect and subsequently remove the left drive shaft, it may be necessary to disconnect the ball joint. It is necessary to unscrew the large bolt that secures the ball joint pin to the steering knuckle. Using a pry bar, slightly lower the lever with the ball joint down so that the ball joint pin comes out of the mounting hole of the steering knuckle. In this case this was not required. Slightly moving the inner joint and lifting it up together with the drive shaft, squeezing it out with a puller (with a hammer, through the spacer), remove the drive shaft with the outer CV joint from the wheel hub. In this case, there may be a need for free movement of the steering knuckle. Photo 8a.
Photo 8 b.
9. The drive shaft has been removed. We fasten it in a vice. Photo 9.
10. Internal hinge. Removing the lock washer, removing the internal hinge, the Belleville washer and the protective cover (boot). Disassembly, washing, inspection of operability and reassembly of the hinge must be carried out by a person with knowledge and experience. Photo 10.
11. We put a new protective cover (boot) on the drive shaft and the internal joint. Experience is required when putting on and installing in place. Photo 11.
12. Consistently and correctly install and fix the rebuilt (new) hinge on the drive shaft. Photo 12.
13. Fill the hinge with grease and attach the sealing gasket to it. Photo 13 New grease is packed here.
14. External hinge. Removal of fixing elements, removal of the external hinge, disassembly, washing, inspection of functionality and reassembly must be performed by a person with knowledge and experience. Photo 14a Old grease is packed here.
Photo 14 b
15. Install a new protective cover (boot) with a small clamp on the drive shaft. Photo 15a.
Photo 15b.
16. We put a large clamp on the cover and consistently and correctly fix, on the drive shaft, the rebuilt (new) outer joint, pre-filled with lubricant. Fasten and crimp the clamps. Photo 16.
17. The left drive shaft is assembled and ready to be installed on the vehicle.
Photo 17.
18. Using plates and new bolts, securely attach the internal joint to the gearbox flange. A brake inserted into the ventilation holes will help fix the hub. disk, screwdriver. Tighten the nut securing the drive shaft to the hub after putting on the wheel and lowering the car. Photo 18a
Photo 18b
Photo 18c
19. The final, strong tightening of the nut securing the drive shaft to the hub is performed after securing the wheel and lowering the car.
Addition from PHILINS:
Those planning to carry out the above work on their own! pay attention to the correct position of the ball joint retaining bolt, photos 8b and 18b; the correct position is in photo No. 8b
Many people screw in the bolt, as in photo 18b, because... To replace the ball joint, you no longer need to unscrew the lower bolt of the caliper holder (bracket). With the correct position as in photo 8b, this work is inevitable. But at the same time, nothing else keeps the bolt from falling out while moving. If the ball joint locking bolt is in the correct position, if it is unscrewed while moving, it will not fly out (it will rest against the caliper bolt).
Addition from AVANTgardist:
and more info for those who will carry out such work, the boots of the external hinges (like the hinges themselves) are large and small, before buying a new one, look at what kind of hinge you have, large or small, of course you can pull the small boot onto the large hinge , but not worth it.
Addition from Corney:
As far as I can see, this was done on a manual transmission. I would like to emphasize that in an automatic transmission, anyone who removes the shaft completely will encounter a problem. The right shaft will unscrew without problems. But the left one, you will need to lift the automatic transmission itself a little with a pry bar, since everything is not very convenient...
Addition from brigand:
When I was changing the anthers, after disassembling and washing the inner CV joints, I discovered traces of wear and chipping on the paths. Although there was no knocking, I decided, since I had taken everything apart, to swap the left and right CV joints, since there were no contraindications. It turns out that the CV joint rotates in the opposite direction and works with the unworn part.
Addition from gene1:
For fellow forum members who will be doing this procedure for the first time, it would be necessary to indicate more specifically how the retaining rings are removed and installed, where the cone rings and spring washers should look (Fig. 1a and Fig. 1b). It seems like a small thing, but then the forum will be flooded with “help, it’s backlash!!!”, “help is knocking!!!”
PS The advice to “put it as it was” is not suitable. When disassembling this unit, it turned out that the last owner (or repairman) was not friendly with either his head or his hands
Continuation and all discussions of the report here
Thanks: murz88
How can I find the information I need here?
Decoding the factory equipment of the car (English) Decoding the factory equipment of VAG in Russian! Diagnostics of
Volkswagen, Audi, Skoda, Seat, error codes.
If you have not found information on your car, look at the cars built on the platform of your car. Most likely, the information on repair and maintenance will be suitable for your car.
What is the main function of a car boot?
If you are wondering how to replace the inner CV joint boot? Then you need to properly understand the whole mechanism. The importance of replacing the boot is that it powers the two front wheels. Thanks to its use in a car, the wheels turn following the movements of the steering wheel. The main elements that serve as the basis for the hinge are durable alloys of various types. The main purpose of such alloys is to withstand the entire maximum load of the machine. To successfully hold the load intended for it, it is necessary that the hinge is always clean and there is no foreign debris inside it.
CV joint disassembly diagram
How to find out what condition the CV joint and boot are in?
It is more convenient to check the anthers on a lift. To check, you need to turn the front wheel all the way and find the place where the CV joint is located. One of two pictures will be visible to the eyes:
- The corrugated rubber band is intact, there are no traces of grease - the parts do not require replacement.
- The integrity is damaged, there is a possibility of dirt penetration - replace the boot as soon as possible while the CV joint is in good condition.
You can notice the first signs of a CV joint malfunction by the sound.
When the car turns sharply, the wheels are turned out to the maximum, cracking and knocking noises are clearly audible. Not paying attention to extraneous sounds, the driver can wait for the CV joint to literally crumble while driving, which can lead to an accident. It is important to know!
You should turn the wheels to the left as much as possible and start moving. We heard a crunching sound – the CV joint of the right wheel was damaged. You need to check the left wheel in the same way, turning the steering wheel to the right all the way. Buy boot and CV joint
Replacing the inner CV joint boot of Lanos, Sens and Chance
If there are signs of wear not only on the external, but also on the internal boot of the guarantors on Lanos, then it is recommended to immediately replace both devices. Internal boots fail less frequently due to the fact that they experience less compression forces when turning the wheels. If the products still need to be replaced, this is done as follows:
- When the axle shaft is released from engagement with the hub (point 12 of the previous section), it is necessary to remove it from the gearbox.
- Next, the process of replacing the internal CV joint boot on a Lanos is carried out on the removed axle shaft.
- The principle of disassembling the internal grenade is the same as in the case of the external CV joint. The grenade is secured with a locking ring. To replace both boots on the axle shaft, it is not necessary to dismantle both grenades. To do this, remove one CV joint (any) and replace both casings.
- We install the assembled axle shaft in place, and perform the assembly in the reverse disassembly sequence.
The video below shows how to replace the inner CV joint casing on a Lanos.
As you can see, the process of replacing grenade boots on Lanos is not difficult, and the work takes no more than 2-3 hours. To understand the importance of maintaining the boots in good condition, it should be noted that the cost of a new CV joint is from 2,000 rubles (not the original). The original will cost 2 times more. In addition, if the CV joint fails, the car will not be able to continue moving independently. That is why it is very important not only to be able to change grenade boots yourself, but also to monitor their condition on your car.
Methods for checking the inner CV joint
“Grenade” is a simple hinge consisting of 2 axle shafts. It is affected by several forces:
- when driving, torque is transmitted by the gearbox (front-wheel drive);
- when turning - steering;
- when driving off-road - bumps and unevenness.
There is constant friction in the mechanism, which gradually destroys the parts. The slightest ingress of dust inside quickly disables the “grenade”. The mechanisms are worn out, the gap between the surfaces increases, and extraneous crackling and noises become noticeable. The first signal that the grenade has broken is a strong crunching sound when the car accelerates sharply or when driving over obstacles. It’s even worse if the noise is heard even during normal, straight-line movement - then the joint needs to be changed urgently.
Repair or replacement?
A simultaneous check of the bellows protection (casing) and the hinge is carried out on a jack:
- the machine is installed level;
- one of the wheels hangs out - be sure to install a wheel chock;
- The boot is carefully inspected.
If the rubber is intact and there are no traces of oil around, the CV joint is in order. If the rubber is torn, you need to change the cover so that dirt does not get inside the mechanisms. However, you should not immediately start replacing the casing - you need to continue checking:
- apply the parking brake (the selector must be in neutral);
- start the engine;
- Depress the clutch, engage 1st speed;
- Slowly release the clutch while pressing the brake with your other foot to load the joint.
