Replacing an external CV joint on an Audi 80
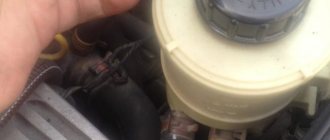
Before looking at the CV joint, we rushed under the hood of the rarity.
Out of fright, the engine volume was not recorded. The control system, judging by the air filter, is some kind of Mono-Jetronic. I really liked the mechanism for adjusting the tension of the alternator belt.
But the engine compartment, in fact, has nothing to do with the matter. The complaint was about a CV joint crunching. Well, let's take off the wheel:
Why are the wheel bolts screwed in? Oh, it's a long and beautiful story. Religion, or more precisely, early acquired sclerosis does not allow us to loosen the fastening of the drive shaft (aka the nut, or more precisely, in this case, the hub bolt) on a stationary car. Putting the wheel back on is too lazy. The disk in front, as you can see, is not ventilated, so the favorite method (a screwdriver into the disk so that it rests against the bracket) is not suitable. We ask a colleague to hold the brakes and make an unexpected discovery for ourselves - the disc is not attached to the hub in any way, so it turns. We return the wheel bolts to their place and successfully unscrew the hub bolt. Head on 30. So far the German is not presenting any surprises in terms of repairs.
But now it's time to remove the caliper. We take the head at 13 and.
This is where the four rings present the first surprise. To unscrew the caliper, you need to hold the guide into which this bolt is screwed. You need to hold it with an open-end wrench, suddenly - at 15. Usually you expect such surprises from the French. Well, okay, we have plenty of this stuff.
We carefully hang the removed caliper on the spring using a special dealer wire:
The disk, as already mentioned, is not attached to the hub by anything, so its removal takes exactly one second. Next you need to remove the shield, otherwise it is very inconvenient to climb to the ball joint mounting bolt. The shield is secured with three 10mm bolts, and it is highly recommended to replace them, because after 23 years they become very fragile.
Now you need to unscrew the nut and remove the ball mounting bolt. In the same way as was done when replacing the drive shaft on a Peugeot 206. These actions were not included in the frame, so in words: after removing the bolt, you need to pull the ball pin out of the socket in the steering knuckle. This is done either with a crowbar or with a hammer and a block of wood (so as not to hit the suspension arm directly with the hammer). In this case, the second option was chosen, and now the steering knuckle is free. We immediately free the drive shaft from the steering knuckle:
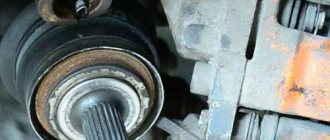
Here it is, the hero of the occasion - a torn boot, due to which water and dirt get into the CV joint in abundance, as a result of which the precision unit, one of the shining peaks achieved by mechanics, turns into crispy shit to be thrown away:
In principle, you don’t have to bother and change the CV joint without removing the shaft from the car. But this is not very convenient. Therefore, it was decided to remove the entire shaft. Unlike most modern front-wheel drive cars, on the Audi 80 the drive shafts of the right and left wheels are almost (and maybe completely - you need to look at the catalogues) the same in length, and do not have intermediate attachment points (like suspension bearings on Renaults, Fords, Peugeots) . The drive shaft is attached to the box flange with a counter flange. This flange is secured with six bolts. And just as we were about to praise German practicality and wisdom, we suddenly discovered that these bolts were 12-sided Torx. Which was not found in service-193 until this day. Therefore, here is a proven recipe for dismantling such bolts: - a T40 hexagonal Torx is inserted; — with some effort it turns in the slot, licking off some of the edges; - then insert a 6-point hexagon, one significant effort to break the bolt - then you can unscrew it completely calmly.
Here is the bolt after this event:
It is clear that this is not a very correct approach, but in my defense I would like to say that a set of new replacement bolts was purchased, and at the same time a set of twelve-sided torx bits, so there are no abnormal modifications or other “Steel Udder” collective farm work on the car was produced.
The process of unscrewing these six bolts on the right is a long one, since access to them is not very easy - it is on the right that this flange with the internal CV joint is neatly covered with a protective piece of iron, presumably from the exhaust pipe passing nearby. The protection, in turn, is also not very easy to unscrew; in general, the left side is easier to install and dismantle.
One way or another, the bolts were unscrewed, and now we have the shaft in our hands. Here is a whole, beautiful and full of grease inner CV joint:
And here is the external one, battered by life:
It's time to remove the outer CV joint - it must be replaced as an assembly. An unexpected problem arises here. Unlike many other options, there is no locking ring to remove to make your life easier. There is a retaining ring inside the CV joint, but it is not possible to get to it. There are two ways. Either knock down the old CV joint (problematic, since with all the equipment of the service-193, it still does not have a workbench with a solid vice), or screw in the hub bolt - it will rest against the shaft and pull the CV joint from the shaft.
Using the available means, we first tried to knock down the CV joint through a wooden spacer:
And then screw in the bolt, holding the shaft, again, using improvised means:
As expected, all this had no result. An operational meeting on the project was held with the involvement of independent consultants. As a result of the meeting, it was decided to resort to the help of art. The DJ loaded a fashionable CD with Bulgarian music and in five minutes dismantled the holding part of the clip. As a result, the CV joint was disassembled into the following components:
In the above picture we see: - on the left - the CV joint housing. It was not damaged during the dismantling process; - bottom right - the inner race, which, in fact, fits onto the drive shaft. It was also not damaged during dismantling; — two larger rings on the top right are, in fact, a cage (also known as a separator) that holds the CV joint balls in it, and the CV joint itself from falling apart into two halves. It was she who had to be cut with the help of DJ Snezhana (why? A normal Bulgarian name!); - two balls, slightly touched by the grinder (read - broken). Another four were lost between work and photography; - two rings that are placed on the shaft in front of the CV joint and spring it (so that it does not walk along the shaft).
Replacing CV joints and boots on Audi 80
A constant velocity joint (CV joint) is one of the key elements of a car's suspension, providing rotation and rotation of the wheelbase. Due to operation in extremely difficult conditions, this unit often becomes a headache for car enthusiasts, especially when it comes to its repair or replacement.
THIS IS INTERESTING: Mazda 3 heater does not work
In most cases, restoring a CV joint is almost impossible and the only solution is to dismantle the old, faulty unit and install a new one.
As a rule, the average service life of a constant velocity joint is about 100 - 150 thousand kilometers.
This indicator can increase either up or down, depending on the quality of the unit itself, driving style, road surface condition, weather and climatic conditions, and a number of other factors.
Signs of a CV joint failure include the following deviations: various unnatural sounds that occur when turning the wheelbase, knocking and grinding noises when making a sharp turn. It is strongly recommended not to delay replacing this unit, since driving with a faulty CV joint can cause even more complex and expensive breakdowns, as well as cause an emergency on the road.
How to change CV joints and boots on an Audi 80?
The process of replacing CV joints on an Audi 80 begins with removing the bolt that secures this part to the axle shaft. It is strongly recommended that this and subsequent actions be performed “from the ground”, in a stable position, to prevent the vehicle from overturning. The further sequence of work consists of the following steps:
- Using a 17 wrench, the tie rod end is unscrewed and pressed out, after which the nut is unscrewed and the bolt is removed from the ball joint support.
- Both clamps are removed from the cover.
- Using a pry bar, which needs to be pressed onto the lever, the ball joints are removed.
- The central bolt is unscrewed and a tube or fitting is placed in its place.
- With a little effort, the faulty CV joint is knocked out.
When installing a new constant velocity joint and boots to it, you need to pay special attention to additional lubrication of the axle shaft. Assembly of the unit is performed in reverse order.
You can buy used spare parts for your car on our website
Despite the huge selection of auto parts, repair kits and auto products, it is quite difficult to find high-quality parts and components. Especially when it comes to a moderate pricing policy. “VseNaRazborku” offers to buy all original used Audi 80 spare parts necessary for local and major repairs on extremely favorable terms:
- Affordable price and no overpayments;
- Official guarantee of quality, reliability and serviceability of parts;
- Convenient payment methods - cash and bank transfer;
- Pickup from warehouses in the Moscow Region or delivery within the Russian Federation;
- Professional consulting support.
By choosing used original production parts for the Audi 80 B4, you protect yourself and your car from counterfeit, defective and substandard parts, components, assemblies, assemblies and mechanisms supplied from China. This, in turn, allows you to significantly reduce time and material costs for maintenance, repair and modernization of the vehicle.
Source: https://vsenarazborku.ru/blog/zamena-shrusa-i-pylnikov-na-audi-80
External CV joint Audi 80 B3 - replacement, malfunctions, choice
The old woman of eighty became famous as a reliable and not too picky car. Many people say that they don’t do things like this today, and in some ways they are right. They haven't done it for twenty years. Nevertheless, hundreds of thousands of hundred and eighty cars manufactured in the late 90s and early 2000s continue to run on our roads. People love these cars and are in no hurry to part with them. One of the unpleasant surprises that the Audi 80 B3 can throw up is the destruction of the CV joint, internal or external. Today we’ll figure out how to remove and replace the outer CV joint of an Audi 80, how to choose a good joint and install it back correctly without errors.
Replacing CV joints for Audi A4 B5
Moscow, 4th Roshchinsky proezd, 19 building 4 [email protected] Availability on Avito
+7 +7 +7
How to replace the CV joint on an Audi A4 yourself?
A constant velocity joint (CV joint) is a bearing whose task is to transmit the torque of the gearbox to the wheel. Features of the CV joint device in the Audi A4 allow torque to be transmitted regardless of the angle of rotation of the wheel.
Signs of CV joint failure
Since this part of the car is subject to constant load, it often wears out and becomes unusable, which is why it needs to be periodically replaced. This need can be determined independently - there are several signals that the CV joint on the Audi A4 has become unusable and requires replacement:
• constant crunching and uniform rumble in the area of one of the wheels of the front axle;
Signs of malfunction and choice of external grenade Audi 80
The imminent death of the Audi 80 constant velocity joint can be diagnosed by several symptoms:
- characteristic crackling sounds when turning, especially when accelerating in a turn;
- crunching sound when moving with acceleration, and sometimes this can be within a certain speed range;
- vibration during acceleration.
Even the most experienced technician cannot tell you how to check the CV joint on an Audi in order to be 100% sure that it is the source of noise. Only an autopsy can show the real degree of wear. The destruction of a CV joint in the middle of a deserted road on a rainy night will also eloquently tell you about the causes of creaks, crunches and vibrations. But it’s better not to let it get to that point.
This CV joint is no longer alive
As practice shows, the left joint asks for retirement more often than the right one, although many experts recommend changing CV joints in pairs - outer and inner at a time, so as not to get your hands dirty again. By the way, for those who don’t like to get their hands dirty, there is the prospect of paying from $40 to $60 just for replacing a grenade (one). Therefore, replacing the CV joint on an Audi 80 is not only useful, but also profitable. For this $60, by the way, we can buy a new, albeit not top-end, hinge kit, ready for installation.
9.1.5. CV joints
Axle shaft (4 cylinder models)
| 1. Inner CV joint outer diameter for cars with a 4-cylinder engine: 100mm 2. Axle shaft There are axle shafts of different lengths depending on the type of gearbox 3. Install the retaining ring in the annular groove on the axle shaft (not visible when the joint is installed) 4. Remove the outer CV joint only complete installation: install the hinge on the axle shaft using a mallet so that you can install the retaining ring 5. Thrust washer 6. Convex washer 7. Hose clamp 8. Check the cover for cracks and signs of wear 9. Clamp 10. Check the cover with cover for cracks and signs of wear, remove using a mandrel; before installing on the CV joint, cover the front surface with D3 glue 11. There are 2 types of convex washer: 1. with internal splines 2. with external splines; when replacing, install a washer of the same type 12. Oil seal replacement: remove protective film and stick it on the hinge 13. Retaining ring |
Warning
Axle shaft lubrication on 4-cylinder vehicles: Lubricate the inner and outer CV joints with 90 grams of G-6 grease each.
Axle shaft (5-cylinder models)
| 1. There are 2 types of convex washer: 1. with internal splines 2. with external splines, when replacing, install a washer of the same type 2. Install the retaining ring in the annular groove on the axle shaft (not visible when the hinge is installed) 3. Remove the outer CV joint only in the entire installation : install the hinge on the axle shaft using a mallet so that you can install the retaining ring 4. Thrust washer 5. Convex washer 6. Hose clamp 7. Check the cover for cracks and signs of wear 8. Clamp 9. Axle shaft 10. Check the cover with cover for cracks and signs of wear, remove using a mandrel before installing on the CV joint, cover the front surface with D3 glue 11. Inner CV joint outer diameter: for cars with a 4-cylinder engine: 100 mm for cars with a 5-cylinder engine: 108 mm Quattro: 100 mm 12. Oil seal replacement: remove the protective film and stick it on the hinge 13. Retaining ring |
Warning
Lubrication of the axle shaft on cars with a 5-cylinder engine: lubricate the inner CV joint with 120 grams of G6 grease and the outer CV joint with 90 grams.
Modified axle CV joint
| 1. An axle shaft with an internal CV joint is sold as a spare part, complete with a boot and grease; when replacing the boot, lubricate with 250 grams of grease G 000 604 2. Always replace the stainless steel clamp 3. Check the boot for cracks and wear; to replace it, remove the CV joint to install it a little lubricate the collar on the axle shaft and carefully put on the cover using a plastic wedge 4. Always replace the stainless steel clamp | 5. Check the cover for cracks and signs of wear; to install, remove the outer CV joint 6. Always replace the stainless steel clamp 7. Always replace the clamping ring; install it in the annular groove on the constant velocity joint 8. Replace the entire outer CV joint; lubricate with 90 grams of grease G 000 602 : 50 grams for the boot, 40 grams for the CV joint, lubricate when replacing the boot installation: install the hinge on the axle shaft using a mallet so that the retaining ring fits into the annular groove |
Useful article: 8.3.2.
Removing and installing the gearbox Convex and thrust washers, installation position
| 1. Retaining ring 2. Thrust washer 3. Convex washer |
Removal and installation of CV joint
| EXECUTION ORDER | ||||
|

Which CV joints are better for the Audi 80
This kit, in addition to the CV joint itself, should include clamps, a boot, lubricant, washers and retaining rings and all the necessary fasteners . Audi insists that when replacing a joint, everything connected to it must be replaced. And he does the right thing. All reputable manufacturers fully assemble spare parts, and if the box contains only the CV joint itself, it is better to refuse the purchase. This is either a fake or cheap China made from raw metal.
CV joint GKN Spidan, sales leader for 2020
GKN Spidan with catalog number 300850 , GKN Loebro, article number 300853 have proven themselves well . This company supplies spare parts to the VAG conveyor belt, so you can trust it. And the public reviews are very good. The price of an outer CV joint for an Audi 80 B3 is around $85 , including a full repair kit. Lpr KAD172 hinges (Italy) cost three times less, but they also travel much less. Japanese Nakayama NJ140NY can be purchased for as little as $43, and they also get good reviews. The main thing is not to save money and not buy Chinese junk, so as not to redo all the work twice. We value our time and love our car, right?
Good hinges are sold only with a complete replacement kit
Replacing the CV joint boot on a Volkswagen Jetta 5
FAQ VW Audi Skoda Seat
Information applicable to car repairs:
Volkswagen Golf 5 / Volkswagen Golf 5 (model code: 1K1, 1K5) 2004 - 2009 Volkswagen Jetta 5 / Volkswagen Jetta 5 (model code: 1K2) 2005 - 2010
Volkswagen Tiguan / Volkswagen Tiguan (model code: 5N1, 5N2) 2008 - 2015
Volkswagen Golf 6 / Volkswagen Golf 6 (model code: 5K1, AJ5) 2009 - 2013 Volkswagen Jetta 6 / Volkswagen Jetta 6 (model code: 1G3, AV2) 2010 - 2014
Volkswagen Golf Plus / Volkswagen Golf Plus (model code: 5M1) 2005 - 2009 Volkswagen Golf Plus / Volkswagen Golf Plus (model code: 521) 2009 - 2014
The procedure is also suitable for other vehicles assembled on the A5 / PQ35 platform
Once, while replacing the brake fluid, I discovered a crack in the left CV joint boot. The crack was in the area of the small clamp. There was no dirt yet. It looks like I caught that crack “on takeoff.” I decided not to wait for the moment when the molybdenum grease from the CV joint scattered throughout the entire internal cavity of the wing. I changed it as soon as the opportunity arose. Spare parts:
The progress of the work was as follows: I drove the car onto the ramps with the front wheels. I loosened five wheel bolts (17mm) and the large central bolt (27mm).
I raised the left front corner and put the car on the jack stand. Pulled the ramp out from under the wheels.
There was plenty of space to work. Next, I removed the wheel and unscrewed the top mount of the sway bar link (18mm).
In order to remove the link itself, I lifted the lower arm with a garage jack (thereby relieving the load on the ball link mounting bolt).
Next, I unscrewed the three nuts securing the lower ball joint (16mm). After that, the lower lever moved down. The hub moved outwards and pulled out the outer mount of the axle shaft (to the hub)
Next, using a special wedge, I pressed the internal fastening of the axle shaft to the box. Special wedge for removing axle shafts. Manufacturer: SnapON
The right axle shaft is easily removed by installation and does not require a special wedge.
Axle shaft in hands!
Then the dirty work begins. It is necessary to stock up on rags, towels and rubber gloves (so as not to smear everything and everyone around). Clamped the axle shaft in a vice.
Released the clamps securing the boot. Using wire cutters, I cut the boot along the axis. I took it off and cleaned everything of grease. Next, using an oak block, I knocked the CV joint off the axle shaft (the block must be rested against the inner basket of the CV joint.
In principle, the CV joint is easily knocked down with a mallet. Without the use of a bar. It will not be possible to squeeze out the CV joint with an axle bolt! Bolt is too short
I suspect that this is a feature of the axle shafts for the 2.5 engine
I removed the retaining ring and two thrust washers from the axle shaft (all of this went into the trash).
I made a mark on the CV joint basket (I know that this is not important... I still adhere to the rule so that the balls fit into the same pockets from where they were pulled out)
Next, I disassembled the CV joint and cleaned it of old grease.
Assembled the CV joint. The previously made marks during assembly should match.
So that new grease does not come out through the bolt hole. I closed the hole by screwing the old bolt into it.
I filled the CV joint with new grease. I made sure that all the balls were coated with lubricant both outside and inside. Next, we prepare the axle shaft for installing the CV joint. We put a small clamp on the axle shaft. We tighten and install the boot in place. We secure the boot with a clamp to the axle.
Installed new mounting washers and ring.
Carefully place the CV joint on the axle shaft (I used a plastic mallet). I made sure that the CV joint was fully seated. Next, I squeezed out the remaining lubricant under the boot. I secured the boot with a new clamp.
Installation proceeds in reverse order. When installing the axle shaft into the box, you must make sure that the axle shaft is inserted all the way (you will hear a click from the locking ring).
Installed the outer end of the axle shaft into the hub. Threaded a new bolt (without tightening). I secured the lower ball joint to the lower control arm. The lock nuts are new. Tightening torque 60Nm.
Next, using a garage jack, I raised the lower arm until the stabilizer rod entered the mounting hole without tension. The tightening torque of the nut is 70Nm.
Next, I put the wheel on and lowered the car onto the ramps. Tightened the center bolt. The tightening torque for the 12-point bolt is 70Nm + 90 degrees of additional rotation (I checked this several times. The old hex bolt was tightened with a force of 200 Nm. The new, twelve-sided bolt is tightened with a force of 70 Nm + 90 degrees).
Reinstalled the decorative cap. That's all, essentially.
Continuation and all discussions of the report here
Thanks: Bansai
How can I find the information I need here?
Decoding the factory equipment of the car (English) Decoding the factory equipment of VAG in Russian! Diagnostics of
Volkswagen, Audi, Skoda, Seat, error codes.
If you have not found information on your car, look at the cars built on the platform of your car. Most likely, the information on repair and maintenance will be suitable for your car.
Changing the outer CV joint on an Audi 80 B3
The causes of hinge destruction are most often poor-quality anthers. They tear, the lubricant is thrown out, instead of it all sorts of rubbish gets into the boot - sand, stones, water, reagents and the hinge quickly crumbles. Replacing the CV joint on an Audi 80 B3 and B4 is quite simple and can be done in several ways. The most correct and academic way is to remove the drive completely, clamp the axle shaft in a vice and carefully and cleanly replace both hinges.
But we are well aware that there is not always enough time for this. Therefore, we will replace it in an academic way next time. And today we will do this:
- We park the car on a level surface (not everyone has an inspection hole or a lift).
- We tighten the handbrake and put wheel chocks under the rear wheels.
- The first step is to remove the hub bolt. As a rule, it takes root, so to tear it off you will have to find a very powerful 24mm socket wrench with a wrench and reinforce it with a longer pipe. Pre-treat the bolt with WD40 penetrating lubricant or something similar. It will break and will not go anywhere.
We tear off the hub bolt only on the ground
- Now you can remove the wheel bolts, hang the car on a jack, place a stand (highly desirable) and remove the wheel.
- We thoroughly clean everything we see around the CV joint from dirt and clean the tie rod end nut.
Tie rod nut
- Using a 17 key, unscrew it and press the pin out of the rack. It is advisable to use a puller, since strong blows to the rod will not benefit the steering rack.
- Using the same key, unscrew the nut securing the ball joint, move the fist to the side, using a pry bar. The support should come out without problems, the main thing is to calculate the correct angle for placing the mount.
Ball joint mounting - Remove the boot clamps and move them along the drive towards the gearbox.
Remove the boot clamps
- The CV joint can be knocked out by inserting a wrench, extension or something similar into the bolt hole. But you can do it more technologically - we screw the hub bolt into place until it stops and it will press out the hinge itself without any unnecessary movements.
Removing the boot
- The hinge is held in place by a retaining ring installed in the groove of the axle shaft, remove it and knock it down with gentle blows on the CV joint carriage, holding the axle shaft so that it does not move horizontally.
We remove the CV joint from the knuckle splines
- Remove the plastic bushing and washer and carefully wipe the axle shaft with a rag.
Carefully wipe the axle shaft
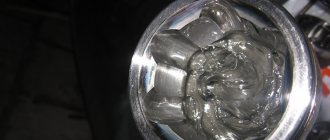
- We take out a brand new CV joint and generously lubricate it with the grease that comes with the kit. We rotate the separator several times, adding lubricant.
New CV joint. All that's left is to lubricate
- Apply a small amount of lubricant to the axle shaft, to the splined part and a little further. This is necessary for the boot to fit without problems; it must fit tightly. We put on the new boot from the kit. We put the boot on the lubricated axle shaft
- We put a metal washer on the axle shaft, followed by a plastic bushing.
First the washer, then the plastic bushing
- We distribute everything that remains in the tube with lubricant evenly over the inner surface of the boot so that it is more elastic, and a supply of lubricant for the hinge will not hurt. All that remains is to tighten the clamps
- We put the CV joint in place and secure the boot with clamps.
Boot assembly with clamps
- We install the hinge into the steering knuckle, trying to get into the splines, put the support in place, lubricating the pin with grease, this will make it easier to remove it in the future.
CV joint assembly with knuckle
- The ball nut is supposed to be tightened with a force of 50 Nm, but I don’t really believe that anyone will measure this force.
- We screw in the hub bolt and screw the steering rod into place. Do not tighten the hub bolt all the way yet.
- Install the wheel and lower the car to the ground. Only now can you tighten the hub bolt with all your heart. Again, with a force of 200 Nm.
This photo report shows in detail how to replace the outer CV joint and boot on an Audi A6 C5 with your own hands. The signs of a CV joint failure are known to all car enthusiasts. The main one is the appearance of a characteristic “crunch”. This sound can only be produced by balls that roll along the grooves because they have too much wear. The sound can appear at any time, but usually it happens when turning, sharp acceleration, or overcoming obstacles. Car enthusiasts need to know about other options for how to check the CV joint.
To finally verify that the hinges are faulty, the following will help:
- slight jerks when starting the car or changing dynamics;
- play of the shaft located between the CV joints when trying to move it in different planes.
The boot protects the CV joint from the ingress of various foreign objects, therefore constant velocity joints are always sealed with a rubber boot, and very quickly fail if even a small hole appears in the boot.
Required tools for replacement:
- Hammer;
- Small screwdriver;
- Hexagon 14;
- Socket wrenches for 17 and 18;
- Ratchet wrench and heads for 17 and 18;
- WD-40;
If you change the CV boot on the right side, you will have to remove the levers, since the pants (exhaust pipe) are in the way, but on the left side, the CV joint can be removed without unscrewing the levers.
1
New boot.
2
We drive the car into the pit and remove the hub bolt (hexagon and pipe). Jack up, unscrew and remove the wheel. Unscrew the hub bolt all the way.
4
To remove the CV joint, you need to either release the upper arms from the steering knuckle, but in my case it was so rusty that it can only be released with the help of heat), or by freeing the two lower arms, which was done.
5
Use a spanner wrench or sockets to tighten the nuts and knock the levers out of the steering knuckle.
6
Turn the steering wheel to the left all the way and release the CV joint (there is enough space there).
7
Next, we screw the hub bolt into the CV joint so that it comes off the shaft, helping with a hammer. We remove the remaining boot and clean the shaft from dirt and grease.
10
Next, we screw the hub bolt into the CV joint so that it comes off the shaft, helping with a hammer.
11
We remove the remains of the boot and clean the shaft from dirt and grease. We take a new CV joint and fill it with grease (the one that comes with it), do not forget to screw the bolt into the CV joint so that the grease does not flood from the other end.
12
First, squeeze a little onto each ball from the top, then stuff the grease under the balls from the bottom and a little more into the center, stuff the rest into the boot.
14
We put the boot, support washer, plastic ring and retaining ring (lock up) onto the shaft.
16
We put on the CV joint itself and hammer it onto the shaft with gentle blows. We compress the boot with clamps (use the clamps that come with the CV joint).
17
We insert it into the hub, tighten the hub bolt and screw on the straight lever.
18
Then we put the steering wheel in a level position with the wheels, insert the second lever and turn it.
20
Put the wheel on and tighten the bolt.
Personal experience: Audi 80 B3 vs Audi 80 B4
04.22.2009 by Uncle Edik in FAQ
My personal comparison based on the operation of an Audi 80 V3 1.8 carburetor and an Audi 80 V4 2.0 injector:
advantages of B4 : the trunk has become normal (and a station wagon has also appeared), the appearance is more impressive, if desired, it is easier to find a packaged version, after 94. The door upholstery has become better (there is no fabric right up to the glass, which likes to get greasy in this place), the presence of wheel arch liners on all wheels, the standard suspension may be a little softer than in the B3, but not significantly.
disadvantages of B4 : the weight and, accordingly, fuel consumption increased (less than 10 liters or more in the city, no matter how it works, I couldn’t even get less than 11-11.5 on the Avant with climate control).
advantages of B3 : easier with all the consequences (my consumption even in winter did not exceed 9 liters, people with mono-injection, if desired, fit into 8 liters (exactly note Audi 80 | Replacing the thermostat | Audi 80. Uncle Edik)), the body seemed all right to me a little stronger than in B4.
cons of B3 : well, a very small trunk, the vast majority of copies are in poor configuration, and of course, age….
It felt like my B3 1.8 carburetor accelerated to hundreds at least as well as the B4 Avant 2.0 injector, but in the B3 the gears were much longer, which is a big plus for me (at 100 km/h about 2200 rpm, and in the B4 at the same speed it turned out to be 3000 rpm), but at speeds higher the B4 gains more confidence (apparently the influence of mass is less affected, and power is more significant).
IMHO, if you already have a normal B3 that suits you, then changing it to B4 doesn’t make much sense. Replacing the thermostat on Audi 80 b3. In fact, Audi tuning provides wide scope for the implementation of any ideas. And if you look for a machine from scratch, then even a B4 is very difficult to find a normal one, but with a B3 it’s generally a one in a million chance.
Internal CV joint of an Audi 80
Many motorists today, after discovering any breakdown in their car, instead of going to a service center, prefer to fix the problem themselves. Be it even a complete replacement of a worn-out part.
However, in most cases, only owners of used cars decide to carry out repairs themselves. After all, in the salon, even the simplest repairs threaten serious financial losses. And if the driver has certain skills, any part can be completely changed independently, for example, if it is an internal CV joint on an Audi 80.
For what reason can an internal CV joint fail and how to recognize a breakdown?
The steel alloy from which the CV joint for this Audi model is made is capable of withstanding enormous loads for a long time. This is high quality carbon steel. And therefore, from the first minutes of vehicle movement, the internal joints bear a high responsibility.
Despite all the strength of the part, over time it still fails. This is usually due to common factors such as:
- heavy, prolonged loads due to aggressive driving;
- climatic conditions;
- poor-quality road surface, which is especially important in Russia;
- accidents.
But there are two main enemies of the internal CV joint of the Audi 80 B3: sand and dirt. Because of this, the lubricant deteriorates and scratches form on the parts. Over time, the boot begins to tear. And it’s good if the car owner noticed a malfunction at the stage of a torn boot, because then the entire CV joint will fail.
Attention! It is important not to leave replacing the internal grenade until later. After all, it is she, along with other particularly important components, that is responsible for safe movement.
A failed grenade is very easy to recognize. While driving, a faulty part causes unpleasant, loud, sharp crunching noises. The crunch is created by gaps and scratches. It is heard from one side or the other, depending on which CV joint on the Audi 80 is broken. This sound indicates serious problems with the car and the need for immediate inspection.
The procedure for replacing the inner CV joint in stages
There is a certain algorithm of actions in order to replace the front or rear internal CV joint of an Audi 80. All actions must be performed in strict sequence. First, let's list them briefly.
- The car must be placed above the inspection hole or jacked up. For greater safety, if a jack is used, you need to build an additional support from bars.
- Raise the handbrake and install special anti-roll bars.
- Unscrew the hinge bolt and loosen the nuts.
- If the car was standing above the inspection hole, you need to lift it and put supports in order to remove the wheel that has the faulty part.
- Remove the drive.
- Completely unscrew the previously loosened CV joint bolt.
- Turn the wheels to the right and remove the outer CV joint with boot.
- Unscrew the CV joint bolt and remove the inner grenade with retaining rings.
- The internal CV joint of the Audi 80 b4 is being replaced.
- All parts are reinstalled in the reverse order.
All the nuances of the step-by-step replacement procedure
Before installing the Audi 80 on a jack, you must remove the hub bolt. When the car is on a jack, it is almost impossible to rip it off because the bolt can become stuck. If the hub bolt is very difficult to remove, it can be treated with a special tool. Then you need to use a 16mm socket to unscrew the nut.
Attention! It is important to remember that the bolt will not simply be removed and will have to be squeezed out, for example, with a crowbar. Better to have new bolts. Then you can simply knock out the first one and then install another one.
To remove the hinge, you need to screw a bolt into it and hit it with all your might with a hammer until the Audi 80 CV joint is free.
You should take a closer look and remember the position of the restrictor rings. It is very important to install new ones as well. It's better to take pictures of them before removing them.
To remove the boot, unscrew the clamp and remove the locking ring with pliers. The new boot and clamp must also be treated with lubricant.
THIS IS INTERESTING: Replacing the Mazda 6 thermostat
New parts need to be very well lubricated. Before replacing the internal CV joint on an Audi 80 B3, it is important to purchase new components in advance, these are the CV joint itself, boots, retaining rings, and lubricant.
Source: https://mashintop.ru/articles.php?id=3202
on “Personal experience: Audi 80 B3 vs Audi 80 B4”
- &# 1 Ilya : April 24th, 2009 at 6:05 am
I have a B3 '87. I'm done. the suspension there is complete PPC. I spent about 30 thousand on the suspension. Replacing the thermostat on Audi 80 b3. But the engine makes me happy, it has never let me down in 1.5 years.
Nothing, on mine I just changed the control arm bushings, stabilizer struts, and ammo once. Replacing the outer CV joint in an Audi 80B4 (Photo report) -. In 5 years. I changed it to an Audi 80 and replacing them if you are not careful takes the life of the Audi 80 b3 87g. 1yu6. Take good wages and you won’t have any problems. And the engines are really excellent; I’ve changed the oil in the last 5 years.
The AUDI B3 is an excellent car for every day and simply super for beginners, it forgives everything except for the sudden release of the clutch when starting off, it slips instantly, the consumption is 8 liters, I liked the 70 tank, although because of this the trunk is a bit small. But the silvery flower, rather pinkish-brown faded in the sun, is very original and dirt is not visible on it at all. They changed small things on the suspension and the sensor on the fan, did a wheel alignment, it cost 3000 rubles. Replacing the internal CV joint of an Audi 80 Video! -. The engine and gearbox deserve praise, since I forgot to switch, I accelerated to 80 in the second one, so good sound insulation, although after 120 the car starts to float, probably due to the very high tires r14 185/70. An excellent copy for little money. PS What kind of car is the owner...
How to remove and replace the CV joint on an Audi A6 C5 yourself
Hello! I won’t beat around the bush, but will go straight to the problem. A couple of months ago, on my workhorse car, the Audi A6 C5, when turning the steering wheel to one side, a characteristic cracking sound began to be heard from under the wheel space, I don’t know how else to describe it.
I puzzled over for a long time what this could be, and after a trip to one of the specialists, the verdict was made that the left outer CV joint (constant velocity joint) was crunching.
And then the question arose of how to replace the outer CV joint in an Audi A6 C5, either trust specialists for $ a sum of money, or do the entire procedure for removing and installing a new part yourself.
After studying many forums, I decided that changing the left CV joint would be a piece of cake, since you don’t need to remove any levers, and you can completely forget about the hammer.
What do you think, so it is, on the Audi A6 the outer CV joint and boot are changed very easily and below I will show the whole procedure and the scope of the upcoming work.
Replacing CV joint Audi 80 B3
Do you hear crackling or clunking noises when turning right? Disgusting sounds when turning to the right, under engine load?
And this bearing would have lived long and happily if it weren’t for the boot that protects the insides from getting any rubbish in there. The boot has the disgusting property of exploding at the most inopportune moment, the CV joint lubricant under the influence of centrifugal force is thrown out, and the CV joint itself gets dust, small stones, water, hedgehogs, nails, and everything that usually flies out from under the wheels.
In general, you read about how they gave me a garage to use for two weeks?
Well, so, there was a hole in the garage, and having gone down into this hole, I eventually saw the reason for the knocks and crunches when turning right. Mmmm, let me think about 6 bolts and a nut, the need for a hole for work, the inconvenience of access to these 6 bolts, the SIX abilities to rip off the thread or the head if the bolts are soured, or still 2 nuts? So, we put the car at speed for the Automatic transmission in position P on the handbrake, and for reliability on the wheel chocks.
If the work is being carried out in the courtyard of a house, then you can drive your rear wheels right up to the curb, and slip a couple of bricks in front. Then we take a healthy 30 kg wheel wrench or a small 30 kg wheel wrench or a 90 kg comrade in my case, I myself weigh 90 kg and with a well-aimed blow, with a rubber mallet we knock the cap off the axle nut if it is there.
And then we loosen the nut with a spray gun. replacing the inner CV joint on an Audi 80 b3
The Korean-made car Kia Rio is in high demand among Russian buyers, thanks to its relatively low price and good performance features. During use, experienced car enthusiasts carefully familiarized themselves with the design of the newest car. Now there are separate activities for repair work and maintenance. There is a lot of text in the text of the article, useful for some!
Replacement Replacing the inner CV joint of an audi 80 b3 Lacetti handbrake Video Replacing the Lacetti parking brake pads video Chevrolet Lacetti Lacetti replacing the parking handbrake pads and cables To carry out the work, you will need an inspection hole or overpass. We prepare the vehicle for work, see
Replacing a CV joint on an Audi A4 with your own hands
12.01.2018 2,
After a long and merciless operation of the Audi A4, car owners have to deal with the breakdown of many spare parts. The CV joint, a constant velocity joint that sets the car's wheels in motion by transmitting torque when turning up to 70 degrees, also often fails. Drivers often call this important element a “grenade.” The CV joint consists of an outer and inner race, a separator and 6 balls.
Also, the constant velocity joint has rubber covers (anthers) that protect it from water and dirt. If the rubber boot remains sealed despite abrasions, it can be replaced. If the anthers rupture, the CV joint must be replaced.
Replacing the Outer CV Joint Audi 80 B3
First ambush: As a result, I purchased the following device assembled: The nut came loose like a nice little one And so on to the replacement itself, they removed all the dirt to get under it, changed the rollers. Misha Kovalev 5, views.
Replacing the Steering Rack of Renault Scenic The steering rack of Renault Scenic 2 is damaged due to the heavy load on the front axle of the car. Replacing the steering rack of Renault Scenic 2. On the Megane 2 platform, the Scenic 2 minivan was designed, which has good capacity. Interesting on the topic: Renault Duster heater fan.
We are fighting vibration and noise. The Ruville kit is ready for installation. But we are well aware that there is not enough time for this. Therefore, we will replace it in the following academic way.
Replacement of outer CV joint A-80 B3
And today we will do this: We park the car on a flat area; there is no inspection hole or lift. We tighten the handbrake and put wheel chocks under the rear wheels.
Replacing the inner CV joint on an Audi 80 b3 involves removing the hub bolt. As a rule, it takes root, so to tear it off you will have to find a very powerful 24mm socket wrench with a wrench and reinforce it with a longer pipe. Pre-treat the bolt with WD40 penetrating lubricant or something similar.
It will break and will not go anywhere. We tear off the hub bolt only on the ground. Now you can tear off the wheel bolts, hang the car on a jack, use a stand, and remove the wheel.
We thoroughly clean everything we see around the CV joint from dirt and clean the tie rod end nut.
Steering rod nut Using a 17 wrench, unscrew it and press the pin out of the strut. It is advisable to use a puller, since strong blows to the rod will not benefit the steering rack.
Replacement of outer CV joint AUDI A6 C5
This photo report shows in detail how to replace the outer CV joint and boot on an Audi A6 C5 with your own hands. The signs of a CV joint failure are known to all car enthusiasts. The main one is the appearance of a characteristic “crunch”. This sound can only be produced by balls that roll along the grooves because they have too much wear. The sound can appear at any time, but usually it happens when turning, sharp acceleration, or overcoming obstacles. Car enthusiasts need to know about other options for how to check the CV joint.
To finally verify that the hinges are faulty, the following will help:
- slight jerks when starting the car or changing dynamics;
- play of the shaft located between the CV joints when trying to move it in different planes.
The boot protects the CV joint from the ingress of various foreign objects, therefore constant velocity joints
are always sealed with a rubber boot, and very quickly fail if even a small hole appears in the boot.
Required tools for replacement:
- Hammer;
- Small screwdriver;
- Hexagon 14;
- Socket wrenches for 17 and 18;
- Ratchet wrench and heads for 17 and 18;
- WD-40;
If you change the CV boot on the right side, you will have to remove the levers, since the pants (exhaust pipe) are in the way, but on the left side, the CV joint can be removed without unscrewing the levers.
1
New boot.
2
We drive the car into the pit and remove the hub bolt (hexagon and pipe). Jack up, unscrew and remove the wheel. Unscrew the hub bolt all the way.
4
To remove the CV joint, you need to either release the upper arms from the steering knuckle, but in my case it was so rusty that it can only be released with the help of heat), or by freeing the two lower arms, which was done.
5
Use a spanner wrench or sockets to tighten the nuts and knock the levers out of the steering knuckle.
6
Turn the steering wheel to the left all the way and release the CV joint (there is enough space there).
7
Next, we screw the hub bolt into the CV joint so that it comes off the shaft, helping with a hammer. We remove the remaining boot and clean the shaft from dirt and grease.
10
Next, we screw the hub bolt into the CV joint so that it comes off the shaft, helping with a hammer.
11
We remove the remains of the boot and clean the shaft from dirt and grease. We take a new CV joint and fill it with grease (the one that comes with it), do not forget to screw the bolt into the CV joint so that the grease does not flood from the other end.
12
First, squeeze a little onto each ball from the top, then stuff the grease under the balls from the bottom and a little more into the center, stuff the rest into the boot.
14
We put the boot, support washer, plastic ring and retaining ring (lock up) onto the shaft.
16
We put on the CV joint itself and hammer it onto the shaft with gentle blows. We compress the boot with clamps (use the clamps that come with the CV joint).
17
We insert it into the hub, tighten the hub bolt and screw on the straight lever.
18
Then we put the steering wheel in a level position with the wheels, insert the second lever and turn it.
20
Put the wheel on and tighten the bolt.