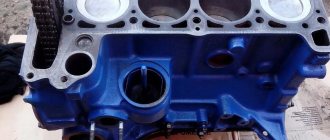
The Chevrolet Niva SUV is equipped with two types of engines – Opel’s 1.8-liter Z18XE and the 1.7-liter VAZ-2123. If the Opel engine does not cause car owners virtually any problems, then various problems occur with the VAZ power unit.
Niva Chevrolet hydraulic compensators often cause trouble for car owners - valves knock, the engine begins to work intermittently.
Why do Chevrolet Niva valves knock?
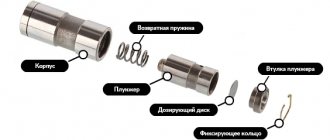
On regular “Classic” VAZ engines, rockers are installed in the gas distribution mechanism, and the valve clearances are adjusted with screws. On VAZ-2123 engines, instead of screws, hydraulic compensators are installed - they are made in the form of the same adjusting screws, but excess gaps in the hydraulic device are removed due to a plunger pair operating under oil pressure. The hydraulic compensator on the Shevinivsky engine is designed very simply and consists of four parts:
- the body itself;
- return spring;
- the lower and upper parts of the plunger pair (check valve with piston and the plunger itself).
Valve knocking in the Chevrolet Niva timing belt can occur for several reasons:
- there is insufficient oil pressure in the system;
- the engine oil is dirty, the oil channels are clogged;
- insufficient oil level in the lubrication system;
- the seat for the compensator is worn out;
- The parts themselves are of low quality and therefore require replacement.
Often the hydraulic compensators (HC) of the Chevy Niva knock only when cold, and after 30-40 seconds the knock disappears. The reason for this phenomenon is the supply of oil pressure to the hydraulics with a slight delay. To get rid of this problem, you can try replacing the oil and oil filter. When the valves knock “hot” - this is worse, you need to remove the camshaft from the main body and clean the channels. If flushing does not help, the hydraulic compensators need to be replaced.
Valve knocking can be different, and it does not always occur due to the fault of hydraulic valves; it can be caused by:
- worn camshaft cams;
- worn rocker surfaces;
- wear of the end of the valve stem itself.
But it often happens the other way around - due to hydraulic compensators, intense wear of the rockers and camshaft occurs. It is not recommended to drive with valve knock:
- parts of the gas distribution mechanism fail;
- due to large valve clearances, engine power decreases and fuel consumption increases;
- It's unpleasant to listen to such a knock.
Hydraulic compensators or adjusting bolts
Hydraulic compensators installed from the factory are not always of high quality, and can begin to knock even after a short mileage. In some cases, the cause of the knocking is an untwisted main valve, that is, it was not tightened with the proper force during installation (tightening 2-2.2 kgf). But if the parts are already inoperable, the question arises - how to replace the faulty hydraulic valves.
The most reliable in the automotive market are considered to be the hydraulic compensators of the German company INA; also for the Chevy Niva, hydraulic compensators are produced by AvtoVAZ, and the hydraulic compensators are of the old and new type, they differ in the cylinder heads (cylinder heads became different for cars produced after 2008).
Hydraulic compensators are mainly sold individually, but they are not cheap - the price of one AvtoVAZ group is approximately 330-400 rubles, while an adjusting bolt costs only 30-50 rubles. If the driver agrees to adjust the valves every 10 thousand km, then it is better to install the bolts - there are fewer problems and the repair is cheaper.
Niva hydraulic compensators, a bit of theory
What exactly is a hydraulic compensator and why is it needed in the engine? The valves have a thermal gap. You can “choose” it in two ways. The first way is mechanical adjustment. Either with washers, as on the “eight”, or bolts, as on the “classic”. The second way is to install a hydraulic compensator between the camshaft cam and the valve. Oil is supplied to the hydraulic chamber under pressure, and thereby the valve clearance is selected. But there is one thing, BUT. For high-quality operation of hydraulic compensators, a certain oil pressure is required. According to German documentation, at least 1.5 kg at idle. On our classic engine, normal pressure at idle is 1.2-1.5 kg. But we hung a hydraulic chain tensioner and eight hydraulic compensators on our oil pump. The system is working at its limit. Let me remind you that the design of the pump remains from a penny and has a performance designed for a 1.2 liter engine. Shown in the photo. 1 – old-style hydraulic support, 2 – new-style hydraulic support, 3 – new-style hydraulic support cup.
Hydraulics old and new
Old-style Niva hydraulic compensators
The first Chevrolet Niva rolled off the assembly line in September 2002. Until 2004-05, General Motors supplied its own hydraulic compensators (I never found the manufacturer). Cars from these years are still driven with only an oil change. But after this time, the “domestic spill” hydraulics began to appear, and problems immediately began. To this day, there are no high-quality replacements, only surgical removal and installation of a “death to old-style hydraulics” kit. Let me remind you that with old-style hydraulics you can only use. Details are described in a separate article.
New sample hydraulics
A separate chapter will be devoted to the new type of hydraulic compensators, as such, now only about the differences and general issues. Apply from October-November 2008. The picture is exactly the same as with the old-style hydraulics. The first couple of years, high-quality wetsuits and good hot cups. Then, hydraulic compensators of unknown origin and disgustingly processed “half-baked” glasses. There is a category of nivovods and shnivovods who firmly believe that under their hood there is not a Fiat engine from the 60s of the last century, but something new and modern. Therefore, it is necessary to put exclusively what the designers intended. For them, in December 2013, I ordered the first trial batch of original hydraulic guides from Germany. Don't be surprised, it's from Germany. Because our designers did not bother themselves with “brain activity”, but simply adapted hydraulics from BMW.
Replacing hydraulic compensators on a Chevrolet Niva
If the knocking of hydraulic compensators cannot be eliminated, then the parts should be replaced. You can replace the HA yourself, and it is done as follows:
- put the car on a level surface, turn off the engine, set the gear to neutral;
- First of all, remove the air duct, free the valve cover from the pipes;
- unscrew the 8 valve cover bolts;
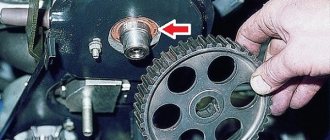
- place a mark on the camshaft - the cast on the shaft housing at the front should coincide with the mark on the back of the gear;
- loosen the camshaft sprocket bolt, then remove the chain tensioner;
- the tensioner can be immediately recharged by recessing the plunger and fixing it in this position with a cap nut;
- unscrew the nuts holding the camshaft, dismantle the camshaft;
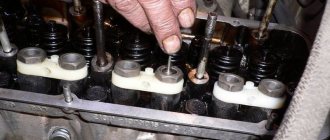
- we take out eight rockers, unscrew the hydraulic compensators;
- we install new “hydraulics” in place, tighten them with a force of 2 kg - it is important not to overtighten them, but you also cannot leave them too loose, they can unscrew;
- put the rocker in place; before installing the camshaft in place, set a mark - the pin should be opposite the hole in the flange (see the figure below);
- we fasten the camshaft, put the sprocket and chain tensioner in place;
- we tension the chain by loosening the cap nut on the tensioner, check the marks again, and fix the chain tension with the cap nut;
- install the valve cover, air duct and pipes.
We start the engine - at first the hydraulic compensators may knock, but as the engine warms up they fill with oil and the knocking should stop. That's it, the replacement of hydraulic compensators on the Chevrolet Niva can be considered complete.
Tips for replacing Chevrolet Niva hydraulic compensators
- If the hydraulic compensators are knocking on a Chevy Niva, you should not immediately rush to remove the valve cover - first you need to try replacing the engine oil in the engine.
- The engine should be filled with high-quality synthetic oil that complies with the SAE classification - 10W40 “synthetic” is suitable for summer; in winter it is better to use less viscous oil, for example, 5W40 or 0W30. If the oil is changed every 10 thousand km, and the oil is of high quality, then the likelihood of clogging the hydraulic compensators is not so great. Another tip is to fill in the same brand of engine oil.
- Old-style hydraulic compensators should not be over-tightened - overtightening will quickly cause them to fail. The force used is about 2 kgf, but if they are tightened too loosely, they can unwind.
- Before changing the HAs, you can first try rinsing them. Hydraulic compensators are washed in gasoline; for high-quality cleaning of toxins, the hydraulic compensators must be disassembled. After cleaning and assembly, the compensators should be checked: you need to push the plunger in with your fingers - if the hydraulic valve is in good condition, it should return back to its original position.
Russian NIVA Chevrolet SUVs were initially produced with two engine options: VAZ-2123 with a volume of 1.7 liters, Z18XE from the auto industry with German Opel quality, the volume of which is 1.8 liters. If the car has a modified German engine, then you should not expect any failures from it. With the Russian assembly, things are more complicated, since, according to reviews from car owners, knocking occurs over time, the engine begins to work intermittently, which leads to premature replacement of hydraulic compensators. If you hear a knocking sound from the valves, experienced auto mechanics recommend first replacing the engine oil and oil filter.
Innovations
In part, the design of this element began to undergo modifications due to difficulties associated with installation. At first, it was created characterized by the absence of oil supply, since it was supplied from the space under the head cover. Such hydraulic compensators "Niva Chevrolet" were easier to install compared to their predecessor. But they did not become widespread due to their similarity to shock absorbers, which was especially noticeable at high speeds.
Later, the elements that supply oil fluid were modernized. They were replaced by a ramp, which is installed much faster than the old design, which has the addition of many o-rings. The latter are absent in the ramp; the connecting parts are plates made of heat-resistant plastic, and the fittings are made from it. This improvement made it possible to disassemble and reassemble multiple times, without requiring much time and effort to carry out all the work.
Reasons for replacing hydraulic compensators with bolts in a Chevrolet Niva
When the design features replaced the adjusting support in the Niva Chevrolet engine with a hydraulic compensator, the engineers were tasked with adjusting the thermal clearances of the valves, which at the same time should reduce the noise level. In the end, the result was not as expected. The quality indicators of hydraulic compensators turned out to be unstable. And this feature affects the operation of the motor. Alarm signals include: knocking under the valve cover, engine tripping, failures, difficulty starting the car engine.
On top of this, inaccurate installation work leads to such a problem that the valve cannot close in time. If this happens at high speeds, the valve inevitably meets the piston. And this leads to valve deformation, which in turn causes loss of compression and the risk of melting. The control system sees the error and turns off the injector to save the catalyst. The motor system begins to trip for no reason. In some engines, there is a surface area at the bottom of the piston that prevents the valve from meeting the cylinder. The valve stops closing completely, its edges burn, and over time the pressure in the cylinder returns. Bolts instead of hydraulic compensators are the most suitable option for the Niva.
If a characteristic valve knock is observed when the engine is warm, then an ordinary oil change is not enough. The work ahead involves removing the “head” and camshaft with further cleaning of the channels. If this work does not bring positive results, the hydraulic compensators will need to be replaced.
Structural difficulties
Despite the extensive list of positive aspects, there are some disadvantages that arise during the assembly line assembly process. First of all, it should be noted that Chevrolet Niva hydraulic compensators require special care and lengthy adjustment during installation; this takes much more time than can be allocated during factory installation.
Compliance with all the subtleties of the process is also rarely noted at service stations, since it is not economically profitable. Another difficulty is that after removing the head the block is disassembled, due to the fact that its reassembly with old gaskets is impossible, it becomes necessary to purchase a new set of gaskets.
Design of hydraulic compensators on Niva Chevrolet
On all classic VAZ engines, rockers were installed in the gas distribution mechanism, and valve clearances were adjusted using special screws. The engine systems of the 2123 Niva Chevrolet models are equipped with hydraulic shock absorbers, which are similar in shape to adjusting bolts. Clearance holes are eliminated due to displacement elements and the required oil pressure in the engine. The design, complex at first glance, consists of the following parts:
- Hydraulic compensator housing.
- Return spring.
- A plunger pair, which is divided into two parts - upper and lower.
Step-by-step procedure for replacing hydraulic compensators
If the knocking in the mechanism cannot be eliminated, you will need to replace it with new spare parts. The car is placed on level ground, the handbrake is engaged and the gear is in neutral.
- The air duct is removed.
- Release the valve cover from the pipes and unscrew the clamps.
- Unscrew the 8 bolts that secure the valve cover.
- A mark is placed on the camshaft, and the mark is left on the back of the gear.
- The sprocket bolt is loosened and the chain tensioner is removed.
- It is recommended to immerse the tensioner in the plunger and secure it with a nut with a cap.
- Unscrew all fasteners securing the camshaft, and then remove it.
- Unscrew 8 rockers and unscrew the expansion joints.
- New spare parts are installed; they should be tightened with a force of 2 kgf, using a special tool.
- The rockers are installed in their places.
- Check the intended docking marks and secure the camshaft in place.
- The sprocket and chain tensioner are mounted.
- Before tightening the chain, you should check that all the marks match, then finish fixing it with a nut designed for tensioning the chain.
- The valve cover is put in place, all pipes are connected. In this case, it is recommended to make a visual inspection of the pipes and clamps. If signs of wear are found, they should be replaced.
- Start the engine and listen to its operation. At the first start, the same characteristic knocking sound will occur, but as soon as the system is filled with oil, it will no longer occur, since the engine operation has returned to normal.
Required tools and materials
Most often, breakdowns occurred with models manufactured before 2008 and with power steering. Afterwards, the manufacturer began installing imported expansion joints. New spare parts do not fit older head models. The solution to the problem is to replace the hydraulic compensators with standard adjusting bolts. You will need:
- locking plate – 4 pcs.;
- adjusting bolt – 8 pcs.;
- the package includes nuts and bushings;
- load spring – 8 pcs.
In addition to all of the above, you will need to purchase a 213th camshaft for a model before 2008. This product has a different configuration of spare parts designed for use with the support system. When equipped with them, the engine will operate more responsively. To adjust the thermal gap, you need a 0.15 mm feeler gauge. The tools you will need are a set of wrenches.
Dismantling hydraulic compensators
The process is not difficult to complete if the car enthusiast has an idea about adjusting the valve on a classic VAZ. The whole job takes about one to two hours. Actions are performed in this order:
- The machine should be placed on a flat surface, the handbrake and neutral must be turned on.
- Release the cover of the autovalve system from all pipes and hoses, and remove the air duct.
- Open the valve cover, unscrew 8 nuts.
- The engine is set to the TTM position of the fourth cylinder. You will need to align the marks on the tidal part of the camshaft housing and the gear.
- The device for fixing the camshaft gear is removed.
- Remove the chain tensioner.
- To dismantle the camshaft, you will need to unscrew its fasteners.
- The rockers are dismantled next in line - 8 pcs.
- The hydraulic compensators are screwed together.
- The bushing installation areas are cleaned of traces of oil.
- Install four locking plates and secure them with bushings.
- The adjustment bolts are placed in the bushings, and the rocker and retaining springs are installed.
- They are installing the camshaft; it is recommended to treat the new spare part with oil in advance.
- Install the drive shaft gear and screw in the mounting bolt.
- Install the timing chain tensioner.
Installation of bolts and assembly features
Installing classic bolts instead of expansion joints allows you to get rid of many problems and the unpredictability of their operation. New hydraulic compensators are not cheap, and there is no guarantee that they will not start knocking again. For these reasons, car enthusiasts are increasingly using adjusting bolts. In this case, you will have to separately adjust the valves and perform the engine assembly steps a little differently.
- Clean all bolt holes thoroughly.
- Place the plates and screw in new pipes.
- Screw in the bolts and included springs and valve rockers.
- The camshaft is placed on its assembly point and the chain tension is adjusted. The oil supply ramp is not installed at this stage.
- Next, the valve system is adjusted.
Valve clearance
The valve system is adjusted according to the same scheme as on a classic VAZ car. In the combined marking mode, the gap is adjusted using a feeler gauge on six and eight valves, the shaft is rotated 180 degrees, then the seventh and fourth, then the third and first are adjusted by 180, the last half turn is the second and fifth valve elements.
- Adjustment is performed using a wide probe or indicator.
- Spare parts will need to be replaced every 10-15 thousand km.
- The valve distance of 0.15 mm is set using a feeler gauge; it should be adjusted only during a cold start. Otherwise, if the value is less, there is a risk of burnout; if the value is increased, a knock will occur.
The technical implementation of hydraulic compensators in VAZ engines encountered particular difficulties. The paired elements seem to have a simple design. The production of spare parts requires high-precision complex equipment and experts of the appropriate level. The VAZ plant did not have these important features; for this reason, replacing hydraulic compensators with bolts in a Chevrolet Niva car is the most rational option.
Preparing the car for replacement.
Replacing hydraulic compensators on a Chevrolet Niva with your own hands does not take very much time, and the work will require a minimum set of tools and skills.
- The car is placed on any flat surface, after which the gearbox is switched to neutral and the handbrake is applied.
- Open the hood and disconnect the air duct
- Remove the clamps and pipes from the valve cover
- Unscrew the bolts that hold the valve cover
What causes the noise
Extraneous noise can occur for various reasons. In some cases, knocking is heard only when the engine is not warmed up. Particular attention is required to noise, which does not disappear after reaching the required temperature level and when switching to different operating modes. An untimely "Niva Chevrolet" with your own hands can lead to serious damage and engine failure.
For many car owners, this task may seem difficult to complete, so if you have any doubts about the correct execution of the work, you should contact a specialist. But if there is a need to replace it yourself, in addition to the main valves themselves, you need to purchase a set of keys. It is not advisable to buy Chinese goods of dubious quality; their low cost is their only advantage.
Replacement
- We set the marks on the camshaft so that they coincide with the back of the gear.
- We loosen the star bolt so that its tensioner can be removed.
- To facilitate further work, it is necessary to recess the tensioner into the plunger, then secure it with a special nut with a cap.
- We unscrew the nuts that secure the camshaft and remove it.
- We take out 8 rockers, after which we can begin dismantling the expansion joints.
- Carefully remove the parts and place them in a specially prepared container.
After this, you can proceed to installing new parts.
New parts are installed using a special torque wrench with a force of 2 kgf. This is necessary so as not to overtighten it and leave it loose. After this, we install the rockers in place and reassemble in the reverse order. An important point during assembly is the installation of the sprocket and chain tensioner.
Before tightening the chain, you must set all the marks correctly, then you can fix it with a tension nut. After this, you can install the valve cover in place and attach the clamps and pipes. After assembly, you need to start the engine to check the installation result. At first, the knocking sound may persist because it takes time for the hydraulic compensators to fill with oil, after which their operation should stabilize.
At this point, the replacement of hydraulic compensators on the Chevrolet Niva is considered complete.
It is worth remembering that replacing hydraulic compensators is not always necessary. Sometimes the cause of knocking can be old engine oil that has changed viscosity. To avoid this, it is necessary to change the engine oil on time. According to the manufacturer's recommendations, it should be done every 7-10 thousand kilometers. In this case, it is necessary to use oil with a suitable viscosity index. For summer it is better to choose brands with parameters 10W40, and for winter 0W30 or 5W30.
What to pay attention to
Particular attention should be paid to the connection of the pump drive sprocket and the chain; they should not become disconnected. The structure along with the chain is mounted on the engine and the fasteners are unscrewed on the camshaft bearing housing, which also holds the fitting of the part that supplies oil to the hydraulic bearings. The pipeline is moved to the side after removing the fitting. The elements located in the rubber rings of the racks must be moved extremely carefully. The other nuts remain and must also be removed along with the flat washers underneath them.
After dismantling the camshaft and bearings, the parts are removed from the head studs, the hydraulic support is unscrewed, and the valve drive lever is removed. This will make it easier to remove the element. It is not advisable to rotate the camshaft after removing the housing, as this will complicate subsequent reinstallation and reassembly.
Before installing Niva Chevrolet hydraulic compensators, it is necessary to remove the oil that has accumulated in the holes of the cylinder block. If you do not pump it out, the valve actuator will not function properly and the element will not be able to be fully tightened. After installation, all parts removed earlier are assembled.
It is possible to make a diagnosis indicating that it is necessary to replace the Chevrolet Niva hydraulic compensators only after removing the camshaft. Usually the first signs are knocking in the valve mechanisms, which does not stop even after the engine warms up. There is a certain amount of truth in this statement, but it is recommended to use less time-consuming methods to begin with. First of all, you need to check the oil level and its cleanliness. If the level is insufficient, the serviceable ones do not fill with liquid, as a result of which the plunger does not rise to the required level and the rocker knocks. Dirty oil can clog narrow passages. If it doesn’t help, then you’ll have to take drastic measures.
It is gratifying that replacing hydraulic compensators on a Chevrolet Niva does not require any special devices. You can get by with a standard set of keys, but it is better to prepare some available tools in advance. To work you will need:
- A set of keys;
- Screwdriver flat and Phillips;
- Metal brush;
- Medical syringe;
- Wire or nylon tie.
In addition, you need to prepare 1 liter of gasoline, a rag and a gasket under the valve cover.
The device of hydraulic compensators.
Previously, rockers were used to adjust valves on VAZ engines, and the clearances were adjusted using special screws. On new engines, compensators are installed that look like adjustment bolts, but the clearances are adjusted automatically due to the plunger pair and oil pressure.
The hydraulic compensator consists of:
- Housings
- Return spring
- Top and bottom of plunger and check valve.
Despite a number of advantages, such a mechanism also has disadvantages that appear when the following reasons arise:
- insufficient oil pressure
- contaminated oil channels
- low oil level
- wear of parts.
Therefore, when the engine is cold started, the parts begin to knock, then when the operating temperature is reached, the gaps decrease and the sound disappears. If adding new oil does not solve the problem, then the Niva Chevrolet hydraulic compressors need to be replaced.
If repairs are not carried out in a timely manner, more serious problems may arise that will lead to wear on the camshaft lobes, rockers and valve stems. It is not recommended to continue operating a vehicle with such malfunctions, as this will increase fuel consumption and lead to problems with the timing mechanism.
Parts installed from the factory are not always of high quality. Therefore, even cars with low mileage may experience valve knocking. Also, among the causes of knocking in new cars, there may be insufficient force when tightening the bolts at the factory.
When choosing new parts, you should pay attention to the manufacturer. INA products, which are manufactured under the control of a German company, are considered the most reliable. You can also consider installing adjusting bolts as an alternative. This will allow you to save significantly, since their cost varies around 50 rubles, compared to 500 rubles for the original part. The adjusting bolts have only one drawback - the need to manually adjust the valves every 10-15 thousand kilometers.
Installation
Several times they sent me links from forums about the fact that they installed German hydraulic compensators, but it became little better than it was. The issue is not with the INA hydraulic compensators, but with the cups. If you look at how the hydraulic compensators are installed in the cylinder head, you will see that the vector of application of force by the camshaft cam goes vertically, and the hydraulic valves and cups are at an angle to the vertical. The cups are traditionally made from shit of poor “half-baked” material, so after a while (50-70 thousand km) an elliptical groove begins to appear, along which the oil pressure required for the hydraulics begins to disappear. Therefore, if you want to update the system and install German hydraulic compensators, install new glasses.
The first hydraulic compensators appeared in Russia in 1989. At that time, they became widespread in the modernization of Zhiguli engines. Modern Niva Chevrolet hydraulic compensators, photos of which are presented below, appeared as a result of many changes and design improvements.
Installation of adjusting bolts.
The installation work is carried out in exactly the same way as in the previous case. The only difference will be manual valve adjustment. To do this, you need a thick probe or indicator.
To take a measurement, you must first align the marks on the camshaft and measure the clearance of valves 8 and 6, then rotate the shaft 180 degrees, and then begin adjusting valves 7 and 4. Then adjust 3 and 1, 2 and 5.
The gap on the valves should be 0.15 millimeters. Only measured on a cold engine. If this value is greater, then valve knocking will appear over time. If you install it less, they may soon burn out.

