Nexia's idle speed - the causes of the problem
In the case of the electronic control system of the Daewoo Nexia injection engine, the most vulnerable area is the sensors. The main one is the idle speed sensor. It is located near the throttle control sensor. This sensor is checked using a special device - a multimeter. The optimal level of resistance between the contacts should vary from 40 to 80 ohms. If excellent readings are obtained, the sensor must be replaced; it is responsible for idle speed.
Not less often, the mass air flow sensor (MAF) fails. Its functionality is checked with the ignition on, but the engine should not be started. A multimeter measures the voltage level between the yellow and green wires. The optimal value is from 0.9 to 1.2 V. The malfunction of the sensor is also determined by the condition of the spark plugs: the part is replaced if there is black carbon on the surface of the spark plugs.
“Floating” speed in the Nexia (Daewoo Nexia) may occur as a result of malfunctions in the EGR system. This sensor is located in the intake manifold and is responsible for the release of exhaust gases. To maintain its normal performance, the sensor must be cleaned regularly.
You may encounter other reasons for this problem. These often include:
- Malfunctions in the operation of the electronic control unit of the car, in other words, the system has “gone bad” and requires diagnostics and re-flashing;
- Broken throttle sensor;
- Incorrect temperature sensor readings;
- Damage to the crankcase ventilation valve.
Where is the crankshaft sensor located on the 8klp Nexia?
DAEWOO NEXIA car engine sensors
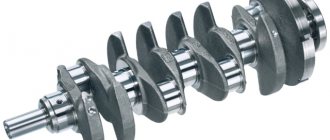
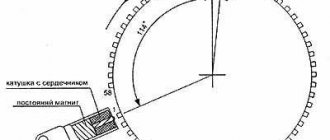
The Daewoo Nexia crankshaft sensor is used to determine the rotation speed and position of the crankshaft. Based on the data it receives, the ECU determines the movement of the pistons.
Based on the information received, all control signals are generated in the main module. The role of the DPKV is extremely important for the operation of the engine.
Failure of the sensor can completely immobilize the car. Location of the crankshaft sensor on the Daewoo Nexia On a Daewoo Nexia with an 8-valve engine, the sensor is located at the crankshaft pulley. The crankshaft position sensor is installed on Daewoo Nexia cars opposite the toothed reference disk. On F16D3 engines, the sensor is located in the cylinder block, near the flywheel, under the oil filter. As a rule, you will notice that the sensor begins to act up when the car begins to spontaneously increase and decrease speed, stall, or, for example, when the power of your car decreases significantly, or the speed simply begins to float from to How to check the position sensor of a Daewoo Nexia change the crankshaft sensor shaft on Nexia There is one way to check the crankshaft position sensor.
You need to disconnect the connectors from the sensor and check the resistance of the wires with a multimeter. The resistance, in this case, should be Ohm - this is the optimal resistance.
If there is no voltage, check the condition of the circuit between the PCM and the sensor. If the circuit is in good condition, take the vehicle to a service station to diagnose the condition of the PCM and perform the appropriate repairs. Also make sure that there are no signs of poor quality grounding of the black wire of the harness.
Remove the sensor. Turn off the ignition and connect its electrical wiring to the sensor.
The crankshaft position sensor (dpkv) is covered
Connect the positive probe of the voltmeter to the terminal of the black wire on the back side of the connector. For more details, see Chapter On-board electrical equipment. Ground the negative probe to ground. Momentarily touch the sensor tip with a metal object such as a screwdriver. At the moment of contact, the voltmeter should register reading 5.
When the metal is removed, the signal amplitude should quickly drop to zero.
pr-people.ru
Replacing sensors on Nexia
In the case of a carburetor engine, “floating” speed is eliminated quite simply: repair work can be carried out in a home garage with your own efforts. But with the injector the situation is somewhat different, and repairs are more difficult. The cost of the sensors themselves is quite decent; it is impossible to carry out work on replacing them yourself: after installing new ones, you will have to configure the engine’s electronic system. All repair work is carried out only using computer diagnostic programs and special equipment.
However, there is also a positive side: the service life of such sensors is very long, so you can’t expect any problems with them for the next 150-200 thousand kilometers.
Sensor cost
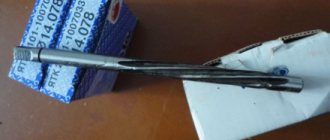
The Daewoo Nexia with an eight-valve engine uses the original General Motors crankshaft position sensor 96183235. The price for such a DPKV is 1000-2500 rubles.
Sixteen-valve Daewoo Nexias have the branded General Motors crankshaft position sensor 96253542. Parts of the car also have DPKV with article numbers 25182450 and 96434780. The price for the original product ranges from 800 to 3000 rubles. If it is impossible to buy a branded DPKV, it is recommended to take a closer look at analogues. The best of them are presented in the tables below.
Table - Optimal analogues of the native crankshaft sensor of the eight-valve Daewoo Nexia
| Company brand | Article number | Estimated cost, ruble |
| CRB | 13040280 | 600-1000 |
| Delphi | SS10895 | 1200-1400 |
| Mobiletron | CSK003 | 800-1200 |
| Intermotor | 18925 | 750-1100 |
| Facet | 90272 | 1300-1800 |
Table - The best alternatives to the branded crankshaft sensor of the sixteen-valve Daewoo Nexia
| Manufacturer | Catalog number | Approximate price, ruble |
| ERA | 550171 | 800-1250 |
| FAE | 79364 | 1300-1900 |
| Delphi | SS10894 | 1150-1700 |
| Febi | 33508 | 1400-2100 |
| Mobiletron | CSK007 | 750-1150 |
High engine speeds and their elimination
The main reason for unstable engine speed at idle is a malfunction of the idle speed control wires and the throttle sensor. The best option is to either replace the wires or pull them out of the common bundle and run them through a separate corrugation.
This is done as follows:
- The ECU connector is removed.
- The main wiring harness unwinds. The wires coming from the sensors are carefully pulled out of the common harness.
- The wires of the main harness are wrapped again. The sensor wires run into a separate corrugation. As an option, you can run new wires from the connectors to the ECU connector, that is, re-solder them. To begin with, it is enough to pass them through a separate corrugation and, if this does not help, resolder them later.
How to check an absolute pressure sensor with a multimeter
Checking DBP with a multimeter consists of several parts:
- checking the resistance of the wires from the control unit to the sensor
- checking the voltage on the sensor
- checking the voltage at the sensor in idle mode
First of all, you need to ring three wires from the DBP to the ECU. In 80% of cases, it is at this stage that the problem is discovered.
I didn’t take photos of the process, since I filmed everything on video, in which you can see it all.
I will simply describe the essence of the test.
Disconnect the negative terminal of the battery.
Next, you need to remove the block from the DBP and from the ECU. You can see how to do this in the video, or in the article Lacetti's problem of three masses
There are three wires from the ECU block to the DBP block that we need to check:
- 1 - mass (A)
- 2 - signal (B)
- 3 - power supply +5 V (C)
To check the DBP wiring, you need to set the ohmmeter to resistance measurement mode up to 200 Ohms and connect the probes in this order:
- to the 1st contact of the DBP block and to the 13th contact of the ECU block
- to the 2nd contact of the DBP block and to the 75th contact of the ECU block
- to the 3rd contact of DBP and to the 50th contact of the ECU block
In all these cases, the resistance should be minimal, and when pulling the wiring harness with your hands, the resistance should not change. If the reading values change, this means that there is an unreliable contact in the wiring and it is necessary to cut the wiring harness and find the problem area.
If at this stage the problem is not detected, then it is necessary to measure the voltage at the sensor.
To do this, we connect back the ECU block, the DBP block and the battery terminal.
We turn on the ignition, but do not start the engine.
We switch the multimeter to DC voltage measurement mode up to 20 V.
We connect the negative probe of the multimeter to the first contact of the absolute pressure sensor, and the positive probe to the third contact. If the probes do not fit into the connector, then you can use ordinary paper clips, insert them into the connector, and connect our probes to them.
The voltmeter should show a voltage of approximately 4.9 V. This means that power is being supplied to the sensor.
Then we connect the “positive” probe to the second contact, and leave the second probe in the first.
The voltage should be approximately 3.5 - 4 V if you are not in the mountains
Let's start the engine. On a warm engine at idle and with consumers turned off (air conditioning, heated rear window, headlights, etc.), the voltage should be approximately 1 V. When the throttle is opened, the voltage should increase and then decrease.
It is also necessary to check the tube from the sensor to the intake manifold for clogging and condensation. And check the fitting on the manifold for clogging with oil from the crankcase ventilation system
If the tube is blown out, the wiring is intact, power is supplied, but the DBP does not work correctly, or does not work at all, then most likely it is time for it to go to the landfill.
The sensor's response can be checked in another way. To do this, turn on the ignition, connect a voltmeter to the first and second contacts of the DBP, disconnect the sensor tube from the manifold and connect a medical syringe to it. When the syringe piston moves, the sensor should respond to this, which can be seen by the changing voltage on the multimeter.
These are all the simple manipulations that will help you check the DBP and identify problems in its wiring.
Here is a video on how to check DBP
Previous Vehicle Diagnostic Parameter - Throttle Position
Return to the main section Car diagnostics
What does a faulty air flow sensor cause?
Operating an engine with an inoperative/faulty flow meter causes detonation of the fuel mixture in the combustion chamber. This affects the operation of the crank mechanism (crank mechanism) and destroys the piston surface, which can cause a “wedge” in the engine.
What indications should a working mass air flow sensor give?
The voltage of the analog-to-digital converter (ADC) of the flow meter when the engine is not running should be 0.996 V. Indicators of 1.016 and 1.025 V are acceptable, but if they reach more than 1.035 volts, it means that the sensing element of the mass air flow sensor is clogged.
To accurately determine the degree of deviation of the operating flow meter values from normal values, it is necessary to evaluate the engine operation at different speeds.
For example, for an injection 1.5-liter VAZ 2111 engine, if it is in good condition, at idle (860–920 rpm) the correct readings are 9.5–10 kg/hour, and at 2 thousand rpm - 19 –21 kg/hour. If the flow meter at 2 thousand rpm shows about 17–18 kg, then the car will drive stably. If the values are from 22 to 24 kg/hour, then the vehicle will move steadily, but the fuel consumption per 100 km will be approximately 10–11 liters. In addition, the car will have difficulty starting in cold weather due to fuel overflow when the engine warms up.
Daewoo nexia - engine and fuel system - Daewoo Club - daewoo forum
This article will talk about how to check the DBP (absolute pressure sensor) and the health of its circuits. I will also post a video test at the end of the article.
The absolute pressure sensor is the main sensor in the engine management system.
All processes in the engine depend on the mass of air entering the combustion chambers. That is why the only engine control lever in the driver’s hands (or rather feet) is the accelerator pedal.
What does the driver’s right foot do? Right! To supply air to the engine. That is, with the gas pedal we simply regulate the air supply. That's all.
At this stage, the human influence on the operation of the engine ends and everything passes into the “hands” of the engine control system. And the primary task of this system is to calculate the mass of air that we launched into the intake manifold. All subsequent actions taken by the ECU to control the engine depend on this calculation.
It is for these purposes that the absolute pressure sensor in the intake manifold is used. It measures the pressure in the manifold and the “brains” use this data to calculate the mass of air passing through the intake manifold into the engine.
But since it is the mass of air that is important, and not the volume, a temperature sensor of the air entering the cylinders must be installed in conjunction with the DBP. This is necessary because warm and cold air have different densities, and, as is known, the mass of a body or gas depends on density.
But we looked at the air temperature sensor in another article, and in this one we will focus exclusively on the absolute pressure sensor.
This is how everything is described in literature and manuals. But my opinion looks a little different. It is not intended to calculate air mass (this is calculated by software), but to determine the load on the engine. I will write about this below.
From all of the above, we can conclude that DBP is a mega important sensor in the engine control system and sometimes requires diagnostics, like all other sensors.
Symptoms of a problem
The mass air flow sensor is located in the air duct near the air filter. It is designed to determine the amount of incoming air. Depending on its readings, the control unit will show how much fuel is needed to form a high-quality fuel mixture. The normal ratio is 1:14. Therefore, the quality of the fuel-air mixture depends on the correct readings of the flow meter.
The high-quality operation of the mass air flow sensor depends largely on the cleanliness of the air filter. Therefore, if symptoms of a malfunction of the mass air flow sensor appear, you should first check the air filter before making repairs. The flow meter is usually beyond repair. If it is faulty, it is replaced with a new device. But its cost is quite high, so you should first make sure that the causes of the problems are in the sensor and not in other malfunctions of the machine.
The signal for diagnosis is the following symptoms of a malfunction of the mass air flow sensor:
- Check Engine appears on the instrument panel;
- an error is displayed indicating a low level of the mass air flow sensor signal;
- the engine is bad, accelerates very slowly, stalls, its power drops;
- high level of fuel consumption;
- the engine is unstable at idle;
- the engine stalls when changing gears;
- The rpms are either high or low.
There are other symptoms of a “dying” sensor. For example, it may have cracks in the corrugated hose that connects the throttle body to the sensor. If the engine stalls, there may be a power problem or damaged wiring. This is a signal to check the electrical wiring. If malfunctions are detected, the machine's electrical system must be repaired.
In addition to the above possible signs of failure of the mass air flow sensor, you should diagnose the sensor signal level.
A low signal level may mean the following:
- Mass air flow sensor is not connected;
Disconnected sensor connector
- open circuit in the sensor connection circuit;
- the mass in the chain breaks, oxidation appears;
- signal wires are broken or incorrectly connected;
- Engine control unit malfunction.
You should not draw conclusions about a malfunction of the mass air flow sensor, relying only on the symptoms listed above. A complete diagnosis of the engine and machine should be carried out, since signs of a flow meter failure may appear if other devices malfunction (for example, due to a clogged air filter). Then you need to repair these devices to restore the car's functionality.
DMRV error code
The following errors may indicate a malfunction in the operation of the mass air flow sensor:
- P0100 - damage to the electrical circuit connecting the sensor. To eliminate the breakdown, you need to check the wiring for integrity, since accidental disconnection of the connector or damage to the electrical contacts is possible.
- P0102 - the vehicle control unit began to receive a low signal, which was recorded at the input of the mass air flow sensor power line. To eliminate the cause of the breakdown, it is necessary to check the electrical wiring and the insulating layer of the cable; oxidation of the contacts of the wiring connector (the so-called chips) is possible.
- P0103 - critically high signal detected at the input of the mass air flow sensor power line. If the cause of the malfunction is not the wiring, then a visual inspection and cleaning of the flow meter will be required or it will have to be replaced with a new one.
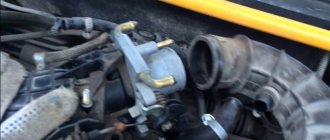
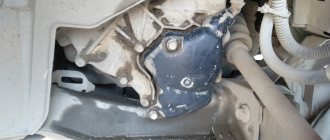
Location of the absolute pressure sensor on the Daewoo Nexia
The absolute pressure sensor has different placement depending on which power plant is located in the engine compartment. So on a Daewoo Nexia with a 16V engine, the DBP is mounted directly on the intake manifold.
The Daewoo Nexia with an eight-valve engine has a different DBP arrangement. The sensor is located on the front panel. It is mounted on a special bracket.
According to reviews from car owners, the 8 valve Daewoo Nexia has a worse DBP location. A tube that is too long is prone to condensation. This often causes DBP failure. Therefore, car owners often independently move the sensor closer to the intake manifold. This allows you to operate the machine in cold weather without fear of condensation forming in the tube.
Replacing the air flow sensor
To replace the sensor with your own hands, you need to prepare a shaped screwdriver and a “10” key.
The replacement procedure consists of the following steps:
- First you need to turn off the ignition and open the hood.
- Then you need to disconnect the negative terminal on the battery.
- At the next stage, you need to loosen the clamp with which the corrugation is attached to the mass air flow sensor.
- Next, remove the corrugation from the pipe.
- Then you need to bend the comb and disconnect the sensor connector.
Disconnecting the sensor connector
Thus, if the car stalls and has all the signs of a breakdown of the mass air flow sensor, then before you start repairing it, you should check the level of its signal, it should not be low, perform a full diagnosis of the car and repair all faulty components and parts.
It is important to undergo regular vehicle inspections and perform timely maintenance, then the parts and components will last longer.
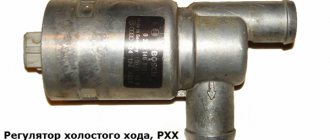
Sensor diagnostic methods
The easiest way to check that the idle speed sensor is working is to start the engine and remove the power connector from the block. When the element is in good condition, the speed will drop sharply and the engine will stop - when the power supply is turned off, the spring will push the cone forward and the cross-section of the bypass channel will completely close. If the engine operation remains the same or changes slightly, move on to other testing methods.
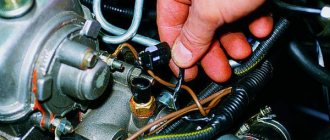
The next stage of diagnostics is measuring the supply voltage, performed in this order:
- Disconnect the IAC connector and turn on the ignition.
- Using a voltmeter, measure the voltage at the corresponding contacts of the removed connector (in VAZ cars these are terminals marked A and D).
- If there is no voltage or does not reach 12 volts, you need to look for a problem in the electrical wiring. Otherwise, proceed to diagnosing the regulator itself.
In VAZ cars, you can check the performance of the stepper electric motor without removing it from the car. Using a multimeter, measure the resistance between the following pairs of contacts: A - B, C - D (it should be 53 Ohms). Then measure other pairs - A - C, B - D, on a working regulator the device will show infinity.
Further checking of the idle speed sensor is carried out as follows:
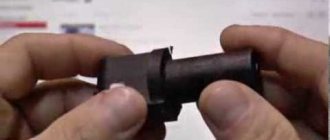
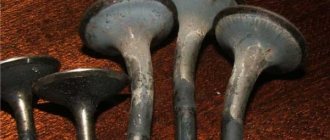
- Disconnect the power supply, unscrew the mounting screws and remove the element from the throttle valve block.
- To prevent contamination of the rod, clean the cone and spring with a soft-bristled brush, using kerosene, diesel fuel, or better yet, carburetor cleaning fluid. Do not use acetone or solvents like 646 - they will destroy the plastic.
- Blow through the cleaned part and connect the connector.
- Place your finger on the rod and ask an assistant to turn on the ignition. The cone of a functioning regulator should move noticeably. If nothing happens, feel free to change the sensor.
Advice. If a strong oil deposit is detected on the working part of the IAC, it is highly advisable to perform the procedure for cleaning the throttle and bypass channel - a similar picture is likely to be observed there.
To install a new regulator, be sure to remove the negative terminal of the battery. After assembly and connection, the IAC controller is calibrated - you need to turn on the ignition and wait 15 seconds. If the battery is not disconnected, the ECU will skip the calibration step, which may cause the engine to run unstably.
Despite the fact that the signs of an IAC malfunction are similar to the breakdown of many other elements of an injection-injected internal combustion engine, some symptoms directly indicate a malfunction of the idle air sensor. Let's look at how to carry out diagnostics yourself and identify a faulty regulator.
Video “Checking the mass air flow sensor using a multimeter”
This video from the “Simple Opinion” channel demonstrates how to check the mass air flow sensor with a multimeter.
guys, what happens if you drive for some time with a faulty air flow sensor?
Has anyone made curtains for windows in Nexia themselves?
by Adminrive · Published 05/26/2014
Good morning everyone
by Adminrive Published 09.11.2016
Daewoo Nexia Black Pearl › Logbook › Adaptation of DPKV on Nexia
Hello everyone, friends. Many people know that on our cars, I mean Nexia, after replacing the timing belt, it is necessary to adapt the crankshaft position sensor (CPS). This happened to me too. I changed the timing belt at 59 thousand, but didn’t pull it. I changed it from the officials, but they didn’t do the adaptation. Either they forgot or were freeloaders, but God will be their judge. After a couple of days, my Check started blinking, just blinking, not on, and it started blinking when you drove for 30 seconds at rpm above 2500. Then I didn’t know about adaptation, and accordingly I started googling and looking for the cause, and found how to eliminate it . I ordered an OBD ll diagnostic cable (I need exactly this VAG 409.1), it arrived a month later in Arkhangelsk. Downloaded the program for diagnosing Chevrolet Explorer 1.7. Next, the adaptation process itself is step by step: 1) The car must be warmed up to operating temperature in advance 2) We turn off all loading elements and devices: radio, headlights and fogs, wipers, etc. and turn off the car 3) We first connect the cable to the OBD-II connector , but not connecting to a laptop
4) then turn on the ignition without starting the car and connect the USB input to the laptop 5) start the car 6) The error (check) may not flash after restarting the engine, so we turn the engine, holding 2500-2700 rpm for 20-30 seconds until the check flashes again (this is necessary so that the error can be read) 6) In the program you need to set the COM port for the program to work with the cable. We move the mouse over “service->settings” or press “F9” and at the top we see the port and a window with a choice. Choose the one you need. You can check the port by launching Device Manager.
7) Next in the program, click “establish connection” and select your engine with the ECU unit (you need to know which unit you have. I have an MR-140. It 100% comes with the A15SMS engine) When the connection is established, a window with the car’s passport data will appear . Click “errors” and wait until the error appears. The code for this error is P0300 “multiple misfires” We do not erase this error, we leave it as it is for now 9) Then click at the top “service->service functions->DPKV adaptation” 10) do everything according to the instructions of the program. (MUST READ everything) 11) After all the work done, we erase the error and that’s it.
After I did everything, I tested it. After driving around the city, moving at 2500-3000 rpm for more than 1 minute, the check mark did not blink and everything was fine.
I apologize if there are a lot of letters, but I tried to convey everything in an accessible and understandable way. If you write anything, I’ll help. Thank you for your attention!)
source