Where are the fuses located on a Chevrolet Cruze?
Even a novice car enthusiast can replace Chevrolet Cruze fuses on his own after studying the material we offer. The process itself is simple and, knowing what is located where, you can do it in just five to ten minutes.
The fuses in the car are located in fairly accessible places. In order to get to them, you do not need to remove bulky components or dismantle complex systems. The first is located in the engine compartment on the right side at the rear, near the battery. The second one, in the cabin on the left, behind the glove compartment. It is very important to learn how to change them, because their failure is a common occurrence. It would be stupid to immediately go to a service station if something in the electrical equipment has failed or the cigarette lighter has simply stopped working. You can first try to fix the problem yourself.
Fuse burned out
Each section of the electrical network is protected by a special fusible element.
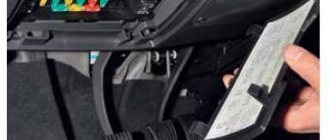
At permissible current values, there is a risk of wire burnout. For protection, the fuse burns out. This is one of the most common causes of car cigarette lighter failure. In the event of such a malfunction, it is necessary to replace the cigarette lighter fuse located in the Chevrolet Cruze mounting block. The location of the block is shown in the photo. It is located on the front panel, to the left of the steering column, under the decorative cover. To get to it, you need to press the button and pull the panel up. The block contains relays and fuses, and a layout diagram is located on the back cover.
Fuse F6, rated 20 amperes, is responsible for the cigarette lighter. To remove the element, you will need tweezers or small pliers. It is prohibited to install a fuse designed for a higher current strength than specified by the manufacturer. Otherwise, it is fraught with a short circuit, cable damage, and fire.
Fuse and relay boxes in the engine compartment
Main block with relays and fuses
It is located under the hood on the right side of the engine compartment, next to the headlight and battery. Closed with a plastic protective cover. 3 fastenings on different sides.
The back of the cover contains current information describing the fuses. Changes in the presented diagrams are possible depending on the configuration and year of manufacture of your car.
Photo block diagram
Description
| Number | A | Protected circuit |
| 1 | 15 | Transmission control unit |
| 2 | 15 | The engine control unit |
| 3 | — | Not used |
| 4 | 10 | Canister air solenoid valve |
| 5 | 15 | Ignition |
| 7 | — | Not used |
| 8 | 15 | Fuel injection system |
| 9 | 15 | Fuel injection system, ignition system |
| 10 | 15 | The engine control unit |
| 11 | 10 | Oxygen concentration sensor |
| 13 | 7,5 | Canister solenoid valve |
| 14 | Not used | |
| 15 | 20 | Rear window wiper |
| 16 | 7,5 | Ignition, cabin air quality sensor (air conditioning system) |
| 17 | 5 | Ignition, airbag |
| 18 | 10 | Cruze throttle position sensor |
| 19 | Not used | |
| 20 | 20 | Fuel pump |
| 22, 23, 29 | Not used | |
| 30 | 15 | ABS |
| 31 | 20 | Body Control Module |
| 32 | 20 | Same |
| 33 | 30 | Heated front seats |
| 34 | 25 | Sunroof |
| 35 | 30 | Audio system |
| 36 | Not used | |
| 37 | 10 | Right high and low beam headlight fuse |
| 38 | 10 | Left high and low beam headlight |
| 39,40 | — | Not used |
| 46 | 10 | Cooling fan |
| 47 | 10 | Oxygen concentration sensor |
| 48 | 15 | Fog lights |
| 49,50 | — | Not used |
| 51 | 15 | Sound signal |
| 52 | 15 | Dashboard |
| 53 | 10 | Electric mirror |
| 54 | 5 | Light switch, light control |
| 55 | 7,5 | Folding mirrors |
| 56 | 15 | Windshield washer |
| 57 | 15 | Steering column lock |
| 58 | — | Not used |
| 60 | 7,5 | Mirror heater |
| 61 | 7,5 | Mirror heater |
| 62 | 10 | Air condition |
| 63 | 7,5 | Rear window sensor |
| 64 | 5 | Air quality sensor |
| 65 | 7,5 | Rear fog lights |
| 66 | 15 | Rear window washer |
| 67 | 20 | Fuel supply control unit |
| 68 | — | Not used |
| 69 | 5 | Battery voltage sensor |
| 70 | 5 | Rain sensor |
| 71 | — | Not used |
| Fuse links | ||
| 6 | 30 | Windshield wiper |
| 12 | 30 | Starter traction relay |
| 21 | 30 | Rear power windows |
| 22 | — | Not used |
| 24 | 30 | Cruze front power windows |
| 25 | 20 | Electronically controlled vacuum pump |
| 26 | 40 | ABS |
| 27 | 30 | Electronic key control system |
| 28 | 40 | Heated rear window |
| 41 | — | Not used |
| 42 | 40/ 30/ 20 | Engine cooling fan |
| 43,44 | — | Not used |
| 45 | 40 | Engine cooling fan |
| 59 | 30 | Diesel fuel heater |
| Relay | ||
| R1 | — | Air conditioning compressor drive clutch |
| R2 | — | Starter traction relay |
| R3 | — | Engine cooling fan (K7) |
| R4 | — | Front wiper mode (speed) relay |
| R5 | Front wipers | |
| R6 | _ | Not used |
| R7 | _ | Engine control system main relay |
| R8 | — | Fuel pump |
| R9 | — | Engine cooling fan (K2) |
| R10 | — | Engine cooling fan (short circuit) |
| R11 | — | Not used |
| R12 | — | Engine cooling fan (short circuit) |
| R13 | — | Engine cooling fan (K1) |
| R14 | — | Not used |
| R15 | — | Ignition |
| R16 | — | Pre-heating system (diesel) |
| R17 | — | Heated exterior mirrors |
High Power Fuse Box
It is located on the battery cover.
Scheme
Decoding
| 1 | 100 | Fuse Box - Instrument Panel |
| 2 | 100 | Fuse Box - Instrument Panel |
| 3 | 80 | Electric Power Steering (EPS) (NJ1) |
| 4 | — | Not used |
| 5 | 250 | Fuse Box - Additional Battery |
| 6 | 250/ 500 | Starter motor |
Additional block with relay
Depending on the configuration, there may be a separate unit with a relay under the hood.
- Cooling fan medium speed relay;
- Cooling fan speed control relay;
- Cooling fan medium speed relay.
Basic
The main power supply in the Chevrolet Cruze will be considered to be the one located in the engine compartment. It is located on the right side of the engine compartment, almost at the right headlight next to the battery. This block contains 17 relays and 71 fuses.
Relays are traditionally designated by the letter R, PP by the letter F. To get to the elements themselves, you need to press the three plastic latches on the cover and remove it. On the back of the cover there is an electrical diagram of the power supply unit, and symbols also show the equipment that is controlled by certain elements of the unit.
Now you need to understand what each of the elements is responsible for in order to correctly and quickly replace it. So, the Chevrolet Cruze mounting block relay:
- responsible for the air conditioning compressor clutch;
- for the starter's work
- engine radiator fan;
- adjust the speed of the front windshield wipers;
- windshield wiper operation;
- reserve;
- for the operation of the engine control module;
- regulates fuel injection;
- engine radiator fan;
- engine radiator fan;
- reserve;
- engine radiator fan;
- engine radiator fan;
- reserve;
- for ignition;
- for warming up the engine before starting it (an additional option for cars with a diesel engine);
- heated side mirrors.
DETAILS: Ford Focus 3 Powershift clutch replacement. Inexpensive!
where the second column indicates the values of rated currents for fuses, that is, such currents, the flow of which causes the PP to burn and open the circuit.
Chevrolet Cruze fuses
Fuses are designed to break because they prevent the entire system from being overloaded. They are the noble victims of the electrical world.
- Locate your vehicle's fuse panel. You may need to take apart the owner's manual, but they can usually be found under the steering wheel. It also makes sense to look under the hood.
- You need to remove the Chevrolet Cruze fuse panel cover. Inside you'll see a series of colors and numbers that represent different amperages, while a diagram (usually on the back cover) will show you what each fuse does in your car.
- Find the fuse that is blowing. If the item is knocked out, the inside will usually be black or the metal thread may be broken. If it's dark, you may need a flashlight to make this faster.
- We take out the broken fuse if its exact pinout is known. You can use various tools to remove a blown fuse. Fuses can break easily, and a broken fuse is much more difficult to remove than a completely intact fuse.
- Insert a new, replacement fuse (or replacement fuses) of the correct amperage - refer to the fuse panel and owner's manual. Using a fuse of the wrong amperage can cause serious problems in the circuit.
- Keep several extra fuses of varying strengths. In a jam, you can always take the fuse out of the lesser used function with the same amperage and use it for something more pressing, but that's just a temporary solution. For example, if the fuse for your power windows blows and there is no rain in the forecast, take the working fuse allocated to the rear window and use it for the power windows. Just double check that the amperage for each is the same.
- Start the ignition to see if your work has paid off.
- If the same fuse fails soon after replacement or fails at all, it may be time for a trip to a mechanic for a diagnosis.
Common malfunctions of the Chevrolet Cruze heater
It should be noted that the vast majority of breakdowns on the Chevrolet Cruze are associated with the draft of the stove damper.
The fact is that the eye on this rod is made of cheap and very fragile plastic, which easily breaks in thirty-degree frost.
This results in several problems listed below.
Video: broken rod on the Chevrolet Cruze stove damper
The stove only blows cold air
The air duct on modern Chevrolet Cruze cars after restyling is divided into two sections - left and right.
Consequently, each section has its own heating damper.
There are also two control rods attached to these dampers. One on the driver's side, the other on the passenger's side.
If the heater on a Chevrolet Cruze only blows cold air, it means that the rods on both dampers have broken, they have dropped to the lowest position, where they remain.
For this reason, cold air begins to blow on the feet of both the driver and the passenger, and a small part of the hot air goes to the windshield.
Video: double stove dampers of a modern Chevrolet Cruze
The stove blows cold and hot air
The situation when the Chevrolet Cruze heater begins to blow cold air on the driver and hot air on the passenger (or vice versa) is observed if the draft breaks on only one of the heating dampers, while the second is normally controlled by its servo drive.
The problem is solved by disassembling the heating system and repairing the broken draft.
Leaking pipes on the Chevrolet Cruze radiator
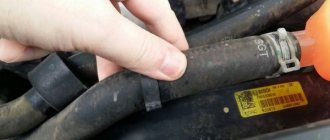
Another common malfunction is leaking pipes on the Chevrolet Cruze stove radiator.
This happens because the quality of the O-rings on these pipes leaves much to be desired.
And in the harsh domestic climate, these rings become unusable in just three years.
After this, coolant begins to flow from under the mounting clamps.
The Chevrolet Cruze pipe leaked due to a worn o-ring
To see the leaks, just look under the hood of the car.
The problem is solved by completely replacing the O-rings on all stove pipes.
Rubber rings are required, the outer diameter of which is 30 mm and the inner diameter is 25 mm.
As a rule, such rings are sold in sets. The cost of one set can vary from 300 to 700 rubles.
Rubber O-rings for heating pipes are usually sold in sets
Mounting block under the hood
Numbers and decoding
| 1 | Module responsible for the gearbox (solenoid valve-regulator). |
| 2 | Engine operation control element. |
| 3 | — |
| 4 | Canister vent solenoid. |
| 5 | Ignition process. |
| 6 | Operation of the front windshield wipers. |
| 7 | — |
| 8 | Injecting fuel into the engine. |
| 9 | Introduction of fuel into the ignition system. |
| 10 | Motor control element. |
| 11 | Oxygen sensor. |
| 12 | Starter solenoid in the form of a relay. |
| 13 | Canister ventilation solenoid. |
| 14 | — |
| 15 | The element is responsible for the rear window wiper. |
| 16 | Sensor checking air quality. |
| 17 | Airbag operation. |
| 18 | Fuel control element. |
| 19 | — |
| 20 | The element responsible for the fuel pump. |
| 21 | Rear window lifters. |
| 22 | — |
| 23 | — |
| 24 | Front windows. |
| 25 | Vacuum pump, electronic. |
| 26 | Abs |
| 27 | Electronic key systems. |
| 28 | Heating element for rear window. |
| 29 | — |
| 30 | Element for heating the windshield. |
| 31 | Body control element. |
| 32 | Body control module. |
| 33 | Heated driver and front seats. |
| 34 | Sunroof in a car. |
| 35 | Amplifier and passenger information system. |
| 36 | — |
| 37 | Fuse element for the right high and low beam headlight. |
| 38 | Left low beam headlight element. |
| 39 | — |
| 40 | — |
| 41 | — |
| 42 | Cooling fan low speed relay. |
| 43 | — |
| 44 | — |
| 45 | Fan. |
| 46 | Supercharger. |
| 47 | Lambda probe. |
| 48 | Elements of fog lights |
| 49 | — |
| 50 | — |
| 51 | horn |
| 52 | Dashboard |
| 53 | Safety element F53UA 10A A10 Rear view mirror in the cabin (DD8), M29L Headlight level control unit - left (TR6), M29R Headlight level control element - right |
| 54 | Backlight switch, Lighting control |
| 55 | Mirror switch, rear view |
| 56 | Glass washer elements |
| 57 | Steering column block |
| 58 | — |
| 59 | Diesel fuel heating |
| 60 | Mirror heating |
| 61 | Mirror heating |
| 62 | Air conditioner element |
| 63 | Rear glass sensor |
| 64 | Air analysis sensor |
| 65 | Fog lights |
| 66 | Rear washer |
| 67 | Fuel system control element |
| 68 | — |
| 69 | Battery voltage sensor |
| 70 | Rain sensor |
| 71 | — |
Instrument panel fuse box
The fuse box components are located behind the storage compartment on the instrument panel (in the passenger compartment).
Chevrolet Cruze Saloon - fuse box - instrument panel.
Number and scheme:
| 1 | Infotainment module, speakerphone. |
| 2 | Current converter (DC/AC). |
| 3 | Body control module. |
| 4 | Infotainment system. |
| 5 | Information screen, echo sounder. |
| 6 | Cigarette lighter element. |
| 7 | Car socket. |
| 8 | Body control element. |
| 9 | Body control element. |
| 10 | Body control element. |
| 11 | Air blower, internal. |
| 12 | — |
| 13 | Details of heated seats in the cabin. |
| 14 | Connector for diagnostics. |
| 15 | Air cushion |
| 16 | Rear door, car trunk buttons, central locking. |
| 17 | Air conditioning module. |
| 18 | trailer. |
| 19 | Gear control lever. |
| 20 | Battery sensor. |
| 21 | tool. |
| 22 | Electronic keys are in position. |
| 23 | Body control element. |
| 24 | Body control element. |
| 25 | Steering column lock. |
| 26 | Rear socket. |
Chevrolet Cruze 1.6 1.8 cars from 2006, 2007, 2008, 2009, 2010, 2011 were considered. This data is also relevant for 2012, 2013 model years.
The following relay descriptions refer to maintenance-free printed circuit board (PCB) elements:
- KR3 Horn relay
- Fuse F51UA – washer pump motor.
- Front fog lamp relay.
- High beam relay.
While the car is running, there is a chance that one of the fuses in your car will fail. When this happens, the results usually don't create a crisis, but it does mean that something on the car is no longer working. Most likely, what stops working on your car will be relatively minor. For example, these could be backup lights, turn signals, high-speed heating fan settings for the heater system, climate control, radio, or even interior lighting. In any case, if the fuse blows, the device in question will not work.
For external (low and high) or internal lighting, the possibility of a fuse is the cause of the failure. In fact, for any single component or system in a vehicle, the likelihood that a fuse will cause an electrical failure is quite high. In most cases, this should be the first thing the driver checks.
If a device or vehicle system is not working and your suspicions fall on the fuse, the first step is to look at the owner's manual. The guide will help you locate the fuse box and reveal how to access it. On older cars, the box was usually located under the tap, to the left of the brake pedal or next to the parking brake pedal. Chevrolet Cruze parking sensors can be found when purchasing the maximum configuration, otherwise you will have to buy it separately. It is worth noting that when using a headlight leveler, in case of operational errors, it is also necessary to check the system and various fuses.
Purpose of the stove damper
The stove damper on the Chevrolet Cruze is designed to regulate the flow of warm air entering the cabin from the heating radiator.
It is located to the right of the driver, under the dashboard.
This device is driven by a special rod connected to a small servomotor, which is controlled by a climate control unit.
The damper on the Chevrolet Cruze heater consists of two halves separated by a partition
Chevrolet Cruze Fuse Box
Chevrolet Cruze fuse location
Where is the fuse box located?
Under the hood - number 12
To gain access to the fuses in the engine compartment, you need to release the three latches of the block cover, then remove it.
On the inside of the cover there is a diagram of the location of fuses, relays and fuse links.
The mounting block contains tweezers for removing and replacing fuses
Before replacing a fuse in a Chevrolet Cruze, find out the cause of the blown; if you replace the fuse and it blows again, you need to contact an auto electrician. Do not change fuses to a different rating or jumper, this may lead to a fire or failure of the electrical equipment protected by this fuse. The purpose and amperage of the fuses are shown in the table below.
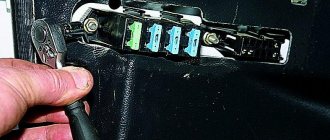
In order to replace the fuse in the engine compartment block of a Chevrolet Cruze, use tweezers to grab the fuse and remove it from the connector.
Then install a new fuse
To replace the relay and fuse link, remove them by hand by shaking them to the side
Mounting block of fuses, relays and fuse links in the engine compartment of a Chevrolet Cruze with an open cover
Decoding block elements.
| Fuse/fuse link/relay number | Current strength, A | Protected circuit |
| 1 | 15 | Transmission control unit |
| 2 | 15 | The engine control unit |
| 3 | — | Not used |
| 4 | 10 | Canister air solenoid valve |
| 5 | 15 | Ignition |
| 7 | — | Not used |
| 8 | 15 | Chevrolet Cruze fuel injection system |
| 9 | 15 | Fuel injection system, ignition system |
| 10 | 15 | The engine control unit |
| 11 | 10 | Oxygen concentration sensor |
| 13 | 7,5 | Chevrolet Cruze canister solenoid valve |
| 14 | Not used | |
| 15 | 20 | Rear window wiper |
| 16 | 7,5 | Ignition, cabin air quality sensor (air conditioning system) |
| 17 | 5 | Ignition, airbag |
| 18 | 10 | Chevrolet Cruze throttle position sensor |
| 19 | Not used | |
| 20 | 20 | Chevrolet Cruze fuel pump |
| 22, 23, 29 | Not used | |
| 30 | 15 | ABS |
| 31 | 20 | Body Control Module |
| 32 | 20 | Same |
| 33 | 30 | Heated front seats |
| 34 | 25 | Sunroof |
| 35 | I 30 | Chevrolet Cruze audio system |
| 36 | Not used | |
| 37 | 10 | Right high and low beam headlight fuse |
| 38 | 10 | Left high and low beam headlight |
| 39,40 | — | Not used |
| 46 | 10 | Cooling fan |
| 47 | 10 | Oxygen concentration sensor |
| 48 | 15 | Fog lights |
| 49,50 | — | : Not used |
| 51 | 15 | Sound signal |
| 52 | 15 | Dashboard |
| 53 | 10 | Electrochromic mirror |
| 54 | 5 | Light switch, light control |
| 55 | 7,5 | Folding mirrors chevrolet cruze |
| 56 | 15 | Windshield washer |
| 57 | 15 | Steering column lock |
| 58 | — | Not used |
| 60 | 7,5 | Mirror heater |
| Number | Current in amperes | Purpose |
| 61 | 7,5 | Mirror heater |
| 62 | 10 | Air condition |
| 63 | 7,5 | Rear window sensor |
| 64 | 5 | Air quality sensor |
| 65 | 7,5 | Chevrolet Cruze rear fog lights |
| 66 | 15 | Rear window washer |
| 67 | 20 | Fuel supply control unit |
| 68 | — | Not used |
| 69 | 5 | Battery voltage sensor |
| 70 | 5 | Rain sensor |
| 71 | — | Not used |
| Fuse links | ||
| 6 | 30 | Windshield wiper |
| 12 | 30 | Starter traction relay |
| 21 | 30 | Rear power windows |
| 22 | — | Not used |
| 24 | 30 | Chevrolet Cruze front power windows |
| 25 | 20 | Electronically controlled vacuum pump |
| 26 | 40 | ABS |
| 27 | 30 | Electronic key control system |
| 28 | 40 | Heated rear window |
| 41 | — | Not used |
| 42 | 40/30/20 | Engine cooling fan |
| 43,44 | — | Not used |
| 45 | 40 | Chevrolet Cruze engine cooling fan |
| 59 | 30 | Diesel fuel heater |
| Relay | ||
| R1 | — | Air conditioning compressor drive clutch |
| R2 | — | Starter traction relay |
| R3 | — | Engine cooling fan (K7) |
| R4 | ” | Front wiper mode (speed) relay |
| R5 | Chevrolet Cruze front windshield wipers | |
| R6 | _ | Not used |
| R7 | _ | Engine control system main relay |
| R8 | — | Fuel pump |
| R9 | — | Engine cooling fan (K2) |
| R10 | — | Engine cooling fan (short circuit) |
| R11 | — | Not used |
| R12 | — | Engine cooling fan (short circuit) |
| R13 | — | Engine cooling fan (K1) |
| R14 | — | Not used |
| R15 | — | Ignition |
| R16 | — | Pre-heating system (diesel) |
| R17 | — | Heated exterior mirrors for chevrolet cruze |
Pros of Chevrolet Cruze
First of all, this is the exterior. Unlike many faceless representatives of this segment, Cruise looks impressive and thoroughbred. The powerful and massive front end, with sharpened optics and an impressively sized radiator grille, is mesmerizing. The car also looks quite good in profile, and the rear with its stylish lights will not disappoint. The car is not low - sufficient for our roads.
The “advanced” and high-quality interior should not be discounted either. The plump, three-spoke multifunction steering wheel fits comfortably in your hands, the elegant dashboard really charges you with positivity, is easy to read and does not irritate you on a long journey. The central part of the dashboard is nice, intuitive, convenient and not overloaded with buttons and keys.
Aluminum-look inserts fit organically into the overall landscape and do not look tacky against the background of the black plastic of the dashboard. The front seats will delight you with well-developed lateral support, and there is also quite enough space in the back.
They pull smoothly and assertively, ranging from 5.7 to 8.3 liters in the combined cycle, which, of course, is a bit much. The “mechanics” switches easily and freely, and there are no serious complaints about the automatic transmission either. The ride quality is also quite good - there is almost no wave buildup, the car takes corners calmly, and it firmly holds zero on the highway.
Also recorded as an asset – from RUB 609,000.
Chevrolet Cruze fuses: description, location, photos and videos
Hello dear friends! I want to share with you the Chevrolet Cruze fuse diagram
The vehicle has two fuse boxes: • in the left front part of the engine compartment. • in the passenger compartment behind the storage compartment or, in right-hand drive vehicles, behind the glove box. In the block above the positive terminal of the battery there is a group of main fuses. If you need to replace them, contact a service station. Before replacing a fuse, turn off the corresponding switch or turn off the ignition. Some circuits may be protected by multiple fuses. In addition, additional fuses can be installed in the block. Mounting block located in the engine compartment:
1. Transmission control unit 2. Electronic engine control system controller 3. - 4. Canister solenoid air valve 5. Ignition 6. Windshield wipers 7. - 8. Fuel injectors 9. Ignition coils, fuel injectors 10. Engine control unit 11 Oxygen sensor 12. Starter solenoid 13. Canister solenoid air valve 14. - 15. Rear window wiper 16. Ignition, air quality sensor 17. Ignition, airbag 18. Fuel supply control unit 19. - 20. Fuel pump 21. Rear power windows 22. - 23. - 24. Front power windows 25. Electronically controlled vacuum pump 26. ABS 27. Electronic key control system 28. Heated rear window 29. - 30. ABS 31. Body control unit 32. Control unit body equipment 33. Heated front seats 34. Sunroof 35. Infotainment system, amplifier 36. - 37. Right high beam headlight 38. Left high beam headlight 39. - 40. - 41. - 42. Cooling fan 43. — 44. — 45. Cooling fan 46. Cooling fan 47. Oxygen sensor 48. Fog light 49. — 50. — 51. Horn 52. Instrument panel 53. Electromagnetic mirror 54. Light switch, light control 55. Folding mirrors 56. Windshield washer 57. Steering column lock 58. - 59. Heated diesel fuel 60. Heated mirrors 61. Heated mirrors 62. Air condition 63. Rear window sensor 64. Air quality sensor 65. Rear fog lights 66. Rear washer 67. Fuel supply system control unit 68. — 69. Battery voltage sensor 70. Rain sensor 71. —
* — 1. A/C compressor clutch relay 2. Starter relay 3. Cooling fan relay 4. Windshield wiper speed control relay 5. Windshield wiper relay 6. — 7. Power train relay 8. Fuel pump relay 9. Cooling fan — Medium Speed Relay 1 10. Cooling Fan - Medium Speed Relay 2 11. - 12. Cooling Fan Speed Control Relay 13. Cooling Fan - High Speed Relay 14. - 15. Main Ignition Relay 16. Fuel Heater Relay 17. Relay rear window defogger
Mounting block located in the cabin
1. Infotainment system, hands-free telephone 2. - 3. Body control unit 4. Infotainment system 5. Information display, parking aid, siren 6. Cigarette lighter 7. Power socket 8. Body control unit 9 Body control unit 10. Body control unit 11. Heating and air conditioning fan 12. - 13. Heated seats 14. Diagnostic connector 15. Airbag 16. Central locking, rear tailgate 17. Air conditioning 18. - 19. Gear shift lever 20. — 21. Instruments 22. Ignition, electronic key control system 23. Body control unit 24. Body control unit 25. Steering column lock 26. —
Fuse box in the cabin
The block is located in the panel on the left side directly at the driver's left knee.
To gain access, open the small items storage compartment and pull it up. Then you should remove the bottom of the drawer from the panel stops and pull it out.
Photo of the block
Scheme
Table with designation
| 1 | 10A Mobile phone control module |
| 2 | Not used |
| 3 | 25A Body controller |
| 4 | 20A Radio receiver |
| 5 | 7.5A Parking assistance control module, sound emitter, steering column switch - center console, display |
| 6 | 20A Cigarette lighter - front |
| 7 | 20A Socket for additional electrical appliances - center console 1/2 |
| 8 | 30A Body Controller |
| 9 | 30A Body Controller |
| 10 | 30A Body Controller |
| 11 | 40A Door Control Module - Electric Fan |
| 12 | Not used |
| 13 | 25A Seat heating control system module |
| 14 | 7.5A Diagnostic block, oil supply fitting |
| 15 | 10A Airbag diagnostic and control module |
| 16 | 10A Rear compartment door release relay |
| 17 | 15A HVAC control unit / HVAC control panel assembly |
| 18 | Not used |
| 19 | Not used |
| 20 | Not used |
| 21 | 15A Instrument cluster |
| 22 | 2A Ignition switch/door lock receiver |
| 23 | 20A Body Controller |
| 24 | 20A Body Controller |
| 25 | 20A Steering column lock control module |
| 26 | Not used |
| Note: The relays listed below are service-free printed circuit board (PCB) relays and are located inside the unit. | |
| 1 | Releasing the rear compartment door |
| 2 | Logistics mode |
| 3 | Auxiliary Power Relay |
Please note: the cigarette lighter fuse in the Chevrolet Cruze is located in this block at number 6.
Removing the main fuse and relay box
Located on the right side of the engine compartment, next to the battery under a plastic protective cover.
Numbering and decoding of protected circuits:
| № | Denomination (A) | Protected circuit |
| 1 | 15 | Transmission control unit |
| 2 | 15 | The engine control unit |
| 3 | — | Not used |
| 4 | 10 | Canister air solenoid valve |
| 5 | 15 | Ignition |
| 7 | — | Not used |
| 8 | 15 | Fuel injection system |
| 9 | 15 | Fuel injection system, ignition system |
| 10 | 15 | The engine control unit |
| 11 | 10 | Oxygen concentration sensor |
| 13 | 7,5 | Canister solenoid valve |
| 14 | Not used | |
| 15 | 20 | Rear window wiper |
| 16 | 7,5 | Ignition, cabin air quality sensor (air conditioning system) |
| 17 | 5 | Ignition, airbag |
| 18 | 10 | Cruze throttle position sensor |
| 19 | Not used | |
| 20 | 20 | Fuel pump |
| 22, 23, 29 | Not used | |
| 30 | 15 | ABS |
| 31 | 20 | Body Control Module |
| 32 | 20 | Same |
| 33 | 30 | Heated front seats |
| 34 | 25 | Sunroof |
| 35 | 30 | Audio system |
| 36 | Not used | |
| 37 | 10 | Right high and low beam headlight fuse |
| 38 | 10 | Left high and low beam headlight |
| 39,40 | — | Not used |
| 46 | 10 | Cooling fan |
| 47 | 10 | Oxygen concentration sensor |
| 48 | 15 | Fog lights |
| 49,50 | — | Not used |
| 51 | 15 | Sound signal |
| 52 | 15 | Dashboard |
| 53 | 10 | Electric mirror |
| 54 | 5 | Light switch, light control |
| 55 | 7,5 | Folding mirrors |
| 56 | 15 | Windshield washer |
| 57 | 15 | Steering column lock |
| 58 | — | Not used |
| 60 | 7,5 | Mirror heater |
| 61 | 7,5 | Mirror heater |
| 62 | 10 | Air condition |
| 63 | 7,5 | Rear window sensor |
| 64 | 5 | Air quality sensor |
| 65 | 7,5 | Rear fog lights |
| 66 | 15 | Rear window washer |
| 67 | 20 | Fuel supply control unit |
| 68 | — | Not used |
| 69 | 5 | Battery voltage sensor |
| 70 | 5 | Rain sensor |
| 71 | — | Not used |
| Fuse links | ||
| 6 | 30 | Windshield wiper |
| 12 | 30 | Starter traction relay |
| 21 | 30 | Rear power windows |
| 22 | — | Not used |
| 24 | 30 | Cruze front power windows |
| 25 | 20 | Electronically controlled vacuum pump |
| 26 | 40 | ABS |
| 27 | 30 | Electronic key control system |
| 28 | 40 | Heated rear window |
| 41 | — | Not used |
| 42 | 40/ 30/ 20 | Engine cooling fan |
| 43,44 | — | Not used |
| 45 | 40 | Engine cooling fan |
| 59 | 30 | Diesel fuel heater |
| Relay | ||
| R1 | — | Air conditioning compressor drive clutch |
| R2 | — | Starter traction relay |
| R3 | — | Engine cooling fan (K7) |
| R4 | — | Front wiper mode (speed) relay |
| R5 | Front wipers | |
| R6 | _ | Not used |
| R7 | _ | Engine control system main relay |
| R8 | — | Fuel pump |
| R9 | — | Engine cooling fan (K2) |
| R10 | — | Engine cooling fan (short circuit) |
| R11 | — | Not used |
| R12 | — | Engine cooling fan (short circuit) |
| R13 | — | Engine cooling fan (K1) |
| R14 | — | Not used |
| R15 | — | Ignition |
| R16 | — | Pre-heating system (diesel) |
| R17 | — | Heated exterior mirrors |
Fuse location
The Chevrolet Aveo has several mounting blocks. There are two of them in total - one in the engine compartment and one in the cabin. In the engine compartment there is a block on the front left side of the vehicle. In the cabin - under the steering wheel.
Location of the fuse box in the engine compartment.
Fuse diagrams
According to the Chevrolet Aveo fuse diagram, the internal fuse block consists of 20 fuses and is responsible for the operation of the sound signal, windshield wiper, brake light, turn signals, audio system, interior lighting, heated mirrors, etc.
Fuse box diagram Fuse box diagram in the engine compartment.
| Fuse designation | Protected circuit |
| F1 | SDM |
| F2 | EMS1 |
| F3 | OBD |
| F4 | Luke |
| F5 | sound signal |
| F6 | wiper |
| F7 | stop signal |
| F8 | rear fog lights |
| F9 | electric mirror |
| F10 | instrument cluster |
| F11 | audio system/RKE |
| F12 | turn signal |
| F13 | cigarette lighter |
| F14 | interior lighting |
| F15 | door lamp |
| F16 | EMS2 |
| F17 | audio system/clock |
| F18 | heater |
| F19 | reversing light |
| F20 | heated mirrors |
The engine compartment fuse box consists of 23 fuses and 10 relays, and is responsible for the operation of the ignition system, hazard warning lights, headlights, power windows, engine control unit, etc.
Interior fuse box diagram.
| Fuse designation | Protected circuit |
| F1 | battery |
| F2 | left parking light |
| F3 | right parking light |
| F4 | starter/ignition 1 |
| F5 | computer air conditioning/ignition 1 |
| F6 | warning light |
| F7 | right low beam headlight |
| F8 | left low beam headlight |
| F9 | front fog lights |
| F10 | driving lights |
| F11 | high speed cooling fan |
| F12 | low cooling fan speed |
| F13 | computer air conditioning system |
| F14 | electric window 2 |
| F15 | electric window 1 |
| F16 | fuel pump |
| F17 | the engine control unit |
| F18 | EMS1 |
| F19 | EMS2 |
| F20 | reserve |
| F21 | reserve |
| F22 | reserve |
| F23 | ABS |
| R1 | fuel pump relay |
| R2 | power window relay |
| R3 | parking light relay |
| R4 | front fog lamp relay |
| R5 | high beam headlight relay |
| R6 | low beam headlight relay |
| R7 | distant fan relay |
| R8 | Low fan relay |
| R9 | air conditioning relay |
| R10 | main relay |
| FP | fuse replacement tweezers |
Tips for replacing Chevrolet Aveo fuses
Remove the required fuse and check the integrity of the metal thread by looking through the special window in its upper part. Also pay attention to the contacts to see if there are any signs of oxidation on them.
If you find a blown fuse, change it, but remember that fuses serve to protect the vehicle's electrical equipment from overheating and fire when high current flows in the circuit, as well as from short circuits. Therefore, a blown fuse may indicate a malfunction.
You need to change fuses taking into account their color markings.
Many car enthusiasts, when a fuse blows, replace it with a paper clip or wire. This, to put it mildly, is not entirely correct, because... can lead to failure of expensive electrical equipment or even fire.
High Power Fuse Box
Located on the battery cover:
Numbering and decoding of protected circuits:
| 1 | 100 | Fuse Box - Instrument Panel |
| 2 | 100 | Fuse Box - Instrument Panel |
| 3 | 80 | Electric Power Steering (EPS) (NJ1) |
| 4 | — | Not used |
| 5 | 250 | Fuse Box - Additional Battery |
| 6 | 250/ 500 | Starter motor |
Additional engine compartment relay box
*Optional, depending on vehicle equipment
- Cooling fan medium speed relay;
- Cooling fan speed control relay;
- Cooling fan medium speed relay.
*Optional, depending on vehicle equipment
- Cooling fan medium speed relay;
- Cooling fan speed control relay;
- Cooling fan medium speed relay.
Remove the block cover; to do this, press the three latches on the sides.
On the back of the unit cover there is a diagram of the location of fuses and relays.
The faulty fuse is replaced with a working one using special tweezers from the fuse box kit.
Location and electrical diagram
If any electrical equipment fails, first check the electrical fuse that controls it. To make this easier, take a look at the proposed diagrams.
If some equipment fails, look for it in the tables. Next, having determined its number, look for the location of the element responsible for it in the circuit.
This block contains mainly elements responsible for the equipment inside the car: socket, cigarette lighter, air conditioner, fan, etc. You shouldn't have any problems finding what you need.
Removal and replacement process
Located at the driver's seat on the left under the panel. To access the fuses, you need to open the block cover and pull the block up, then release the lower part from the latches and pull it out.
Open the lid and pull it up to remove it completely. On the back of the cover there is a diagram of the location of the fuses. Replacing a faulty fuse is similar to the above.
If something in your electrical equipment has failed, first find it in the diagram, and then determine its location. Next, you can start replacing it.
Engine compartment
- Raise the hood cover and fix it.
- Next to the battery we find a plastic box.
Located next to the battery
Fasteners that need to be pressed out
Turning it over, we find on the reverse side a schematic image that will help us determine the location of the required electrical fuse, relay or fuse link.
Diagram on the reverse side
We find special tweezers (it greatly simplifies the replacement process). Before replacing, try to determine why the element burned out.
Simply pinch the fuse that needs to be replaced with tweezers and pull it out of the connector.
New, insert into tweezers and install into the connector.
- Relays or fuse links can be easily removed and installed by hand.
Behind the glove compartment
- Remove everything from the glove compartment.
- Open it.
