| Photo of disc and pads | |
| The pads are almost worn out | |
| I took the pads from Lacetti, because... they have a “whistle” that makes a whistle when the pad is completely worn out, and they are less likely to run into a fake. The whistle begins to creak when the remaining thickness of the pads is about 3 mm | |
| Nexias with 16-valve engines come with 14″ brake discs, so the pads from the Lacetti are identical to the original ones | |
| Unscrew the two bolts from the caliper using a “14” socket | |
| We remove the caliper and press the cylinder with two thumbs so that it goes inside. This can only be done if the car has been standing for more than 40 minutes and has had time to cool down. | |
| Comparing new and old pads. The Lacetti pads have two lines, they say this helps with braking. | |
| They should run without freezing; if they freeze, you will need to unscrew them and lubricate them with special grease for calipers. Reassemble in reverse order. We do the second side in the same way. To make it easier to remove the caliper, I twisted the steering wheel in the direction from which the caliper is more accessible. After the work done, do not forget to bleed the brakes! |
Source: https://www.Nexia-FAQ.ru/obslugivanie/zamena-pered-kolodki.html
A site for those who love cars and are not afraid of wrenches
Rear brake pads
Replacing the rear brake pads on a Daewoo Nexia or Chevrolet Lanos does not represent much technical difficulty and is quite doable in a garage, or in good weather on a suitable flat area.
Brake pads on Nexia
the same as on
Lanos,
Opel
models . For installation I chose WEEN pads, which are positioned as a premium class, but at the same time are sold at an affordable price.
Looking ahead, I’ll say that I’ve already driven about 1,000 km since installation, and after they’ve broken in, I’m quite happy with the result. This is not an advertisement, believe me. Well, now about how to change the brake pads.
No special tools are required to replace the pads. There will be enough pliers, a single and Phillips screwdriver, a jack and a wheel wrench.
You will also need a caliper and a file.
Place chocks on both sides under the front wheels and engage 1st gear, lower the parking brake lever
. Loosen the rear wheel bolts and place the rear of the car on secure stands. It’s better to do it on both sides at once (you’ll also have to adjust the parking brake).
Working on a jack is strictly prohibited.
Check the level of brake fluid in the reservoir; you may need to remove a little (for example, using a syringe), since when the pistons of the working cylinders are compressed, the level will rise noticeably.
Checking the brake fluid level
Removing the brake drum
Remove the wheel and unscrew the drum mounting screw.
We unscrew the screw with a Phillips screwdriver; if it is rusty, you can use an impact driver.
If the drum sits tightly on the hub, then you need to treat the flange with WD or vinegar essence and tap it with a hammer through a piece of wood.
If the drum is heavily worn, if the pads interfere with removal, you will need to release the tension on the handbrake cables and use a screwdriver to move the parking brake release lever through the hole in the support disk (on the back side, closed with a rubber plug). But this is a last resort and rarely happens.
During long-term operation, a bead forms along the edge of the working surface of the drum; it should be ground off with a file or emery stone. After removing the collar, measure the diameter of the brake drum with a caliper in at least two opposite directions.
Control of drum geometric dimensions.
If the inner diameter of the drum exceeds 201 mm, it should be replaced. Replace brake drums in pairs (both sides at the same time).
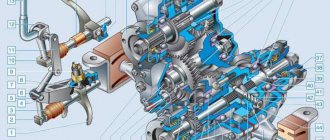
Now let's move on to inspecting the brake mechanism (diagram for clarity). Make it a rule: check everything you can see, touch, shake, etc. In a specific example (suspension spring, shock absorber strut, brake pipe, play in wheel bearings, working cylinder (leakage, integrity of rubber boots)).
Brake mechanism diagram.
Using a screwdriver or pliers, remove the upper tension spring, then the support posts (hold the post on the reverse side, and use the pliers to press the washer and turn it), after which everything can be disassembled without any problems. Using a metal brush and a dry cloth, clean the brake shield from dirt. Lubricate with refractory grease the contact points of the pads with the support shield and the working cylinder.
Lubrication of reference points
If the thickness of the friction linings is 1.5 mm or close to it, such brake pads should be replaced (we replace the pads as a set, on both sides, it is forbidden to swap pads).
You should also change the pads on which the linings are oily, lag behind the base, have chips and deep grooves.
When replacing pads, the manufacturer recommends changing the accompanying parts (springs, spacers, support posts). These kits are available for sale.
Repair kit
The design of the rear brake very interestingly implements a mechanism for automatically adjusting the gaps between the shoes and the drum, thanks to sliding spacer bars; at the same time, as wear occurs, the gap in the main working system is selected and the parking brake is adjusted. And here there are several points that you should pay attention to during assembly. The spacers and adjusters on the left and right sides of the vehicle are not interchangeable
.
And in the repair kit for the left brake that I bought, the teeth on the adjusting nut were cut in the other direction, so I had to leave the original one. Be careful.
And the teeth are in the other direction
The nut on the thread of the spacer bar rod should rotate easily, without any effort. Before installation, the thread should be lubricated, the nut should be screwed in completely, but not tightened.
Thread lubrication spacer plan
An important nuance regarding the operation of the gap adjustment mechanism was suggested to lexa67068rus with drive2 about installing a castle spacer washer on the block, which is installed in front of the car in the direction of travel.
Installing the washer on the block
If this washer is missing, the double-arm lever may get caught between the block and the spacer bar, as a result of which the automatic adjustment will not work. These washers are not supplied with new pads and are not included in repair kits with springs either. They must be purchased separately, part number according to catalog 94525222.
Washer repair kit
First, install the spacer washer on the block, then the adjustment mechanism lever.
Mechanism with washer assembly
We install all the parts in their places, moving the pads inward using a pry bar and a wheel wrench, recess the pistons of the working cylinder until they rest against the spacer bar. We put on the upper tension spring.
Assembled feed mechanism.
Rear wheel brake mechanism of Opel Nexia Lanos
We put the drum in place, fix it with a screw and press the brake pedal several times, bring the pads to the drum, and clicks of the automatic gap adjustment mechanism should be heard.
When the clicking stops, you should check the ease of rotation of the drum. Light brushing of the pad is acceptable, which will stop after running-in. If everything is fine, install the wheel.
Don't forget to tighten the bolts after lowering to the ground.
Good luck on your journey
Source: https://avtomastersam.ru/zamena-zadnix-tormoznyx-kolodok-svoimi-rukami/
How to replace the front brake pads of Daewoo Nexia
The service life of the front brake pads on Daewoo Nexia depends primarily on the pads themselves, as well as on the driving style. The better the quality of the pads, the longer they will last. Also, with smooth acceleration and braking, the pads will last longer.
How to determine the need to replace pads
Front pads wear out faster than rear pads. Therefore, you need to monitor their condition and check them more often. The following signs indicate that the working surface of the pads is worn to the maximum permissible level:
- characteristic squeaking sound when pressing the brake pedal
- the level of brake fluid in the expansion tank is below the required level
- the brake pedal “goes” all the way to the floor, and the braking distance increases
If you find the above signs on your Daewoo Nexia, it is quite possible that the front pads are worn out and require checking and replacement.
Which pads to choose
Original Daewoo pads 96281937 were installed from the factory. The cost of the set at the moment is from 950 rubles. In addition to the original pads, in stores you can find a large selection of analogues at more affordable prices.
Similar pads:
- ADR (Russia) ADR290611 price from 400 rub.
- AMD AMDBF171 price from 550 rub.
- Fenox BP43013 price from 650 rub.
- Markon 13200170 from 450 RUR
- Pilenga FDP7003 from 450 RUR
Before purchasing analogue brake pads, be sure to check with the seller whether the pads you are purchasing are truly suitable for your car.
Instructions for replacing pads yourself
Using a wheel wrench, loosen the wheel nuts and jack up the car.
We unscrew the wheel and see in front of us a caliper with an upper and lower mounting bolt
Using a 14mm wrench, unscrew the lower caliper mounting bolt and slightly loosen the upper one.
We lift the caliper bracket up and pull out the old pads from the seat.
We carefully inspect the old pads - if the wear is even, we proceed to replacing the pads with new ones. If the top or bottom is worn out more, this indicates that the caliper is jamming during braking and it is necessary to lubricate the caliper guides with special lubricant.
We install new pads in place of the old ones, recess the piston in the caliper bracket until it is completely recessed. This is necessary to fit the bracket onto the new pads.
After installing the pads and assembling, before starting to move, press the brake pedal several times so that the piston in the caliper takes its working position.
Source: https://1remontauto.ru/zamena-perednikh-kolodok-daewoo-nexia.html
We treat brake sores or how to make the rear wheels brake.
It all started when I went to the state. those. inspection, spent 8 hours, but never received the coveted ticket due to the fact that the rear wheels braked very differently, namely, the difference in braking forces was more than 90%, while the handbrake performed a little better. I went to the service station, where they installed chocks on a wheel that was not braking. I went to the GTO again and again returned without a ticket, with a diagnosis of “insufficient braking force on the rear axle” and with a verbal recommendation “you have air there, bleed the brakes.” To be honest, I was tired of running around, trusting the service station workers (to whom I contacted) too, and so I decided to figure out the problem myself, study similar situations from other car owners and solve the problem, if possible, on my own. That's what came out of it. So, first, a little theory. The brake system in the car is hydraulic, dual-circuit, with diagonal distribution of circuits with a vacuum booster. The front wheel brakes are disc, the rear wheels are drum. There are also so-called “pressure control valves in the cylinders of the rear brake mechanisms,” but in two different Kama Sutras I did not find not only a description of the principle of operation, nor any information at all except that they are located on the main brake cylinder, how to unscrew them you need a 22 key, they must have the same markings and you must always put new o-rings on them. (on the diagram numbered 7 and 8). I don’t like it when people don’t say something. I scoured the Internet, read forums, and found only a weak text description in the style of “there’s one thing in another thing” and the fact that people either modify them in the literal sense of the word with a file, or partially or completely throw out all the guts from them. In general, nothing concrete, intelligible or credible. Well, as they say, “Who is the last king here? No one?! So I’ll be the first!” I drained the liquid, removed one mysterious valve and began to study. And in fact, the culprit itself I couldn’t find a diagram of the internal structure of the valve on the Internet, so I had to draw it hand-to-hand. I warn you that the drawing turned out to be very sketchy, the proportions and shape of the parts are very approximate. The figure shows the following designations, which I will use further: 1 - Main valve body, screwed into the main brake cylinder; 2 - An additional part of the body, screwed into the main body, serves to fix the internal parts of the valve; the brake pipe fitting leading to the rear brake mechanism is screwed into it; 3 - Moving middle part (contains a very thin channel for passing hydraulic fluid); 4 — Solid (large) spring; 5 - A small moving part of the valve, I called it “Mushroom”; 6 - Small spring (mushroom spring); 7 - Large cuff (large rubber sealing ring); 8 - Small cuff (small sealing rubber ring). The green arrow indicates the direction of movement of the hydraulic fluid when the brake pedal is pressed. I did not find a description of the principle of operation, but based on logic and the remnants of knowledge of physics, I will try to explain how, in my opinion, this should all work in theory. Let me give some clarifications first. The fungus is located in such a way that in rest mode it does not block the central channel of the movable middle part; in addition, there is plenty of space around the stem of the fungus for hydraulic fluid, and there are no obstacles for the fluid in this place. A small spring serves only to softly fix the fungus in the guides, and also to prevent the fungus from “escaping” into the master brake cylinder when the brake pedal is released when the fluid returns to the GTZ. The cuffs are used to prevent liquid from “walking” around the movable middle part, while allowing it (the part) to move in the longitudinal direction. This system works like this: In rest mode, the hydraulic fluid pressure on both sides is the same, a large spring 4 holds the movable middle part 3 in the extreme left (according to the diagram) position, the fungus 5 does not close the channel in the middle part, the system is in the “open” position. When you press the brake pedal in the system on the right, according to the diagram, pressure begins to increase, hydraulic fluid begins to flow through the open channel of the middle moving part to the left side of the structure and further to the brake cylinder. The pressure on the left side begins to increase, the fluid pressure force begins to act on the moving middle part, the part begins to shift to the right, but this force is counteracted by a large spring (the areas on the left and right of the middle moving part are not equal, so there is no equilibrium of forces). As soon as the pressure force on the left side of the system exceeds the resistance force of the large spring, the middle moving part moves to the right according to the pattern and thereby closes the channel with the fungus, the liquid stops flowing into the left side of the system, and the system closes. Then everything is simple: the force exerted by the brake reservoir in the wheel on the pads stops increasing, and accordingly the braking force in the rear brake mechanism stops increasing and the rear wheel is not blocked. After releasing the brake pedal on the right side of the system, the pressure drops, the brake fluid from the left side through the channel in the middle part repels the fungus and goes into the GTZ, the pressure on the left side drops and a large spring returns the middle moving part to the leftmost position according to the diagram. Balance is restored. This is a beautiful theory, but in practice, a large spring loses its properties over time and the closing force of the valve system decreases. As a result, the valve closes even before any significant braking force appears on the rear wheels. My experiments showed this indirectly - with the rear axle hanging up - with the brake pedal pressed to the floor, it was enough to pull the wheel with your hands and it would spin. Next comes the most interesting part. Having studied the design of the valve, as well as the theory of brake mechanisms, I came to the conclusion that it is absolutely not necessary to limit the rear wheels by that much. The efficiency of drum brakes is significantly worse than disc brakes, all other things being equal; in addition, the increase in pressure in the system can be limited by the diameter of the passage hole. It was decided to remove the fungus and small spring from the system, bleed the brakes and conduct field tests. Which is what was done. These are the extracted parts: And here is the hole that became visible in the valve: A series of field tests showed that now the rear wheels are blocked, but not at the same time as the front ones; the braking distances on the ground differed in length by approximately 1:4 or 1:5 , i.e. the rear wheels were blocked much later. Subjectively, the car began to brake better, the brakes became clearer, and in addition, the car practically stopped “nodding off” when you press the brake. The subsequent passing of the GTO did not cause any problems; I was surprised that before changes were made to the diagnostic card, the specific braking force of the service brake system was 0.41; reference parameter is 0.53; and after the changes, the strength became 0.806. Those. The overall efficiency of the braking system has doubled. Of course, time will tell whether this change is good or bad; we will have to see how the car behaves in the winter, but I have already applied the brakes to the floor a couple of times, there was no change in trajectory or twisting, subjectively the rear wheels did not were blocked. Something like this! PS: If anyone makes changes to the brake system in the same way, I highly recommend keeping silent about it at the TRP, because this is not entirely good from the point of view of legislation. Their (GTO specialists) job is to check the technical serviceability of the vehicle, and there are a lot of “laws” and “reality” in our country in which industries there are two huge differences.
Replacing brake pads Daewoo Nexia instructions with photos
Replacing the brake pads of the Daewoo Nexia during normal operation is required once every 60 thousand kilometers. After a mileage of 120 thousand kilometers, it is advisable to change the brake discs, which quickly lose their effectiveness after this mileage. Daewoo Nexia front brake pads are replaced when the lining thickness is less than 1.5 mm. If a creaking noise appears when braking, it is better not to delay it. Moreover, the process of replacing the front pads is very simple and does not cause problems.
The Daewoo Nexia has ventilated disc brakes at the front. Naturally, pads must be replaced as a set on both wheels. Otherwise, due to uneven wear, the car may pull to the side when you press the brake. The brake mechanism is quite simple. This is a so-called single piston floating caliper.
To begin with, we hang the front wheel and use a powerful screwdriver or a mounting spatula to slightly press the piston into the caliper cylinder, this will significantly help in the future. See the photo below.
Next, take the 13 key and unscrew the lower guide pin.
After the finger is unscrewed, you can lift the caliper by turning it on the upper finger.
We take out the old pads of the Daewoo Nexia. We insert new ones, but pay attention that the inner and outer blocks are slightly different. There is a special reinforced plate on the inner block; the brake piston should rest on it, keep this in mind.
Now you need to press the brake piston completely into the cylinder, for which you can use sliding pliers. Next, lower the caliper and screw the lower guide pin into place.
After replacing the second pair of pads on the Daewoo Nexia, be sure to press the brake pedal several times so that the piston presses the pads tightly to the disc. Now you can check the brake fluid level in the expansion tank. If the level is higher than normal, then use a pear to pump out the excess; if it is lower, then add more.
Source: https://ruauto99.ru/2017/05/zamena-tormoznyx-kolodok-daewoo-nexia-instrukciya-s-foto/
How to service brakes?
It is necessary to service elements of the Daewoo Nexia system when replacing brake pads. This will ensure maximum service life of the mechanisms. Be sure to check the condition of all rubber components. Every time you replace the pads, it is advisable to apply new lubricant to the moving elements.
Use only silicone lubricants that are made with a synthetic base. They are able to withstand very high temperatures. It is not recommended to use lubricants such as “Litol-24” or “CV joint”, since they are unstable to temperature changes. But you cannot apply lubricants to working surfaces - this will cause the system to completely stop working.
Brake pads for Daewoo Nexia n100/n150
Daewoo Nexia is equipped with front disc and rear drum brakes. On Nexia n100/n150 models with 8 cells. 1.5 liter engines.
Front brake pads with different articles and sizes were installed, depending on the type of caliper.
The rear pads were installed the same regardless of the generation of the model; they have article number 96226110 or NP1441 .
“H” type caliper was equipped with brake pads with the article number - 96101972S . “C” type caliper, pads with other sizes and part number are suitable - 96273708 . For Nexia n100/n150 with 16 cells. engines 1.5 l.-1.6 l. The same front brake pads are installed with the article number - 96281937 .
To change the pads on a Nexia car yourself you will need: a jack, a wheel wrench and an open-end wrench set to “14”.
Dimensions of front and rear brake pads for Daewoo Nexia
There are Nexia models with 16 cells. engines that have brake discs installed not only with a diameter of 256 mm but also with 236 mm discs, so when selecting pads it is better to start from these parameters.
Car model
Disc diameter
LengthHeightThickness
| Pad size | ||||
| Caliper H type Engine 1.5 SOHC MPI art. 96101972S | 99.9 mm | 59 mm | 15 mm | 236 mm |
| Caliper C type Engine 1.5 SOHC MPI art. 96273708 | 126.9 mm | 47.9 mm | 16.5 mm | 236 mm |
| Engine 1.5 DOHC MPI Engine 1.6 DOHC MPI art. 96281937 | 143 mm | 51.5 mm | 17.6 mm | 256 mm |
Dimensions of Nexia rear drum pads:
- diameter 200 mm;
- width 46 mm.
Price for front and rear pads of Daewoo Nexia
The original and popular analogs of the front brake pads do not differ significantly, since Korean cars have inexpensive Korean pads. But the price will depend on the premium brand and the quality of the material used.
GM 96101972S
Articles and cost of front pads for Daewoo Nexia
Caliper H type Engine 1.5 SOHC MPI:
- Original pads 96101972S - price 690 rubles.
- Sangsin SP 1155 - price 950 rub.
- Hankook Frixa FPD02 - price 335 rub.
- NiBK PN-0234 - price 440 rub.
Caliper C type Engine 1.5 SOHC MPI:
GM 96273708
- Original pads 96273708 - price 1180 rub.
- Sangsin SP 1086 - price 670 rub.
- TRW GDB 3195 - price 950 rub.
- Yes Q ESD9051 - price 700 rub.
- Fenox BP43006 - price 490 rub.
- PMC PKC-006 - price 600 rub.
Engine 1.5-1.6 DOHC MPI:
- Original pads 96281937 - price 1680 rubles.
- Sangsin SP 1077 - price 690 rub.
- Fenox BP43003 - price 550 rub.
- NiBK PN-0374 - price 840 rub.
- PMC PKC-003 - price 500 rub.
GM 96281937
Prices for rear drum brake pads Daewoo Nexia
- Original pads NP1441/96226110 - price 1300 rub.
- Sangsin SA 055 - price 890 rub.
- Fenox BP53023 - price 690 rub.
- NiBK FN-11622 - price 980 rub.
Which brake pads are better for Nexia?
When it's time to change the pads on the Daewoo Nexia, the best choice would be original components or Sangsin, which supplies spare parts to the assembly line. But when there are none, you can also pay attention to analogues from well-known brands. They boast a more reasonable price with quality like the original and interesting features.
TRW GDB 3195 pads with COTEC friction coating, which reduces the braking distance during the grinding-in process, which increases driving safety immediately after replacing them. According to numerous reviews, TRW products exceed the quality of the original.
Belarusian Fenox BP43003, judging by numerous reviews, have a good price-quality ratio in the budget segment. The Fenox company has an even cheaper version of the BP43013 pads without an audible wear sensor.
But the inexpensive Hankook Frixa FPD02 pads do not always respond well, indicating increased dustiness, which is not very good, because the calipers are quickly covered with waste friction material.
It’s better not to consider the cheapest pads from little-known companies, which can often neglect quality. When choosing pads, you can save a little in the case when this is the last replacement before purchasing new brake discs.
Subscribe
to our channel in
Yandex.Zen
Even more useful tips in a convenient format
Subscribe
Did not find an answer to your question?
Ask in x. We will definitely answer!
for repair Daewoo Nexia (N100/N150)
Source: https://etlib.ru/blog/700-tormoznye-kolodki-na-deu-neksiya
Replacing rear pads on a Daewoo Nexia - replacing rear brake pads on a Daewoo Nexia n150
Replacement of rear pads on Daewoo Nexia is carried out infrequently, since when braking 70% of the load goes to the front ones. The problem with diagnosing brake pads on a Daewoo Nexia is that they can only be examined after removing the brake drum. Brake failure is a dangerous failure. If the pad comes off the pad, the wheels can lock even at high speed. For this reason, more and more car manufacturers are no longer installing drum brakes, but they are still used on Daewoo Nexia.
Replacement frequency
No one can say for sure after what period it is worth replacing brake pads, since it depends on a large number of conditions:
- Quality of the lining;
- Condition of the brake drum and cylinder;
- Serviceability of the sliding mechanism;
- Vehicle operating conditions;
- Driver's driving style.
Attention! If the drum is severely damaged, the pads will quickly fail.
Brake pads can last 5-100 thousand kilometers. The service life depends on the above factors and luck. Therefore, their serviceability must be closely monitored. You can identify failing pads by the sound from the brake drum, as well as by the intensity of braking.
Pad selection
- At the moment, there are no problems with choosing and purchasing pads, since pads suitable for Daewoo Nexia are found on a large number of cars: Daewoo Lanos, Espero, Nubira, as well as on some budget Chevrolet models, which are descendants of the Opel Kadett.
- The advantage of drum brakes is their cost and ease of maintenance.
- Some models of brake pads, sorted by descending price:
- The highest quality and most expensive are Ferodo FSB-335. These German-made pads are popular in Russia, although they do not sell very well. The price is about 5 thousand rubles.
- Another German model is Zimmermann. They cost 4 thousand rubles, which is twice as expensive as the original ones.
- Factory pads Hi-Q SA-055 from a Korean manufacturer. The quality is not much inferior to their German counterparts, but they cost only 2 thousand.
- Onnuri is also a Korean model, but costs a little less – 1.5 thousand.
- Rider is a model from a Hungarian company. The cheapest on this list.
Prices are approximate.
They may vary in different regions of the country, and also become more expensive/cheaper over time.
When dismantling old brakes, it may turn out that it is not only the pads that need to be replaced. It will not be superfluous to buy a complete repair kit, which includes almost all components of the brake mechanism. It costs around 500 rubles.
Tools necessary to replace rear pads on Daewoo Nexia n150
- Wheel chocks;
- Two jacks;
- A set of spanners and heads for them;
- Pliers (if available, it is recommended to use long-nose pliers);
- Mild steel hammer;
- Screwdrivers; WD-40;
- Silicone grease resistant to high temperatures.
Replacing rear brake pads on Daewoo Nexia
Dismantling algorithm
- For convenience, use a viewing hole or drive the car onto a lift.
- Install wheel chocks on the front wheels.
- Apply lubricant to the rod and loosen the parking brake cable tension nut.
This is done in two ways: using a socket with an extension or removing the heat shield. - Using a jack, raise the car on both sides so that the rear does not touch the ground.
- Remove the wheel by unscrewing the mounting bolts.
- Disconnect the hub cap and unscrew the nuts.
- Unscrew the countersunk screw and remove the drum. If you can't remove it, carefully knock the drum down with a hammer.
- Important! Before disassembling the mechanism, remember the location of all parts!
- Disconnect the spring from the adjusting device and from the support post by rotating the cup 90 degrees while holding the support post.
- Remove and clean the support post.
- Disassemble the mechanism on the second side in the same way.
- Disconnect the tension spring from the top. First from the front block, then from the rear.
- Move the pads apart from above and unhook them from the handbrake cable.
- Take them out and inspect their condition.
- Clean the shield from dirt and corrosion, apply lubricant.
Assembly algorithm
Important! Replace the springs with new ones, if possible. If there are defects on the springs, then it is unsafe to put them back.
The assembly algorithm resembles the dismantling algorithm in reverse order.
- Start connecting the new block to the rear of the handbrake cable.
- Secure it with a tension spring.
- Return the cleaned support post and its spring to its place; to install the post, you need to turn the bowl 90 degrees again.
- Attach the front block.
- Secure it with a holding post and a spring with an automatic closing mechanism.
- Check for correct assembly.
- Lubricate the hub and replace the grease in the bearing.
- Install the drums and wheels.
- Press the brake pedal several times until the parts of the mechanism are in the desired positions.
- Adjust the handbrake.
Attention! Remember to lubricate moving parts that require lubrication, such as the hub or bearings. The lubricant must be resistant to high temperatures.
Check the drums carefully for wear. If you install new parts in worn drums, their service life will be noticeably reduced.
Remove the side of the excavation if you are installing old drums. And if the surface wear is more than 20 centimeters, the brake drums also need to be replaced.
Source: https://nexiadaewoo.ru/zamena-zadnih-tormoznyh-kolodok-na-deu-neksiya-n150/
Removing old pads
And now more about how to replace the rear brake pads with your own hands. You need to start by disassembling the entire mechanism:
- Using pliers, you need to disconnect the spring, which is installed on the automatic adjustment device. After this, remove the spring completely.
- Gently hold the stand and press down on the cup to rotate it 90 degrees. After this, remove the spring from the support post and the cup.
- Remove the support post.
- Repeat the operations with the second block.
- Hold the pads and disconnect the springs that tighten them at the top. First, disconnect the spring from the block that is located closer to the front of the car.
- Move the pads apart and disengage their levers from the handbrake cable.
Daewoo Nexia rear brake pads - how to choose and replace?
August 17, 2018
The braking system of a car is important for ensuring safety while driving. Therefore, you should carefully monitor any possible problems with this element. The pads have a strong influence on braking, and they are also the main consumable in this system.
General description of the Daewoo Nexia brake system
The brake system on the Daewoo Nexia is hydraulically driven. This ensures fairly reliable and efficient operation. It is worth remembering that all the problems that brakes cause are consequences of design features. Therefore, let's look at them in more detail.
The drive system has two diagonal circuits, which avoids complete brake failure. If liquid leaks from one circuit, the second circuit will stop the machine, but the efficiency will be slightly reduced.
Ventilated brake discs are installed on the front wheels; they do their job perfectly. Drum brakes are used on the rear axle. This allows you to make the car a little cheaper to produce without losing the effectiveness of the safety systems.
There is also a mechanical parking brake. It has a cable drive to the rear wheels, which allows it to be used separately from the main working system.
Rear pads for Daewoo Nexia
Let's look at how the rear brake pads on this model differ. First of all, it’s worth remembering that drum brakes are installed here, which imposes certain requirements on the pads. The friction layer is made in a semicircle to ensure the most effective interaction with the drum.
When the lining wears out, the automatic gap adjustment mechanism comes into operation. Thus, the rear brake pads work in all cases, even with severe wear. But, here it is worth remembering that the drum itself may be erased unevenly. Then the lining will wear unevenly, which will lead to problems when braking.
Remember that the condition of the brake pads on the rear wheels has a strong influence on the operation of the parking brake. Therefore, you just need to monitor their condition, this will greatly simplify the operation of the car.
Purchase
There are quite a lot of offers on the market; buying rear brake pads for the Daewoo Nexia will not be difficult. At the same time, it is extremely important to select these parts correctly. After all, quality directly affects the mileage from replacement to replacement. Also, when choosing, keep in mind that pads from Daewoo Matiz may be suitable here.
The first thing to decide is whether to purchase originals or contract parts. Original spare parts are more expensive and, in principle, have no advantages. Most of the contract spare parts are not inferior in quality to the originals. But they usually cost less. The only nuance worth remembering is not to buy Chinese components, they are not of high quality.
It makes sense to purchase spare parts only from well-known suppliers. This provides certain quality guarantees. You should not buy parts in roadside stores or other places where counterfeit components can be found.
Replacement
Before replacing the pads, you should jack up the car and remove the wheel. The next step will be to dismantle the drum. To do this, unscrew the guides, then the drum is simply knocked off the hub. In order not to split it, you need to use a block and hit it with a hammer.
Next, the springs are removed. First of all, adjustment; it is more convenient to do this with long pliers. After that, the tension springs are also removed using pliers. The blocks are moved apart and the hook with the parking cable is removed.
Remove the parking brake lever. This completes the disassembly. Installation is in the reverse order. When reassembling, it is better to use new tension springs. They are sold separately in a rear brake repair kit.
In our online store you can buy auto parts with delivery throughout Russia.
Popular car brands for ordering spare parts
Source: https://xn--74-6kcajg8ax0a3b.xn--p1ai/about/articles/35/