Air suspension means the replacement of standard elastic suspension parts (torsion bars, springs or springs) with rubber reinforced air springs. The role of an elastic body in pneumatic cylinders is performed by compressed air pumped from the system. This type of suspension is mounted on one or two axles. In this case, the wheels on the axle are controlled according to the principle - each independently or independently.
The simplest installation scheme involves mounting the air suspension in a dependent pattern on one axle. This pendant includes:
- compressor;
- air flow separator;
- receiver;
- airways;
- one air spring for each wheel;
- pressure gauge;
- a valve that prevents the pneumatic bags from being emptied of air;
- three-position switch, which is responsible for the functions of switching off, deflating, and inflating.
When installing a more complex air suspension, an automatic pressure control relay in the system is added to the design. The number of compressors with receivers, pressure gauges, controls, and sensors is also increasing.
In some cases, microprocessor control units are added that allow the suspension stiffness to be adjusted with minimal or no intervention from the driver.
Installing air suspension provides the following advantages:
- improved handling. At the request of the client, it is possible to additionally install sports shock absorbers and anti-roll bars;
- ease of setup. The driver can independently adjust the suspension depending on the driving style and road conditions. By changing the pressure in the system, you can achieve softness and greater comfort, or stiffness and composure on the road;
- high degree of practicality. Installation of air suspension allows you to increase the load capacity of the machine. This has a noticeable effect on pickups and small trucks;
- individuality. Mounting air suspension is a kind of tuning element that allows you to lower the car qualitatively and make it more stylish.
› Installation of air suspension.
Part 1 - Take care of your nerves. Big, big Hello everyone!
Finally, I gathered my thoughts and decided to tell you and show you how the air suspension was built in my car.
A little background.
Before purchasing the Priora, I was already mentally and morally prepared to change its appearance.
Installing ugly body kits, dismantling headlights for angelic ones is not my thing, I don’t like it. Stock suspension, on which at a speed of 100 km/h the car dangled like a boat in the ocean, a huge roll, no stability, Kama Euro, in general, anyone who bought this device will understand) The decision was made immediately, cutting springs is not new, it’s inconvenient to drive , hard (drove, checked). Pneuma is what we need, let's try it =) Since at first I was a complete novice in this matter, I read a huge number of forums, etc. One bright day my friend advised me not to bother and buy a ready-made kit. Which is what I did. I bought a ready-made set of four-circuit air suspension on Rubens in a store on air.
The set consists of:
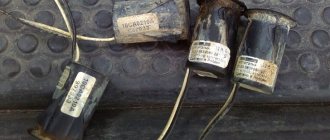
— Receiver (12-liter tank) — enough for one lift of the whole car (no more is needed) — Short-stroke -70 (lower struts) — Donuts (3 pillows on each stand with brackets) — Berkut R20 compressor (air pumping) — Block valves (8 valves, so that each wheel can be adjusted separately) - Camozzi moisture trap (a necessary thing to prevent water from getting into the pillows, made in Italy) - Pressure gauge (to monitor the pressure in the receiver) - Reinforced hose from the compressor to the cylinder - Pressure switch (so that the compressor turns off automatically after pumping the required amount of air) - Tubes, hoses (air flows directly through them to the airbags) - Window lifter buttons 4 pcs. (in order to raise and lower each wheel) - Camozzi fittings (fix the tubes through which air flows to the struts, cushions) And various other small things, such as nuts, check valves and relays.
In general, guys, in words it’s all so beautiful and delicate. In fact, this is “obscene language.” This set turned out to be so-so apples. The racks were not coated, they were not fully pressed (you will understand when it starts siphoning from all the cracks), the relay was not checked (does not work), the pressure gauge was not checked (does not work), it feels like the guys are doing it for speed, not for quality. The kit requires modifications and a large number of wires, I spent about 1000 rubles on them if I’m not mistaken, since they are not included in the kit, but you need a lot of them.
Where does the installation of an air suspension begin?!:
1.) Of course, by cutting down the spar and welding a pipe into it.
He took this matter very seriously and turned to real professionals in his field. People who work in garages will do better than in ProService. If anyone needs it, I can tell you the number, they will do it beautifully. It looks something like this (and this is necessary for the muzzle to lie completely on the floor, since the drive would rest against the bracket): Left 5 cm, Right 5.5 cm (cleaned, cut, welded, cleaned, coated, painted)
2.) Direct installation of racks. This can be done for you at any service center, and you can install them yourself, it’s not difficult, they installed them at a friend’s service center, where the pneuma was assembled. It’s not expensive, it takes a lot of time, so I asked them to have it installed before my arrival, and I’ll finish it myself. You will also need supports, I took the usual “ten” ones, simply because there were no others in the store, they pushed into my ear that they were normal, but in fact, as usual...
3.) Then throw away the spare tire, and in its place install the cylinder (receiver), valve block, compressor, moisture trap and run for the wires. You will need 1 thick plus, in my case it was DAXX 4Ga, then I changed it to a welding one, so take it immediately 4 meters (it will go to the compressor and battery), take DAXX 4Ga 1.5 meters is enough (battery buttons) and take thin wires for the raising and lowering buttons, preferably in different colors, otherwise they will get tangled; you need about 32 meters (8 wires 4 meters each), also take with you 20 ties for normal fixation of the tubes, large crimp rings (4 pieces) and small ones for wires, I don’t remember what they are called, you need about 25 of them, because you’ll lose half anyway), at the same time buy corrugations for this whole thing and be patient. I understood absolutely nothing about this matter and went around buying it all as events unfolded. By the way, I didn’t do it alone, Evgeniy helped me in all this, it seemed, not an easy task, his car is in the photo below, I consider him a strong person, because he was with me in the service for several days, listened and tolerated me all this time, Take my word for it - it's not easy.
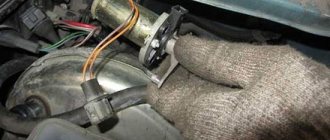
4.) So, first we install a reinforced hose into the compressor, attach a moisture trap to it and pull it through the tube to the cylinder (See photo below). Next we lead the plus from it to the battery.
5.) After this, we insert the fittings into the struts (front), measure out the required number of tubes and carefully lead them through the interior to the valve block, preferably along the thresholds. We don’t tighten the fitting too much, we don’t tighten it, otherwise I tightened it and then it was JUST ANRIAL (a little later)
6.) We carry out the same operation with the rear hoses, only for this we will need to drill 2 holes in the pan to stretch them to the valve block, do not forget to rewind with electrical tape in these places where they come into contact with the iron so that the hoses and iron do not rub you need to lubricate it so it doesn't rot))
7.) When all this is stretched, we connect it to the valve block, one side on the block is a rise, the other side is a lowering, then you’ll understand, just don’t mix up the hoses, glue the insulation to distinguish it. The upper hoses are the front, respectively the lower hoses are the rear.
8.) Well, that’s basically it, you will need to install a pressure switch in one hole on the receiver and a pressure gauge, you can either leave it in the trunk (I did so) or place it somewhere on the panel or in the armrest.
(there is also a long story there, I’ll tell you a little later) 9.) There are 8 valves on the block that are responsible for raising and lowering the car, so from each valve you will need to connect one wire to minus, for this we simply connect it to each contact on the valve we collect the blue wire in a bundle, look for the minus on the body and hook everything to it, tighten the bolt, for this I drilled a hole and hooked everything to it) We hook the rest of the wires to the buttons, there’s a lot of hassle, you can get confused at times.
We display the buttons anywhere, first I displayed them on the panel, then in another place altogether, more on that a little later. (Read the operating principle of the window lifter and how to install the button on the Internet) Today, the capabilities of automotive technology are constantly growing. Existing components are regularly updated and existing technologies are improved. Air suspension is an integral attribute of high-quality tuning.
In addition to technological capabilities, it allows you to change the body design of familiar models. After the advent of air suspension, it became widespread among French concerns. Innovators appreciated its capabilities.
Among the most significant are the following:
- Possibility of artificial regulation of road clearance
. In addition to the connection between ground clearance and vehicle load, the suspension allows you to increase the speed of the car, since the center of gravity of the object moves lower; - The comfort of car operation increases.
Installing traditional shock absorbers forces owners to choose between comfort and ride harshness. The pneumatic system is a combination of the best qualities; - Increases resistance to increased loads.
By adjusting the suspension, the likelihood of mechanical damage to the body is significantly reduced. The chassis retains its original appearance and the car does not lose control when driving.
In the video - air suspension for any car:
Manufacturing of air struts
Before manufacturing air struts, it is necessary to decide on the choice of pillows, based on the weight of the vehicle and the diameter of the springs.
You also need to take into account the location of the spring (separate from the shock absorber, or the shock absorber in the spring).
For a passenger car, the most common and universal air springs are Rubena 114x2, 114x3, 130x2 and 130x3.
For heavier vehicles, the Dunlop 152x2, 152x3 and Rubena 170x2, 170x3 models are suitable.
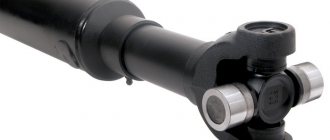
To make air struts, we will need machined flanges and brackets to mount the air spring.
Welding flange (for strut, shock absorber).
For sale on the websites there are ready-made flanges for the diameter of the air spring, as well as ready-made semi-kits. Flanges to match the diameter of your pillow and stand can be ordered from the dealer.
The bracket can be a blind type (photo No. 1) (if the shock absorber is located separately from the air cushion), or with a hole in the center (photo No. 2) for the shock absorber shank (if the shock absorber is located inside the air cushion).
photo #1
photo No. 2
The platform for the spring is cut off from the rack and a flange is welded to mount the cushion. A brace is placed on the cushion.
And it is tightened to the welded flange on the rack using bolts. A bracket is also put on the cushion from the top and bolted to the flange; a rubber seal is put on the rod from the top. Ready air strut.
If the rear shock absorbers are installed in springs, then the manufacturing process is similar.
If the rear shock absorber is separate from the spring, the manufacturing process becomes simpler. You won't have to weld anything anymore. Ready rear air spring (provided the shock absorber is located separately).
After air struts are manufactured, they must be checked for air leaks before installation. After checking, all that remains is to remove the old suspension and install a new one, stretch the hoses, wires, and connect the control unit.
Installing an air suspension in specialized centers will cost quite a bit of money; ready-made air suspension kits or components, and installation by yourself will save you at least half of the budget.
Professional drivers quickly recognized the capabilities of air suspension for use in commercial trucking. It allows you to compensate for heavy loads on the standard suspension, change the rear overhang of the body, and increase the softness of the ride. Auxiliary air suspension has gradually migrated to SUVs, pickup trucks, minivans, cars and commercial vehicles. The design of air springs is simple, reliable and carefully designed, so installing air suspension is understandable to every car owner. You need to select a suitable kit, prepare metalwork tools and a lift, carefully study the instructions and slowly get to work.
What does it consist of?
The air suspension consists of the following elements:
How it works/why it is needed
Installing an air suspension involves replacing conventional springs with air springs. The latter are containers made of hard plastic. Their inflation allows you to adjust the height of the car, which imitates springs.
Modern systems have electronic components and sensors that are a significant advantage. All-metal suspensions are not able to instantly adjust and adapt to irregularities on the road.
The primary task of pneumatics is to quickly regulate the distance between the bottom of the machine and the road surface. It has gained the greatest popularity among owners of domestic cars. But you can read about how this happens in the article at the link.
Video shows how air suspension works:
How effective is it when used?
- It is highly effective
. During operation, malfunctions rarely occur, and the fast ground clearance allows you to save running parts. - It is advisable to use the suspension for regular transportation of goods and movement on rough terrain. Ride comfort improves, travel speed increases and controllability is maintained.
Pneumatics installed with your own hands or at the factory are undoubtedly superior to metal springs.
What's the result?
The air suspension is a complex high-tech design that requires special attention, but there is no need to be afraid of it.
First: the air suspension is not afraid of “full off-road” operation and is structurally a fairly reliable unit in itself. But at the same time, it needs regular attention - high-quality washes and preventive service checks, which allow us to identify possible problems at the initial stage.
Second: it’s a good idea for the owner of a car with such a suspension to at least have a general idea of how the system works on his particular car in order to independently protect individual components and assemblies from external influences, both chemical and mechanical, and to provide the maximum possible protection for the underbody.
Third : if a malfunction occurs, you should not panic and immediately prepare a lot of money for repairs. Perhaps it's all about the sensor or a rotted wire. If you are unlucky, you will face serious expenses - from one hundred thousand rubles and more.
The editors of the Engine magazine express gratitude to , the official dealer of Jaguar Land Rover, and its technical specialists for their assistance in preparing the material.
How to install it yourself
Installing air suspension on your own will require careful consideration of each element. The most difficult step is installing the plastic cushions and removing the shock absorber struts.
The installation process is as follows:
- The front suspension is disassembled
. The body is bored to install the cylinder. Containers can be adjusted in diameter. ; - The air supply fitting is protected;
- Tubes are installed for subsequent connection to the cylinders and receiver;
- After securing the compressor, electrical wiring is laid.
The video shows the DIY installation process:
Connection diagrams
Air suspension connection diagrams.
There are several types of air suspension connections. Basic – the easiest to operate and reliable in operation. It can be single-circuit (pumps two pillows at a time) and double-circuit (each pillow pumps separately).
The standard connection scheme can be controlled from inside the car. The automatic one has no manual control and independently corrects the misalignment of the vehicle.
Which one to choose
Before purchasing a suspension, it is recommended to determine the functional purpose of the car. The owner of a gazelle will need to increase the carrying capacity without sacrificing control on the road, the driver of a racing car needs more performance.
For installation on a VAZ car, a dual-circuit system is best suited.
A four-circuit air suspension is suitable for the sedan.
The height of the pillows should be less than 250 millimeters, and the capacity of the receiver should be 8 liters.
Does it make sense to change the spring suspension to pneumatic?
Available statistics indicate that most owners of budget vehicles are dissatisfied with the handling and stability of their cars when cornering. Replacing a conventional spring suspension with a pneumatic one can immediately change ordinary movement indicators:
create the required ground clearance;
increase smoothness by increasing sensitivity;
make car trips more comfortable;
eliminate body sagging even at maximum load.
However, before changing a conventional suspension, for example, on a VAZ, it is recommended to calculate all the disadvantages of such a replacement:
high cost of assembled air suspensions;
if any of the suspension elements fail (for example, a valve, compressor or receiver), you will have to change the entire system - replacement for spare parts will not be possible;
Unlike spring suspension, air suspension reacts worse to changes in temperature conditions and reaction with road chemicals.
Air suspension is a rather controversial issue. It's hard to say whether this is good or bad... Firstly, it's expensive. The installation itself is expensive, even if you do it yourself, and then maintenance must be done, and if repairs, then again, expensive! I wouldn’t put it on a Moskvich or a VAZ
Yurets
https://vsepoedem.com/story/pnevmopodveska-svoimi-rukami
Features of using hydro, pneumatic and conventional suspension
Do not forget that modern cars can be equipped with a hydraulic suspension, which works thanks to a special fluid. Hydraulic suspension is considered more reliable than pneumatic suspension, as it provides a service life of up to 400 thousand kilometers. However, hydraulic elements are sensitive to the level of lubrication and, if they dry out, fail.
A conventional spring suspension has minimal cost and is easy to repair or replace. When both hydraulic and air suspensions are expensive, and in the event of damage to any element, the entire unit immediately loses its functionality. However, when comparing hydraulic and air suspensions, most drivers choose “pneumatic” due to its greater availability and wider range of settings.
Let's cooperate!
The BraBil company offers a full range of services for installation, repair and maintenance of VB-Airsuspensions air suspensions. Cooperation with us will allow each customer to receive:
- high quality of work performed and components used;
- flexible prices;
- short installation time;
- short delivery times for components;
- trained personnel;
- free consultations.
Take a step towards comfort right now: call the company’s single number to receive information about the cost of services or send a commercial offer to the email address This email address is being protected from spambots. You must have JavaScript enabled to view it. — our managers will respond as soon as possible!