Fuses and relays Daewoo Nexia N150
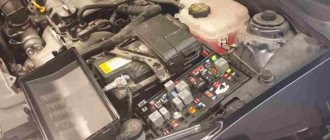
Most electrical circuits are protected by fuses. Powerful consumers (headlights, cooling system fan motor, electric fuel pump, etc.) are connected via a relay. The information is relevant for Daewoo Nexia 2008, 2009, 2010, 2011, 2012, 2013, 2014, 2020, 2020 models. Fuses and relays are located in the mounting block.
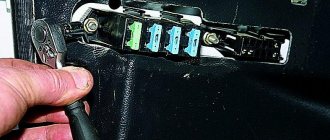
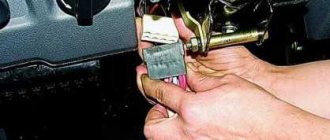
To access the mounting block, remove the protective cover in the instrument panel.
On the inside of the mounting block cover there is a diagram of the location of fuses and relays installed on the outside of the block. The rating of the fuses, the circuits they protect and the purpose of the relay are given in the tables. Location of fuses and relays on the outside of the mounting block
Location of fuses and relays on the inside of the mounting block
| Purpose of the relay in the mounting block | |
| Relay number | Relay purpose |
| K1 | Cooling Fan (High Speed) |
| K2 | Direction indicators. |
| K3 | Fuel pump. |
| K4 | Fog lights. Rear fog lights. |
| K5 | Side lights, fog lights. |
| K6 | Headlights. |
| K7 | Cooling fan (low speed). |
| K8 | Air conditioning compressor clutch. |
| K9 | Sound signal. |
| K10 | Headlights. |
| K11 | Melodious signal. |
| K12 | Turning on the 4th speed heater fan. |
| K13 | Ignition system. |
| K14 | Windshield cleaner. |
| K15 | Rear window heating timer. |
| Circuits protected by fuses | ||
| Fuse designation (see photo) | Current strength, A | Protected Circuits |
| F1 | 10 | ECU (battery circuit). |
| F2 | 10 | Side lamps, license plate lights, instrument cluster and control lights. |
| F3 | 15 | Ignition system relay circuit. |
| F4 | 20 | High beam headlight lamps. |
| F5 | 10 | Low beam lamp of the left headlight. Electric drive for adjusting the direction of the light beam of the left headlight. |
| F6 | 10 | Low beam lamp for the right headlight. Electric drive for adjusting the direction of the light beam of the right headlight. |
| F7 | 30 | Electric fuel pump, fuel injectors. |
| F8 | 20 | Turn indicators, brake lights. |
| F9 | 30 | Windshield cleaner. |
| F10 | 10 | Fuel tank filler flap drive. |
| F11 | 10 | Relay for turning on the electromagnetic clutch of the air conditioning compressor. |
| F12 | 30 | Cooling fan motor (low speed). Heater fan. |
| F13 | 20 | Reversing lamps. Generator excitation circuit. Instrument cluster, cigarette lighter, melodic sound signal, clock. |
| F14 | 30 | Sound signal. Cooling fan (high speed). |
| F15 | 20 | Alarm. Interior lamp. Trunk light bulb. |
| F16 | 30 | Window lift motor gearboxes. |
| F17 | 10 | Audio system (circuit from ignition switch). |
| F18 | 30 | Trunk lid lock control. Rear window heating timer. Central locking. Audio system (battery circuit). |
| F19 | 30 | Heater fan 4th speed relay. |
| F20 | 30 | Fog lights. |
carpod.ru
Replacing the fuel pump — Daewoo Nexia, 1.6 l., 2008 on DRIVE2
As part of the search for a problem due to which the car is difficult to start, we climbed into the tank. There is dust on the fuel pump cover and under the carpet. And it turns out that not all bolts have washers.
There is some debris in the tank, but this is not critical.
But the fuel pump doesn't look very good.
The hose from the pump to the fitting was corroded into rubbish.
Now for a happy life we need a pump.
You will also need a new mesh filter. The old filter covered 22 and a half thousand km. And we also need a new hose.
All this was hung on the bracket and off we went. The car started up “with half a turn”.
The previous pump was still original, it lived for almost 122 thousand km. Evil tongues say that driving on an empty tank ruined him. Although why would the hose corrode like that if the tank is always empty. The previous inspection of the fuel pump was 22,564 km ago, when the coarse filter was replaced, and the hose was intact then, otherwise it would have been changed. Be that as it may, the new pump will probably meet the same fate, because I will not change my habits because of the pump.
Current mileage: 121928 km.
Update 07/25/2014
Last night and this morning the car started right up. Looks like the problem has been resolved.
Update 14/04/2016
Well, it's dead. Completely dead. It looks normal, and the rubber band that we installed last time is intact. But it doesn't work.
The relay is working, current is supplied to the pump connector, there is gasoline in the tank. But it doesn't work.
Upon closer inspection, something was discovered on the body. Something wanted to get out and killed the pump.
Twenty-one months, i.e.
almost two years and 46553 kilometers. Absolute anti-record for fuel pump life expectancy. There is nothing to replace it with, they assembled it without connecting it, just to close the tank. Now in the search for a new pump, this shouldn't be a problem. Current mileage: 168481 km.
Update 04/15/2016
Again the fuel pump was pulled out into the light of day.
But this time we have a replacement for him.
They quickly swapped the non-working one for the working one, otherwise I’ve been starting it on gas for three days already.
They also installed a new mesh. Let's see how long it will live. I took the dead pump with me, if I have time and desire I will cut it up, I still wonder what is inside it. Current mileage: 168533 km. Update 16/04/2016
The new pump is very quiet. I really can't hear it when I turn on the ignition. I can only tell that it works because the engine starts on gasoline. The previous pump could be heard.
Update 05/29/2016
I dismembered the dead fuel pump. Where the hernia came out at the pump, it turns out there are no mechanical parts, it has electrics. And traces of melted plastic are visible there, under this cover.
This is what's inside opposite the hernia.
If you pull the wire to try to pull the element out, it turns out that the inner rod is broken.
It seems that the cause of death clearly has nothing to do with poor quality fuel.
Fuses and Relays Used in Nexia - Diagram, Photo
In the Daewoo Nexia, the location of the fuses and relays can be seen below, under the steering column, by opening the decorative cover. Fuses and relays are hidden under it.
Once I inserted a DVR into the cigarette lighter of my Nexia, but it turned out to be defective and shorted. It was on the go, and my dashboard immediately went dark and the battery icon came on. I thought the generator had broken down. Then I found this article and realized that the fuse had simply blown out.
Fuse location
For those who urgently need to see the location of the fuses, here is a table.
| Fuse number and color (current strength, a) | protected circuit |
| f1 (10) red | electronic engine control unit (battery circuit) |
| f2 (10) red | side lights, license plate lights |
| f3 (10) red | airbag (if installed) |
| f4 (20) yellow | high beam lamps in headlights |
| f5 (10) red | low beam lamp and electric corrector (if installed) of the left headlight |
| f6 (10) red | low beam lamp and electric corrector (if installed) of the right headlight |
| f7 (30) green | fuel pump, injectors |
| f8 (20) yellow | Turn signal lights, hazard warning lights, brake lights, anti-lock brakes (abs) (if equipped) |
| f9 (30) green | windshield wiper and washer |
| f10 (10) red | electric drive of the hatch cover of the fuel tank filler pipe, abs (if the system is installed) |
| f11 (10) red | air conditioning compressor activation relay (if air conditioning is installed) |
| f12 (30) green | Cooling fan motor (low speed) |
| f13 (20) yellow | instrument cluster, clock, cigarette lighter, warning buzzer, alternator, reverse lights, rear window defroster switch and relay |
| f14 (30) green | Cooling fan motor (high speed), horn |
| f15 (30) green | interior lamp, clock, trunk lamp, electric antenna (if installed) |
| f16 (10) red | power windows (if installed) |
| f17 (10) red | car radio (circuit from ignition switch) |
| f18 (30) green | car radio (battery circuit), electric trunk lock, heated rear window, door lock system (if installed) |
| f19 (30) green | heater fan motor |
| f20 (30) green | fog lights |
Fuse box in Nexia
Fuses on Nexia are responsible for the safety of electrical appliances. When a short circuit occurs, the fuse burns out first, thereby protecting the electrical appliance. The fuse box diagram for Nexia 8kl and 16kl are identical and for Nexia n100 and n150 the blocks are also interchangeable. Every self-respecting motorist should have such a diagram at hand. Also, replacing fuses should be done with the engine turned off. The Nexia has a double fuse box; the main fuses and relays are located on the outer visible side, and the remaining relays are located on the reverse side.
To differentiate between each other, fuses come in several colors. Each color has an amp rating.
Red – 10 Amps Blue – 15 Amps Yellow – 20 Amps Green – 30 Amps
Fuses used in Nexia
Location and purpose of fuses
(Click on the fuse you are interested in and find out what it does)
Find out which fuse is responsible for what below.
- Fuse F1 Electronic engine control unit (ECU) - 10A
This fuse is responsible for powering the brain; if you remove this fuse, the car will not start.
- Fuse F2 Tail lights and license plate light—10A
If your license plate lights and side lights do not work, check this fuse.
- Fuse F3 The fuse was a waste of time, but in some models. — 15A
Also a fuse for the brain, but in most cars there is an empty space here.
- Fuse F4 High beam - 20A
The fuse is responsible for the operation of both high beam bulbs at once, so if the high beam does not light, then check this fuse. If neither the right nor the left high beam headlight lights up, then the reason is most likely in the fuse; if it doesn’t light up on one side, then the light bulb has burned out.
Low beam light with electric beam direction corrector, if your corrector does not work and the low beam does not shine, then check the fuse
- Fuse F6 Low beam on the right side, right headlight range control - 10A
Same as f5, but on the right side of the car
- Fuse F7 Fuel pump (fuel pump in the gas tank) - 30A
The fuel pump has a 30 Amp fuse; it is not recommended to install a larger one.
- Fuse F8 Hazard warning light, side turn lamps (turn signals) - 20A
The hazard light may short out the light, if this fuse is overheated, then check the hazard light or turn signals
- Fuse F9 Windshield wipers - 30A
If the windshield wiper doesn't work, it's not a fact that it's a fuse, but it's worth checking
- Fuse F10 Fuel filler neck (fuel door lock actuator) - 10A
In winter, a common problem is that the hatch does not open; if you press the button too much, most likely the electric motor will fail, but before that, check the fuse
- Fuse F11 air conditioning compressor (relay) - 10A
According to the pinout of the fuse diagram on the Nexia, there is a fuse for the air conditioner; if there is no air conditioner, there is no fuse.
- Fuse F12 Radiator cooling fan (low speed) - 30A
An important fuse, always check it to avoid problems with engine cooling.
- Fuse F13 Instrument panel, cigarette lighter, horn, glove box light - 20A
If this pre knocks you out, it means there is a short circuit somewhere. As soon as this fuse burns out, you will immediately understand that the instrument panel will go out and the cigarette lighter will stop working.
- Fuse F14 Nexia cooling fan (maximum speed) - 30A
Always keep the fuse intact so that lack of cooling does not damage the engine.
- Fuse F15 Interior light bulbs, radio antenna - 20A
If the light in the cabin does not light, then the fuse or light bulb is to blame. Check the fuse first
- Fuse F16 Power windows - 30A
If not a single window regulator works, then the front one is burnt out. They usually burn out in winter.
- Fuse F17 Radio - 10A
If the radio doesn't work, look at it
- Fuse F18 Trunk lock drive, central locking, battery-powered radio - 30A
The trunk does not respond to the opening button, and the central locking and radio are silent? It's a blown fuse.
RELAY 1 turn signal
Blower Motor RELAY 2
RELAY 3
fuel pump
If you want to learn more about the fuel pump relay, I recommend reading our article.
RELAY 4 fog lights
Relay on the back of the fuse box
The Nexia still has several important relays and fuses on the back of the fuse block.
- Fuse F19 is responsible for the air conditioner
- Fuse F20 is responsible for the fog lights
RELAY 5 Main relay of powerful switched electrical circuits
RELAY 6 Windshield Wiper Modes
RELAY 7 Heated rear window. The heated rear window has an auto-off function.
RELAY 8 Low beam when high beam is turned on together
RELAY 9 Horn
RELAY 10 Air conditioning compressor relay
RELAY 11 Radiator cooling fan (low speed)
RELAY 12 Head light
RELAY 13 Outdoor lighting
RELAY 14 Buzzer, turns on if you have not fastened your seat belt.
Fuses protect a device or device from failure. They burn out when a high load is applied to the circuit, so it is strictly forbidden to install a larger fuse, as this can lead to a fire in the wiring. If the fuse does not trip and does not burn out, it means that the fuse rating was not selected correctly. It is measured in Amperes, you can buy fuses for Nexia in any store, and if you don’t have spare ones, you can pull them out from another place that does not affect the normal operation of the car - this is the air conditioner, antenna and interior lighting.
It is also forbidden to install temporary jumpers instead of fuses; this can also end badly for your Nexia.
Add the article to bookmarks or share with a friend so that the diagram is always at hand.
xn--e1agfkw9f.xn--p1ai
Rules for replacing fuses
To replace a blown fuse or a failed relay, you need to de-energize the corresponding circuit of the vehicle's electrical system (turn off the ignition or remove the terminal from the battery), open the mounting block and remove the faulty part from the terminals. For ease of use, some sets of fuses are equipped with special plastic pliers that facilitate dismantling.
You also need to remember a few rules that will help avoid damage to the electrical system of the Daewoo Nexia:
- Do not use fuses with a higher current rating than specified in the instruction manual. This can cause burnout of contact tracks on the printed circuit board of the unit, breakdown of final energy consumers, and even fire of the car.
- It is strictly forbidden to replace fuses with metal jumpers or short-circuit the legs of burnt fuses with wire.
- You should not save on buying fuses, since products of dubious quality from the lower price range often do not correspond to the rating indicated on the case and, therefore, do not perform a protective function.
In the Daewoo Nexia, the location of the fuses and relays can be seen below, under the steering column, by opening the decorative cover. Fuses and relays are hidden under it.
Once I inserted a DVR into the cigarette lighter of my Nexia, but it turned out to be defective and shorted. It was on the go, and my dashboard immediately went dark and the battery icon came on. I thought the generator had broken down. Then I found this article and realized that the fuse had simply blown out.
Read more: How to install the sensor correctly
Fuses and relays Daewoo Nexia N100
Fuse links, fuses and relays for turning on the vehicle's electrical equipment are installed in a block located on the left behind the instrument panel.
On the cover of the block there is a diagram of the location of the fuses.
| Fuse color | Maximum current, A |
| Grey | 2 |
| Light brown | 5 |
| Brown | 7,5 |
| Red | 10 |
| Light blue | 15 |
| Yellow | 20 |
| Light green | 30 |
| Orange | 40 |
Part of the fuse and relay box covered by the instrument panel cover
| Relays and the circuits they turn on | |
| № | Switched circuits |
| 1 | Relay-breaker for direction indicators and hazard warning lights |
| 2 | Cooling fan (high speed) |
| 3 | Fuel pump |
| 4 | Fog lights |
| Fuses and the circuits they protect | |||
| № | Current, A | Protected Circuits | |
| F1 | ESM | 10 | Electronic engine control unit |
| F2 | ILLUMINATION | 10 | Side lighting |
| F3 | ECM2 | — | Reserve |
| F4 | HEAD LAMP H/BEAM | 20 | High beam headlights |
| F5 | H/LAMP LH L/BEAM | 10 | Low beam and electric corrector (left headlight) |
| F6 | H/LAMP RH L/BEAM | 10 | Low beam and electric corrector (right headlight) |
| F7 | FUEL PUMP | 30 | Fuel pump, injectors |
| F8 | HAZARD LIGHT | 20 | Turn signals (hazard warning lights), brake signals |
| F9 | WIPER | 30 | Windshield wiper and washer |
| F10 | FUEL DOOR | 10 | Electric drive of the fuel tank filler hatch cover |
| F11 | AIRCON | 10 | Air conditioning compressor relay |
| F12 | BLOWER MOTOR (LOW) | 30 | Cooling fan (low speed) |
| F13 | CLUSTER CIGAR CHIME | 20 | Instrument panel, digital clock, cigarette lighter, buzzer, reversing lights, generator, rear window defroster |
| F14 | HORN BLOWER MOTOR (HIGH) | 30 | Horn, electric cooling fan (high speed) |
| F15 | ROOM LAMP ANT | 20 | Interior and luggage compartment lighting, electric antenna drive |
| F16 | POWER WINDOW | 30 | Electric windows |
| F17 | AUDIO (IGN) | 10 | Car radio (powered by ignition switch) |
| F18 | AUTO TRUNK DOOR LOCK AUDIO (WATT) | 30 | Car radio (battery powered), electric rear window defroster, electric trunk lid lock, central locking |
Bottom of fuse and relay box
| Relays and the circuits they turn on | |
| № | Switched circuits |
| 5 | Air conditioning fan (maximum speed) |
| 6 | Intermittent wiper mode |
| 7 | Heated rear window (with automatic shut-off function) |
| 8 | Low beam headlights (when high beam lamps are turned on) |
| 9 | Sound signal |
| 10 | Air conditioning compressor |
| 11 | Electric cooling fan (low speed) |
| 12 | Headlights |
| 13 | Outdoor Lighting |
| 14 | Buzzer |
| Fuses and the circuits they protect | ||
| № | Current, A | Protected Circuits |
| F19 | 30 | Air conditioning fan |
| F20 | 30 | Fog lights |
Replacing fuses and relays
Before replacing the fuse, it is necessary to determine and eliminate the cause of its blown. To avoid failure of electrical equipment, fuses with an increased rating or homemade fuses must not be installed.
Sequence of execution 1. Prepare the car for work.
2. Remove the instrument panel cover.
3. Using the diagram on the back of the cover and the tables (see above), we find the fuse for the faulty circuit and remove it.
A faulty fuse can be identified by a blown thread.
Sometimes the fuse thread remains intact, while its connection inside the fuse is broken. It is impossible to visually determine such a malfunction. In this case, you can assess the condition of the fuse using an ohmmeter.
4. Install a new fuse of the appropriate rating.
5. To replace the relay, remove it from the block, having previously identified the faulty one from the table (see above).
You can verify that a relay is faulty by checking it, or installing another one in its place that is known to be good.
6. Reinstall the block cover.
The information is relevant for Daewoo Nexia models 1994, 1993, 1994, 1995, 1996, 1997, 1998, 1999, 2000, 2001, 2002, 2003, 2004, 2005, 2006, 2007, 2008.
carpod.ru
replacing the fuel pump Daewoo Nexia N100 16v — Daewoo Nexia, 1.5 l., 2004 on DRIVE2
Full size
Hi all. For a long time I puzzled over which pump to buy. And then mine began to howl. I didn’t wait until he died while overtaking. The pump parameters needed for my Ksyushka are as follows: pressure 3.5 bar, capacity 90 l/h. The choice was this: 1. Krauf KR0087P (pump only). It is written that they are Germans. But after reading and searching well, I realized that it was German (although it’s doubtful judging by the price). 90 l.h 3.5 bar. 925 rub. 2. Kortex KPF0036STD (pump only). An experienced friend recommended it to me. 85 l.h 3 bar. Well, the characteristics bothered me. I’m thinking of either choosing it according to its characteristics or making it more powerful. All the same, RDT will solve everything. 894 rub. 3. Mapco 22510 (assembled). I've read a lot. The reviews are not bad. I just didn’t want to overpay for the station. characteristics are normal. 1370 rub. 4. StartVolt SFP0501 (pump only). Ours is domestic (the Chinese make it). These are installed on the UAZ Patriot. The characteristics are off the charts. 3.5 bar, 100 l.h. 818 rub. In general, I chose the first option from Krauf. The replacement process is simple. 1. Relieve the pressure in the tank. I open the lid, disconnect fuse F7. I start the car until it stalls. 2. Recline the back seat and find the hole. 3. Disconnect the power connector. I disconnect the phone. I unscrew all the bolts. 4. Carefully pull out the station with the pump. The pump can be rotated to easily remove the pump from the tank. 5. Disconnect the connector on the pump itself. 6. I move the lower part of the pump, thereby removing it from the station. 7. Remove the hose from the pump. By the way, I also changed the rubber band 90232009. (190 rub.) Assembly in reverse order. This pump has a problem with the connector. I had to work on collective farms. When I completed the assembly. Get behind the wheel quickly and check the operation of the pump. Everything works perfectly. The pump pumped for a long time (5-6 seconds) when turning on the 2nd position of the ignition switch. The new one pumps for 1-2 seconds. I forgot to tell you which pump was seized. The pump was bosch 0580453449. Capacity 75 l.h., 3 bar. I changed it because Winter is approaching, and he started howling. I skated it for a good 65,000 km. Pretty good. Now, if the characteristics still matched, I think I would continue skating.
Full size
Full size
Full size
Full size
Price: 1,115 ₽ Mileage: 62,000 km
Fuse diagram and relay block Daewoo Nexia N150
Jan 8 2019
Most of the electrical circuits in a Daewoo car are protected by fuses. Powerful consumers of electricity (headlights, cooling fan motor, fuel pump, power steering, etc.) are connected via a relay.
The information is relevant for Daewoo Nexia N150 models after 2008.
The fuses and relays for the two models Daewoo Nexia N150 and N100 are similar and differ only in access to the mounting block.
To access the fuses and relays, you must remove the protective cover in the instrument panel.
On the inside of the mounting block cover there is a diagram of the location of fuses and relays installed on the outside of the block.
The rating of the fuses, the circuits they protect and the purpose of the relay are given in the tables.
Daewoo Nexia has external and internal fuse blocks:
Fuse and relay diagram on the outside of the mounting block.
Fuse and relay diagram on the inside of the mounting block.
Now you can list all the relays:
List and designation of circuits protected by fuses:
And finally, a short video about why a fuse can constantly fail.
Similar automotive related posts:
webavtocar.ru
Fuel pump Daewoo Nexia. Signs of a faulty fuel pump.
Nothing pleases a car owner’s ears more than the rhythmic knock of a well-oiled gasoline engine, so any extraneous noise in the beating of a car’s heart is perceived as an extremely alarming symptom. What can we say about serious “interruptions” or situations when the engine suddenly freezes in a silence oppressive with its uncertainty. And here the owner will need all his experience and skill in order to, having clarified the symptoms, correctly diagnose and decide on repairs.
characteristics, diagram, photo and video
Not only the functioning of electrical equipment, but also of the vehicle as a whole depends on the performance of fuses. Therefore, from time to time you need to check the unit, even if all elements of the system are working normally. In this article we will tell you where the Daewoo Nexia fuses are located and how to replace them if necessary.
Content
[ To uncover]
[Hide]
Location and electrical diagram
Fuse and relay mounting block layout
The Nexia model uses DC electrical equipment, the rated voltage of which is 12 volts. All energy consumers in a given vehicle are connected according to the same principle. In particular, the negative terminals of the equipment are connected by ground (that is, connected to the body of the car), which, in turn, acts as a second wire. The power supply for all devices comes from two sources: if the engine is not running, then from the battery (battery), if it is running, then from the generator.
The fuse box (hereinafter referred to as the BP) and relay in the Daewoo Nexia car is located at the bottom of the car’s dashboard. Specifically, it is located on the left side of the instrument panel. In vehicles produced before 2008, the PSU is marked N100, and in younger cars - N150. Let us tell you right away that in terms of their design, circuit and purpose of components, the power supply units are absolutely identical. The only difference is in access to them due to the design features of the torpedo.
We present to your attention a diagram of the power supply unit and relay with a description of all the elements.
Power supply diagram for Daewoo Nexia cars - it shows the numbers of all components of the unit and relays
Table describing the purpose of mounting block fuses
You may also find the relay description useful.
| Detail number | Purpose |
| K1 | This relay is responsible for the operation of the ventilation device of the cooling system. Specifically, this relay is called a “high fan speed relay.” |
| K2 | This element ensures the functioning of the direction indicator lamps. Accordingly, if it fails, you will not be able to signal to other drivers about your intention to turn. |
| short circuit | Responds to the functioning of the fuel pump. If this relay fails, the operation of the fuel pump will be impossible and, accordingly, it will not be possible to start the engine. |
| K4 | Responsible for the operation of the front and rear fog lights. |
| K5 | Provides operation of side lamps and fog lamps. |
| K6 | If this relay breaks down, the operation of the headlight lamps (responsible for low and high beam) will be impossible. |
| K7 | The failure of this component, which is responsible for the speed of the cooling system fan, indicates that the engine may overheat and, as a result, boil. This part must be replaced immediately if it fails. |
| K8 | A breakdown of this relay indicates that the climate control system compressor clutch is not working. |
| K9 | Responsible for the operation of the steering wheel horn. |
| K10 | Also ensures the performance of headlight lamps. |
| K11 | This component ensures the functionality of a melodic signal (sound when doors are opened, seat belts are not fastened - depending on the configuration). |
| K12 | The relay is responsible for activating the fourth speed of the heating system fan. If it fails, then at too low temperatures the heater will not be able to operate at full capacity. |
| K13 | The ignition system ensures operation. If the relay burns out, starting the engine will be impossible. |
| K14 | Responsible for the windshield wiper device. |
| K15 | Rear window heating timer. |
Removal and replacement process
If you need to replace a fuse, remember that you should use a new element of the same power as the burned one.
Of course, fuses are interchangeable with each other, however, keep in mind the fact that different circuits in your car's wiring require different protection. If you don’t know what power the burnt-out element has, then just look at it: there are numbers on the part, this is the power.
Vehicle Daewoo Nexia
If you recently replaced the element, but it burned out again almost immediately, this may be due to a short circuit. First, you need to eliminate the cause itself, that is, check the section of the wiring for which the relay or fuse is responsible, and get rid of it. In practice, usually the main reasons for the systematic failure of elements is a broken or worn-out wire. Therefore, before replacing the element, it would be better to replace it.
Also, refrain from installing homemade devices. Very often, motorists make such mistakes, but such actions do not lead to anything good. So, let's start replacing the fuses.
- Open the hood of your car and find the battery. Before getting into the unit, you need to disconnect the battery; to do this, disconnect the negative terminal.
- Find the place where your power supply is installed and remove the protective plastic cover from it.
- Then you will need to find the element that you think has failed. If your stove or cigarette lighter does not work, this does not mean that the fuse has failed. The problem in operation may lie directly in the device itself. However, the block needs to be checked first. To find the fuse you need, you can use the diagram provided on our website or look at the back of the cover. It shows the removal of the power supply with the parts responsible for the electrical equipment.
- If the part really fails, then the fusible thread located inside it will be broken or burnt out. But if you notice that the plastic body of the element itself has melted, then this indicates not only its breakdown, but also a short circuit, as a result of which it melted. It should also be added that sometimes the part is visually intact, although the connection inside the thread is broken. You won't be able to identify any damage just by looking at it. Then you will have to check the condition of the device using a special ohmmeter device or insert a new one into the socket of the burnt-out element. Remove the part using special pliers.
- So, install the device with the required rating in place. As stated above, the rating (that is, the numbers on the fuse) must match. Check the functionality of electrical equipment whose operation was previously unsatisfactory to you.
- To replace the relay, follow similar instructions. First, determine which relay needs to be replaced. Remove it with your hands while pulling up and down. Do this carefully so as not to damage the nest. To check the functionality of the relay, install in its place one in which you are absolutely sure that it is working.
- After completing all the replacement work, replace the cover of the mounting block, and then connect the battery.
Video from Evgeny Zybkin “Purpose of Daewoo Nexia fuses”
In this video, the author demonstrates the original Daewoo Nexia operating book, which contains a diagram and description of all elements of the mounting block.
avtozam.com
How to remove the fuel pump on a Nexia
The fuel pump on the Nexia is located under the rear seat, in principle, like most modern cars.
Tags: removing the fuel pump on a Nexia, how to properly remove the fuel pump, repairing the fuel pump |
Fuse and relay mounting block for Daewoo Nexia 2008
To access the mounting block...
...remove the protective cover in the instrument panel . On the inside of the mounting block cover there is a diagram of the location of fuses and relays installed on the outside of the block. The rating of the fuses, the circuits they protect and the purpose of the relay are given in the tables.
Purpose of the relay in the mounting block
| Relay number | Relay purpose |
| K1 | Cooling fan (high speed). |
| K2 | Direction indicators. |
| short circuit | Fuel pump. |
| K4 | Fog lights, Rear fog lights. |
| K5 | Side lights, fog lights. |
| K6 | Headlights. |
| K7 | Cooling fan (low speed). |
| K8 | Air conditioning compressor clutch. |
| K9 | Sound signal, |
| K10 | Headlights. |
| K11 | Melodious signal |
| K12 | Turning on the 4th speed heater fan. |
| K13 | Ignition system. |
| K14 | Windshield cleaner. |
| K15 | Rear window heating timer. |
Circuits protected by fuses
| Fuse designation | Rated current, A | Protected Circuits |
| F1 | 10 | ECU (battery circuit). |
| F2 | 10 | Side lamps, license plate lights, instrument cluster and control lights. |
| F3 | 15 | Ignition system relay circuit. |
| F4 | 20 | High beam headlight lamps. |
| F5 | 10 | Low beam lamp of the left headlight. Electric drive for adjusting the direction of the light beam of the left headlight. |
| F6 | 10 | Low beam lamp for the right headlight. Electric drive for adjusting the direction of the light beam of the right headlight, |
| F7 | 30 | Electric fuel pump, fuel injectors. |
| F8 | 20 | Turn indicators, brake lights. |
| F9 | 30 | Windshield cleaner. |
| F10 | 10 | Fuel tank filler flap drive. |
| F11 | 10 | Relay for turning on the electromagnetic clutch of the air conditioning compressor. |
| F12 | 30 | Cooling fan motor (low speed). Heater fan. |
| F13 | 20 | Reversing lamps. Generator excitation circuit. Instrument cluster, cigarette lighter, melodic sound signal, clock. |
| F14 | 30 | Horn, Cooling fan (high speed). |
| F15 | 20 | Alarm. Interior lamp. Trunk light bulb. |
| F16 | 30 | Window lift motor gearboxes. |
| F17 | 10 | Audio system (circuit from ignition switch). |
| F18 | 30 | Trunk lid lock control. Rear window heating timer. Central locking. Audio system (battery circuit). |
| F19 | 30 | Heater fan 4th speed relay. |
| F20 | 30 | Fog lights. |
Location of fuses and relays on the outside of the mounting block
daewoo.biz
Main fuses for Daewoo Nexia
The main set of fuses is located in the Daewoo Nexia mounting block. The block is located at the bottom of the instrument panel, on the left side of the steering column. On the outside, the fuse box is covered with a plastic decorative cover. For the convenience of the driver, the location diagram and purpose of fuses and electromagnetic relays are indicated on the inner surface of the cover, and the seats on the board are numbered.
Control and security:
| Fuse no. | Functionality of the electrical circuit | Maximum current |
| F1 | Powering the ECU from the battery | 10 amps |
| F3 | Electronic ignition unit | 10 amps |
| F7 | Power supply to the fuel pump and fuel injection nozzles | 30 amps |
| F10 | Immobilizer, ABS system, fuel tank flap drive | 10 amps |
| F13 | Generator, instrument panel, horn, cigarette lighter power supply | 20 amps |
| F12 | Power supply to the cooling fan motor (low speed) | 30 amps |
| F14 | Main radiator fan motor power supply (high speed), horn | 230 amps |
Read more: Gas equipment for a car with a carburetor
Lighting devices:
| Fuse no. | Functionality of the electrical circuit | Maximum current |
| F2 | Side lamps and rear room lights | 10 amps |
| F4 | High beam bulbs for front headlights | 20 amps |
| F5 | Low beam bulb, light direction corrector (left headlight) | 10 amps |
| F6 | Low beam bulb, light direction corrector (right headlight) | 10 amps |
| F8 | Turn signals, hazard warning lights, brake lights | 20 amps |
| F13 | Reversing light | 20 amps |
| F15 | Interior lighting, trunk light, dashboard clock | 20 amps |
| F20 | Standard fog lights (located on the back of the fuse box) | 30 amps |
Climate and multimedia devices:
| Fuse no. | Functionality of the electrical circuit | Maximum current |
| F9 | Electric windshield wipers | 30 amps |
| F11 | Activating the air conditioning compressor | 10 amps |
| F16 | Electric door window drives | 30 amps |
| F17 | Radio control (from the ignition switch) | 10 amps |
| F18 | Car radio power supply (from battery), electric trunk lid lock, rear window heating system, central door locking wiring | 30 amps |
| F19 | Power supply to the heater fan (located on the inside of the fuse box) | 30 amps |
replacing the fuel pump filter without replacing the fuel pump) — Daewoo Nexia, 1.5 l., 2000 on DRIVE2
Today I made the discovery of the century, without a doubt, Nexiyavods should applaud me))
...it started with the purchase of a Nexia...I didn’t even know what the tank is empty icon looked like...it’s just that at some point the car started stalling when turning right and gurgling at high speeds...how many traffic light races have I lost because of this)))) )…how shameful the proud dash towards the green looked…and after 2 seconds the car, like a paralytic, twitched and tried to stall :((
It turned out that the problem was not at all a burnt-out light bulb in the dash (one day it caught fire))
Having removed the fuel pump, I saw an interesting picture - the filter was something black... having cleaned it, I forgot about the problem... for 2 months... and then yesterday... when I started preparing my old lady for the decisive battle - running 1000 km without stopping)) ... I decided to deal with the problem... Having stopped at BIBI (Avto49) I compared the filter with the VAZ one, the latter turned out to have a smaller diameter... I had no desire to go to collective farming, because if something goes wrong, it won’t be visible)) I went to the Koreana, there I learned an interesting thing - the filter is changing... together with the pump (((...accidentally went into spare parts for the Japanese...it turned out that Toyota produces a filter with the same fasteners) (in the top photo you can see the ellipse-shaped hole for the rod on the fuel pump, both filters have all the same dimensions)) ..only different shapes...grabbed it and ran away to measure it - it turned out - it didn’t seem like it - everything fit just perfectly!
despite the external differences, everything fits and fits) ... the filter is also flexible)
I already have 2 spare parts from Toyota in my car (also a valve for the washer)))
Issue price: 166 ₽ Mileage: 265,000 km
Fuel pump (how I solved the problem) — Daewoo Nexia, 1.5 l., 1996 on DRIVE2
I forgot to tell you how I solved the problem with the fuel pump that happened a couple of weeks ago.
Since recently I have become distrustful of the craftsmen, I decided to recheck the pump. For this purpose, I disassembled the 450W power supply from the computer and made a 12V source for testing at home. The problem appeared with frost, so one of the reasons could be frostbite (condensation or moisture that got in with the fuel). To do this, I warmed up the pump by holding it under running warm water and washed it at the same time. Next, I immersed it in a container of water and connected it to power, the motor started working faster, but the pump did not perform its function. The second problem could be air. There was less than 10 liters of gasoline in the tank and experienced Nexiavods said that 5 liters in the tank is a critical minimum, firstly there is a risk that the pump will burn out (which often happens in our area) and secondly (which is what got me interested) when moving the pump can suck in air and will no longer be able to create the required pressure. By the way, this happened once to a close friend (according to the master, when the car did not start after pouring gasoline into an empty tank). Since I recently drove on liquefied gas, I didn’t pay attention to the fuel level in the tank. It sounds stupid, but I decided to check this out too. I sucked air from the pump immersed in water until water came out, then turned on the power. Either because I didn’t calculate the power of the pump or because I didn’t believe that the air in the pump was really a problem, I didn’t think about where the water would flow))))) in the end, as soon as I turned on the power, I took a shower with water that stank of gasoline and doused the furniture) )). Then I went to the mechanic along the way and bought a new “diaper” and a filter that is at the bottom of the car. The technician ran a couple of liters of gasoline on the stand, he made sure that the pump was working as it should and assembled the car. First, we disconnected the fuel rail and connected the pump; a couple of pieces of ice spit out from the fuel line.
As a result, we came to the conclusion that the condensate in the system froze and since air got into the pump, it was unable to create pressure to push the fuel!
