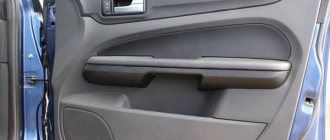
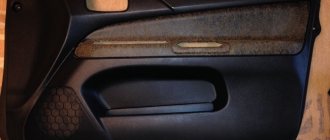
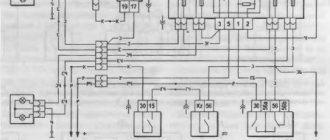
Removal of door parts is required when repairing door mechanisms, when replacing the door itself, during straightening work and when painting doors.
We prepare the car for the job.
First, let's look at removing the rear door trim.
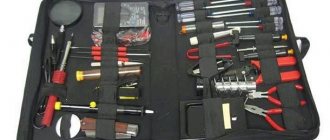
To work you will need tools: a set of screwdrivers, 10mm wrenches, TORX T15, T30.
Disconnect the negative terminal of the battery.
Use a screwdriver to pry up the plastic plug for the screw securing the inner handle of the lock and remove the plug.
Unscrew the screw
While pressing the latches, move the inner handle to the side
Press the latch
and disconnect the lock drive cable end holder. Remove the door lock drive handle
Pressing the latches, remove the window handle
Using a screwdriver, use a screwdriver to remove the cap for the screw securing the armrest pad.
Unscrew the screw securing the armrest pad
Let's take it off
Fold up the door trim, pressing out the plastic clips
Unscrew the screw securing the trim at the back of the door
Unscrew the screw in the central part of the door
We unscrew the bolt of the lower fastening of the cladding
We disengage the hooks of the window lift mechanism from the door trim, lift the trim up and remove it
location of the window lift mechanism hooks in Figure 15
Install the rear door trim in reverse order
How to remove the left and right door trim
For each brand and model, the fastenings of the left and right door trims are different, but if you know the principle of disassembly, you can remove the trim on any car.
The basic rules are:
- if it is frosty, then carry out the work in the garage, as there is a risk that the light and fragile plastic on some elements will crack (in an unheated garage, as a rule, it is 10 degrees warmer);
- prepare tools;
- dismantle so that you can put it back.
How to repair a Hyundai Solaris retainer?
The performance of the latch depends on its service life; after 3-4 years of intensive use it may fail. If the main function of the fastener is not fulfilled, immediate repair will be required.
You can repair it yourself:
- The cover covering the inner handle (card) will be removed. To do this, you need to unscrew two screws;
- the card snaps off;
- use a 10-mm wrench to unscrew the bolts holding the latch;
Read more: How much does a Land Cruiser 150 weigh?
- the protective film is removed (partially) and the retainer is taken out;
- the retainer is thoroughly washed with gasoline, cleaned of dirt and rust, after which its functionality is restored;
- Additionally, you can strengthen the plastic parts of the retainer by drilling holes in them into which metal rods need to be inserted, but this is not recommended by all experts; making changes to the design is not always desirable.
The latch is installed in place.
Required Tools
If your car doesn't have power windows, the job will be a little more difficult than working with power doors.
The only tools you will need are the following:
- Phillips screwdriver;
- A clip puller is a device for pulling out clips (the principle of operation is like an anti-stapler). Using a clip-on tool, you can carefully remove the fastening elements without damaging the surface.
Recommendation: It is better to use a plastic clip. It pulls out the clips more gently, while an iron clip puller can leave scratches. Some people use improvised means, such as a flat-head screwdriver to pull out clips and staples, but using this method leaves damage to the trim. Therefore, if the car is expensive, then you need to buy a clip cutter.
The sequence of dismantling the door trim
- First of all, carefully remove the decorative trim that covers the mirror adjustment. We dismantle it using the same clip cutter or a flat screwdriver (but very carefully).
- Remove trim from door handle. Also, using a clip on the side of the lock, pry up the lining and remove it. Remove by hand to avoid cracks.
- Remove the screw from the door handle.
- Next, place the clip on the side under the handle and bring it to the middle of the width of the handle. The panel should pop out without much effort. The panel, as a rule, has a special spike in the center that can easily be broken. To remove it carefully, you need to slightly lift the panel and at the same time slightly pull the trim towards you with a clip puller.
- Now the wires are visible. They must be disconnected from the power window controls.
- At this stage there are 3 screws left at the bottom of the door. We unscrew them. Usually on all cars there are 3 screws at the bottom of the door.
- The casing is now held in place only by internal clips. We grab the casing from below and carefully pull it towards us. The clips should come loose and clicks will be heard.
- After the pistons have fired, we lift the casing up and release it. Clips can become fragile over the years, so it is advisable to install new ones.
Recommendation: after completing the necessary work (replacing or repairing the lock, installing speakers, installing a soundproofing layer, etc.), when assembling the door trim, put in place the part that is between the door and the glass that is easier and more convenient when the glass is in the lowered state .
Withdrawal algorithm
Before starting work, according to safety rules, it is necessary to remove the negative terminal from the battery.
- To provide access to the two fastening screws, you must first remove the decorative trim on the door handle . To do this, carefully, so as not to damage the casing, insert a screwdriver or a knife blade into the gap between the handle and the trim and pull it towards you. On some models, on the decorative trim there is a control unit for adjusting the outside mirror, from which you need to disconnect the connector with wires.
After snapping the clip, the card must be pulled up to pull out another clip from the groove. You can see it by slightly bending the trim.
Click off the part indicated by the red arrow. The opposite part (yellow arrow) is simply disengaged.
Sheathing installation
Before starting installation, make sure that the plastic fasteners are intact.
When removing the trim without a clip remover, the clips remain in the door in the unlocked position. If the clamps are not damaged, before installing the casing, they must be “cocked” using a spatula, first inserting it between the membrane and the washer, and then pushing it up.
Broken or defective clips must be replaced with new ones, otherwise a loose fit of the trim to the door will contribute to the appearance of extraneous unpleasant sounds when the car is moving.
Installation of the casing is carried out in the following sequence:
- Connect the door lock release cable.
- Secure the electrical wiring harnesses and connect all previously disconnected connectors to the central locking, power window and mirror control units.
- Connect the speaker.
- By connecting the negative terminal of the battery, check the functionality of all electrical mechanisms. A preliminary check will allow you to correct any problems in time before the door is fully assembled.
- Place the trim in place and make sure that the clips align with the seat. Secure the clips with light blows or hand pressure.
When installing the trim, you should pay attention to this protrusion that fits into the groove of the door near the glass. The plastic here is very soft, often bends and stands up unevenly.
How to remove the trim of a modern car
If the car doors have electric windows installed, there are built-in speakers, and there is a large diffuser on the side, then in this case it is easier to dismantle the trim, but you have to remove the external trims.
The procedure for removing the trim of the front and rear doors of a car:
- Lower the glass down.
- The speaker grille must be moved towards the door hinges and pulled out of the grooves.
- Use a flat-head screwdriver or a clip-on pry to pry the overall diffuser in the center and remove it.
- Remove the protective cover from the control unit (CU) for power windows and mirrors.
- Rotate the plug mount 90 degrees and remove the entire panel.
- We take out the 3 clips at the bottom and pull the casing down. There are no hidden screws or other holding devices in this design.
- The casing has been removed.
How to remove the rear door of a Hyundai Solaris:
Sometimes it becomes necessary to remove one of the car doors in order to repair it or for other reasons.
The driver will need:
- wrench with 13mm head;
- straight, flat screwdriver.
The work is carried out in the following order:
- there is a bolt securing the limiter to the body pillar, it is turned out;
- the cover is removed from the wiring harness;
- the block is disconnected from the connector, first you need to push it with a screwdriver;
- the bolts holding the door hinges are turned out;
- the door is removed;
- repairs are made, after which the part is put in place.
An example of removing door trim on a Kalina car
How to remove the left front door trim:
- Unscrew the door lock (lock button).
- Remove the cap and unscrew the casing bolt with a Phillips screwdriver.
- Unscrew bolts 4 and 5.
- Carefully remove the Lada Kalina door trim from the retaining clips. Disconnect the connectors with wires from the door module.
The procedure for removing the right door trim (Lada Kalina):
- Unscrew door lock No. 4.
- Unscrew bolts No. 2 with a screwdriver.
- There is a decorative lining on car door handles. You need to remove this cover and unscrew two screws No. 3 and remove handle No. 1.
- Detach the trim from the door. Disconnect the wire connector.
To dismantle the rear door of a VAZ LADA Kalina 2, you will need two screwdrivers: a Phillips screwdriver and a flathead screwdriver.
The rear door must be disassembled in this order:
- Unscrew door lock latch No. 2.
- Remove the handle cover. Unscrew 2 screws No. 1 with a screwdriver. Remove the door handle.
- Using a flat screwdriver, remove decorative element No. 6, handle No. 7 and window socket No. 5.
- Detach and remove door trim.
We remove the door cards of the VAZ 2110.
- How to remove the door trim of a VAZ 2110? First of all, using a Phillips screwdriver, unscrew the plastic pocket at the bottom of the door trim. It is held on by 3 screws.
- We pull the bottom of the pocket slightly towards ourselves, and lower the top down, thereby allowing the plastic to come out of the slots in the casing. Let's debug it aside.
- If you do not have power windows, but regular ones, then at this stage you need to remove the window handles. To do this, we hook the fixing ring under the handle itself. Remove the handle and remove the plastic ring. Just like in the photo.
- Next you need to remove the door handle. It is held in place with just two bolts. But these bolts are covered with a plastic cover. It can be removed by prying it off with a knife or a thin screwdriver. I advise you to wrap a knife or screwdriver in cloth, since the thickness of this lining is very small and it can easily be broken or damaged with a metal object. Therefore, we perform this procedure very carefully and leisurely.
- Now you can unscrew a couple of bolts securing the door handle.
- Once the bolts are unscrewed, you need to remove this handle. Pull the left edge towards you and remove the right edge from the slot in the trim. Then rotate the handle 90 degrees to the right to remove it from the door release lever.
- Now you need to unscrew the plastic latch to block the door from closing. In principle, it unscrews perfectly with your fingers, but if it doesn’t work, then use a Phillips screwdriver. Having unscrewed it, we put it aside, along with it we remove the plastic cover on it (I have it in red).
- If you have speakers in your doors, then unscrew their fastenings (usually they are fastened with 4 screws). When they are unscrewed, take them out and disconnect the pair of wires connected to them.
- Well, now we are ready to remove the door trim of the VAZ 2110. Next, we pry up the lower edge of the door card and try to tear it off the clip.
- When one edge is torn off, you can carefully move on in a circle. For convenience, the photo below shows where the trim is attached to the metal door frame with clips. The first photo is the front door, the second photo is the back door.
- When the door trim panel is torn off from all the clips, lift its bottom and remove its top from the latch rod.
This completes the removal of the VAZ 2110 door trim. Now you can perform the actions for which you removed it. Before installing the door card back, replace the broken clips with new ones. Installing the door trim occurs in the reverse order.
Video
This video shows an analysis of the door of an Audi A6 C5 (Audi A6 C5).
Removing the driver's door trim on a Priora.
Mazda 3 trim (Mazda 3).
How to repair a window regulator.
Door trim Wolksvagen Polo sedan (Volkswagen Polo sedan).
Toyota Camry trim (Toyota Camry).
Dismantling the casing on Grant.
In general, the process of removing decorative trim on car doors, including the trunk door, is not as complicated as it seems. The main thing is not to damage it during dismantling. The principle of operation, depending on brands and models, is similar.
Removing the front door trim (card, panel) on a Logan, as on other cars, may be needed to repair the window lift mechanism, opening the door, and the like. The procedure is easy enough to do it yourself.
Removing trim from car door
Each car has its own design features of elements such as the door and its trim. But, regardless of this invisible moment, there is something in common between different car models. Let's consider these points.
- Before you begin the task of removing the door trim, you should completely turn off the car. In order to turn off the power supply to the machine, it is very easy to disconnect the negative terminal of the battery.
- After the car is left without electrical power, you need to use a Phillips screwdriver to unscrew the screws that secure the handle that has installed power windows.
- In case the trim
is removed from the front door, you must first remove the decorative trim of the mirror in which the background is displayed from the plastic clips. - If the car door is equipped with a glove compartment, it should also be removed by prying the plastic clips with a clip and unscrewing the bolts. To do this, the car enthusiast has the aforementioned Phillips screwdriver in his arsenal.
- The trim is secured to the car door with bolts that are located below the specified structural part. Again, they need to be confiscated using a screwdriver; otherwise, it will not be possible to remove the necessary component.
- The lock that blocks the door must also be removed because it represents an obstacle to the successful completion of the planned operation.
- After all of these parts have successfully left their permanent installation places, you need to arm yourself with a plastic clip-on clip, which is carefully placed between the trim and the car door. The process of separating plastic fasteners, or, as they are also called, clips, is carried out in a similar way.
The locations of the listed fasteners, as well as their number, are primarily indicated in the operating and repair instructions that any machine has. The thing is that these indicators are individual for each model.
The trim that adorns the car door and makes it quite functional should definitely not be removed at low ambient temperatures. This is due to the specific nature of plastic, which allows its properties to change slightly at different temperatures. So, if the air is not heated enough, the casing
A car door may burst if it is strongly influenced by external factors.
Sheathing
, put on the rear door, is removed similarly.
The photo shows parts of the car door trim.
Certain nuances that are associated with work.
It should be noted that in most car models, along with the casing, you will also need to remove the heat insulator
In any case, all these actions must be done as carefully as possible so as not to damage either the door or the trim.
Moreover, you need to pay great attention to small details that can easily be lost. They may fall under the seat or, worse, on the ground, where they are at risk of damage.
In the latter option, there will be a need to purchase new ones, and this is sometimes very difficult to do due to the fact that they are not cheap or do not appear on the market often.
You need to know that removing the trim is quite easy, but putting it back in place is sometimes very difficult. As you already know, the trim is attached to the doors using specialized PVC clips. In the process of dismantling the mentioned finishing element, you should be sure to understand the location of these clips. Only in this case the casing
will be fixed quickly and without much difficulty.
Eventually
Remove the specified vehicle door
It is recommended in a special room to avoid any unpleasant circumstances with the loss or damage of parts, as well as other problems that are associated with instability of the atmosphere.
This is not considered a rule, but by doing this, you can protect your own nervous system from unnecessary and completely unnecessary experiences. In addition, this way there is no fear that it will rain unexpectedly, stopping the process.
As for winter, in this case, which was mentioned above, must be observed.
Finally, you can watch a video that will give you answers to questions that might arise while reading the real text.
We operate on the front doors
The fastening of the Renault Logan front row door panels is concentrated at four points, and in addition, the panels go around the speaker locations.
- The dismantling process should begin by removing the handle; do not forget that this is how the front door is disassembled. Here, use your fingers to press on the area where the window lifter handle is fixed and remove the retaining ring. After these simple manipulations, the handle can be easily removed. Note that it is fixed using three small clips.
- Remove the silver plated trim. We pry it off with a thin screwdriver. The handle is held at two points, one of which is “secret”.
- We mount a couple of screws located on the front part (end cap). One of the fastening elements is located on the Renault Logan armrest and is removed using a Torx key. The second one must be pulled out of the inner handle. Please pay attention to this point: the size of the handle screw is slightly larger. The handle itself will need to be pryed off, since its fit is very tight.
- We remove the rim of the button responsible for disabling the lock. We remove additional plastic elements from the embedded speakers using our fingers.
- The Renault Logan speakers are fixed at five points. Once the fasteners are removed, the speakers should be removed.
- Now let's dismantle the card. She carefully “tears” herself from her seat with her hands. Sometimes the process can be complicated due to the fact that the panel can be glued with a special sealant that acts as a sealing component. Standard fasteners are made in the form of 11 pistons. These plastic elements cover the entire perimeter of the inner surface of the card. When the panel is “torn off” they make a characteristic sound. Replacing them is easy.
- The dismantled casing remains hanging. The culprits are the speaker wires. The plugs are carefully disconnected, while the card is supported by hands. The panel can now be put aside.
- It is also recommended to disconnect the lock plug. We pry it up and lower it down.
Installing the panel on the front doors is necessary in the reverse sequence of manipulations.
Renault Duster configurations and prices 2018
Steps for removing trim from the front door
Materials and tools:
- Phillips screwdriver;
- straight screwdriver;
- insulating tape;
- clips.
Dismantling the car's front door trim is carried out in several stages. First of all, you need to unscrew all the screws, they are located near the car door handle, as well as the bolts that secure the special power window control module. Then this module is pulled out along with the car mirror adjustment system.
Secondly, it is necessary to disconnect the wires connected to the systems and leading to the power source by disconnecting the latch. Then, after all the wires have been disconnected, they begin to detach the handle trim holders. This is how the front door is disassembled.
After unscrewing the bolts, remove the upholstery. The car lining is fixed with three screws located at the bottom; they need to be unscrewed. Next, unfasten the special button responsible for locking the door lock. The next stage is removing the trim from the front door of the Priora, which is the most difficult.
Using a flat screwdriver, carefully lift the cladding and remove the special plastic holders holding the cladding. After they come out, put them aside. That's it, the main work is done.
Do-it-yourself removal and installation of the front door trim on a Renault Logan
The dismantling procedure is given below:
- Using a T25 bit, unscrew the screw securing the inner door handle pocket and remove it, disconnecting it from the rod
- Then, using a T20 bat, unscrew the two screws securing the casing: one in the recess in the center, and the second from the end at the top
- Remove the speaker cover and unscrew several screws under it, removing the speaker itself, if it is present there.
- Carefully pry up the upholstery from the corner around the entire perimeter, pulling it off the plastic clips
The final result will be shown in the photo below:
For greater clarity, it is worth looking at the photo report below, in which everything is shown in a very accessible and understandable way.
Video on removing door trim
The report is based on a 2009 Renault Logan, so the procedure may differ from some later model vehicles.
I hope that the video review presented gave a complete picture of the implementation of this repair. If you have any questions, you can ask them in the comments below.
How to Disassemble the Rear Door on an Opel Astra ~ AUTOINTERLINE.RU
21.8 Disassembling doors
When the door trim is removed, screws (arrows) are visible, which must be loosened in order to separate both parts of the door. help with the choice of lambda probe 1, and for the x20xev lambda you will have an Opel Astra g. Using a “magnifying glass”, the placement of the “adjusting wedge” (3) is shown, which, for adjustment, is pushed to a greater or lesser extent between the “support of the door mounting units” (1) and the base of the door (2).
Removing door
This describes the dismantling of the front door trim. How to remove the rear when designing lamps for a Nissan Qashqai rear door trim. The rear door trim is removed in the same way.
Removing the door trim, step 1: by pressing out the fastening protrusion (2), remove the trim of the window handle (1), then unscrew the handle (3).
Removing the door trim, step 2: remove the handle bowl (4) by loosening the Phillips-head screw (3), and unscrew the screws underneath (1 and 2).
Removing the door trim, step 3: unscrew the screws (1) from the front side, throw the trim upward in order to pull the fastening hooks (2 and 3) out of the grooves.
Removing the door trim, step 4: with the trim removed, hang the door opening contact cable (1) from the guide (3) and the control lever (2).
- Remove the window crank handle: insert a screwdriver under it from the axis of the crank handle and press the fastening tab. buy original spare parts for Opel Astra 1, 2, 3, 4, 5, f, g, h, j, k, classic. Remove the cover towards the handle axis. Underneath it, unscrew the Phillips head screw.
- Remove the inner door handle bowl downwards after loosening the Phillips head screw.
- Behind the handle, two other Phillips-head screws become accessible. How to import and drive a car from Lithuania? How to disassemble the side mirror of a Kia Rio - 3. Unscrew them.
- On the front side of the cladding, remove one Phillips-head screw each at the front and back.
- The internal door lock button remains installed.
- Now, by striking the elbow from below with your fist, slightly knock the door trim upward so that the latches on the reverse side of the trim come out of the grooves of the door frame.
- Remove the trim and throw a little away from the door.
- On the reverse side of the door opening contact, pull the cable sheath out of the guide and hang the cable out.
- Disconnect the plug connectors on the switches and on the speaker.
- If necessary, carefully remove the insulating film from the rear of the door trim. how to turn on the air conditioning Opel Astra N 1.8 at cum sa activa?i aerul condi?ionat opel astra h. Make sure that it does not break in the places of the latches and contacts of the switches.
- Before installing the cladding, insert the intermediate rubber parts into the holes of the clamps in the door frame (if they came off during dismantling).
- To make the latches move better, lubricate the rubber parts with a small amount of Vaseline or silicone paste.
- Make sure that the insulating film is carefully inserted on the reverse side of the cladding. It must be inserted into a recess around the perimeter of the cladding.
- When installing, make sure that the door lock button is correctly inserted into the hole in the trim.
Removing door parts
For example, after minor damage to the metal, it may be necessary to remove the door base from its mounting support. In this case, it is recommended to varnish the new door base before installation. How to disassemble a mirror on a gazelle; repair mirrors on a gazelle. Although after that you need to work very carefully.
- Remove the door trim.
- Dismantle the door as described above, and place the outer side on a soft lining (foam plastic, wool blanket).
- Pull the outer door handle control rod and lock drum out of the mounting clips. Clutch for Opel Astra H, repair and maintenance. To do this, release the locking bolt on the clamps by 90°.
- Loosen the four mounting screws on the front sides of the door.
- Remove mounting assembly .
THIS IS INTERESTING: Repair of the master brake cylinder of a VAZ 2107
1 – lock drum with heating element; 2 – door handle;
3 – rotary valve;
4 – decorative panel; 5 – TORX mounting bolt in front.
Opel Astra G removing rear door trim
how to quickly and urgently open. The arrow shows the spring clamp of the control rod of the opening contact.
Lock control rod with subsequent parts
1 – lock drum lever; 2 – spring clamp;
3 – rod;
4 – control spring clamp; 5 – lock release lever.
The window regulator is visible from the rear on the multifunction model:
1 – upper guide roller; 2 – window lifter guide rail;
3 – glass support;
4 – window lifter motor. Arrows – screw-shaped glass/window regulator connections.
The photo shows the screws (1 and 2) that must be loosened to release both parts of the door.
The door lock hangs only on 2 screws (1 and 2). How to replace coolant in an Opel Astra. But the preparatory work for dismantling the lock has a significant scope, because it is necessary to remove the “assembly support” from the door base.
Removing the outer door handle: in addition to the rest, it is necessary to discard the rotary bolt (1) and unscrew the TORX bolt (2).
The figure shows the screw-shaped connection (2) of the window regulator with the window glass (1) at the rear in the front door frame.
Removing the door lock
- Remove the door mounting support from its base as described above.
- Remove two 6mm TORX bolts.
- Remove the lock.
Tips: In a small series, door locks were installed without synthetic coating. These locks can be removed without removing the “assembly support” from the door.
Removing the outer door handle
Anyone who does this work on a mounted door must have a measured disposition and dexterous hands.
- Front door : remove the inner door trim.
- Move aside the spring clips of both control rods (they lead to the locking wedge), and hang the control rods.
- Through the recess on the inside of the door, unscrew the TORX bolt in front of the door handle using a T25 key.
- Through the door frame, feel the small locking lever at the height of the lock drum and fold it 65° to the rear edge of the door.
- Now remove the door handle from the inside.
- Remove the lock drum and outer decorative panel from the outside. While doing this, rotate the panel slightly.
- If necessary, disconnect the wire.
- Installation: you need to understand the location of the parts in relation to each other while still in the dismantled state. Replacing the clutch master cylinder on an Opel Astra N. Otherwise, it is guaranteed that it will not be possible to install the release lever.
- The release lever is inserted with the handle tilted back and tilted forward to lock.
- Rear door handle: removal and installation are similar, but fastening with two TORX screws - without a release lever.
Removing the lock drum
- Remove the outside door handle.
- Insert the key into the drum so that when the drum is pulled out, the lock plates and springs do not fall out.
- Press out the locking ring at the rear end of the lock drum .
- Remove the driver and coil spring, remember their position for later installation.
- Remove the lock drum from the decorative panel.
- When installing, make sure that the closed tooth on the gripper ring gear fits into the cavity between the teeth of the microswitch gear.
- Coat the new lock drum with rust removal and insulation spray.
- Remove the door trim.
- Remove the door mounting support. Astra engine oil was originally called z16xer and was installed on the Opel Astra N. How to remove the rear left door trim on an Opel Zafira. The base of the door remains on the car.
- Lower the door glass completely.
- Place the mounting on a soft pad.
- Loosen the window regulator/window screw connection, lift the window and remove it.
- Drill out the four window regulator mounting rivets.
- The window regulator and crank mechanism are a module and can only be removed or replaced together. This is not the case with the power window motor. It can be replaced separately (chapter Tools and devices ).
- Installation: rivet the window regulator, placing the lower rivets first.
- Adjust the window in the door.
Removing a window from a door
Removing a window from a door is described above. how to remove the taillight on a Ford (Ford Focus 3) how to remove the front fender of a Ford. In addition, after installation, adjust the glass in the door (next section).
Adjusting the window in the door
Adjusting the window in the front door: the rear edge of the window (1) of the front door must fit into the seal (4) of the support of the door mounting units (2), a = 9 mm. The number “3” indicates the rear door pillar. The same applies to the front edge of the rear door window.
The glass in the front and rear doors is adjusted in the same way (in mirror image).
- The glass in the front door should insert its rear edge (pillar B) into the seal approximately 9 mm. The same applies to the glass in the rear door as for the front door.
- At the top and in front, the glass should be parallel to the seal along the entire perimeter. And greetings again, friends! In the previous entry (part 1) it was shown how to disassemble the K4M engine on the second Senka to replace the timing belt, or the pump, or the phase regulator, or something else. In other words: it should not be skewed in the doorway.
- If necessary, draw a line with a felt-tip pen along the rear edge of the front glass (or along the front edge of the rear window) at a distance of 9 mm from the edge of the glass.
- Install the glass - make sure the line of the rubber seal is parallel.
- Raise the glass almost all the way.
- Now check whether the contour of the seal and the contour of the glass are parallel to each other.
- If not, loosen the glass and adjust the glass so that it is parallel to the seal.
Impact strips are glued to the door. How to disassemble a mirror with a turn signal? I’ll be happy to tell you, with photos, because I spent a long time puffing until I found all the hooks on the front cover. For dismantling and installation, see chapter 1.
Source: https://autointerline.ru/kak-razobrat-zadnjuju-dver-na-opel-astra/
How to remove the front door trim on a Renault Logan
The trim from the front doors is somewhat more difficult to remove than from the rear ones, so let’s look at them first.
For all actions we will need:
Now, directly to the procedure:
- All visible bolts are tightened - primarily on the door opening lever, the end and under the plug at the bottom. Also, you need to remove the plastic trim from the door - one of the bolts that is twisted with Torx is also hidden there.
Unscrewing the Renault Logan front door bolts
You need to remove the plastic cover as carefully as possible - there is a very high probability of damaging the plastic. To ensure the safety of fragile plastic, you can wrap the screwdriver in a cloth - the plate is held on by pistons, and, despite its apparent strength, it can still be broken when removed. The procedure should be carried out in small jerks - for this, there is an excellent gap at the base of the door.
- The speaker is unscrewed from the door - if you did not replace the bolts with analog ones yourself, then you will still need the same Torx key. The speaker is held on by four bolts.
Moving on to the stern doors
How to remove the rear door trim? Here the process of removing decorative cards is much easier. Dismantling is carried out for the following purposes:
- to replace a window regulator or lock;
- if there is a need to replace the handle, glass or lifting mechanism;
- for installing (replacing) loudspeakers.
We draw attention to the features of the procedure described here, which is correct only for versions of Renault Logan, the doors of which are equipped with manual window lifts.
- Remove the handle.
- Using a Torx wrench size 30, unscrew the screw located inside the handle.
- We remove the inner handle and remove the rod from the mounting hole.
- Let's move on to dismantling the armrest. Here we use a Torx size 20 and unscrew the screw securing the upholstery.
- The rear door panels have nine fastening pins. They also snap off when the panel is “squeezed” manually.
- We lift the card and remove the button blocking the internal lock from the hole in the end switch. It also needs to be removed.
The sealant can create a number of difficulties when removing the card. We apply a little more force, and the panel unconditionally capitulates under the pressure of a strong owner. We helped you figure out how to remove the rear door trim.
How to Disassemble the Rear Door of an Opel Astra G
Removing the trim on the driver's door of the Opel Astra G (Opel Astra G)
Trying to turn the mechanical lift with pliers did not yield any results. To find out the reason, I had to remove the door trim
.
The first thing I started with was to carefully unfasten the decorative corner trim on which the mirror adjustment mechanism is installed. For this purpose, I used a screwdriver to pry it on myself in order to pull out the plastic pistons that secure it to the door. There is no need to completely remove the triangle; the main thing is to free the casing.
Later I unscrewed two screws holding the casing at the very bottom.
Next I removed the door handle trim. I pryed it off with a flat screwdriver, overcoming the resistance of the plastic clips.
There were 5 terminals going to the power window button. I disconnected them, having previously sketched out the connection diagram.
Opel Astra G removing rear door trim
How door trim
on
Opel Astra G
? It's very easy and simple. Maximum 5 minutes. Music: Cover Love me.
Trim of any door (until 2009)
To unscrew the screws, you will need Torx T20 and T25 keys. Let's start dismantling:
- Unscrew the screw in the armrest;
We unscrew the same self-tapping screw in the “sink” (Torx T25);
- The sink itself is removed from the casing, then the lock rod is removed (required!);
- Using a flat screwdriver, remove the trim above the pawl;
- Window lifter handle (if any) – pull the ring “towards you”, press the latch in the direction “away from you”;
- Speaker basket - remove the cover, unscrew the screws, remove the basket.
Dog at the door
The plastic trim on the rear door is removed (see photo). At the front, in turn, they unscrew the self-tapping screw - it is located at the end.
It would seem that there are no fastening parts left. But don't rush! There are elements that are removed before removing the trim on the Renault Logan door:
Front door without trim
There are no baskets in the rear doors. This means there is no need to delete anything. And the casing is simply bent from the corner and pulled outward, overcoming the resistance of the pistons.
There is one trick: if there is a speaker in the rear door, it is turned off when the trim is already removed. The same applies to the two connectors attached to the rear end of the card.
Why remove trim from car doors?
Reasons why you need to remove door cards on Renault Duster cars:
- restoration of electrical wiring damaged due to improper installation of the alarm system;
- removing the electric drive of the window lifting mechanism for repair or replacement;
- dismantling the electromechanical door lock (for example, in case of component failure);
- replacement or installation of additional speakers of the acoustic system;
- repair of the load-bearing frame or outer door panel damaged as a result of a minor accident;
- removing the rear view mirror housing (only for the Duster front door);
- installation of additional tuning elements that protect the interior from external noise;
- restoration of normal drainage of rainwater entering the internal cavities of the door through holes along the glass.
Rear door trim (after 2009)
Read everything that was said in the previous chapter. The rear door in the new generation is designed similarly, only it has additional decor.
Front and rear door trim
First of all, try removing the window lifter handle, if there is one. The mounting points for the casing (card) are similar to those already discussed. Their number is three.
Let us list once again where to look for a self-tapping screw:
- On the corner of the armrest;
- On the “shell” that needs to be removed.
The third attachment point is the pad above the pawl. As you can see, everything is elementary. The number of pistons on the rear door is 9.
You will need to disconnect the connectors - don’t forget about it. We looked at how to remove the trim on the rear door of Renault Logan.
Speaker and two more connectors
Anyway, let's figure out the handle
The handle or handle of the window lifter from Renault is designed simply. There is a plastic ring that is spring loaded. And if you move it, you can see a metal part.
Handle structure, modern version
This part, that is, the bracket, holds the entire handle. If you move the two antennae apart (see figure), the handle can be easily removed.
Some people manage to pull the bracket out. They use a regular screwdriver and don’t even damage the plastic. By the way, in the cars of the first years of production (2005-2007) handles without brackets were installed. You can remove such a handle by simply pulling it towards you. In this case, the part itself usually breaks. Stock up on glue or a new spare part.
Parts from the Renault catalog:
- 6001546339 – old model;
- 6001548552 – new.
In this manual, we will examine in detail the procedure for removing and installing decorative front door trim on VAZ 2110-2112 vehicles. I would like to say right away that performing this procedure will not take you more than 10 minutes of time and you will need a minimum number of tools, namely:
- Flat blade screwdriver
- Phillips or shaped screwdriver
How to adjust the door on a Hyundai Solaris?
Some Solaris cars still have problems with closing and opening doors. If fixation does not occur clearly enough, then in such cases adjustment is required.
The driver will need the following equipment:
- pry bar, can be replaced with a drill bit from a hammer drill;
- T40 format Torx bits.
Inconvenient fastening of the cage nuts, which are welded from the inside to the side posts, makes access to them difficult, and the work becomes more complicated. Therefore it is necessary:
- loosen the fasteners with the star slot using TORX;
- insert a pry bar into the stopper and adjust the hinges manually, pressing alternately up and down and adjust the movement and placement of the mating part.
When everything can be adjusted, tighten the fasteners of the limiter. If necessary, the door can also be adjusted by loosening the hinges.
To do this you need:
- check whether additional force is required to securely close the door, whether there is a need for additional pressure on it. If force is required, adjust by setting it with several up and down movements;
- remove the fastening screw and apply effort to adjust the fastener; it will need to be moved from side to side several times;
- tighten the limiter bolts;
- the stop can be set by carefully hitting it several times with a plastic hammer, achieving a slight movement;
- Pull the outer handle towards you, outwards, and then check, by placing the door against the body, whether the maximum possible accuracy of fit has been achieved. If yes, you can tighten the fastening screws and carry out another control check.
Read more: Mazda Premasi error codes
