Reasons why glass replacement is needed
Drivers are forced to replace them for various reasons. Conventionally, they can be divided into several groups: mechanical damage, glass wear and problems with the seal. Let's consider each of the reasons separately.
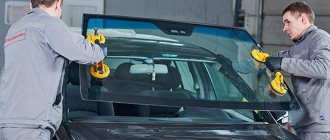
Replacing a windshield on a car
Mechanical damage
When driving at high speed, the smallest stones hitting the windshield lead to cracks (see How to remove scratches on a car). Over time, the crack begins to grow and if appropriate measures are not taken, it will no longer be possible to save the glass. In such cases, replacement is needed.
Types of windshield damage
Part wear
Defects on the windshield of a car with a fairly high mileage will be visible even to the naked eye. We are talking about minor abrasions, scratches or chips. The presence of such flaws leads to visual distortions, due to which visibility of the road is limited. Therefore, if possible, the glass must be replaced.
Windshield wear
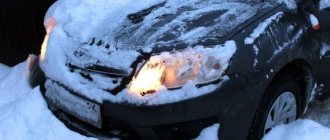
The seal allows moisture to pass through
Poorly glued glass at the factory can leak over time, causing moisture to enter the car interior and negatively affect the body, wiring and interior upholstery. All this is possible if the identified defect is not eliminated. But to get rid of leaks, it is enough to treat the area of contact between the glass and the body using a sealant. If this does not help, then the windshield needs to be reinstalled.
Windshield lets water through
Note! Car glass repair is only possible if there is minor damage. In all other cases, replacement of the part is required.
Removing old glass
The car needs to be washed, if not the whole, then at least the area you will be working with . Then place the car on a flat surface where it can stand for about a day. This is necessary to ensure that the glass does not move while the sealant hardens. To avoid cleaning the interior, cover the front seats and dashboard with cloth or film. If you plan to reinstall the glass, prepare a place for it where it will lie while you work on the body. A large box covered with a soft cloth or thick clothing is suitable for this.
Required tools and materials:
- string;
- awl or knitting needle;
- screwdriver;
- chisel;
- wrench;
- scotch;
- glass sealant;
- sealant gun;
- anti-silicone solvent;
- primer primer;
- swab to coat with primer.
All of this can be purchased separately (any car enthusiast will have some), or you can purchase a special kit for replacing glass in a car.
About the necessary tools and materials
To make the replacement as quick as possible, you need to prepare in advance by taking care of the tools for the job. You cannot approach the issue of replacing auto glass irresponsibly, so it is advisable to purchase materials and tools in advance.
What you need to replace your windshield
Materials
To work on replacing auto glass, you need the following materials:
- adhesive (sealant);
- activator or solvent;
- glass cleaner;
- primer.
Glue-sealant for gluing glass
Instead of a solvent, you can use any degreaser. This will be needed to remove the old sealant and clean the surface before gluing the new windshield.
Windshield Selection Guide
Tools
Among the tools, the motorist should have the following with him:
Glass removal kit
- protective gloves (preferably several pairs);
- cotton swabs;
- masking tape;
- glue gun;
- stationery knife;
- chisel;
- a set of wrenches and screwdrivers;
- suction cups for removing and moving glass;
- a special tool for cutting old glue (if you don’t have it, then you need a long awl and a metal string).
Glass jack or glass suction cups
On a note! The work can be carried out in a dry garage or outside if the weather is sunny. When choosing a garage as a place for replacement, you need to have the car parked there for 24 hours before starting the process.
Replacement steps
The procedure for replacing auto glass can be divided into several main stages. The correct implementation of each of them is important for the result of the entire work.
Windshield installation and replacement
Table. Steps to replace a windshield.
| Stage name, photo | Description |
| Dismantling the old part | A special tool or string is inserted between the windshield and the groove. Then the old sealant is carefully cut. You need to act carefully so as not to damage the plastic in the cabin. |
| Surface preparation | Old sealant and molding are removed. If necessary, you can use a knife. After this, a new windshield is tried on. |
| Degreasing the groove | As soon as the remaining sealant is removed, the surface must be degreased. An anti-silicone degreaser or a special degreaser composition is suitable for this purpose. |
| Padding | You cannot apply primer to old sealant, so the surface must be thoroughly cleaned. The primer is applied with a brush in one layer. |
| Activator | It is used to treat particles of old sealant if it was still not possible to completely remove it. Use according to instructions. |
| Glass installation | A new windshield is installed on the prepared surface. To make it convenient to carry, use special suction cups. |
Having familiarized yourself with the stages of work and having prepared all the necessary tools, you can proceed directly to replacing the windshield. The main thing is desire, patience and free time.
Step-by-step instructions for installing new glass
Procedure:
- It is necessary to carefully treat the glass groove with the product from the kit or an anti-silicone degreaser.
- Afterwards the primer is applied using a special swab or small brush. The glass and the groove where it should go are processed. This will improve the adhesion of the surface to the glue. It is not recommended to apply a primer to glue residues; it is better to treat it with an activator.
- It is recommended to warm up the sealant before use. If there are suction cups, then it is recommended to apply it to the glass; if not, then to the body. Start squeezing it out with an air gun in an even, continuous layer from the bottom and center.
- Afterwards, insert the glass into place and secure it on top with masking tape so that it does not move out.
- You should press on the glass, as a result it will lie tighter, and the glue will fill the voids. But don't overdo it, otherwise it will be difficult to replace it again if necessary. If the sealant protrudes, it can be easily removed when the polymerization process is completed.
- After replacing the windshield, you can already replace the plastic protection, moldings and brushes.
- The car must be left for at least a day. The sealant will set faster at higher ambient temperatures. If the ambient air is below or equal to 0º C, polymerization of the glue will not occur.
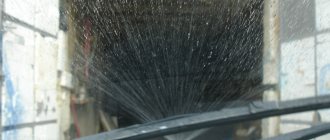
The next day, the tape is removed and the tightness between the glass and the body is checked. To do this, it is advisable to take your car to a car wash. Run water onto the glass for at least two minutes . This is the only way you can understand whether moisture is penetrating inside. To be sure, you can wipe the joint from the inside with a dry cloth. If you notice water, then additionally glue it again on the inside and outside. If water does not penetrate, then the goal has been achieved - you can completely assemble the car.
As you can see from the article, replacing the windshield yourself does not require large investments or physical strength. It is enough to stock up on desire and time for work that is not rushed.
Windshield replacement
Before replacement, the vehicle must be placed on a level surface. Only after this can you proceed directly to the replacement.
How to replace a car windshield
Dismantling
Step 1 . Raise the hood and remove the wipers. They are secured with nuts, so there will be no problems with removal.
Remove the windshield wipers
Step 2: Disconnect the clips on the plastic piece located near the windshield.
Detach the clips
Step 3: Remove the plastic piece after all the clips have been removed.
Remove the plastic element
Step 4. Using a thin putty knife, remove the moldings from the sides of the glass.
Remove the moldings
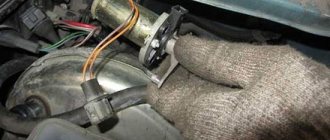
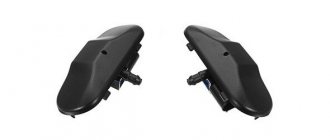
Step 5. If your model has a rain sensor, then you also need to remove it. It is attached to the windshield with glue.
The rain sensor also needs to be removed
The sensor is attached with glue
Step 6: Use a special tool to cut the old caulk.
Use a tool to cut away the old caulk
Step 7. Carefully cut off the old glue: first on one side and then on the other.
Remove old glue
Step 8. Once the top and sides are cut, lightly press down the glass from the inside. This way you can check whether the glue has been cut off everywhere.
Press the glass from the inside
Step 9: Prepare a cutting tool to cut the sealant at the bottom of the windshield. This must be done from the salon.
Prepare a tool for cutting the sealant
Step 10: Start cutting away the old caulk. You need to act carefully so as not to damage the interior plastic.
Carefully cut off the old sealant
Step 11. Help yourself with your other hand by lifting the glass. This will make it easier to cut it out.
Lift the glass with your free hand
Step 12: Remove the windshield after cutting out the sealant. If the part is too large, use the help of a neighbor or friend.
Remove the old windshield
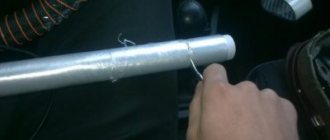
Removing the windshield with a string
Many motorists do not have special tools for cutting off old glue, so they use a regular metal string to do this. A handle must be attached to one end of the string. Next, you need to pierce the sealed seam using a long awl and pass a string through the hole. Now you also need to attach a handle to the second end of the string.
Removing the windshield with a string
Note! It takes two people to cut the adhesive sealant. One person sits inside the car, and the other sits outside. The string must be pulled from side to side, thereby cutting the old sealant.
Surface preparation
Step 1. The contact area between the glass and the car body must be cleaned.
Clean the windshield mounting grooves
Step 2: Remove the old seal. To do this, use a regular screwdriver or a thin spatula. It must be removed along the entire perimeter.
Remove the old seal
Step 3. Get rid of accumulated dust and dirt using a vacuum cleaner. You can use a car vacuum cleaner or a regular household vacuum cleaner, but with a special thin attachment.
Remove accumulated dirt
Step 4. Degrease the surface after cleaning. Any degreaser will be suitable for this purpose.
Degrease the surface
Step 5. Treat the damaged areas (where some of the paint was removed with a tool) with a primer. It is a clear adhesion promoter with a strong odor. The product will enhance the adhesive properties of the compounds used.
Apply primer to damaged areas
Step 6. This is what the finished prepared surface looks like. Wait until everything is dry, and then you can begin installing the new part.
The surface is ready for installing new glass
Installing new glass
Step 1: Clean the surface of the new windshield before installation. Then degrease it.
Degrease your new windshield
Step 2: Apply gel to the edges of the glass. After this, you need to wait a few minutes until the liquid dries.
Apply gel to glass
Step 3: Prepare glass glue. It is advisable to use a product that dries in no more than 2 hours.
Insert glue into the glue gun
Step 4 . Apply glue to the body surface using a glue gun. The product must be applied evenly.
Treat the body with glue
Step 5. Fix the glass with special suction cups if you do not have an assistant. In this case, a holder is used that is attached to the side window of the car.
Secure the glass with special suction cups
Step 6. Reinstall the glass and gently press it against the surface of the body.
Install the windshield
Step 7: Press down on the windshield and remove all suction cups.
Remove all suckers
Step 8. Check the quality of the part installation.
Evaluate the quality of your windshield installation
Step 9 . Connect the rain sensor and install the wipers. Now you need to wait a few hours (depending on the glue used) until the product completely hardens, and you can enjoy the result of the work done.
Put all the parts in place
Windshield, how to install a windshield, step-by-step work
- We install a clean rubber seal on the glass.
- We cut the dispenser tube at a height of 20 millimeters.
- The glue is applied to the contour of the glass or to the surface of the body. The sealant strip must be continuous.
- Next, carefully place the glass in the opening. Press it down so that it fits tightly to the body and the sealant fills all the voids.
- We fix the glass with strips of tape.
- We install wipers, moldings and plastic protection.
Recommendations for replacement
To ensure that your windshield installation is as efficient as possible, you need to follow a few simple recommendations.
Tips for replacing your windshield
- You can't skimp on materials . Glass in a car is changed infrequently, so it is not advisable to skimp on it or on glue. When choosing a composition, you need to consult with specialists.
- Do not slam doors after installing the windshield . Immediately after installing the parts, the doors must be closed carefully to avoid the formation of excess pressure in the cabin. Otherwise, the air flow will press on the glass.
- Wear protective gloves . You cannot ignore safety rules, because when working with glass there is a risk of getting cuts. It is also recommended to wear special glasses when replacing auto glass.
- Wait for the glue to dry completely . After installing the glass, it is advisable to wait a day, but it is better to avoid traveling for 2-3 days. The same can be said about washing a car - at least 2 days.
- Replace the windshield wipers. Using old wipers on new glass may cause scratches.
Do not forget to install a rain sensor after replacement.
It is not necessary to replace the auto glass yourself, because if you do not have free time, then you can entrust this task to specialists from automobile workshops. True, this procedure will cost much more, because in addition to the materials themselves, you need to pay for the services of repairmen. Therefore, if you want to do the work yourself and do not have extra money for the services of specialists, you can change the windshield yourself. You just need to follow the instructions given above.
You should not wash your car immediately after replacing the glass.