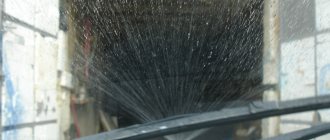
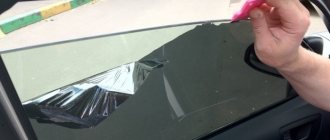
No driver can guarantee one hundred percent protection of the windshield from damage. If you notice a crack or chip on the surface of the glass while driving, you need to immediately stop, put paper on the problem area, and seal it with tape.
If you are driving with the heater, air conditioning, or windshield defroster turned on, turn them off as quickly as possible. This eliminates the temperature difference between the environment and the interior. Drive at low speeds to minimize vibration. Try to drive on a good road - the body will “twist” less. Don't skimp on a tow truck if the crack appears on the driver's side, impairing visibility.
As soon as you reach your destination, determine the configuration and size of the crack. Never put off repairing cracks and chips on your windshield until later, as such defects tend to develop quickly.
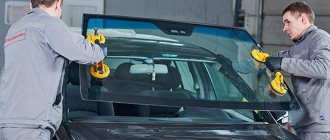
Repair glass or completely replace it
A non-alternative replacement is carried out if:
- the part was produced with a manufacturing defect;
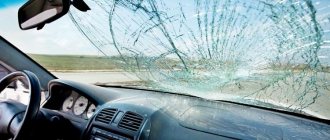
- the glass shattered into several pieces;
- cracks are long (more than 20 cm);
- The crack structure is branched.
It is better not to undertake the repair of cracks on a windshield that has extensive damage.
If your glass does not have the signs described above, it is suitable for repair work. But the final decision is made by the transport owner independently, taking into account economic efficiency, time and labor costs.
Repair is considered the most economical and practical way to remove small cracks and even deep chips. Practicality is not always obvious, since the criteria for a specific situation, transport and its owner will always be different. We can only list a few points that can influence the final choice - to replace or repair damaged glass. If there is a chip on the surface, considering the costs, it is better to repair it. Windshield repair will also be cost-effective when there is a linear crack of up to twenty centimeters and rays of no more than three centimeters. If we consider the financial side of the issue, repair will be the best option when the cost is less than 50% of the cost of a new part plus installation costs. Taking into account that glass for foreign cars is very expensive, it is advisable to repair linear cracks of unlimited length.
DIY windshield repair
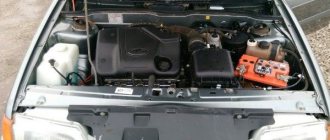
The cause of damage to a car windshield is most often a stone thrown from under the wheels of another car on the highway. A high-speed impact from even a small but hard object can cause a chip or crack in the glass. Replacing it requires quite significant costs.
At the same time, there are quite effective methods for eliminating such damage with your own hands. Often motorists have to fix them themselves, since it is not profitable for a car service center to do cheap work. Moreover, the task of eliminating chips or small cracks is not difficult even for an amateur. And timely repairs will extend the life of the glass and delay its replacement.
Diagnosis of glass damage
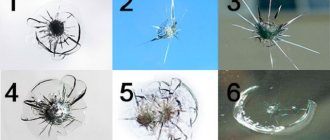
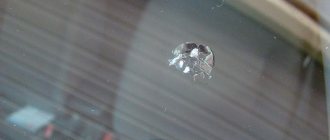
Immediately after detecting glass damage, it is necessary to determine its type. You can deal with the following on your own:
— Chips with partial loss of the upper part; — Cracks; - Branched cracks.
Chips are removed with a special photopolymer followed by polishing the surface. Such repairs will prevent cracks from appearing at the chip site. If a crack appears due to damage, it should be repaired immediately. Otherwise, a real problem may appear - a branched crack, which impairs visibility and can cause fair claims from traffic inspectors. However, even such damage can be repaired if done correctly.
It should be noted that only triplex glass, which is marked W, L or Laminated, can be repaired. Glass of the “Stalinite” type (also called “Kalenka”) cannot be repaired.
If repairs need to be postponed
Most often, repairs cannot be started immediately after damage. But certain measures can be taken to ensure that the problem does not get worse and subsequent repairs are more effective.
For example, the crack should be sealed with transparent tape (which is why it is always useful to have it in the car). It will not obstruct your view and will protect the damaged area from contamination.
If the windshield is significantly damaged, it is necessary to drive to the garage at a minimum speed so that vibrations and fluctuations do not cause the crack to grow larger. And before repairs, you should not use car chemicals to wash glass. This may impair the polymerization of the adhesive.
Repairing chips
Repairing chips does not require special qualifications or sophisticated equipment. However, you still have to prepare something. First, you need to purchase a universal chip repair kit from an auto store. Such sets from different manufacturers differ little from each other. And the price of these products, as a rule, is an order of magnitude lower than the cost of windshield repair at a service center.
It is best to carry out repair work in a well-lit garage or in sufficient sunlight. If this is not possible, you should use a hair dryer (a construction or even a regular hair dryer will do).
To correctly assess the defect, it is necessary to determine the size of the chip and the presence of microcracks. To do this, you should use a flashlight and a magnifying glass. If there are microcracks, their edges are drilled with an electric drill with a diamond drill in order to prevent their growth.
If there are no cracks at the site of the chip, then you can proceed to the repair itself. First you need to clean the damaged area from dust, dirt and micro-splinters. To do this, the chipped area can be washed and dried with a hairdryer. When cleaning, do not use any detergents. They can form a film on the surface that will prevent the glue from properly polymerizing. All you need to do is use a brush, a needle (they should be in the repair kit) and plain water. The surface can be degreased with alcohol.
After this, a disposable injector from the kit is installed at the site of damage. It consists of a self-adhesive mug and a plastic nipple for a syringe with glue. Hereinafter, you need to check the instructions for the repair kit. A one-component polymer is immediately placed in a syringe, and a two-component polymer is mixed in it from two containers.
The syringe is installed in the injector nipple and pumped several times according to the following scheme: 5 minutes - a vacuum is created by pulling the piston, 10 minutes - pressure is created by pressing. After this, the process is repeated. Detailed instructions on how to do this are given in the instructions for the kit.
The repair kit must be equipped with a special metal bracket, with which the syringe is fixed to the nipple. After the last press on the piston to create pressure, the assembled injector with the syringe is left at the chip site for several hours (usually 5-6 hours).
After removing the injector, the repair site must be cleaned of excess glue. To do this, you can use a blade or a sharp construction knife. It is important to remember that complete polymerization will occur only after 8-10 hours. Now all that remains is to polish the glass and the car can be used again.
Crack repair
Repairing a crack is somewhat more difficult than repairing a chip, and it will take a little longer. For this procedure, you can use the same repair kit as for removing chips. The gluing procedure itself is also no different. But preliminary preparation will require more attention and work.
First you need to prepare additional equipment - an electric drill and a diamond drill. After this, in good lighting, you need to determine the length of the crack. Stepping a few millimeters away from its edge (1-2 mm is enough) a hole is drilled. This procedure is necessary to relieve internal stress on the glass surface. If this is not done, the crack can go further in any direction. The finished hole is cleaned and dried. All other procedures are performed in the same way as in repairing chips.
And one more useful tip in conclusion. As is known, the polymerization process is accelerated by exposure to ultraviolet rays. Therefore, after applying glue and dismantling the injector above the repair site, you can turn on the ultraviolet lamp or place the car in direct sunlight. As practice shows, in this way it is possible to accelerate the hardening of polymer glue several times.
If you follow all the instructions correctly, any car enthusiast can repair a chip or crack on your windshield.
What will be needed for repairs
With the help of a special kit, car glass repairs are greatly facilitated.
The final list of tools, equipment and materials required to carry out repairs is as follows:
- polymer
(other names: optical glue, resin). Available as part of any repair kit. The transparency coefficient is close to that of glass. It is stored in a liquid state, but once it is placed under direct ultraviolet rays, the polymer will begin to quickly harden. The edges of chips or cracks will stick together. There are universal polymers on the market that can be used for both chips and cracks. Based on their composition, they are divided into single-component/multicomponent. The optimal solution is to choose a polymer mixture with minimal hardening time. This way you can ensure maximum convenience of repair with minimal time investment; - injector and bridge
. They are used to ensure that the mixture fills the desired area as accurately as possible. Based on the material, the structures can be plastic or metal;
If you do not repair auto glass to order, then it is better to prefer plastic, as it is cheaper
- diamond drill bit and drill
. Use a drill with a speed control function and the ability to connect to the vehicle’s standard power supply. Instead of a drill, it is better to use a cutter on a flexible shaft from a drill (if possible); - pump
. It is used to pump out air from cracks. When pouring polymer, the tool creates additional pressure; - UV lamp
. Exposure to its radiation causes the glue to harden. When choosing a lamp, pay attention to the supply voltage and illumination area; - flashlight and mirror
. They must be used to accurately determine the boundaries of the defect and evaluate the effectiveness of the work performed. For example, you can determine the presence of air bubbles in the polymer; - scriber
_ A special tool used to remove small pieces of glass and expand the damaged area; - razor blade
(knife, scalpel). With their help, polymer residues are removed; - curvimeter
_ A measuring device used to determine the length of cracks. Depending on the length of each defect, the cost of repair work and the amount of polymer required are calculated; - protective devices
. You can use masks, goggles, gloves, rags and anything else that may be needed to do the job.
Eliminating scratches
The main cause of small scratches on glass is ordinary sand. It settles on the glass, wiper blades, seals and on the rag you use to wipe your car. Sand particles constantly scratch the surface. Therefore, visibility decreases over time. Polishing will help restore transparency to the windshield. Sanding is not recommended. Most likely, it will not be possible to carry out such processing on your own in a high-quality manner.
To polish the windshield, you can use folk remedies and professional materials. Before you begin removing scratches, wash your windshield thoroughly. Wipe it with a dry, clean cloth or a special glass cloth. Don't use newspaper.
GOI paste will help get rid of small defects on glass.
To eliminate small scratches with improvised means, use toothpaste or GOI paste. The best effect is achieved when using GOI paste. A small portion of the paste is applied to a clean cotton swab or piece of felt. Then rub in a circular motion on the problem area.
Polishing your windshield helps remove small, shallow scratches.
Reapply the paste and rub in a circle in the opposite direction. To speed up the process, you can use a sander with a felt attachment.
Automotive supply stores offer various types of polishes for polishing windshields. Before using pastes, we recommend doing a test polish on a small area of glass. Polishes contain various types of reagents and it is unknown how they will act on the glass surface.
After polishing, wash the glass thoroughly.
Deeper scratches are difficult to remove. In this case, there are two options: you need to come to terms with this state of affairs, or do something drastic and replace the windshield.
Read more: How to install silent locks on a VAZ 2105 2106 2107 and other classic models instructions with photos and videos
Contents of the repair kit
A car glass repair kit can be used professionally or for do-it-yourself triplex restoration. Their cost differs because a do-it-yourself car glass repair kit does not contain some tools, and devices that, however, you can do without. Some of them have a replacement in the home craftsman's arsenal. For example, a professional kit includes an ultraviolet lamp (crack filler polymerizes under the influence of ultraviolet rays). For these purposes, the home master makes do with sunlight in the radiation spectrum, which, as is known, contains a lot of ultraviolet radiation. The one-time repair kit does not include an electric drill.
An inexpensive kit for car glass repair consists of a bridge with a scriber (expander) and an injector, as well as three bottles of polymer of different consistencies that can be used to repair both cracks and chips.