Staff
The standard parking sensors used on some UAZ Patriot vehicles are manufactured by ITELMA. The system includes ultrasonic sensors equipped with an emitter and a reflected signal receiver. The distance to the obstacle is calculated by a microprocessor control unit. The information is displayed on a special board equipped with an indicator display. The distance to the obstacle is displayed in meters, additional indicators show the degree of approach on the left and right sides. Additionally, a buzzer is installed in the unit.
The sensors are placed in standard holes made on the rear plastic bumper of the car body. In the standard version, 3 sensors are mounted on the lower plane of the bumper; additional sensors are installed on the side of the cladding (they detect obstacles located at an angle to the body). All sensors have the same design and sensitivity.
How parking sensors work on Vesta
When the ignition is turned on and reverse gear is activated, Vesta's safe parking system is activated. This is indicated by a short high-pitched sound signal.
Active sensors send ultrasonic signals, which begin to return back from a distance of 100 m, pushing off from an obstacle. The control unit of this system processes the data received from the sensors and converts them into a signal or image in the Vesta cabin.
The “native” parking sensors of the Lada Vesta informs about approaching an obstacle with an intermittent high signal of increasing frequency. From a distance of 40 cm to the object, the sound becomes continuous.
The alarm unit issues messages not only when reversing, but also when Vesta is stationary. The sound, in addition to the distance to the obstacle, also indicates a malfunction of the safe parking system. The parking sensors turn off immediately when you turn off the reverse gear or turn off the car's ignition.
How to install and connect
Parking assistant installation algorithm:
- Mark the rear bumper of the car. Sensor installation diagrams and templates in jpg or tiff format are available for download on the Internet. When installing analogues instead of original parts, it is necessary to manufacture and install spacer rings (standard sensors have a larger diameter than alternative products).
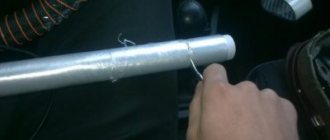
- Lay the connection cable inside the bumper; to install the cord, it is recommended to remove the plastic lining from the car. The sensors are connected to the harness using plugs.
- Mount the control unit in the standard socket located inside the rear right fender. To access the mounting studs, you will need to remove the plastic linings of the luggage compartment, which are held in place by screws and latches. The controller is mounted on studs with nuts.
- Connect the harness to the connector. When installing an alternative assistant, it is necessary to connect the control unit to the reversing lights (or the limit switch located on the gearbox).
- Route the connection cables to the indicator unit, which is installed on the instrument panel. The cord is laid through the car interior under the decorative trim of the sills and pillars. It is recommended to connect the cables with the standard wiring harness (plastic clamps). The display is attached to the surface of the instrument panel with double-sided tape or mounted on the trim elements of the center console.
Replacing the parking sensor unit
Replacement is made in the event of a block failure or if the driver wishes to install a parking assistant with visualization. The Passat B6 parking sensor unit (PDC) is a black plastic box, approximately the size of a pack of cigarettes. Among the data printed on the cover: VW logo, barcode and QR code, block number (in the photo taken by the owners of the Passat B6, article numbers of the format 3C0919283C, 3C8 919 475 and similar are visible).
Where is the PDC Passat B6
In cars manufactured earlier than 2008, the Passat B6 parking sensor control unit is located in the niche of the right rear fender. Access to it is not from the outside, but from the inside of the car, from the trunk. The driver will have to unscrew the trim.
Where is the parking sensor located? Photo source: https://www.drive2.ru/l/474902437732286523/
In the B6 Passat that came off the assembly line after May 2008, the PDC is located in the front panel on the driver's side, above the fuse box.
Replacement process
The first step is to turn off the car and make sure that all electrical consumers are turned off. Instructions for replacing the PDC for the Passat B6 sedan, released before May 2008:
- Remove the trim on the right side of the trunk. In the process, you will have to dismantle the opening cover, the fixing rings, the backlight and unscrew several bolts.
- Disconnect the connector from the 12V outlet. The socket will appear during the process of removing the casing.
- The PDC is held on by two pistons. It should be removed by squeezing the pistons with pliers. All that remains is to disconnect three connectors.
Progress of work on replacing the parking sensor control unit for Passat B6, released after May 2008:
- Open the cover of the fuse box located under the steering wheel.
- Disconnect the electrical connectors from the desired element.
- Pull out the PDC.
Installation occurs in reverse order.
What is parking sensors and why is it needed?
Parktronic is otherwise called parking assistant. This is a system that is equipped with ultrasonic sensors. The emitter emits a signal, after which the receiver records the reflected sound waves. The received information is processed in a microprocessor control unit. Data on the distance to the object is displayed on a display located in the cabin. The metric system is used to display distances. In addition, the device indicates whether an obstacle is on the right or left side. Additionally, the device is equipped with a buzzer.
In the UAZ Patriot, the sensors are built into special holes located on the rear bumper of the vehicle made of plastic. 3 sensors are placed on the bottom of the part. Additional ones are placed on the side surfaces. The design features and sensitivity of each sensor are the same. The device is installed on cars of various years of manufacture: 2014, 2015, 2020, etc.
Original equipment
The purpose of the device is to warn the driver about the presence of obstacles in a blind area. A safe parking system may contain a different number of sensors. Simple devices have 2 sensors, and the most effective and functional ones, in addition to 8 emitters, are equipped with a rearview video camera. The standard set includes:
- Control block. Serves to process incoming information and transmit it to a display device.
- Display (indicator). Informs the driver about the side of the obstacle and the distance to it. Emits a signal that changes in frequency as it approaches an obstacle.
- Sensors. Ultrasonic devices that emit and receive a signal reflected from an obstacle and transmit it to the control unit.
- Set of connecting wires.
Some models are equipped with a core drill bit for making mounting holes. Parking sensors work when reverse gear is engaged. It reports its status by sounding a signal and turning on the display. A working parking device will show the distance to the obstacle. If the sensors are covered with a layer of dirt or ice, a high-pitched buzzer will sound continuously.
How to install and connect the device
The car owner can independently install the device on a basic modification of the car. You can also replace the parking assistant on those vehicles that had the equipment installed during factory assembly. Installation is carried out according to the following algorithm:
- First you need to mark the rear bumper. If an analogue was chosen instead of the original part, you will need to install spacer rings. This need arises due to the difference in the sizes of the elements: standard options are larger.
- A cable is routed inside the bumper. To carry out the work, it is better to remove the plastic lining from the machine. Sensors are connected to the harness using plugs.
- In the rear right wing there is a socket into which the control unit will need to be built. To gain access to the mounting studs, you will have to remove the plastic trim from the trunk. Secure the controller using nuts.
- The harness is connected to the connector. When choosing analogues, you will have to connect the control unit to the reversing lights.
- An indicator block is placed on the dashboard. Cables need to be connected to this element. They should be connected to the standard harness using plastic clamps. Using double-sided tape, you can secure the scoreboard by mounting it on the finishing elements of the console located in the center.
Passat B6 parking sensors: common problems, causes of malfunctions
On forums, owners of the Volkswagen Passat B6 often complain that dirt or water gets into the parking sensors, as a result of which they stop functioning. You can remove the damage by cleaning the contaminated element. The situation will become more complicated if the chrome or paint covering the radar begins to warp. In this case, the element will need to be replaced.
Parking sensor. Photo source: https://idriver.by/avtorazborka/datchikparktronika/1005001-2096
With the arrival of cold weather, ice may appear on the inside of the trunk of the Passat B6 version 8 and older between the body and the trim. As a result, the parking sensor control unit will be surrounded by an ice crust. In this situation, the indicator on the dashboard begins to blink, there is no sound, or wheezing sounds can be heard. The control unit needs to be removed and dried, but there is a high probability that the unit will need to be replaced.
Another problem: the sensitivity of the Passat B6 radars is too high or low. In the first case, the parking sensor will respond to a non-existent obstacle, in the second, it will ignore the obstacle. Often the malfunction is due to incorrect settings of the control unit. A signal may be triggered for no reason if the radar is dirty or covered with snow.
Less often, failure of any part of the Volkswagen Passat B6 parking sensors occurs: the control unit, sensors, sound alerts, wiring connections and the wires themselves, a fuse, and an indicator backlight LED. You can check them using computer diagnostics.
Common parking assistant faults and troubleshooting
Failures are often observed in the contact groups in the cable connector. If the circuit breaks or the resistance changes, the device spontaneously emits a loud, sharp squeak. When the reverse gear is turned off, the car does not squeak. To fix the breakdown, you will have to disconnect the pads and inspect the contacting surfaces. Contaminants must be removed from the parts and a liquid-protective agent must be applied.
The device may break if the cable is damaged or torn. Inspect the cords and test them with a special electrical tool to identify problems. Use copper wire to replace damaged sections. To connect elements, purchase crimp tubes. The connection points are isolated and placed in places inaccessible to liquid.
If the sensor becomes dirty or covered with a layer of ice, operation is disrupted. It is better to replace the damaged sensor with an original one.
Sometimes the device detects obstacles but does not make a squeak. The buzzer or switching circuits may break. In such situations, vehicle owners should replace the products. Repair is possible only if you have experience in performing such work and special equipment.
The driver is always responsible for parking and maneuvering in critical situations.
The Parktronic system is an auxiliary system. It is not designed to replace the driver and cannot relieve him of his duty to remain attentive.
The Parktronic system can be switched off using a switch on the center console.
Sensors
The nearest zone is monitored by 6 sensors (1) on the front bumper and 4 sensors on the rear bumper.
To ensure full functionality of the Parktronic system, keep the sensors free of dirt, ice and snow at all times. To this end, clean the sensors regularly, but avoid scratching or damaging the sensors.
Warning indications
The driver is notified of the distance between the sensors and the obstacle via signaling devices.
The warning lights for the front area are located on the instrument panel above the driver's side air vent and above the center air vent.
The warning light for the rear area is located in the rear of the passenger compartment.
If the Parktronic system is turned on, the frame (1) on the indicator lights up.
The indicators are divided into 6 yellow and 2 red segments.
If the vehicle approaches an obstacle registered by the sensors, one or more segments light up depending on the distance.
Starting from the seventh segment, an additional intermittent warning signal is heard, and from the eighth segment, a continuous warning signal is heard for a maximum of 3 seconds.
Sensor range
in the middle approx. 100 cm
in the middle approx. 120 cm
At these distances the first yellow segment lights up. As the distance decreases, other segments light up.
Minimum distance between sensor and obstacle:
front corners approx. 15 cm
in the middle approx. 20 cm
One or both red segments are lit. In addition approx. A warning sound sounds for 3 seconds.
Further approach may result in the obstacle no longer being displayed (the segments do not light up).
Danger of accident!
The driver is always responsible for parking and maneuvering in critical situations.
Make sure that there are no people or animals in the maneuvering area.
The Parktronic system is an auxiliary system. It is not designed to replace the driver and cannot relieve him of his duty to remain attentive. Therefore, the driver must continue to pay attention to the vehicle's immediate surroundings when driving at low speeds.
When parking, pay special attention to objects located below or above the sensors, such as flower stands or a trailer tongue.
Such objects located in close proximity (approx. 30 cm) may not always be recognized by the system and may thus be damaged or cause damage to the vehicle.
The function of the Parktronic system may be impaired if the sensors are damaged or covered with dirt, snow, ice and especially sleet.
Interference from other ultrasonic sources, such as air brakes on trucks or air hammers, cannot be completely excluded.
It is possible that certain objects that may touch the front or rear of the vehicle may not be detected by the system's sensors.
Turning off the Parktronic system
The exterior mirror position switch is located on the center console.
3 - Control LED - lights up when the Parktronic system is turned off
Switching on occurs automatically if the ignition key is turned to position 2.
Driving with a trailer
If the power cable is plugged into a power socket when towing a trailer, the rear protection function is not activated.
If the power cable is disconnected, the rear protection function is reactivated.
The trailer adapter with 7-pin plug must be unplugged from the socket after disconnecting the trailer, otherwise the rear protection function will remain deactivated.
Malfunction of the Parktronic system
In the event of a malfunction, only the red segments of all indicators light up.
The cause may be an external ultrasound source or a dirty sensor. After cleaning the sensors, turn the electronic key in the starter switch to position 2 again.
In the event of a malfunction, additionally for approx. A warning sound sounds for 3 seconds and the control LED on the Parktronic system switch on the center console lights up. The system is shutting down!
Contact a Mercedes-Benz Service Center as soon as possible to have the Parktronic system checked.
Replacement of elements of the Lada Vesta safe parking system
The vehicle parking system is designed to detect obstacles located behind the vehicle and warn the driver of the distance to the obstacle with an acoustic warning signal.
The system detects obstacles using four ultrasonic sensors operating on the principle of echolocation, which are located in the rear bumper of the car.
The parking system includes the following components:
— control unit for the safe parking system;
— safe parking system sensor;
— alarm unit for safe parking system;
— wiring harness for safe parking system sensors.
The system is activated automatically when the ignition switch is in the “I” position and reverse gear is engaged, and a short high-pitched beep is heard to confirm that the system has been activated.
If an obstacle is in the detection zone, the system informs the driver about the presence of an obstacle with an audible signal.
The signal may be intermittent or continuous, depending on the distance to the obstacle. The car can move in reverse or stand still.
When the vehicle approaches an obstacle, starting from a distance of about 100 cm, an intermittent high-tone alarm sounds, the frequency of which increases as it approaches the obstacle.
The signal becomes continuous when the distance between the bumper and the obstacle is about 40 cm.
When reverse gear is engaged, the parking assist system is automatically deactivated.
Features of operation and operation of the safe parking system
After turning on the system, the control unit conducts a comprehensive check to detect defective sensors or other system malfunctions.
If a defective sensor or other system malfunction is detected, after the power-on signal, a continuous high-pitched beep sounds for 3 seconds, then:
— if the left (in the direction of the car) sensor is faulty, the system signals the faulty sensor with one short high-tone signal;
— if the central left (in the direction of the car) sensor is faulty, the system signals the faulty sensor with two short high-tone signals;
— if the central right (in the direction of the car) sensor is faulty, the system signals the faulty sensor with three short high-tone signals;
— if the right (in the direction of the car) sensor is faulty, the system signals the faulty sensor with four short high-tone signals;
- if the control unit is faulty, five short high-tone signals are heard.
After signaling the presence of a malfunction, the system turns off.
It should be taken into account that due to the characteristics of the propagation of ultrasonic waves, the system does not always detect dangerous obstacles:
— located near the vehicle below the sensors;
- absorbing ultrasonic waves - down clothes, soft snow, etc.;
- scattering ultrasonic waves - thin objects, pointed objects, smooth walls.
In addition, heavy precipitation and/or other conditions that cause distorted sensor signals may interfere with the sensors' ability to detect obstacles.
When the vehicle is maximally loaded, it is possible to detect low-lying obstacles that are not dangerous for a collision.
When operating a vehicle with a trailer, the parking system can be disabled.
To prevent malfunction, sensors should be kept free of snow, ice and dirt.
When cleaning sensors, do not use hard or sharp objects.
Removal and installation of components and parts of the safe parking system
Safe parking system sensor - removal and installation
We prepare the car for the job. We place the car on the lift. Raise the hood and disconnect the negative terminal of the battery.
We raise the car to a height convenient for doing the work.
Disconnect the sensor connector 1, Figure 1, of the safe parking system from the harness block 2 of the rear bumper wires.
We release the clamps of the holder 2, Figure 2, of the parking sensor and remove the sensor 1 of the safe parking system.
If necessary, squeeze the holder clamps and remove the parking sensor holder from the rear bumper.
Install the safe parking system sensor in the reverse order of removal.
When installing holder 2, Figure 2, of the parking sensor on the rear bumper, mark “A” should be in the upper position.
Replacement of the control and alarm unit of the safe parking system
We prepare the car for the job.
Raise the hood and disconnect the negative terminal from the battery.
We take out the two buttons for fastening the upholstery and unscrew the left upholstery 1, Figure 3, arches and sidewalls.
Disconnect block 2 of the rear wiring harness from block 4 of the control and alarm system of the safe parking system.
Using a T20 nozzle and a screwdriver, unscrew the two screws 3 of the self-tapping fastenings of the unit to panel 5 of the left sidewall and remove the control and alarm unit of the safe parking system.
Install the control and alarm unit of the safe parking system in the reverse order of removal.
Self-installation of parking sensors
In order for movement in a car to be safe, as well as comfortable and convenient, car owners have to install various devices on their car, the action of which is aimed at facilitating control. Parking sensors can also be classified as one of these devices; parking is much easier with it. Manufacturers try to equip their cars with all possible safety features. That is why almost every model of a modern car already initially has systems and devices whose operation is aimed at easy control of vehicles, including in the reverse position.
Parking sensors are installed on the car so that the driver can track all obstacles and objects that are in the “dead zone”. The driver is immediately notified in the form of an audible signal if the car is too close to an object that could cause a collision. Parktronic has a traditional configuration, which can include from 2 to 8 sensors, and the surveillance sector increases with a larger number of sensors. This system is equipped with an electronic control unit that processes and transmits information to the driver; without it, parking sensors become completely useless.
It is not at all surprising that modern parking sensors have a video surveillance system and are able to display images on a monitor. The operating principle of parking sensors is as follows: sensors send constant ultrasonic signals, they are reflected from the object creating an obstacle and sent back to the sensor, which in turn displays information on the screen. But the process of transmitting information passes through a control unit that processes the signal that comes from the sensor. Moreover, all this will take the parking sensors a matter of seconds.
Which device to choose
Service centers and dealers offer installation of various safe parking systems from Chinese “no-name” manufacturers to multifunctional systems of world brands. To select a suitable device, the driver must know some of the nuances of parking kits:
- installation location (front, rear or both bumpers);
- number of sensors;
- methods of warning about an obstacle;
- display devices;
- functionality and features of the system;
- manufacturers.
Most often, rear parking sensors are installed, since the space behind the car is poorly visible. However, when driving in city traffic during rush hour, it becomes important to keep your vehicle safe from the vehicle in front. If parking radars start working when you engage reverse gear, then the front ones start working when the speed decreases to 10-15 km/h.
Classic parking kits have 4 sensors. This is the optimal number, so it is not advisable to reduce their number, since the functionality of the device is reduced. An important feature is the method of conveying information about an obstacle to the driver. There are 4 types of alerts:
The form and functionality of the indicator used depends on this. In simple kits, a beeper is installed. It emits a warning signal. Many drivers are happy with this. More functional systems use LED displays. They reflect not only graphic, but also digital indication with an accuracy of 1 cm. No other information is displayed on the device.
Purchasing a device
Many car owners think that installing parking sensors on their own is very difficult, but this procedure does not require special knowledge and skills. By following the rules that make it easier to install the system, you can save a real amount. Moreover, if the car has a regular seat, then installing parking sensors will go without any difficulties.
If you have already chosen and purchased parking sensors, you can begin installing it. If not, when purchasing this device, pay attention to the systems that best suit your model and make of car.
The purchased device must include instructions, translated into Russian. If it is not there, then simply refuse to purchase this system, even if it has good technical parameters and a low price.
Problems with parking sensors on UAZ Patriot
If the presence of such a device on foreign car models, such as parking sensors, has not been an innovation for a long time, then the presence of this element on the UAZ Patriot SUV is of extraordinary interest. Modern SUV models are equipped with parking radars from the factory, which makes the UAZ Patriot more charged and able to park even in the most difficult situations. But sometimes it happens that the standard parking sensors beep constantly or periodically, what does this mean? This material is dedicated to the design of this product, as well as methods for troubleshooting parking sensors.
Rear parking radar
Installing parking sensors on a car
Before running to the car to quickly install the parking sensors, read the instructions that came with the system. Only after studying all the details can you proceed to the installation stage.
- First install the ECU (Electronic Control Unit). In most cases, the driver will place it in the trunk, but the choice of location for it is up to you.
- Select a location on the bumper to install the sensors. Sensors are located on both bumpers, front and rear. Take your sensors and mark a location for them. But before that, you should remove the bumper and prepare it for installation, just wash it well and let it dry. To mark, take a marker; an alcohol solution washes it well from surfaces.
- First, mark the locations for the sensors that are placed along the edges. Then divide the distance between the outer sensors by parts. The remaining two sensors need to be installed at this interval. The number of segments between the outermost sensors is equal to the number of sensors to be installed.
- The instructions should inform about the parameters for the location of the sensors; usually it is installed at a height of 50 centimeters from the ground. The holes must be drilled perpendicular to the bumper. This is to ensure that the sensor is installed horizontally and not obliquely.
- Use a router bit to drill holes for the sensors.
- Then install sensors on the outside and run the wires inside. Special retaining rings are used to secure them from the inside. Sensors must be installed from left to right and designated in Latin letters. To ensure that the sensors are securely attached, place them on glue or silicone.
All sensor wires must be assembled into a bundle, it will be connected to the standard wiring harness; for your convenience, it is worth collecting them and connecting them using insulating tape. If the sensors are installed on the bumper, the wires go inside the trunk and the bumper is secured in place.
Then connect to the electronic control unit, while relying on the sensor connection diagram. After that, connect them to the monitor. The display should be located in a place convenient for the driver. You can secure it with double-sided tape.
Before continuing to operate your vehicle as usual, test the parking sensors and their parking radar. This will make it possible to understand what objects it reacts to and what it reacts to falsely.
Replacing parking sensors for VW Passat B6
The parking sensors on the Passat B6 are located in the radiator grille and the lining of both bumpers. To remove the sensors from the radiator grille, you will need to remove the decorative element:
- Open the hood and unscrew the 6 upper and 2 lower screws.
- Disconnect the connector from the sensor.
- Press the element from the outside, holding it inside with your hand.
Similarly, remove the radars located on the bumpers.
Replacing parking sensors. Photo source: https://web.archive.org/save/https://www.youtube.com/watch?v=6cZe94M7hVA
The procedure for removing the front bumper trim:
- Remove the front wheels.
- To remove the lockers: unscrew 5 screws, slide out the back, unscrew the remaining 10 screws and completely remove the locker.
- Unscrew the 6 upper and 7 lower hardware, as well as 2 screws and 4 nuts securing the trim to the left and right wings.
- Disconnect all connectors and hoses.
Removing the rear bumper trim using the example of a sedan:
- Unscrew the 4 screws and unclip the 2 locker clips.
- Unscrew the 6 screws and press out the locking tabs (on both sides) at the bottom of the bumper.
- Remove the rear lights: open the service hatch cover in the trunk, disconnect the connectors, and unscrew the 2 nuts.
- Remove the 2 screws behind the rear lights.
- Remove the bumper trim and disconnect the connectors.
Installing parking sensors on the Passat B6 is done in the reverse order. The front and rear bumper trims and rear lights must be positioned while maintaining equal clearance with all body elements. The gap between the front bumper and the headlight should be 1.5-2.5 mm, between the rear bumper and the fender - 0-1.5 mm.
Installing parking sensors: eyes in the back of the head
The usefulness of such an electronic assistant as parking sensors is beyond doubt. We'll tell you what you need to know about it and help you install it correctly.
In large cities it is becoming more and more crowded - jokers say that the feeling of comradeship is intensifying. But not everyone masters the art of parking in tight spaces. These people need parking sensors to help them, which warns one and a half to two meters in advance that they are approaching an obstacle in front or behind the car. As you get closer, the device produces increasingly intense sound signals, and the display shows the distance to the object and direction.
Parktronic consists of several ultrasonic sensors (from three to six), a signal processing unit and an indication device. Kits sold for self-installation almost always contain four ultrasonic sensors (it would be more correct to call them transceivers of a directional ultrasonic frequency signal). The signal processing device is located under the trunk trim and is always connected to the wire leading to the reversing lamp. Therefore, the parking sensors start working only when the car’s transmission (manual or automatic, it doesn’t matter) is switched to reverse mode. Moreover, even the burnout of this lamp will not lead to a failure of the parking sensors.
Many devices, when detecting an obstacle, are limited to emitting a sound signal that varies in tone or frequency depending on the distance to the object. Devices installed on a car on a conveyor often work according to this scheme. At the same time, the distance from which warning signals are given for standard parking sensors depends on the settings. In most cars, the system starts beeping about one and a half meters before the obstacle, and, for example, in some Mercedes-Benz models it wakes up only half a meter. Universal parking sensors often have a visual indicator showing the approximate direction and distance to the obstacle.
Parking sensors or rear view camera?
| Low price, sufficient resistance to dirt; the receiving device can be very compact |
| The failure of one or more sensors is usually not indicated in any way |
| There is always feedback: if the camera is dirty, it’s immediately obvious, if it doesn’t work, it’s also visible |
| Requires installation of a display device |
What are they?
There are a lot of parking sensors in the market. Devices that serve exclusively the rear of the car cost from 1,000 rubles. And if the system also controls the space in front of the car, then the price starts at 3,500 rubles.
Previously, the rear unit was connected to the display device with a long wire that had to be pulled across the entire cabin. Today, many parking sensors use these elements to communicate via radio, which greatly simplifies installation, but also makes it easier on the wallet: prices start at about 2,500 rubles. In addition, there are models of parking sensors in which the display device can perform additional functions - for example, a trip computer.
If you don’t want to bother with the installation yourself, turn to professionals. A service that specializes in the installation of additional equipment will usually offer a model or two that is available. Work together with the cost of the device will cost no less than 4000–5000 rubles. If we are talking about installing parking sensors on a new car at a car dealership, prepare an amount that is one and a half to two times larger. The official installation has only one advantage: if any electrical problems arise during the warranty period, the dealer will not be able to refuse to fix the problem free of charge.
The best option is if the parking sensors are installed by the car manufacturer at the factory. The warranty on standard equipment is longer, and experience suggests that such systems are more reliable.
It often happens that parking sensors cannot be ordered separately - only as part of a so-called package, together with other equipment. And it's not cheap. For example, a package that includes parking sensors for a Volkswagen Polo will cost almost 40 thousand rubles.
How to connect and test
Power is supplied from the reversing light chip. If the display is installed on a dashboard or interior mirror, then the connecting harness is pulled along the floor of the car and raised along the A-pillar to the monitor. If the indicator is installed on the ceiling near the loading door or a beeper is used, there is no need to lay wires throughout the cabin.
After installation, the kit is checked for functionality. When the transmission is on, an object is brought to the sensors one by one until a signal appears. After this, measure the distance to the nearest sensor that detected the obstacle. The resulting value will be the boundary of the sensitivity zone.
To determine the minimum operating distance of the sensor, you need to install an object between the sensors (outermost and central) and put the Lada Largus in reverse mode. The distance at which the presence of an object is not determined will be the desired value. This method can also determine the “blind” zone.
If the parking sensors do not respond to the presence of objects in the work area, it is necessary to determine which element has failed. To do this, with the power on, lightly touch the sensor emitter. A working element produces clicks that can be felt by your finger. A malfunction may also appear in the connecting wires. Therefore, there is no need to rush to throw away the sensor without checking the integrity of the lines.
The functionality of the unit is checked by connecting a known-good sensor. If the kit reacts to objects, then the unit is working. Defective elements must be replaced as soon as possible, since the efficiency of the system is reduced, which can negatively affect parking results.