In order to heat the steering wheel you need:
1. piece of genuine leather 35?45 sq. cm (depending on steering wheel geometry); 2. enamel winding wire with a cross-section of 0.25 sq. mm, about 10 m long; 3. nylon fishing thread; 4. power button (I used the button with the “air conditioning” symbol) - 1 pc.; 5. 4-pin relay 904.3747-10 — 1 pc.; 6. pieces of wire with a cross-section of 0.75-1 sq. mm; 7. 5-10 A fuse - 1 pc.; 8. needles.
How to make a heated steering wheel in your car?
The work begins with removing the steering wheel. You must first mark the position of the steering wheel relative to the shaft in any available way (make a mark with a marker). I decided to thicken the steering wheel using heat-insulating film.
I placed foil on top of it to reduce losses due to heating of the steering wheel. To ensure that the thermal insulation film does not melt at the points of contact with the heating element. As a heating element, I chose copper winding wire with a cross section of 0.25 square meters. mm. The wire length is calculated based on the required dissipation power. We wrap the wire around the rim of the steering wheel: “at 10 and 14 o’clock” we take smaller steps (0.7-1 cm), because the hands will be located there and the heating of these zones will be enhanced; on the rest of the steering wheel the step is larger (1.5 cm).
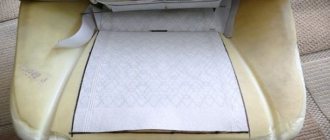
We bring out the wires through the “spoke” of the steering wheel to power the heating element. The most difficult thing is, of course, covering the steering wheel with leather. To do this, we get patterns: we wrap the steering wheel with cling film, and on top of the latter with masking tape, and draw seam lines on the steering wheel wrapped with tape. In this case, it is necessary to take into account the geometry of the steering wheel; an individual approach to the steering wheel of one shape or another is required. Now we use small scissors to cut the masking tape along the intended seam lines. We unfold the resulting pieces and place them on a sheet of thick paper, trace the outlines and cut out the final templates, which will serve as a pattern. We transfer the pattern to the leather, taking into account the fact that the transverse seams require a fold of 3-5 mm (add 3-5 mm to the transverse edges), and the longitudinal seams must be made with the skin stretched (remove 3 mm from the longitudinal edges). We sew the resulting pieces of leather with the transverse edges (“into a ring”). For transverse seams I used thinner thread (they are practically invisible), for longitudinal seams I used thicker thread. There are many automotive seams, they differ in the level of complexity, width, etc. things.
I decided to make the longitudinal seams in a “pigtail”. The pigtail seam seemed lighter and neater to me. But this is a matter of taste... Longitudinal seams are made directly on the steering wheel. When making stitches, you need to be careful not to catch the wire and tear it. Then we place the steering wheel in its rightful place and begin assembling the power circuit.
Assembling the power circuit requires knowledge of TOE (electrical engineering) and does not present any difficulties.
My car has a lot of additional modifications that require electrical power, so I initially laid a wire with a cross-section of 2.5 square meters along the “left side”. mm (load up to 30 A) and made taps from it for “additions”. On each “tap” there is a fuse selected according to the condition of detuning from the load current. I do not recommend connecting all the modifications to the cigarette lighter, because... the load capacity of its circuit is limited. The power button was placed “next door” to the button for turning on the heated rear window and powered in parallel. The control relay is located on the steering shaft bracket on one of the bolted joints, in close proximity to the button and the load (less wire consumption).
The resistance of the heating element was 3.3 Ohms, therefore the load current is 3.64A, power dissipation is 43.6W. Installed a 5A fuse. Where the wire will be wound and unwound on the steering shaft, it is better to reinforce the wire in the form of a “braid”, this greatly reduces the likelihood of wire breakage under the influence of mechanical forces. I've been driving for about a year and the “system” hasn’t let me down yet.
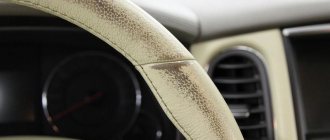
It works great, heating to a warm state occurs quite quickly (less than 2-3 minutes). In addition, the leather-covered steering wheel is pleasant to the touch, slips less and looks beautiful. But the main thing is efficiency.
Issue price: approx. 500-600 rub.
Thank you for your attention!
In the winter season, even a working car interior heating system is not able to provide pleasant tactile sensations from the steering wheel. Heating the steering wheel can correct the situation. Let's consider installing the kit, making the heating yourself, and the advisability of purchasing a braid with a built-in heating element.
SHOULD I BUY A KIT OR MAKE IT MY OWN HANDS?
The desire to retrofit your car with a heated steering wheel can be realized in 4 ways.
To choose your own path, you just need to estimate the cost of the finished kit, the elements separately, and the time costs for installing a heated steering wheel using each method.
BRAID
Advantages of installing heated braid:
For the apparent convenience you will have to pay with serious disadvantages:
- It is impossible to turn on the heated steering wheel while driving. The power cord going to the cigarette lighter will restrict the movements of the steering wheel, which makes it difficult to control the car and is fraught with an accident;
Do you know why you shouldn’t warm up your car while idling?
- minor effect. When turned on for a short time, the steering wheel will heat up very little and quickly release heat after removing the braid. We do not recommend driving constantly with this kind of accessory on the steering wheel. Due to its versatility and manufacturing features, the heated braid is poorly fixed to the steering wheel, which may prevent emergency steering in case of a skid;
- the braid, wire and adapter for powering the heated steering wheel will have to be constantly stored in the car.
TOOLS AND MATERIALS
To install the heated steering wheel kit you will need:
- soldering iron, flux and some solder;
- tool for removing the steering column trim, steering wheel. You can find detailed removal instructions in the repair and operating manual for your vehicle;
- a feather drill for a hole in the steering wheel spoke for a thermal switch;
- universal glue "Moment". The glue will not allow the conductive fabric to wrinkle or peel off from the rim when connecting and re-stitching.
INSTALLATION
- Remove the negative terminal of the battery.
- Remove the steering column trim.
- Touch any unpainted metal part of the vehicle to remove excess static electricity.
- Unclip the airbag module and then disconnect the airbag connector. The airbag should be stored and transported with the trigger side facing up.
- Align the wheels by placing the steering wheel in the center position.
- Loosen the steering wheel nut. The nut must be completely unscrewed after the steering wheel has been removed from its seat.
- Spread and remove the old steering wheel trim.
We install heating
The kit for installing a heated steering wheel must include slip rings that connect the parts of the carbon heating tape. It is necessary to cut recesses in the rim for the slip rings. The most convenient way to do this is with a cutting disc and an engraving machine. Cut the same grooves for laying wires in the rim and steering wheel spokes.
Installing a thermostat is necessary to open the heating circuit when the set temperature is reached. Don’t forget that the temperature sensor also comes with wires, for the exit of which you need to cut grooves in the spoke. If you assembled the installation kit yourself, we recommend using normally closed thermal relays with an operating temperature of 45º.
For effective operation of the temperature switch, the carbon heating tape should be laid in such a way that it fits closely to the sensitive element of the thermostat. To fix the tape, apply a small amount of glue to the rim and knitting needles. After assembling and connecting the power, all you have to do is check the functionality of the heated steering wheel, sew up the old braid or send the steering wheel to be reupholstered.
When installing, the cable must be in the central position! Otherwise, you risk breaking the contact tape when turning the steering wheel completely.
MDCF WIRE HEATING ELEMENT
Installation involves wrapping heating wire around the steering wheel rim. After removing the old trim, wrap the steering wheel with wire, using a pen or felt-tip pen to mark the expected location of the heating coils. Then, using an engraving machine or a stationery knife, make grooves in the rim for laying the wires. The grooves must be of such depth that the heating wire lies flush.
Position the thermostat at 45ºC in the steering wheel spoke. To reduce the response inertia, the turns of the heating wire must pass in close proximity to the sensitive element of the temperature switch. For better heating in the area of the correct position of the hands on the steering wheel, we recommend reducing the distance between the turns. To prevent the heating element from moving during the process of covering and connecting power, wrap the rim with stretch film. The process of making an excellent heated steering wheel with your own hands is demonstrated in the video.
POWER CONNECTION OPTIONS
- Your vehicle is equipped with a steering harness that has at least one free track. The option is not bad, but the conductivity of one conductive ring will not be enough for the steering wheel heating to work effectively. The solution to the problem is to install a suitable cable with a large number of free contacts. You can also disassemble the case and install a separate tape with a large number of tracks.
- A cable with 2-4 free contacts is installed. An ideal option, since all you have to do is calculate the load, connect the steering wheel heating to the standard cable and display the power button.
- The design of the steering column does not imply the presence of a cable as such. The video shows how to make a heated steering wheel using a slip ring and a copper-graphite brush.
Connect the negative terminal of the heating to the metal part of the steering wheel. The positive terminal through a cable (washer) must be powered from any thick wire on which + is found after turning on the ignition. Place a fuse of the required rating as close as possible to the power supply point. The thermal relay is installed in the open circuit of the heating power supply.
HOW TO CALCULATE THE LOAD
The permissible power of the steering wheel heating will depend on the amount of current that the contact ring of the cable can transmit through itself. How to calculate current consumption? Measure the resistance of 1 m of the heating element with a multimeter. The connection diagram for the heated steering wheel assumes the use of separated heating elements. Therefore, the formula for calculating the total resistance will depend on whether a parallel or serial connection is used (most often a serial connection is used).
According to Ohm's law, U=IR, therefore I=U/R, where I is the current consumed, U is the voltage of the on-board network (recall that a working car generator produces about 14 V), R is the resistance of the heating element. Based on the current value, select the required wire cross-section and the fuse rating of the steering wheel heating circuit.
If you doubt the calculations, disassemble the cable and connect the heating from the battery. Tactilely or using a thermocouple, evaluate the degree of heating of the loop tracks before the thermal switch breaks the circuit. Also use a multimeter in ammeter mode to measure the actual current consumption. We hope you know how to use a multimeter?
There are many things in a car that, at first glance, do not in any way affect the performance of its basic functions, but are nevertheless in demand by many drivers. Often they have, let’s say, not the most decisive influence on driving and traffic safety. Such conveniences include a heated steering wheel, which you can do yourself.
Installing a heated steering wheel, why is it necessary?
There is no doubt that this is a purely seasonal option. Yes, and you need it in the first twenty minutes after getting into a cold car, for example, after parking at night. But nevertheless, the heated steering wheel option is present in many business class cars, not to mention premium cars.
. You just need to try to drive the car several times at a temperature of minus thirty degrees in order to applaud such an improvement.
It would seem that a person is protected from frost; he has a fur coat, gloves and other warm things. But driving a car with gloves is very inconvenient for many. In addition, we must take into account that these are not the gloves that racers use, and it is difficult to properly feel the steering wheel in them. And they slide, which can simply lead to errors in driving. Frozen hands may well provide the same result.
This problem can be solved quite simply - you need to use a heated steering wheel, and then no cold weather can prevent you from driving. You can find out more information about this after watching the video.
Required tools and materials
Of course, such a function will not always be used, since in the warm season there is no benefit from it. However, if you want to feel good in any conditions, then you simply need to make a heated steering wheel with your own hands. In addition, this does not require any rare or expensive tools, and you can find all the materials and parts at any automobile market or store.
So, to connect this option you need to purchase:
- Steering wheel (the original can be left as a spare if your experiment is unsuccessful);
- A kit for installing heated seats, called “Emelya Gorynych”. In addition, you will need to buy a relay, which is used to regulate the temperature and prevent excessive heating;
- Sharp knife or scalpel, scissors;
- Insulating tape, 2-sided tape;
- Sealant (the paste type is best).
What is needed to ensure a heated steering wheel?
In fact, implementing such an option is quite simple. By saying this, we mean the content of the work, but not the possibility and quality of its implementation. Installing a heated steering wheel on a car means:
- placing a heating element on its surface;
- using a special button to turn on the heated steering wheel mode;
- using a sensor to monitor the temperature of the steering wheel surface;
- manufacturing and attaching a protective device for the heating element to the steering wheel. This may be a braid or leather case;
- connecting all elements into a single circuit and connecting to the on-board network.
All these works are quite simple, which allows us to talk about the possibility of making a heated steering wheel with your own hands. There are several options for how to do this. The difference between them lies in the type of heating element used, control circuits and options for connecting the heating to the vehicle's electrical system. In any case, to perform such work you do not need specially equipped premises or complex tools, and it can be done with your own hands in an ordinary garage.
DIY crafts for car enthusiasts
I am posting a detailed description of how to make a heated steering wheel and cover the steering wheel with leather with your own hands! But if you don’t need heating, you can just cover it with leather!
So, let's begin:
1. Let's make a sketch! Take cling film and cut off a piece of the roll about 5 centimeters!
We cover the steering wheel with cling film in those places where there will be leather! First remove the airbag!
And cover the top of the film with tape!
On the resulting cover made of film and tape, draw the cut points and cut with a knife in these places!
So the sketches are ready, we align them and transfer them to cardboard, but we remove five millimeters from each of the four resulting sketches in length (where the pieces will be sewn together), and on the contrary, we add five millimeters in width!
2. Now we cut the whole thing out of leather (in my case, from leather, since I couldn’t find any leather) and sew it together!
3. Let's start heating! I stole the heating from a Chinese heated seat (broken), repaired it and evenly wound it around the steering wheel with moderate tension! Now the problem is how to connect it.
We disassemble the steering wheel and see that the signal and the airbag are connected using a tape twisted into a spiral, which is located in a plastic case!
Let's take it apart and breathe a sigh of relief! There are 6 tracks on the tape, but only 4 are needed for the airbag and the signal, which means two are free (AvtoVAZ people knew it :))!
So we use them. We solder the wires to these contacts and put everything back together.
We put it on the car and connect it via a relay and a fuse. I decided to make the power button right on the steering wheel (more precisely under the steering wheel, according to class=”aligncenter” width=”352″ height=”474″[/img] 4. Now you can continue with the skin! I wrapped the heating in a couple more layers of cling film , so that moisture does not get in and the uniform arrangement of the wire does not shift!
We pull the resulting cover over the steering wheel and check whether everything is in its place; if not, we cut it where necessary. As they say, measure twice, cut once! By the way, the cover turned out to be much smaller than the steering wheel, but that’s how it should be.
Let's stretch, don't be afraid, leather has stretching properties! When everything is adjusted, we machine sew along the edge of the entire cover (but this is only necessary if you chose a seam like mine).
5. Now comes the most painstaking part! Tighten the cover at the joints using one of the existing seams. Here are some of them (I chose sport).
PS The skin is elastic so some errors can be tolerated. I recommend strong threads, I used silk ones, but they sometimes broke, you need thicker ones, and it’s better, of course, to use real leather!
I’m very pleased with the result, when it’s -15 outside, you get into the car and while it’s warming up, in one or two minutes the steering wheel becomes warm. Warms up to 40-50 degrees! It’s very convenient when your hands are cold to warm them on the steering wheel, and not lean them against the stove nozzles! and throughout the whole journey it’s pleasant to hold on to it and don’t want to let go!
The steering wheel turned out to be waves because of the wire, at first I wanted to get rid of it, but when I tried it, it was even more convenient! But if you want a smooth steering wheel, then you can seal the voids between the wires with fabric insulation!
Well, that's it!
Author; Vadim Leonidovich Lugansk, Ukraine
Popular;
- DIY steering wheel tuning
- DIY decorative steering wheel
- We make heating of the fuel filter with our own hands
- How to start a car if the battery is dead, a simple method.
- How to re-tighten the steering wheel, in detail, a guide for beginners
- DIY headrest pillow.
- How to avoid falling asleep while driving
DIY front in Subaru Legacy B4
How can you make a warm steering wheel yourself?
Before deciding how to make a heated steering wheel, you need to understand for yourself what it should be like. This means that it can be implemented in several ways.
Heating when parked
This is the simplest, but also limited in capabilities, do-it-yourself option. To do this, a special pad is installed on the steering wheel, which is connected to the cigarette lighter with a cable. It is clear that you cannot drive with such heating. It works while the engine is warming up after starting in a parking lot. Considering that in winter this takes quite a lot of time, the steering wheel has time to warm up, and you can drive calmly, the steering wheel will be warm. Moreover, the heater will subsequently ensure a normal temperature in the cabin, and heating will no longer be needed. Similar work is performed using a special kit available for sale. The video allows you to understand how it looks on the car and how it works. Let us clarify once again - this option is only possible while parked, it cannot be used while driving!
Universal option
In this case, to heat the steering wheel, you must do a full range of work yourself, namely:
- The steering wheel has been modified, it is necessary to place heating elements on it;
- a heating control button must be installed;
- a leather cover or braid is attached to the steering wheel, hiding and protecting the heating elements from damage;
- The heating control and its elements have been connected to the vehicle’s on-board network.
Flexible thermal tape can be used as a heating element that provides heating.
how it is located on the steering wheel is clear from the photo above
Or ordinary nichrome wire, to place it on the steering wheel you will need to make special grooves and then fix the wire in them with glue. The whole thing is covered with plastic wrap on top; food film can also be used. Then braiding is done or leather is tied. The video will help you understand how to do it yourself. The only thing that needs to be taken into account is the production of templates for cutting leather. Connecting to the on-board network is carried out in different ways, everyone determines for themselves how it will be convenient for them. A button is provided to control the heating; it can be installed in any convenient place. This is how you make a heated steering wheel with your own hands. Depending on your desire, the control circuit is additionally equipped with a temperature sensor, then it will turn on and off automatically.
Equipping a car with such an option is a completely affordable task and can easily be done with your own hands. This does not require any special equipment or tools, and it can be done in any conditions. But after the heating installation is completed, driving a car in cold weather does not cause inconvenience and indirectly affects traffic safety.
2. Next you will have to draw a little. Take a marker and mark the grooves into which the heating elements will later be laid. I pulled out almost 7 meters of wire from my Emelya. Make the markings at your own discretion, you can do it according to my example, see photo, step approximately 2-3 cm.
3. Once the lines are drawn, it's time to cut grooves for the heating element. For this I used a sharp knife, if anyone has a drill you can try it, it seems to me that using a suitable attachment it will turn out no worse than mine and perhaps much faster.
4. The wire, in principle, should hold on anyway, since after heating is done, the steering wheel will be covered with leather. But I still recommend placing the heating element on glue to be sure, so to speak. In places of turns or bends, you can fix the position using electrical tape. When everything is dry it can be removed.
5. After laying the wire, I covered everything with sealant, this is so that the grooves are not felt under the skin. Fill the grooves, then you can remove the excess with a knife.
6. When all the elements are laid and sealed with sealant, you can find out how to do this in one of my older articles.
7. When the heated steering wheel is ready, it must be connected to power.
Thermal elements for motorcycle handles
The simplest and most economical way to make the handles of a motorcycle heated is to install electric thermocouples on them. The kit includes 2 plate covers with wires riveted to them, a switch, two heat shrink tubes and a small roll of electrical tape. Such sets from Chinese, “Carprie”, “Sanborns”) with a heating temperature of 30÷50˚C depending on the power (10X2, 12X2 or 15X2 W) and the switch device (2 or 3 positions) now cost 230÷690 rubles.
Installation (in accordance with manufacturers' recommendations) is quite simple:
- We wrap thermoelements around the standard steering wheel handles.
- We secure them with the electrical tape included in the package.
- We put heat-shrinkable tubes over the installed pads.
- We warm it with a hairdryer.
- We attach the switch in a convenient place (for example, to the left mirror mounting bolt).
- We secure the wires from the heaters and the switch to the steering wheel using plastic clamps.
- We connect the red wire to the positive of the battery, and the black wire to the negative.
Attention! In the instructions, the manufacturer recommends connecting the positive wire to the ignition switch contacts. Significant current consumption (up to 2.4A) can lead to burnt contacts.
- Turn on the switch and check the operation of the heaters.
Important! After installing the right heater, it is necessary to leave a loop of the connecting wire to ensure free movement of the throttle handle. If, after releasing, the handle does not return to its original position, the wires need to be corrected, and only then secure the wiring.
Low power products (10X2 W) can be installed on mopeds and scooters.
For those who fundamentally do not want to change the appearance of their bike, we advise you to purchase similar products from Heat Demon. The set (power 20X2 W, with a three-position switch) costs 3000÷3500 rubles. The fundamental feature of these devices is the presence of durable and thin self-adhesive thermoelements. Installation Features:
- Carefully remove the standard rubber handle linings.
- We clean and degrease the places where they are attached.
- We attach self-adhesive thermoelements to the steering wheel.
- We install the standard handle covers in place.
For owners, Harley-Davidson has specially developed a set of metallized thermocouples that are inserted inside the handlebar tube. However, the cost of such a kit with a 4-position temperature controller and a power of 20X2 W is 15200÷18500 rubles.
Now let’s talk about how to connect our heated steering wheel
There are several options:
- Use clockspring if there are “extra” wires.
- Using a contact pad, using the principle of so-called sliding contacts.
The first option didn’t suit me, because I didn’t have any extra wires, and besides, I didn’t really want to disassemble the cochlea solely for the sake of stuffing two wires in there. In short, I decided to connect a homemade heated steering wheel as follows:
- I ordered two copper rings 1.5 mm thick from a turner I know, then threw on them, as you understand, “+” and “-”.
- Using a soldering iron, I connected the wires to them and connected them through a relay to the battery. In order to avoid problems due to the heating being left on overnight, I decided to make the relay turn on only when the ignition is on.
- Using double-sided tape, I secured the rings to the clockspring.
- I poured epoxy glue between the rings to prevent shorting.
- I left one contact at “plus”, took the second negative one from the steering shaft, and in the end one remained unused.
- I made a contact opposite the rings and placed it in the steering wheel; to do this I had to drill a hole in it.
- Then I insulated everything properly to prevent contact with the steering wheel.
- Then I decided to install a spring so that the contact was constantly pressed against the rings. To do this, I used a thin plate; on one side it is pressed against the steering wheel, and on the other it presses on the contact.
Something like this... Now all this stuff needs to be installed in place for further use.
Basic principles of heating installation
90% of success depends on the motorcycle model and the selected heating system. Manufacturers do not skimp on installation instructions. On the market you can easily find kits both universal and highly specialized for specific bikes. Different prices. Moreover, there are heating systems that are inserted inside the steering wheel tube and thus heat up from the inside. If your choice falls on them, then pay attention to one detail. A steel steering wheel holds heat better than an aluminum alloy steering wheel. Such systems are a rare choice, but they also have their place. Although it causes mistrust among many, because the heating must work in such a way that the heat reaches the driver through the tube, grips and gloves, and this costs energy.
First, the standard handles are dismantled and a place is prepared for heated grips. After removing the previous ones, glue and even rust may remain. Next you need to try on the system and calculate the position of the wires. Many people hide the wires inside the steering tube. Pay special attention to the stroke of the throttle handle. It is important to leave a gap for turning it so that the wire does not interfere with work. It’s easy to check the setting: if after unscrewing the gas the handle does not return, then the wire length is incorrect. With short-stroke handles the principle is the same.
A control panel, also known as a switch, is mounted on the left side of the steering wheel. It differs in functionality for different models and has several modes depending on the manufacturer.
Technically, it is recommended to connect via a relay so that the heating only works when the motorcycle is started. This is done to ensure the safety of the battery, even if you forget to turn off the heating; without the ignition, the system should not consume energy.
To find the right terminal for connecting the relay, it is recommended to use a tester - a multimeter. With the ignition off, you need to measure the voltage on all available contacts. Those points where +12V is fixed are not suitable. In the place where there is voltage when the ignition is on and not when the ignition is off, this is the best option for connecting a relay. The mount is made next to the battery compartment so that it does not interfere with the installation of the battery.
“What might you not know about a motorcycle battery?”
What else should you consider when choosing heated grips?
- Heated grips are selected according to the diameter of the handlebar tube
- The model is designed for small-capacity equipment and has lower consumption
- Motorcycle models with cruise control are not always compatible with heated grips. But the manufacturer always warns about this.
Impression:
- Heating the steering wheel with your own hands is a very real task if you approach it wisely.
- The heating process is quite fast and, most importantly, uniform, literally in 2-3 minutes the steering wheel is quite warm.
This option is found in many trim levels of different modern car models. However, what if your car was released earlier and there is no opportunity to enjoy such a simple but pleasant feature? It turns out that you can install such a heating element on your own, and it’s always nice to get pleasure from work done with your own hands.
So, detailed instructions on how to make a heated steering wheel are given below. For this we need:
- the steering wheel itself;
- heating kit, which is used to heat the seats;
- thermal relay;
- glue;
- stationery or any other sharp knife;
- sealant;
- insulating tape.
Heating installation process
Many car enthusiasts simply do not know how to make a heated steering wheel on their own; to do this, you just need to approach it with responsibility and seriousness of intentions. The entire insulation process does not take much time, but there are processes where you need to be as careful and precise as possible.
View gallery
- First, remove the steering wheel, there is no point in this topic now telling you how to remove the steering wheel, because each car is unique, and no one can tell you how to do this better than the operating instructions.
- Now let's start the drawing lesson. At this stage, using a marker, you need to draw lines where the heating elements will be placed. It all depends on your imagination and the length of the materials so that it is enough for the entire steering wheel.
- You need to take a sharp knife and make cuts according to the previously drawn pattern on the outside of the steering wheel.
- We make the winding, at this stage you need to secure all the wires well and glue them where necessary. We wrap the bends with electrical tape.
- Heating the steering wheel with your own hands at the first stage is almost complete. All that remains is to take care of the driver’s comfort and use sealant to cover all the unevenness of the steering wheel.
You can also cover the steering wheel with leather or any other material that matches the interior of your vehicle. To cover the steering wheel with leather, you need to use a cardboard pattern, which will consist of several parts. Then we cut out the pieces of leather we need using cardboard, put them on the steering wheel and carefully sew the cover on the inside of the steering wheel.
View gallery
How to do the work yourself
An electric heated steering wheel is made approximately as follows. First you need to remove the cover, and then remove the steering wheel itself from the column. Using a sharp knife, carefully scratch the groove into which the electrical wire will be laid. In order to keep the car steering wheel as warm as possible, it is advisable to lay the wires across the wheel in smooth circular movements. Once the grooves are outlined, we have to cut them down to the base using the same knife.
It is necessary to ensure reliable fixation of the wire in the steering wheel, and therefore we will additionally attach it with glue. The places where the steering wheel spokes are located are the most difficult in this regard - it is best to also use insulating tape here. Once the glue has dried properly, it can be carefully torn off. We will also apply a layer of sealant on top, with which we will carefully cover the grooves with the wires laid in them. All that remains is to re-cover the steering wheel with leather or put the old cover back in its original place.
In order to connect such a unit to the battery, we need a free contact pad. We will attach a plus and a minus to a pair of copper rings, respectively. Electrical wires are soldered to them, and then through a thermal relay we connect it all to the battery. To prevent the possibility of a short circuit, pour a little epoxy glue onto the rings between the contacts. It is also important to provide for, or rather, eliminate the possibility of battery discharge if the heating does not automatically turn off at night.
Other alternatives to installing a heated steering wheel
You can purchase such a kit, the price of which will be significantly lower than a ready-made one from auto stores, for a relatively small investment. However, the wheel heats up in a matter of minutes, and in cold weather your hands simply reach out to feel the heat emanating from the steering wheel. After this, you will no longer be able to imagine using the car any other way.
For those who do not want to bother with such work, there are specialized automobile services or service stations, where such a service can cost from 8,000 rubles and more. The most difficult thing is the stage of installing hidden wiring and organizing a properly executed connection of the heating function. To do this, you can use various options: this can be the organization of a push-button output, or power supply from a car cigarette lighter, or connecting the steering wheel to an existing system for heating seats in the cabin.
After the heating system is installed, the steering wheel is reinstalled. It is attached back to the steering column, and it is still necessary to check the functionality of the assembled electrical circuit. This system includes several components:
- a pair of heating steering elements;
- fuse;
- switch;
- wiring.
A ready-made heated steering wheel is offered by automakers such as Renault, Nissan, Citroen, Chevrolet, Toyota, and even then not in all trim levels and not for all models. You can order this service as an additional service from dealers of these brands. However, if you are not the proud owner of a car with this function, you will have to contact a professional auto electrician, or do all the work yourself. All that remains is to carry out a high-quality reupholstery, and you can demonstrate the results of your work to surprised friends and neighbors in the garage.
Whether such heating is needed in a car, let everyone decide for themselves. Some people don’t want to bother and prefer to put gloves on their hands while waiting for the interior to warm up. But for other drivers, the idea may seem interesting, and implementing it is not as difficult as it might seem at first glance. We will be glad if the information brought you theoretical and practical benefits. For those who like to modify their car themselves, articles about
Is steering wheel heating necessary and important?
Today, a car is a complex device, a product of more than a century of human activity, which combines all the best technical, scientific and information solutions of mankind. These are mechanical, hydraulic, electrical and electronic systems, components, assemblies and solutions that have been created, tested and proven, without exaggeration, for decades.
Today's modern car is, in addition to all of the above, a huge range of information computer technologies and programs. In a modern car, you can count from seven to eleven electronic control units, that is, small computers, the presence of which in the car most of us are not even aware of. Each of them is responsible for the operation of some of its most important systems in the life of the car (engine management system, anti-lock braking system, vehicle stability control system, audio preparation, immobilizer, climate control, parking sensors, and so on). All the options of a modern car can be happily listed ad infinitum, but this should probably be a separate topic.
And, probably, it will be quite difficult to imagine a modern car, even a budget class one, without such additional options as heated mirrors, heated seats, heated rear window, climate control, light and rain sensors, alarms with automatic start, air conditioning, and so on. . Some ten fifteen years ago these were ultra-modern new products, but now they are our way of life. A modern car is designed for humans, and all these functions help make our lives more hassle-free, functional and simple.
An absolute novelty in the field of additional car equipment is the rather strange and one might even say wonderful function of heating the steering wheel, or, as is correct, the steering wheel of the car.
Some of you have probably already thought to yourself about And someone thoughtfully said: “Wow! Quite a useful and functional option! I would definitely use it in my car!”
Here, of course, the right to choose is given to you – consumers (in our situation, motorists), but you must admit, it’s quite unpleasant to get into a car chilled from the cold in a parking lot on an early frosty morning, and even to take hold of a cold, one might say icy steering wheel! Well, who needs this? Don’t forget, the car was created for man, not man for the car, although fifteen years ago everything was the other way around.
If you look at this issue from another, more optimistic side, then after starting the car engine in the morning, its interior quickly warms up under the influence of the interior heater or simply the stove, and accordingly becomes not as cold and disgusting as it seemed at the beginning. The same goes for the steering wheel! And in general. If you turn the cold steering wheel a little, then nothing really terrible will probably happen. The choice is yours! Good luck on the roads!