Removing wheels
If possible, start by mounting the bike. It should be installed on the left side when removing the rear wheel. Do not stand the bike upright without the rear wheel as this may damage the rear derailleur.
1. Rear Wheels : Set the derailleur to the outer gear and inner front wheel chain. This will loosen the chain and make the wheel easier to remove.
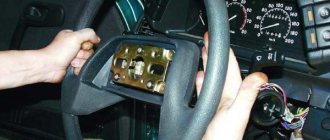
2. Disconnect the brake rim, if equipped. The release mechanisms of typical MTB and road brakes are shown below.
Note : With disc brakes, pad release is not required. Also, with hydraulic disc brakes, do not squeeze the brake lever when removing the disc from the bike. Otherwise, the pads will close and you will have a very difficult time putting the wheel back on the bike. Use a specially designed spacer such as PP-1.2 if necessary.
3. Disconnect the wheel from the frame:
- Eccentric mechanism for securing wheel axles : Pull the lever of this mechanism outward to the end. If necessary, loosen the quick release adjusting nut to remove any protrusions on the fork end.
- Straight Axle : Some functions are similar to the quick release axle for securing wheel axles - pull the lever outward to disengage and twist to loosen. Some straight axles are equipped with a special device that is supposed to weaken the axle. However, other simple levers that are needed to loosen or tighten are not used.
- Solid axle : On wheel axles with nuts, both nuts must be loosened from the outside.
4. On the front wheel - simply point the wheel down and out of the fork. For rear wheels, pull the rear shifter to allow the cogs to clear the chain. Lower the wheel, pointing it down through the brake pads and forward to clear the chain and shifter.
Some gear shifters have a clutch mechanism that makes them difficult to turn. They have features that make it easy to remove the wheel.
- To engage the SRAM shifter, move the bottom roller forward to loosen the chain and press the button to lock it in place.
- To engage the Shimano gearshift mechanism, you need to find the on/off lever and move it to the non-operating position.
Rear derailleur
The gear shifter is an important part of a multi-speed bicycle. Thanks to this component, it becomes possible to move in extreme conditions, which include moving against the wind, climbs, and poor road quality. The transmission unit must cope with all these problems. The quality of the ride and the safety of the cyclist depend on the smooth operation of the speed switch. This skill is very useful, and every bike owner should learn how to adjust the gear shift themselves. Every cyclist can adjust bicycle gear shifters independently. You need to study the theory in detail by reading the instructions, or using the advice of experienced bike owners.
Before adjusting the derailleur, you need to adjust the rear derailleur. The entire adjustment process will be greatly facilitated by placing the bicycle in the correct position (wheels up). This way, all the necessary details will be visible, and getting to them will be much easier.
Wheel installation
The wheels must be properly installed on the bicycle frame. Misalignment can cause problems with shifting and alignment of the bike. If the wheel is not securely fastened, it may fall off while riding and injure the cyclist.
Solid axle bushings use nuts on the axle on the outside of a pad on the frame. The axle nut has a washer built into it or a separate washer. If the washer has teeth or knurls, they are connected to a recess to secure the wheel. Lubricate the threads on the axle when the wheel is mounted on the bicycle.
It is often easier to install the front wheel when the bike is on the ground. When placing the bike on the ground, the axle must be completely in the pad on the frame.
1. Make sure that the wheel cam lever is in the open position and that its brake mechanism is open.
2. Install the wheel into the frame pad. Make sure the hub is fully seated in the frame or fork.
3.Tighten the wheel:
- Cam mechanism for securing wheel axles: Tighten the axle until the lever meets resistance 90° from the frame or fork.
- Straight Axle: Move the axle in place and turn clockwise until it stops.
- Solid Axle: Tighten both nuts on the axle until snug.
- The use of a torque wrench is recommended. However, if it is not available, effort must be made. For 25 Nm, apply about 40 lbs of pressure to the end of the 5" key.
4. Determine the final closing position of the lever.
Rotate the front lever and adjusting nut until the lever ends up just at the front of the fork. Install the rear arm between the chain support and the seat. Reposition the lever as necessary if it is not completely closed. 5. Re-remove the brake mechanism, if applicable.
6. Make sure the wheel is centered on the frame or fork. Loosen the axle nuts and, if necessary, adjust the center of the wheel in the frame and tighten again.
7. Make sure the brake pad rim is centered on the wheel and adjust as necessary.
The beginning of disassembling the bushing is to remove the cassette retaining ring.
Typically, I remove the inner race of the bearing with the locknut using a pair of needle-nose pliers, carefully pushing the “nose” into the spline groove of the outer retaining ring.
Hold the sprockets firmly as if trying to rotate them in the freewheel direction. For a right-hand thread wheel, use the same method to force the hub retaining ring to rotate counterclockwise.
The outer retaining ring has a right-hand thread. When working with a bicycle drivetrain, always remember the direction of pedaling, which always corresponds to the direction of tightening. So the bushing usually unwinds counterclockwise. If the transmission is located on the right, then the rear hub will definitely have a right-hand thread.
Additional Information
Quick release
The cam mechanism uses a hollow hub axle equipped with a shaft, a lever that acts as a cam mechanism, and an adjusting nut to secure the wheel axles. The cam puts tension on the shaft and pulls, and the adjusting nut is pressed tightly against the pad on the frame. This tension holds the wheel securely to the frame.
The adjusting nut determines the amount of tension on the cam mechanism lever to secure the wheel axles and the cam. Lubricate the cam mechanism if it is sticky or dry.
The eccentric mechanism for securing the wheel axles is equipped with two conical springs. The small end of the spring faces the axis, and the large end surfaces face outward. These springs make it easier to install the wheel. If one or both springs are twisted or damaged, they can be removed. They have no meaning once the wheel is firmly attached to the bike.
What to do if you can’t adjust the rear derailleur of your bike
There are several methods to solve this issue. But if the standard setting instructions did not work, to set up the rear speed derailleur you need to:
- dismantle the chain, remove the cable;
- move the switch to the chain position on the smallest star;
- use adjusting bolts (this way you can tighten the cable);
- set the adjusting bolt H to the extreme position;
- move the piece called the parallelogram to the large star and adjust the position of the bolt L.
The regulator is fixed with bolts. It must be set to its extreme position. After which, the chain must be shifted in this order: the front cassette is the largest sprocket in diameter, the rear, on the contrary, is the smallest.
DEVICE AND INSTALLATION OF THE FRONT WHEEL ON A BICYCLE
The front wheel of a bicycle is the driving unit, without which it is impossible to imagine a bike, except perhaps a unicycle. The driven wheel, synchronized with the fork, is responsible for the trajectory of the bicycle and, to a greater extent, rolling ability. Unlike the rear wheel, the front wheel is simpler in design, but also requires timely maintenance.
A bicycle, like a car, needs regular maintenance, and the front wheel is one such important component that cannot be neglected. Let's give him some attention!
Common problems and solutions
The cause of deformation or damage to the axle is poor quality materials or design features of the bushing. This component cannot be restored; it can only be replaced with a similar one.
You can find a suitable axle at a bicycle parts store. It should be taken into account that these parts differ in a number of parameters. Therefore, it is better to take the old axle with you so that together with the seller you can select a suitable replacement.
Backlash
Backlash is caused by poorly tightened locknuts. During the trip, a characteristic sound of the rear axle beating against the bearings appears. If the play is not removed in a timely manner, serious damage to the bushing is possible.
How to get rid of backlash? You need to gradually tighten the flare nut. Using the testing method, find a position in which there are no extraneous sounds when the wheel rotates. Now all that remains is to secure the cone using a locknut.
Excessive tension
When this problem occurs, the flare nuts are over-tightened. You need to repeat the steps described above, but now loosen these elements a little. In the absence of timely maintenance, gradual destruction of the bushing is possible.
Extraneous noise
Sometimes during a ride, cyclists notice creaks, crunching, and extraneous noise in the rear hub area. Sounds like these indicate the need for maintenance.
It is necessary to disassemble the bushing, clean the parts from dirt, lubricate, and replace worn components. If after servicing the extraneous sounds do not disappear, then it is better to contact a professional. Perhaps they are due to the poor quality of the product and it should be completely replaced.
Perform regular maintenance on the bushing. Over time, dirt and sand become clogged into it, which have abrasive properties and gradually destroy parts. Always use high quality component lubricants. Proper and regular maintenance is the key to a long bushing life!
What does a wheel consist of?
Bicycle wheels are the most conservative component. Of course, models with alloy wheels have appeared, and all-round wheels are installed on track models, but they are in the minority. Still, the majority of bicycles are equipped with spoked wheels.
The front wheel arrangement is as follows:
- normal bushing;
- rim;
- connecting needles;
- rim protective tape (flipper);
- tube and tire;
- disc (on models with disc brakes).
The hub is the axial part of the wheel and is an assembly unit consisting of a central axle, bearings and cone retainers. Cone bearing systems are most often installed on bushings with open bearings. They can also be equipped with sealed bearings or seals.
Bushing with open bearings
The rim is a supporting structure, a metal ring. The rims are made mainly of aluminum; expensive models have carbon rims. Based on rigidity and power, they are divided into three types:
- single-walled - the outer and inner surfaces have one line of contact (lintel);
- double - the inner surface is attached to the sides, separated from the outer;
- triple rims are the strongest and most durable option: the inner wall is also attached to the sidewalls, but, unlike the double rim, the triple rim has an additional wall in the middle.
Vertical jumpers form channels running in the direction of rotation. Based on the number of such channels, modern rims are divided into one, three and five-piece:
Spokes are elements connecting the hub to the rim. They perform the functions of securing, distributing loads along the rim and central axis and softening vibrations during movement. The rim is perforated, each hole is designed to secure one spoke. A bicycle wheel has a number of spokes that is a multiple of four. Depending on the model, their number varies - from 28 to 40 on average.
The number of spokes for the front wheel is usually less than the number for the rear wheel. This is due to the fact that the majority of the loads fall on the rear of the bike, and the wheel needs to be stronger there.
According to the type of cross-section, the spokes are divided into:
- standard (rolled) – constant circular cross-section along the entire length from the sleeve mount to the tip;
- aerodynamic (blade-shaped) - elliptical or rectangular profile;
- variable section (drawn) - standard section at the heads and narrowing towards the middle.
The tube is the inner part of the tire that holds air under pressure. The tire is the outer shell that contacts the road, absorbs bumps, and protects the tube. The tire is made of harder rubber than the tube.
Rim tape, or flipper, is a rubber lining under the camera to protect it from punctures on the tips of the spokes. Dynamic loads cause the chamber walls to bend, causing them to be pressed against the rim surface. Without a flipper, the camera may be pushed into the hole with the tip of the spoke. This problem is more pronounced on the rear wheel, where the loads are higher, but a flipper is also required on the front wheel. The torn tape must be replaced with a new one. A proven homemade option is to cover the rim with several layers of electrical tape, except for the hole for the nipple.
Types of rear bicycle hubs, their differences from each other
Depending on the design, the rear hub has several modifications:
- with freewheel, without brake mechanism;
- brakeless, without freewheeling;
- with built-in foot brake and free wheeling.
The fundamental difference between the braking option is that to stop the bike on the pedal you need to press in the opposite direction. Inside there is a brake mechanism: a drum and pads, which are activated when the star rotates in the opposite direction.
How to remove the front wheel from the fork
Removing the wheel is the simplest procedure for maintaining a bike. This is done very simply:
- Turn the bike upside down.
- Release the rim brake and remove the caliper from the disc brake.
- Loosen the fasteners from the fork dropouts.
- Remove the wheel axle from the mountings.
On dropouts, the fastening is either nut or eccentric. In the first case, you will need two 15 mm wrenches - with one we hold the nut, with the other we carefully twist it on the opposite side. With an eccentric, everything is simpler - loosen the locking nut and fold back the clamping lever.
Dismantling sequence
Before removing the front wheel from the bicycle, it is necessary to rid the bike itself of all accessories and additional devices so as not to damage them under the weight of the structure during the dismantling process.
- We turn the bike upside down and put it on a stand for repairs. Or, in the absence of a special stand, simply on the steering wheel with a saddle.
- Now you need to decide on the type of brake system installed on the bike.
- Disc brakes will not cause any hassle when removing a wheel. The only thing worth considering is that hydraulic brakes do not like being in an inverted position, because air can get into the system. In this case, the brakes will have to be bled after all the procedures performed on your bike.
- The rim brakes will need to be unfastened before removing the structure from the mounts. To do this, you need to squeeze the levers with your hands and remove the end of the cable from the clamp, then move the levers to the sides.
- The hub axle is attached to the fork using an eccentric or nuts. In the first case, you simply unscrew the eccentric, unscrew and remove the wheel from the ends of the fork, gently pulling it up. In the second, use a wrench to unscrew the nut; for convenience, while unscrewing, you can hold it with a second wrench.
When to service the rear hub
To ensure that bicycle parts are always in perfect technical condition, they must be regularly maintained. If we consider the rear hub of a bicycle, then you will need :
- periodically tighten the body;
- regularly change bearing balls;
- during the next disassembly, lubricate all internal parts of the housing;
- Adjust the brake bushing from time to time.
Removing the rear wheel itself is easy, but the process of removing and disassembling/assembling the rear hub of a bicycle is much more difficult. And yet, without such regular maintenance, the part in question may soon need major repairs or replacement.
Signs that indicate the need for urgent servicing of the rear hub of a bicycle:
- when driving there is strong wheel play;
- the crunching of the bearings is clearly audible (this means that they are simply worn out);
- when moving, the bicycle body rattles and wobbles;
- rolling dynamics are bad.
It is worth knowing some features of eliminating a particular symptom:
- If the rear hub housing rotates or becomes loose, this can be eliminated by tightening the fastening nuts.
- If the movement of the rear wheel is difficult, then you may need to loosen the fastening nut a little - most likely, too much force was applied when tightening it.
- If extraneous sounds appear when the bike is moving and the rolling gets worse, you will need to replace the bearings or completely lubricate the rear hub housing.
Installation sequence
To correctly install the front wheel on a bicycle, you must exactly follow the reverse procedure for removal.
- We insert the wheel into the grooves of the frame until it stops. It is important here not to confuse the position of the structure - the direction in which the rotation will occur is indicated by arrows on the tires.
- Screw the nuts or eccentrics into place. You can’t overtighten, but the fixation should be strong enough.
- Fasten the rim brakes back. Put the rim brakes back in place.
- Turn the bike over to its normal position.
Despite the fact that the front driven wheel is a little simpler in design than the rear one, it is still responsible for the course of movement and needs proper care, lubrication of parts, and tightening of the spokes.
The rear drive wheel has many mechanisms, but the principle of removal and installation is similar, except that it will have to be removed from the chain drive and the chain put back in place during installation.
How to disassemble a ratchet?
To repair a ratchet with your own hands, you will need a hammer and a center punch. Instead of a punch, you will need a large nail or self-tapping screw. It is better to disassemble the device on a wheel so that you can hold it.
- The ratchet is screwed onto the wheel. A punch is inserted into the hole on the nut, and the mechanism is disassembled by turning clockwise with a hammer.
- The stars are removed using a puller and a key. There are balls inside under the nut. The wheel also has a second track with balls.
- To prevent the balls from scattering, you need to place a rag or box.
- The smallest sprocket is unscrewed counterclockwise. The rest are simply removed.
Removing the ratchet from the wheel
Now you need to look at the condition of the mechanism, pawls and lubricant. The pawls are the ones that wear out the most. They can be replaced. A repair kit consisting of dogs and rings is specially produced. Be sure to wash the ball bearings. If the balls are black and there are particles of worn metal, then the bearings are broken. Each one needs to be inspected. If dents appear on them, it is recommended to replace them.
Next, we assemble all the parts in reverse order. The cone nut must be tightened firmly, and the play for the sprockets relative to the wheel should be adjusted using thin rings.
Thus, repairing the mechanism yourself is much cheaper and will not take much time and effort. And such actions must be performed regularly to make cycling enjoyable and safe.
Question answer
1. It can be a simple figure eight. 2. It may be that the axle is not completely inserted into the dropout, unscrew the nuts and insert it evenly. 3. Perhaps the wheel is shifted to the right side due to the fact that the axle is longer on one side. You need to unscrew the nuts on it, position it so that the axle length is the same on both sides of the wheel, and tighten the nuts.
Raise the bike. Spin the wheels. Look how bad it spins. Try loosening the nuts on the bushings. The bearings may be overtightened, but do not relax too much, otherwise there will be play.
Design and installation of the front wheel on a bicycle
9 minutes Author: Mikhail Skvortsov 511
The front wheel of a bicycle is the driving unit, without which it is impossible to imagine a bike, except perhaps a unicycle. The driven wheel, synchronized with the fork, is responsible for the trajectory of the bicycle and, to a greater extent, rolling ability. Unlike the rear wheel, the front wheel is simpler in design, but also requires timely maintenance.
A bicycle, like a car, needs regular maintenance, and the front wheel is one such important component that cannot be neglected. Let's give him some attention!
What does a wheel consist of?
Bicycle wheels are the most conservative component. Of course, models with alloy wheels have appeared, and all-round wheels are installed on track models, but they are in the minority. Still, the majority of bicycles are equipped with spoked wheels.
The front wheel arrangement is as follows:
- normal bushing;
- rim;
- connecting needles;
- rim protective tape (flipper);
- tube and tire;
- disc (on models with disc brakes).
The hub is the axial part of the wheel and is an assembly unit consisting of a central axle, bearings and cone retainers. Cone bearing systems are most often installed on bushings with open bearings. They can also be equipped with sealed bearings or seals.
The rim is a supporting structure, a metal ring. The rims are made mainly of aluminum; expensive models have carbon rims. Based on rigidity and power, they are divided into three types:
- single-walled - the outer and inner surfaces have one line of contact (lintel);
- double - the inner surface is attached to the sides, separated from the outer;
- triple rims are the strongest and most durable option: the inner wall is also attached to the sidewalls, but, unlike the double rim, the triple rim has an additional wall in the middle.
Vertical jumpers form channels running in the direction of rotation. Based on the number of such channels, modern rims are divided into one, three and five-piece:
Spokes are elements connecting the hub to the rim. They perform the functions of securing, distributing loads along the rim and central axis and softening vibrations during movement. The rim is perforated, each hole is designed to secure one spoke. A bicycle wheel has a number of spokes that is a multiple of four. Depending on the model, their number varies - from 28 to 40 on average.
The number of spokes for the front wheel is usually less than the number for the rear wheel. This is due to the fact that the majority of the loads fall on the rear of the bike, and the wheel needs to be stronger there.
According to the type of cross-section, the spokes are divided into:
- standard (rolled) – constant circular cross-section along the entire length from the sleeve mount to the tip;
- aerodynamic (blade-shaped) - elliptical or rectangular profile;
- variable section (drawn) - standard section at the heads and narrowing towards the middle.
The tube is the inner part of the tire that holds air under pressure. The tire is the outer shell that contacts the road, absorbs bumps, and protects the tube. The tire is made of harder rubber than the tube.
Rim tape, or flipper, is a rubber lining under the camera to protect it from punctures on the tips of the spokes. Dynamic loads cause the chamber walls to bend, causing them to be pressed against the rim surface. Without a flipper, the camera may be pushed into the hole with the tip of the spoke. This problem is more pronounced on the rear wheel, where the loads are higher, but a flipper is also required on the front wheel. The torn tape must be replaced with a new one. A proven homemade option is to cover the rim with several layers of electrical tape, except for the hole for the nipple.
Repair work
Before you start disassembling and assembling the rear wheel of a speed bike, you need to find a convenient place and stock up on gloves so as not to get your hands dirty. If there is no relevant experience, you should strictly follow the sequence of actions and take into account all the subtleties. Training videos are a great help in this matter.
Removing the Bushing
Repair and maintenance of the rear wheel hub begins with dismantling the cassette with driven sprockets. For this you will need a special tool in the form of a whip and a puller. The cassette is always installed on the wheel on the right-hand thread. This is what ensures its rigid connection with the element itself and allows it to rotate clockwise. This means that you need to remove the cassette by unscrewing it in the opposite direction. This allows access to the axle and bearings.
Any diagram indicates that the designs of hubs for road, road and mountain bikes have different structures. The central part of the rear wheel itself is equipped with three types of bearings:
- industrial bearings (usually with anthers);
- cone-cup bearings with balls on the separator;
- cone-cup bearings with bulk balls.
When disassembling, it is necessary to clearly lay out all the removed elements of the hub in such a way that subsequent assembly of the wheel will allow each part to take its original place.
Disassembling the rear wheel hub begins on the left side. Sequencing:
- Grab the cone on the right side with one wrench, and the lock nut on the left with the second, and screw it off.
- Remove the washer located between the locknut and the cone. The last element should be screwed off the axle without any effort.
- After the cone is removed, carefully remove the separator or pour out the balls (depending on what type of bearing is installed in a particular model). Sometimes, in the case of balls, to do this you need to shift the axis to the left.
- Place the balls in kerosene or another petroleum-based solvent.
- After this, no less carefully remove the balls on the right side. It is better not to tighten the right cone and locknut unless necessary. This will allow you to maintain the position of the axle and further secure the wheel in the bicycle fork without unnecessary problems.
- Carefully inspect the working surface of the cleaned cones. The slightest irregularities indicate that they need to be replaced.
- If there is damage on the surface of the cups, then the entire rear wheel hub must also be replaced. If everything is in good condition, then you can begin the assembly procedure.
When assembling the wheel, first of all, it is necessary to generously lubricate the surface of the hub cups. Grease is quite suitable for this. You need to squeeze the balls into the layer of the product from the right side of the bushing or install a separator with bearings and insert the axle. If you had to shift the axis to the right to remove the balls from the left side, then it should not be inserted all the way, but just enough so that it allows you to put the balls in place.
After installing the balls or separator, you need to insert the axle all the way and screw the left cone onto it so that it rests on the balls. After this, replace the washer and tighten the left locknut with a little force. It is necessary to unscrew the cone on both sides with force so as to ensure free rotation of the axis. If the rotation of the wheel is not easy enough or there is play, it is necessary to readjust the cone pressure on the left side of the axle.
If the wheel rotates freely and there is no play, then the maintenance or replacement of the bearing has been completed successfully.
If damage was found during the inspection of the surface of the cups, the bushings must be replaced. This process is quite complicated. Before removing the bushing, you need to study the instructions. The fact is that to replace an element it is necessary to un-spoke the wheel.
The knitting pattern must be sketched or photographed before disassembly.
You need to unscrew all the spoke heads and remove them from the hub. The likelihood of making a mistake will be much less if, when removing parts, you immediately insert them into the corresponding slot of the new bushing. After all the spokes are installed in their places, it is necessary to give the wheel an umbrella shape by tightening them, and then align the rim. During the work process, the vertical runout of the wheel is first eliminated. Once they have disappeared or are minimized, horizontal runout is eliminated. In this case, it is necessary to loosen the spokes on one side and immediately tighten the spokes on the other side by the same number of turns.
Replacing the camera
To remove the tube from the tire, you must completely deflate it. You need to pry the latter with spoons for sorting, inserting them at a distance of about 15 cm from one another. After this, you need to start spreading the spoons little by little until the entire side of the tire is removed from the rim. All that remains is to remove the nipple and remove the camera.
Installing a new camera is carried out in the reverse order:
- You need to insert the nipple into the rim and thread the entire tube into the tire around the circumference, avoiding twisting and folding.
- Before beading the tire onto the rim, you can slightly pump up the tube so that it takes its shape and takes its place in the tire.
- After prying the tire off, you need to spoon it into the rim, first in the nipple area and then around the circumference.
After making sure that the tire has taken its place on the rim, you can inflate the inner tube to operating pressure. After this, all that remains is to install the rear wheel of the bicycle, and the repair can be considered complete.
How to remove the front wheel from the fork
Removing the wheel is the simplest procedure for maintaining a bike. This is done very simply:
- Turn the bike upside down.
- Release the rim brake and remove the caliper from the disc brake.
- Loosen the fasteners from the fork dropouts.
- Remove the wheel axle from the mountings.
On dropouts, the fastening is either nut or eccentric. In the first case, you will need two 15 mm wrenches - with one we hold the nut, with the other we carefully twist it on the opposite side. With an eccentric, everything is simpler - loosen the locking nut and fold back the clamping lever.
When to remove the front wheel:
- tube/tire replacement;
- tightening/loosening the spokes;
- bushing bulkhead;
- painting the rim.
Installing the front wheel on the fork is done in the reverse order.
Housing disassembly, cleaning and lubrication
It is recommended to make repairs on a spoked hub, otherwise there will be little chance of reassembling the wheel later, unless you have previously had to constantly deal with disassembly.
How to disassemble a brakeless hub on a speed bike? Sequencing:
- Using a puller and a whip, remove the cassette from the axle.
- Open the locking ring.
- Remove washers and bearings. The bushing can be on bulk or industrial bearings. In any case, the main thing is to remember their rightful place and not lose it. The same goes for washers.
- We inspect the damage on the bearings: worn parts will need to be replaced with new ones, suitable for cleaning from dirt in a solvent.
- The entire axle is pulled out.
- The body is cleaned of dirt. The internal cavities are wiped with a soft dry cloth.
- Parts must be lubricated sequentially when installing them back. Initially, apply a little lubricant to the walls of the housing. Particular attention should be paid to bearing lubrication.
- Installing the stopper and tightening the bushing with fastening nuts. It is important not to overtighten the bushing to avoid difficulties when rotating the wheel.
Once the cassette has been successfully set aside, we begin disassembling the hub. This is done only on the opposite side, usually on the left. Using a 15 mm wrench, unscrew the lock nut that secures the axle. Remove the stopper, if there is one.
All the little things in the form of rings and washers are laid out on a piece of paper prepared in advance in the correct order. This is extremely important, otherwise it’s easy to get confused later during assembly. The cone twists, and finally the axis begins to give in. We can see the bearings right on it.
The bearing parts must be removed carefully; it is better to pry them off with a thin knitting needle or tweezers.
We wipe each ball with a cloth soaked in acetone or gasoline and put it aside. Similarly, we remove the “embankment” or industrial bearings on the other side.
We do not confuse the right and left parts, they are run-in to their side and during installation, on the contrary, can cause dissonance in the operation of the entire bushing, in particular, backlash. We don’t lose a single ball, otherwise everything will have to be changed! Sometimes, when opening the bushing, you can see “rot” next to the axial bushing - the balls are completely worn out and require replacement. The same applies to partial abrasion.
After removing the axle, look at its condition. Its working life, as a rule, is comparable to “unspreading” the body or replacing a wheel, but you never know. Even with simple maintenance, it will require cleaning from accumulated dirt.
The inner space of the bushing is wiped with a dry, clean cloth or cotton wool. Overly contaminated areas can be covered with gasoline. We wipe the left cone and check the fastening of the right one (from the side of the cassette sprockets). Once the walls are dry, it's time to apply new lubricant.
A few recommendations: chain or any other lubricant will not work for the bushing; it is better to buy a special compound in advance. The buxol is actively used for bearings, you can use it. It is not worth spreading a thick layer “forever”, because the lubricating composition will be squeezed out and begin to absorb dirt, which is why all the parts will wear out many times faster.
Installation of bushing parts: right bearings – wheel axle – cone – left bearings – stopper – washers and rivets – lock nut. Most likely, the rear hub will need adjustment after assembly. This is done only on the left side. Using the same 15mm wrench, slightly loosen the locking nut. Then it is twisted until it stops, and the cone is held in a fixed position.
Thus, axle play is eliminated, or rather, it is reduced to a minimum. You may have to tinker more than once, the main thing is to achieve synchronous movement of the axle and the entire wheel. A slight twist is still permissible; over-tightening can lead to difficult rotation.
And, of course, checking the repair in practice. We test the bike in different speed modes, trying to feel whether the wheel is loose and how firmly it is fixed. If everything was done correctly, the ride will give you comfort and confidence, otherwise you will have to return to the adjustment again.
Repairing and servicing the rear hub with your own hands is quite simple! If you plan to replace the entire part, then you should choose exclusively the model that is currently installed on the bike. When it is not possible to disassemble the bushing, it is better to seek help from a specialist, otherwise the part itself may be damaged.
Removing and installing a bicycle wheel
Removing the front wheel
1. To remove the front wheel, first of all, you need to release the brake. Most brakes have a simple mechanism that allows you to release the brake without any tools (v-brake).
2. If you cannot easily disconnect the cable, lower the wheels.
3. Pull the eccentric handle towards you, then, holding the nut on the opposite side, turn the handle counterclockwise until the wheel is free. The handle tightens the cam, and usually has “open” and “close” written on both sides. The eccentric rod extends through the hollow axle and is threaded at one end. The two springs on the eccentric are directed with the narrow side inward, and should be on the outside of the frame or fork. Springs are used to provide clearance when removing or installing a wheel.
Front wheel installation
1. Before installation, apply a thin layer of lubricant along the entire length of the eccentric rod.
2. Insert the wheel axle evenly into the fork slots so that the cam handle is on the left side of your bike. The handle must be open.
3. Turn the cam knob clockwise until it meets resistance halfway when tightening.
4. Close the eccentric handle all the way. It is recommended to do this so that the handle is positioned behind the left leg of the fork, this will make it easier to open it with a stop.
5. Put the brake cable back in place and make sure the pads are the same distance from the rim on both sides.
Removing the rear wheel
Similar to the front one, but has some differences due to the rear derailleur.
1. Disconnect the brake cable.
2. Adjust the reverse gear so that the chain is on the smallest sprocket.
3. Loosen the eccentric handle and carefully remove the wheel.
Puller and key
Removing a long-installed ratchet requires considerable effort. It can stick and rust. Special tools must be available, which are a puller and a large adjustable wrench or wrench.
A puller is a slotted wrench for disassembling or installing a ratchet mechanism. It is unscrewed counterclockwise using a wrench or an adjustable wrench. The ratchet and cassette tools are similar, but completely incompatible, do not confuse them.
- First the rear wheel is removed. If the ratchet has not been removed for a long time and it is difficult to remove it with a puller, then it is better to use WD-40 lubricant. It is better to lubricate the threads from the inside, under the stars, and leave for several hours.
- Next, the fastenings on the axle are unscrewed. Prepare a rag in advance to wipe the grease off the axle and avoid getting dirty when performing repairs.
- The puller is put on the nut. Secure it with a nut if it is loose, and if it does not fit, hammer it in with a hammer.
- It is better to place the wheel vertically and rest it against the wall. It is not recommended to remove the tire so as not to damage the rim, and the rubber will also help in holding it in place.
- Use an adjustable wrench or wrench to unscrew the puller with small jerks. It is better to hold the key vertically and press on it from above. Turn counterclockwise.
- We take out the puller and the system itself from the bushing.
When removing, a problem may arise due to the lack of effort to unscrew the stuck mechanism. This problem is solved by lengthening the tool. This can be done using a small tube. Take two bolts measuring 6–8 cm and select nuts for them. One is inserted into the hole in the puller, and the second into the hole in the handle of the adjustable wrench. We tighten with nuts. We insert a tube between the bolts. This creates a lever that makes it much easier to tear off a stuck device.