Payment for goods and downloading of the book in electronic form (PDF format) is made on the website.
To do this, you need to find the book you are interested in and click on the “Buy” button. The price of the book is indicated on the button.
For convenience, the price on the website for residents of Russia, Belarus and Kazakhstan is presented in rubles.
For residents of Ukraine in hryvnias, and for all other countries - dollars.
After clicking on the “BUY” button, a payment window will open where you can select a payment system with which you can pay for the selected book using any bank card (Visa, MasterCard, MIR, etc.)
When you click on the “Pay by bank card” button, the Portmone payment system will open, which is the easiest way to make a payment.
In addition, the website offers four payment systems for payment:
- Yandex (payment from any bank cards, Yandex Money account, QIWI Wallet, terminals, etc.);
- Portmone (payment from any bank cards, Portmone account);
- PayPal (payment from any bank cards, PayPal account);
- WebMoney (payment from any bank cards, payment from WebMoney wallets).
Payment via Yandex Cashier
After selecting payment via Yandex, the Yandex Cashier payment system will launch, where you need to select a convenient payment method (bank card, QIWI, Yandex Money account, etc.)
After specifying payment details and confirming payment, payment for the goods will occur.
If you have a bank card in a currency other than the ruble, then the money will be debited from the card at the rate of the Central Bank of Russia at the time of the purchase.
This payment method is optimal for residents of Russia, Kazakhstan and Belarus.
Official website of the Yandex Kassa payment system https://kassa.yandex.ru
Payment via Portmone
After selecting payment through Portmone, the payment system will launch, where you need to select the payment method: bank card or Portmone account.
The price in the Portmone payment system is converted into dollars at the exchange rate of the Central Bank of the country where you are located.
If you have a bank card in a currency other than the dollar, then the money will be debited from the card at the rate of the Central Bank of your country at the time of the purchase.
After specifying payment details and confirming payment, payment for the goods will occur.
Official website of the Portmone payment system https://www.portmone.com
Installation is in the reverse order.
Removing the rear bumper from the brackets is done in the same way for all body types. Here the work will be quite simple, and the only tool that will be used is a wrench with a 10-mm head. It is necessary to remove the rear lights in advance. You can get to their fastenings using hatches that are located under the trim of the rear wall of the trunk.
It is worth considering that in the third generation restyling, the rear light guides are quite long, and they must be pulled out of the brackets all the way.
- Dismantling begins by unscrewing the upper cross members. They are secured from the inside with two bolts on the brackets. Two more bolts must be found in the area of the wheel arches.
- After this, the structure can be easily removed and set aside.
Payment via PayPal
After selecting payment via PayPal, the PayPal payment system will launch, where you need to select the payment method: bank card or PayPal account.
If you already have a PayPal account, then you need to log into it and make a payment.
If you do not have a PayPal account and you want to pay using a bank card via PayPal, you need to click on the “Create an Account” button - shown with an arrow in the picture.
PayPal will then prompt you to select your country and provide your credit card information.
After specifying the information required to make the payment, you must click on the “Pay Now” button.
Official website of the PayPal payment system https://www.paypal.com
Payment via WebMoney
After selecting payment via WebMoney, the payment system will launch, where you need to select the payment method: bank card or WebMoney wallet.
If you already have a WebMoney wallet, then you need to log into it and make a payment.
If you do not have a WebMoney wallet and you want to pay in another way, you need to select any of the methods that WebMoney offers and make the payment
After specifying payment details and confirming payment, payment for the goods will occur.
Official website of the WebMoney payment system https://www.webmoney.ru/
Explanatory notes on electrical connection diagrams
Appendix 2 2. Wheel drive mechanism 3.
Socket for additional electrical equipment.
How to download a book for free? Steering mechanism 5.
Diagnostics of vibrations associated with vehicle speed 4.
Cooling system 2. Check the steering wheel and steering column 5.
Tables 9. Anti-lock braking system ABS 6.
Tables 3. DIY ABS diagnostics. Renault Megane. (and not only).
See also: Connecting wires to a two-gang switch
Downloading a book
After successfully completing the payment (by any method) and returning to the KrutilVertel store from the payment system website, you will be taken to the successful payment page:
On this page you need to indicate your e-mail, where access to download the book will be sent.
If you are already registered on our website, then simply follow the link to your personal account.
The book you purchased will be in your personal account, from where you can always download it.
Please note that after making the payment, you need to return back from the payment system website to the KrutilVertel website.
If for some reason you did not return back to the site and closed the payment system tab with a message about the successful completion of the payment, please let us know - we will send you a letter indicating access to download the book.
Renault Megane › Logbook › Megane 3 1.5 dci. Replacing the timing belt.
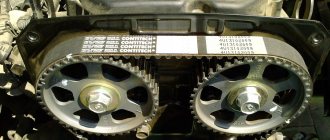
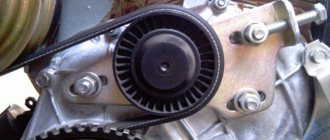
Hi all. I want to share with everyone my story of replacing the timing belt on a Renaurt Megane 3 Grandtour (station wagon). So, we have the K9K 836 engine (or 846, as I understand it, these are two identical engines, correct me if I’m wrong). 100 horsepower, fuel siemens. I hatched a plan of action for a long time, since I didn’t want to drag out this process for a long time (this is the first time I’m changing such a critical element of the engine), I thought about all possible options for the development of events. Initially, I expected that the car would spend one night in the garage (in fact, that’s what happened). So, in order. (photos will come later) After reading the forums and instructions from Dialogis, I realized that to correctly install all the marks you will need the Mot.1489 and Mot.1430 devices (in addition to everything, my father-in-law also has 1.5, so it was decided to make these devices for two people). Shortly before this (somewhere around the New Year), I printed out the dimensions of these devices and gave them to my father-in-law at the factory, where they were successfully turned out and even knurled. In general, it looks like the original ones from the pictures. Many who have already changed the timing belt will say that why have them, because you can do without them? Or “I took a drill and a bolt with a nut”)) This is not my approach, and there was an opportunity to make it. I arrived at the garage and began to disassemble the car. Disconnect the battery. Required condition! I lift the right side, remove the front right wheel, plastic arch protection, plastic engine protection (I removed it before removing the wheel). Then I put two shields on the pit and a block under the engine pan (on the pallet to the right of the plug, in the direction of travel, there is a flat rib, and I placed the bars under it). I unscrew the lower torque rod from the engine. I lower the body. As soon as the engine touches the bars, I begin to unscrew the right engine mount (the one on the timing belt side). At the same time, I unscrew the upper jet rod. It’s better to unscrew it right away than to waste extra time later (when installing it back, please note that in the silent block, which is screwed to the engine, there is an internal bushing with a cone, and in the silent block, which is screwed to the body, there is a protruding rubber band, and if you turn the rod over incorrectly, this rubber band will not allow entry in its place). As a result of dancing with a tambourine, I had to unscrew the bolt securing the air conditioning tube and remove the fuel bulb from the latches. All this in order to remove the engine mount from its place, without disconnecting the fuel pipes. And now, the support is in my hands. Towards her. All this is done for free access to the elements of the belt mechanism. Now comes the fun part. The accessory belt must be removed. We raise the body. The engine will lower relative to the body. Through the window in the wheel arch we find the tension roller; a hexagonal protrusion sticks out above it, with which it can be loosened. There was very little space. I didn’t have an offset key, as requested in the instructions. I had to take a head, a wrench for unscrewing the sump plug, and a piece of pipe. The roller spring is very tight. Pipe to increase force. If the handle of the key is facing down, then you need to rotate it clockwise (pull to the left) and at the same time remove the belt from the pulley with your other hand. All this will be hampered by the wheel suspension. I remove the belt, having first remembered which direction it rotates (I don’t know if this matters, there are no arrows on it). Next you need to remove the plastic timing belt protection. It consists of 3 parts. The first is the top one, which is visible from under the hood. It has two latches (at the front near the fuel pipes and at the back, somewhere near the EGR pipe). The rear one came off ((, so be careful. The second is the middle part. It is also on latches (in the front, near the latch of the upper part of the protection and in the back, below the latch of the upper protection). To get to the rear latch, I lowered the body (raised the engine) and pulling the engine forward by the eye, put your hand in and unfastened the latch. There is also a plastic clip in the middle (looks like a Torx bolt) When removed, it pops out without consequences, but to put the casing back, we take out the bolt, put on the protection and simply push this bolt in with a finger back. The third part from the bottom. What am I telling you? There are all the pictures in the dialog. Next you need to remove the bracket, which will interfere with removing the belt. We unscrew all the screws. To remove it, the body lowered. And only now the process of replacing the belt begins (haven’t changed your mind yet change it yourself? =)) ). I lift the body. This is to get to the crankshaft pulley bolt. I put my assistant behind the wheel and engage 6th gear. The assistant presses the brake as hard as he can, and meanwhile, using the same piece of pipe, I try to unscrew the bolt. Everything is further complicated by the fact that the crankshaft does not rest against the gearbox immediately, but springs back due to the springs of the dual-mass flywheel. And then little by little the bolt began to loosen. Eat! Then the assistant rests and I unscrew the bolt. I remove the pulley and screw this bolt back (as in the instructions, we will use it to turn the crankshaft later). I see a timing belt pulley with a key. I find a mark on it. I find a mark on the valve mechanism pulley. I do it as in the instructions. I unscrew the plug under the starter and screw in the mot 1489 device. I turn the crankshaft until it hits the device. Knock. Resisted. I look at the valve mechanism pulley and insert a mot 1430 device into the hole. Everything seems to match. I unscrew the tension roller, it is in good condition. I take off the old belt. I'm taking a break. It's already late. Went home. When I read the replacement instructions for a long time I could not understand why in the old engines there was no key on the crankshaft and the valve mechanism pulley was solid, why the new ones had a key and a composite valve mechanism pulley. As I later realized, all this was due to the length of the belt. During production, they all differ slightly in length, but the number of teeth on it does not change. So it turns out that when the length of the belt changes and the number of depressions between the pulley marks remains constant, we get a shift in the installation angle of the valve mechanism. To do this, you need to lock the valve mechanism and set the crankshaft to TDC and tighten the belt. After that, on the old ones, tighten the crankshaft pulley without a key, and on the new ones, tighten the valve mechanism pulley screws. The next day after work I continue. I install the new roller in place. I turn it to minimum tension. I had to tinker with installing the new belt (it has arrows for the direction of rotation). All marks match (the mark for the crankshaft pulley is applied both on the outside of the belt and on the inside). I set the tension of the roller. This is where we had to tinker. There is not enough space. It seems to have been aligned along the slot. I rotate the crankshaft two turns. Crap! And the mark then moves. Looks like he put it out again. I'm rotating. It shifts again. Sometimes above the slot, sometimes below. It is still complicated by the fact that when the eccentric is rotated with a hex key, the base of the roller itself rotates slightly (the groove in the cylinder block is slightly wider in width than the protrusion on the roller). Everything is accurate. And it seems like I set the tension. It was difficult to get to the roller with a torque wrench and tighten the roller as in the instructions. I checked the shaft installation angles again using tools mot 1489 and mot 1430. By the way, after installing the belt according to the marks and rotating the crankshaft while I was tensioning the roller, the belt after a certain number of revolutions did not coincide with the marks on the pulleys (I was even scared at first, but then I realized that this was normal, I don’t remember which book I read in, but it seems about gear drives, the idea is The fact that each tooth of the gear must meet during rotation with each tooth of the other gear, for uniform wear, I think the number of belt teeth is selected based on the same considerations). I tightened the bolts of the valve mechanism pulley with a small ratchet by hand (I don’t have a 14 Nm torque wrench) I begin to put everything back together. The video took a lot of time. It's already dark. I would like to have time to at least start the engine. I remove the devices and tighten the plug under the starter. With sealant. I lower the body and push through the engine mounting bracket. I screw it on. I'm putting back the plastic protection. I install the upper jet thrust (don’t mix up the side, I was tired and tried to stick it upside down, right to the engine with a cone). I push the engine mount through. I lift the body, screw in the mounting bolts for the airbag and upper thrust rod. I screw on the pillow, tighten the bolt of the lower reaction support. And I almost went to start it. I take an assistant, put him behind the wheel according to the same scheme: gear, brake, unscrew the old bolt, install the pulley and screw on the new bolt. I take a torque wrench. Gear, brake. I tighten the bolt. The dual-mass flywheel is getting in the way again. 120Nm +95°. It's hard to measure the angle there. It seemed to work by eye. In 2-3 passes. I put on the optional equipment belt. I put the tool away. Back battery terminal. The key is in the card reader. With kind words addressed to the vehicle, I press the button. Aaaand. Brrrrr. Works. Works fine. But it's late. I turned it off and left it in the garage for another night. All that remains is to put on the plastic arch protection, the plastic engine protection and screw the wheel. 3 days to replace the timing belt! It will do for the first time. I was in no hurry. I did everything as responsibly as possible. For myself. I think it will go faster in my father-in-law's car.
The most important! This post is not an instruction for action! The procedure may be different. I just shared my experience, and everyone will decide for themselves whether to do it themselves or send it to a service. Good luck to all.
Problems when paying with bank cards
Sometimes difficulties may arise when paying with Visa/MasterCard bank cards. The most common of them:
- There is a restriction on the card for paying for online purchases
- A plastic card is not intended for making payments online.
- The plastic card is not activated for making payments online.
- There are not enough funds on the plastic card.
In order to solve these problems, you need to call or write to the technical support of the bank where you are served. Bank specialists will help you resolve them and make payments.
That's basically it. The entire process of paying for a book in PDF format on car repair on our website takes 1-2 minutes.
If you still have any questions, you can ask them using the feedback form, or write us an email at [email protected]
Technical characteristics of Renault Megane 3
The 3rd generation Renault Megane model (restyling 2014) is sold in Russia as a 5-door hatchback. The range of car engines includes petrol units of 1.6 liters (106 hp), 1.6 liters (114 hp) and 2.0 liters (137 hp). All of the listed engines are well known to owners of cars produced by Renault-Nissan. For example, the top-of-the-line 2.0 M4R engine for Megane in a modernized form (MR20DD) is installed on the Nissan X-Trail and Nissan Qashqai crossovers. Under the hood of the hatchback, a 137-horsepower unit works in conjunction with a 6-speed manual transmission or X-tronic CVT. A continuously variable transmission of the same type is installed on the 1.6 114 hp engine. But the modification with the initial 106 hp engine. equipped with a 5-speed manual transmission.
The dynamic characteristics of Renault Megane 3 allow the hatchback to accelerate to “hundreds” in 9.9 seconds at best. This figure is available in versions with a 2.0-liter engine and 6-speed manual transmission. The car is braked by disc mechanisms with a diameter of 280 mm at the front and 260 mm at the rear. The front discs are ventilated.
Renault Megane fuel consumption is about 6.6-6.7 liters for 1.6 engines and 7.8-8.0 liters for 2.0 engines.
Full technical specifications of Renault Megane 3rd generation are given in the table:
| Parameter | Renault Megane 1.6 106 hp | Renault Megane 1.6 114 hp | Renault Megane 2.0 137 hp | |
| Engine | ||||
| Engine code | K4M | H4M | M4R | |
| engine's type | petrol | |||
| Injection type | distributed | |||
| Supercharging | No | |||
| Number of cylinders | 4 | |||
| Cylinder arrangement | in-line | |||
| Number of valves per cylinder | 4 | |||
| Volume, cubic cm. | 1598 | 1598 | 1997 | |
| Piston diameter/stroke, mm | 79.5 x 80.5 | 78 x 83.6 | 84 x 90.1 | |
| Power, hp (at rpm) | 106 (6000) | 114 (6000) | 137 (6000) | |
| Torque, N*m (at rpm) | 145 (4250) | 155 (4000) | 190 (3700) | |
| Transmission | ||||
| Drive unit | front | |||
| Transmission | 5 manual transmission | CVT X-tronic | 6 manual transmission | CVT X-tronic |
| Suspension | ||||
| Front suspension type | independent, McPherson | |||
| Rear suspension type | semi-dependent | |||
| Brake system | ||||
| Front brakes | ventilated disc | |||
| Rear brakes | disk | |||
| Steering | ||||
| Amplifier type | electric | |||
| Number of steering revolutions (between extreme points) | 3.1 | |||
| Tires and wheels | ||||
| Tire size | 205/65 R15 / 205/60 R16 | |||
| Disk size | 6.5Jx15 / 6.5Jx16 | |||
| Fuel | ||||
| Fuel type | AI-95 | |||
| Environmental class | Euro 4 | |||
| Tank volume, l | 60 | |||
| Fuel consumption | ||||
| Urban cycle, l/100 km | 8.8 | 8.9 | 11.0 | 10.5 |
| Extra-urban cycle, l/100 km | 5.4 | 5.2 | 6.2 | 6.2 |
| Combined cycle, l/100 km | 6.7 | 6.6 | 8.0 | 7.8 |
| dimensions | ||||
| Number of seats | 5 | |||
| Number of doors | 5 | |||
| Length, mm | 4295 | |||
| Width, mm | 1808 | |||
| Height, mm | 1471 | |||
| Wheelbase, mm | 2641 | |||
| Front wheel track, mm | 1546 | |||
| Rear wheel track, mm | 1547 | |||
| Front overhang, mm | 860 | |||
| Rear overhang, mm | 793 | |||
| Trunk volume (min/max), l | 368/1125 | |||
| Ground clearance (clearance), mm | 158 | |||
| Weight | ||||
| Curb, kg | 1280 | 1353 | 1280 | 1358 |
| Full, kg | 1727 | 1738 | 1755 | 1780 |
| Maximum trailer weight (equipped with brakes), kg | 1055 | 1300 | ||
| Maximum trailer weight (not equipped with brakes), kg | 650 | |||
| Dynamic characteristics | ||||
| Maximum speed, km/h | 183 | 175 | 200 | 195 |
| Acceleration time to 100 km/h, s | 11.7 | 11.9 | 9.9 | 10.1 |
