Replacing the oil pan and its gasket on a VAZ 2101-VAZ 2107
Welcome! Today, many people already know such a thing as an oil pan, but not everyone knows what it really is, when it needs to be changed and how to properly replace it on cars of the “classic” family - we will look at these questions today.
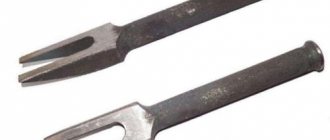
Note! To replace the pan and its gasket, you will need to prepare a few things in advance: First, be sure to stock up on wrenches, or you can use an extension, universal joints and sockets instead!
Summary:
Where is the oil pan and its gasket located? The pan is located at the very bottom of the car engine; unfortunately, in order to fully see the pan it is necessary to remove the crankcase protection, which is done in the figure below:
Note! The blue arrow indicates the gasket that is located between the cylinder block and the crankcase pan!
When do you need to replace the oil pan and its gasket? The pan must be replaced if it is deformed, due to which the engine oil that was located in it begins to flow out of the pan itself.
The pan gasket must be replaced if it is strongly compressed and if it is torn, how do you understand this, you ask? Usually, when the gasket is deformed, engine oil begins to flow through it, but the leak can also be treated by simply tightening the bolts that secure the oil pan, but if tightening the bolts does not produce any results and the leak does not stop, then replace the gasket with a new one.
Question? Which of these two parts are you replacing, the pan or the gasket? (Write your answer in the comments)
Possible faults
Malfunctions of this part do happen, and it is dangerous to ignore them, since loss of oil threatens serious and expensive repairs of the internal combustion engine. They can be easily diagnosed by oil leaks - a characteristic small puddle that remains on the asphalt after an overnight stay and a wet sump. The causes of leaks may be:
- loose oil pan bolt;
- gasket wear;
- loose drain plug;
- cracks in the metal.
Cracks in metal are a much more serious problem than a poorly tightened bolt. They can appear as a result of impacts with large stones, curbs, etc. Even if protection is installed under the crankcase, it can crack due to non-compliance with the bolt tightening torques recommended by the manufacturer. A crack can also occur if the drain plug is overtightened after an oil change or repair. It has a slightly conical shape, is made of a harder metal, and can tear the pan. Such a crack is difficult to see, and some service workers, trying to eliminate the leak near the plug, tighten it even more, which subsequently aggravates the situation.
It is worth noting that a slight “sweating” around the oil drain plug, in the absence of drops or streaks, is normal.
How to replace the oil pan and its gasket on a VAZ 2101-VAZ 2107?
Note! This method is not always suitable for people to remove the pan from a car, because not everyone has items that facilitate this, so at the very end of the article there is a video that shows the procedure for removing and replacing the pan and gasket without the use of special tools!
Removal: 1) Before starting work, drive your car into the inspection hole.
2) Then remove the crankcase protection from the vehicle. (How to remove the protection, see the article: “Replacing the crankcase protection”)
3) Then completely drain the engine oil from the car engine. (How to drain the oil, see the article: “Changing engine oil”)
4) Next, unscrew the two nuts on both extreme sides that secure the right and left engine mount to the cross member.
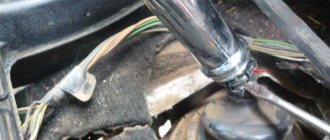
5) Next, install the “Travece” on top of the engine compartment, it is indicated by the number “1” in the photo, and then begin to tighten the nut under the number “2” and thereby lift the engine from the car.
Note! You need to lift the engine until the ends of both studs, numbered “1”, coincide with the flat part of the engine mount brackets, which are indicated under the number “2”!
6) Now, using a wrench or an extension with a hinge and cap, unscrew the “19” bolts that secure the pan to the engine.
Note! There are washers under each bolt, so be careful not to lose them!
7) And finally, use a screwdriver to carefully separate the oil pan from the cylinder block and, as a result, remove it along with the gasket.
Note! If the gasket is stuck to the block, then use a sharp object to remove it and clean the entire plane of the block from pieces of the gasket!
Installation: 1) First, use a clean cloth to wipe the mating surface of the block, and then the oil pan.
Note! There is no need to degrease the surfaces of the block and tray using products such as White Spirit, etc. Because in the future, this will make it easy to disassemble the connection!
2) Next, lubricate both sides of the gasket with a thin layer of silicone sealant to ensure that engine oil does not leak through the gasket in the future.
3) Finally, install all the removed parts in their place, in the reverse order of removal.
Note! Replace all deformed parts with new ones, and tighten the “19” bolts that secure the oil pan during installation crosswise. When tightening the bolts, do not use much force because this may damage the crankcase flange and the gasket may be deformed!
Additional video: For more detailed instructions on removing and replacing the gasket and pan, see the video below:
Installation of seal
Before installing a new gasket, all traces of leaks must be removed. Experienced motorists advise not only to wipe the pan, but also to degrease it. The same actions are recommended for the surface of the block. It is advisable to remove, wash and blow out (at least with a regular tire pump) the so-called “gander”. When installing it back, you can lubricate the rubber ring of the “gander” with sealant for better fixation.
A layer of the same sealant is applied from the inner perimeter. The sealant is laid out on its bed as evenly and quickly as possible, and a similar layer is applied on top. Bolts are baited; If the instructions supplied with the car do not indicate the exact order of tightening them, screw in the fasteners diagonally, crosswise, so as not to unevenly pinch any of the sides.
During the tightening process, the pan must be pressed against the cylinder block. After securing all the bolts, you should check to see if the gasket has protruded anywhere. If it “climbs out”, it’s sad, you’ll have to start installing it again (and if you managed to grab it, then run for a new one). If everything is normal, all parts and fasteners are put back in the reverse order of removal. As you can see, it’s nothing complicated, although it requires time and physical effort. By the way, replacing the oil pan gasket will go faster and without distortions if you call on a sympathizer for help - at the same time, you can drink beer together afterwards.
How to remove the oil pan of a VAZ 2107
Before you begin removing and replacing the pan on a VAZ 2107, you need to understand its purpose, location and damage that entails the need to change the crankcase.
The pan is located at the bottom of the car, and in order to see it and gain access, you will need to remove the protection. Structurally, the device consists of a steel base that resembles a lid. This container contains engine oil, so to ensure tightness, there is a gasket between the crankcase and the cylinder block.
Removing the VAZ 2107 oil pan must be performed when deformations occur, which leads to engine oil leaking out of the engine. There is a lowest point on the cover body where the engine oil drain plug is located. Before removing the oil sump, you must first drain the engine oil.
An oil leak can occur not only when the crankcase is deformed, but also when the integrity of the gasket is damaged. To eliminate the leak, you need to tighten the fastening bolts, and if this does not help solve the problem, then you will need to resort to changing the gasket.
Now, when the need arises to replace the pallet on the seven, we must resort to such manipulations. It is worth noting that the gasket needs to be changed more often, and crankcase defects occur only if there is no protection on the car. Removing the engine oil pan on a VAZ 2107 should be done in the following sequence:
- To begin with, the car should be placed on an inspection hole or overpass. Carrying out work under the bottom without placing the car on a pit or overpass is simply very inconvenient.
- The next step is to begin dismantling the protection, which is secured with 4 bolts.
- After removing the protection, you need to unscrew the oil drain plug. If you plan to change the oil after completing the procedures, it is recommended to warm up the engine to 40-60 degrees before removing the plug. Before unscrewing the plug, you need to place a container into which the oil will drain. You can use an old plastic oil can for this.
- Next, you need to loosen the nuts securing the two engine mounts from under the hood. The nuts need to be loosened, but not completely unscrewed, to avoid the possibility of the engine moving. After loosening the nuts, you need to lift the engine to remove the cover. Without lifting it, it will not be possible to remove the crankcase on the seven.
- There are different ways to raise the engine. The first method is to use a traverse in the form of a wooden block, which is laid parallel to the radiator. A pin, pre-attached to the motor, is passed through the traverse. Screwing the nut onto the stud causes the engine to slowly rise. The second method involves using a winch. The third method is the simplest and most accessible - using a diamond-shaped jack, which is located under the box and, by acting on it, the engine is raised. When the engine rests against the nuts of the mounting brackets, you can continue further manipulations to replace the bottom cover.
- Along the perimeter it is necessary to unscrew all the crankcase mounting bolts, of which there are 19 in total. These bolts are screwed together with the nuts, so when unscrewing them, it is important not to lose them. Some bolts are difficult to reach, so it is recommended to use special hinged wrenches with socket or socket heads.
- After this, you can begin to dismantle the cover, as well as its subsequent replacement. The new crankcase should have a similar design. After the change, the assembly process is performed in the reverse order of dismantling.
Some Important Notes on Gaskets and Seals
- If you are installing an engine oil pan gasket (as opposed to a rubber seal or compound), you may need special adhesive to hold the gasket in place during installation. If so, apply a light layer of adhesive or high-temp sealant to hold the gasket in place.
- Also, keep in mind that a component at the bottom of the engine may create a connection to another engine component along some portion of the oil pan flange, such as the rear main bearing cap, timing cover, or oil pump. With this configuration, you need to apply sealant where these sections meet to prevent leakage in that area once the gasket is installed.
Some engine pans use rubber seals at each end along with side gaskets. You will need to apply sealant where the rubber gasket meets.
If you are going to use sealant as a gasket, apply it evenly over the contact area to a thickness of 3 millimeters.
Replacing the oil pan and its gasket on a VAZ 2101-VAZ 2107
Today, many people already know such a thing as an oil pan, but not everyone knows what it really is, when it needs to be changed and how to properly replace it on cars of the “classic” family - we will look at these questions today.
To replace the pan and its gasket, you will need to prepare a few things in advance: First, be sure to stock up on wrenches, or you can use an extension, universal joints and sockets instead!
Where is the oil pan and its gasket located?
The pan is located at the very bottom of the car engine; unfortunately, in order to fully see the pan it is necessary to remove the crankcase protection, which is done in the figure below:
The blue arrow indicates the gasket that is located between the cylinder block and the crankcase pan!
When do you need to replace the oil pan and its gasket?
The pan must be replaced if it is deformed, due to which the engine oil that was located in it begins to flow out of the pan itself.
The pan gasket must be replaced if it is strongly compressed and if it is torn, how do you understand this, you ask? Usually, when the gasket is deformed, engine oil begins to flow through it, but the leak can also be treated by simply tightening the bolts that secure the oil pan, but if tightening the bolts does not produce any results and the leak does not stop, then replace the gasket with a new one.
How to replace the oil pan and its gasket on a VAZ 2101-VAZ 2107?
This method is not always suitable for people to remove the pan from a car, because not everyone has items that facilitate this, so at the very end of the article there is a video that shows the procedure for removing and replacing the pan and gasket without the use of special tools!
- Before you start work, drive your car into the inspection pit.
- Then remove the crankcase protection from the vehicle. (How to remove the protection, see the article: “Replacing the crankcase protection”)
- Then completely drain the engine oil from the car engine. (How to drain the oil, see the article: “Changing engine oil”)
- Next, unscrew the two nuts on both extreme sides that secure the right and left engine mount to the cross member.
- Next, install the “Travece” on top of the engine compartment, it is indicated by the number “1” in the photo, and then begin to tighten the nut under the number “2” and thereby raise the engine from the car.
Step-by-step instructions for disassembling the internal combustion engine of a car + Video
- Prepare all the necessary tools and drain the oil from the crankcase.
- Firstly, this will be necessary to lighten the weight of the motor, and secondly, it will help to avoid excess dirt on the workbench. Next, unscrew the oil filter. Also unscrew all the bolts that secure the oil pan. The old gasket can be thrown away as it is no longer suitable for further use.
- Now you need to remove the crankshaft pulley. This is not as easy to do as it seems at first glance, since in this case you will need good physical strength. However, no one has canceled the use of a pipe as a wrench extension. Secure the crankshaft from turning by blocking the flywheel. For this, a special device is used, which can be purchased in the store. Next, use a wrench to unscrew the ratchet and remove the pulley.
- Unscrew the nuts securing the valve covers and timing chain, remove it and pull out the gasket. Unscrew the bolts securing the camshaft gears, as well as the shaft that drives the engine oil pump. Next in line is the timing chain tensioner. First, loosen the special cap nut, and then unscrew the other two nuts that secure it to the cylinder head. Do not forget to unscrew the bolt securing the shoe, and then remove the tensioner itself, along with the shoe. Then the pin that restricts the chain is unscrewed, the camshaft and oil pump gears are removed, and the chain is removed.
- Now you need to remove the camshaft. To do this, unscrew two nuts located on its studs in the bearing housing. The housing must be removed and the camshaft carefully pulled out. Before pulling it out, do not forget to also remove the special thrust flange.
- Next, the bolts intended to secure the cylinder head to the block itself are unscrewed. The cylinder head is dismantled immediately along with the manifolds, which are not required to be removed (depending on the type of repair being carried out). After removing the head, it is also recommended to replace the gasket. This procedure will help you, in the future, get rid of repeated removal of this element.
- After this, you need to dismantle the oil pump. To pull it out you need to remove the special thrust flange. After this, remove the roller from the cylinder block, which is responsible for driving the oil pump.
- Using a special removable device, remove the gear that fits onto the engine crankshaft. Then remove the nuts located on the connecting rod bolts. Now remove the connecting rod caps and, using the cylindrical opening, pull out the connecting rods along with the pistons.
Attention! Before removing the connecting rods and pistons, as well as the main bearings and liners, you must first mark them all to prevent errors when assembling the element.
- We return to the flywheel retainer again and install it. Unscrew the bolts that are intended for fastening and remove the washer, then pull out the flywheel mounted on the crankshaft, and then remove the protective cover of the clutch housing.
- Using a puller, remove the gearbox input shaft bearing, which is located in a special socket at the rear of the power unit. Next you need to pull out the special crankshaft oil seal holder. Now unscrew the bolts that secure the caps covering the main bearings and pull them out along with the liners. After this, you need to remove the crankshaft and the uppermost shaft bearings. Also remove the special thrust half-rings that are located on the support.
That's all you need to do to disassemble the engine. The next step is to bore various elements to repair sizes and replace damaged and worn elements. It is recommended to pay special attention to the liners, which are most often subject to rotation, which is why the motor simply jams. After repair, the engine is assembled and installed on the car.
Removing the VAZ 2107 engine sump
In principle, removing the VAZ 21010-2107 engine sump with your own hands is not difficult and, if there is an inspection hole, it will take no more than an hour (including oil changes). How to remove the pallet on the Classic, watch the video clip.
And so you will need: install the car on a pit or overpass, crawl under the car to loosen all the crankcase mounting nuts in a circle. Then use a socket wrench set to “17” to release the engine mounts. And we install a jack under the gearbox housing and lift it. After which you can remove the pan for further manipulations with the engine.
Subscribe
to our channel in
Index.Zen
Even more useful tips in a convenient format
On a warm engine, the oil pressure on the VAZ is on
The engine sump is the part located at the bottom of the car. A crankcase with a pallet is one and the same thing, so it is not at all necessary to use this phrase in everyday life. We will look at the material in detail about what this part is, why it is needed, and also how to remove the pan on a VAZ 2107.
What are the reasons that can cause a crankcase gasket to rupture?
There are not so many real reasons that can lead to gasket rupture. Among them:
Thus, gasket rupture can be associated with several factors at once. In addition, replacing the crankcase gasket is a responsible procedure that should be carried out in accordance with strict adherence to technological standards. An error in performing the work can lead to repeated rupture due to incorrect tightening torque, the entry of foreign particles during installation, poor sealing and other factors of an illiterate approach.
- Sign up for repairs
- or by phone:
- +7
How to remove the oil pan of a VAZ 2107
Before you begin removing and replacing the pan on a VAZ 2107, you need to understand its purpose, location and damage that entails the need to change the crankcase.
The pan is located at the bottom of the car, and in order to see it and gain access, you will need to remove the protection. Structurally, the device consists of a steel base that resembles a lid. This container contains engine oil, so to ensure tightness, there is a gasket between the crankcase and the cylinder block.
Removing the VAZ 2107 oil pan must be performed when deformations occur, which leads to engine oil leaking out of the engine. There is a lowest point on the cover body where the engine oil drain plug is located. Before removing the oil sump, you must first drain the engine oil.
An oil leak can occur not only when the crankcase is deformed, but also when the integrity of the gasket is damaged. To eliminate the leak, you need to tighten the fastening bolts, and if this does not help solve the problem, then you will need to resort to changing the gasket.
Now, when the need arises to replace the pallet on the seven, we must resort to such manipulations. It is worth noting that the gasket needs to be changed more often, and crankcase defects occur only if there is no protection on the car. Removing the engine oil pan on a VAZ 2107 should be done in the following sequence:
- To begin with, the car should be placed on an inspection hole or overpass. Carrying out work under the bottom without placing the car on a pit or overpass is simply very inconvenient.
- The next step is to begin dismantling the protection, which is secured with 4 bolts.
- After removing the protection, you need to unscrew the oil drain plug. If you plan to change the oil after completing the procedures, it is recommended to warm up the engine to 40-60 degrees before removing the plug. Before unscrewing the plug, you need to place a container into which the oil will drain. You can use an old plastic oil can for this.
- Next, you need to loosen the nuts securing the two engine mounts from under the hood. The nuts need to be loosened, but not completely unscrewed, to avoid the possibility of the engine moving. After loosening the nuts, you need to lift the engine to remove the cover. Without lifting it, it will not be possible to remove the crankcase on the seven.
- There are different ways to raise the engine. The first method is to use a traverse in the form of a wooden block, which is laid parallel to the radiator. A pin, pre-attached to the motor, is passed through the traverse. Screwing the nut onto the stud causes the engine to slowly rise. The second method involves using a winch. The third method is the simplest and most accessible - using a diamond-shaped jack, which is located under the box and, by acting on it, the engine is raised. When the engine rests against the nuts of the mounting brackets, you can continue further manipulations to replace the bottom cover.
- Along the perimeter it is necessary to unscrew all the crankcase mounting bolts, of which there are 19 in total. These bolts are screwed together with the nuts, so when unscrewing them, it is important not to lose them. Some bolts are difficult to reach, so it is recommended to use special hinged wrenches with socket or socket heads.
- After this, you can begin to dismantle the cover, as well as its subsequent replacement. The new crankcase should have a similar design. After the change, the assembly process is performed in the reverse order of dismantling.
Removal: step-by-step instructions
Those who are faced with such a procedure for the first time often find themselves in this situation. They open the hood, looking at the engine and feel that the task ahead is of unprecedented scale. But in practice the situation is much simpler.
Two men in their garage can easily remove the old engine and put a new one in its place. You just need to know how to remove the engine on a VAZ 2107.
Immediate advice for beginners: the engine can be removed entirely. However, it weighs more than one hundred kilograms when assembled. And after removing it you still have to disassemble it. Therefore, sometimes it is easier to remove the engine and partially disassemble it directly under the hood.
- The first step is to remove the hood. Although this thing is quite useful during normal operation, when replacing the engine it will only hinder us. There are special nuts for removing the hood. But don’t rush to start twisting them right away. Remember, after finishing the work, the hood will have to be returned to its place. And in order not to make a mistake with its installation, apply special marks around the perimeter of the canopy with a black marker. This will help you save your nerves, which will no longer be enough at this stage of work.
- Use soft blankets to cover the front wings. This will avoid damaging the paint.
- Drain the coolant. To do this, use a hose and a canister. You don't want antifreeze to just be poured onto your favorite garage floor, do you? To drain the antifreeze, there is a special plug conveniently located on the cylinder block.
- Some people also advise draining the liquid from the radiator. But it’s better to put this bad thought aside. Most likely, your radiator tap has been clogged for a long time. And if you start to unscrew it, you will easily damage the radiator. So it's better not to touch him. The rest of the liquid is drained into the lower radiator pipe. After the antifreeze is drained, remove the pipes and take the radiator out of harm's way.
- We also don’t need electrical wires on the distributor, on the oil sensor, on the coolant temperature sensor and on the carburetor (if there is one). So, without regret, we remove them.
- And the fuel supply hose will also only get in our way for now. It must be removed by releasing the clamp using a screwdriver. Do you like the idea that gasoline can pour from this hose onto that very favorite and still clean floor in your garage? If not, then do not forget to lift the hose up and secure it in this position.
- The right side of the engine compartment was sorted out. Now it's the left's turn. You need to carefully unscrew the exhaust pipe. And here a new danger awaits us! The fact is that the factory nuts that are used to fasten the exhaust pipe are made of a very soft alloy. If you press a little, you can collapse the edges in one go. So you will have to apply your experience in unscrewing rusted nuts. And since you’ve decided to remove the engine yourself, we’ll assume that you’ve already learned how to twist the nuts too.
- It was the old starter's turn. It also needs to be removed, after first disconnecting the terminals from the battery. Three fastening bolts will help us unscrew the key to 13.
- You also need to disconnect the wires from the generator.
- Don't forget to remove the air filter housing as well.
- Our work on dismantling the car for spare parts is moving forward successfully. And the time comes to disconnect the engine from the gearbox. You don’t want to tear out your favorite gearbox along with the engine, roots and other contents, do you? To disconnect the parts, you need to use spanners bent to the side, which will easily unscrew the two upper bolts.
- While we are still above the hood, use a screwdriver to loosen the clamps of the heater radiator pipe.
- We remove the throttle from the gas pedal.
- Before going into the pit, we finally remove the choke cable if the car has a carburetor.
- By the way, a pit can be very useful to remove the engine. And if you have one, then you can easily go down into it, remove the clutch cylinder spring and, using a 13mm wrench, unscrew the two bolts.
- Now very carefully move the clutch cylinder to the side to remove it. And under no circumstances even think about accidentally pressing the clutch pedal. Otherwise, you will have to add a new chapter to your epic: a “joyful” overhaul of the working cylinder.
- Now comes the turn of the two bolts with which the gearbox is attached to the engine.
- And let's work a little more with the bolts. Where would we be without them? You need to tighten the bolts that secure the protective cover to the body.
- And a little more twist: you need to use a 17 socket to unscrew the nuts from the engine mounts.
- And only now, when all the preparatory work has been done, comes the culmination of our amazing adventure: we begin to remove the unit from the engine compartment. Place a jack under the gearbox and lift it slightly so as to remove the engine mounts from the mounting studs.
- We hook the motor with special belts and use talcum powder to lift it up a little.
- We put the box in first gear
- With light shaking movements using a winch or talc, remove the engine from the guides.
- When the unit comes off the guides, remove it.
- We roll the car to the side, brew a cup of coffee and relax, satisfied with the work done.
Of course, there is still a lot ahead of us: transportation of the engine to the place of major repairs or self-repair directly on site, installation of a repaired or new unit in place.
There is no point in describing the installation process, since all work is carried out according to the same list only in reverse order.
Of course, textual information alone is clearly not enough to begin work on removing and installing the engine. We advise you to carefully study this issue using a video on YouTube. We have just selected several good lessons on this topic.