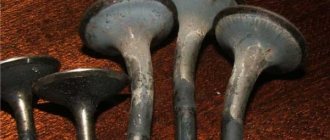
How to determine wear
The inner surface of the bushing wears out the most. Wear becomes noticeable when the mileage reaches 150 thousand km or more. But if you use low-quality brands of oils, then the resource of the elements becomes even shorter.
There are two ways to check the degree of wear:
- Using two measuring instruments - a nutrometer and a micrometer. They allow you to measure the minimum value of the (internal) diameter of the bushings. In addition, with their help you can measure the maximum diameter of the valve stem stroke. In fact, the difference between these two values is the wear value. Just before starting measurements, be sure to clean all elements from dirt, dust, and oil. This will significantly increase accuracy and reduce error.
- Using a special hour indicator mounted on the stand. This can be an indicator or micrometric bore meter. If the gap is large, it is necessary to install a new valve and recheck. If this time the gap goes off scale, you will have to change the guides.
However, it is best to replace the valve guides during a major overhaul. You still need to remove the cylinder head for measurements. And this is the most difficult thing in the repair procedure.
Causes of premature valve sleeve wear
Since valve guides are installed inside the cylinder head and are made (depending on the engine model) from cast iron, bronze, brass or alloys, not every car enthusiast knows about their existence. This is due to the fact that the life of the bushings is from 200,000 km.
The only malfunction is mechanical wear of the inner surface as a result of friction. The following factors influence the rate of wear:
- timeliness of engine oil replacement and quality;
- temperature regime of internal combustion engine operation;
- fuel mixture quality;
- serviceability of the power system;
- correct adjustment of the ignition system;
As a result of guide wear, the valve stem loses centering and moves skewed, which does not provide the necessary tightness between the seat and the valve plate. As a result, oil enters the combustion chamber and a burning combustible mixture breaks into the intake or exhaust manifold, which leads to premature wear of components and parts.
Reasons for replacing VAZ-2109 valve guides
Among the reasons that lead to replacing the valve guide element of the VAZ-2109 engine, experts cite wear of this part. It can be determined by the following characteristics:
- Engine oil entering directly into the combustion chamber (this can be judged by increased oil consumption and gray smoke from the exhaust pipe).
- Tapping from the side of the engine block head (this is the bushing and valve knocking against each other).
- Reduced car engine power.
Also, a malfunction of the guide element can be noticed visually when replacing a set of valves and during a major overhaul of the engine block head.
As soon as the car owner notices signs indicating failure of the guide elements, without wasting time, they should be replaced with new ones. This can be done either independently in a garage or with the help of qualified car service specialists.
Valve mechanism design and repair
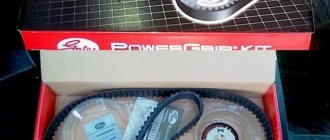
Almost all characteristics of a car engine depend on the condition of the timing belt.
The valve mechanism of internal combustion engines is a special organism with its own operating mode and with its own requirements for maintenance and lubrication quality. If the service is still a bit messy, most oils have a dubious reputation, and often the Mobil 1 sticker speaks only about the quality of the printer on which it was printed, since no one can give guarantees of the quality of the oil in our market, which is generous with scams. Any valve mechanism is driven from the crankshaft via a chain, as in the VAZ 2101, 2106, ZMZ 406 on the Volga or ZMZ 402 on old GAZelles. Modern cars, as a rule, use a belt drive for the gas distribution mechanism. These are all the cars VAZ 2107, Priora, Kalina, VAZ 2108 and VAZ 2109, which we are talking about today.
The valve mechanism is, in principle, quite simple. It consists of the valve itself, a guide bushing, a seat, as well as a spring system for automatically closing the valve with fixation by conical half rings, which are called crackers. To prevent the oil that the oil pump supplies to lubricate the gas distribution mechanism from entering the combustion chamber, a valve oil seal is pressed onto the guide sleeve, which needs periodic replacement. The valve mechanism operates in hellish conditions, often with oil starvation, at high temperatures, while it is required to operate accurately and have perfect tightness of the valve plate/seat interface. At the slightest inaccuracy in operation, the valve timing fails, the combustion chamber loses its tightness, which leads to a sharp drop in power, high fuel consumption and, especially, oil, rapid failure of valve mechanism parts and the entire timing belt.
Video tutorial on replacing valve guides
How to correctly replace VAZ-2109 valve guides
Of course, if you really want to replace the elements that serve to guide the movement of the engine bushing, you can do it yourself in a garage. But such a procedure can cause some difficulties. This is due to the fact that the bushing itself is pressed tightly in order to prevent the appearance of a gap through which engine oil can enter the combustion chamber.
To carry out the procedure for replacing guide elements, you will need tools (every car enthusiast usually has them in the garage):
- puller/mandrel for pressing out;
- presser;
- 8.03 mm reamer (a special long drill with which the hole is brought to the desired size).
It is also advisable to prepare the coolant. All these tools will be needed, since before replacing the guide element you will have to remove the bushings themselves.
On the VAZ-2109, the replacement procedure is carried out in the following sequence:
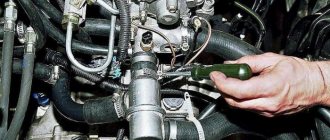
- The first stage is preparing the engine for removing the valve bushings from it:
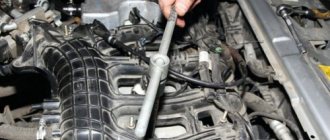
- the valve cover is removed;
- the bolts that secure the block head are unscrewed (there should be ten of them);
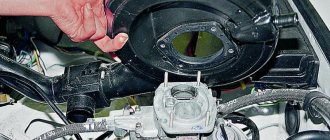
- the cylinder head is removed;
- the camshaft is removed from it;
- the studs are unscrewed (primarily the end ones).
- The second stage, cleaning the cylinder head, should be done on a workbench using a solvent or diesel fuel.
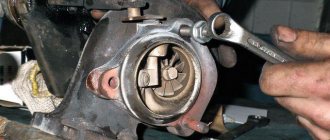
- The third stage is pressing out or knocking out the bushings:
- the mandrel is placed on this element from the side of the combustion chamber;
- the head heats up to a temperature of 100-120 degrees;
- use a hammer to knock out each of the bushings (the blows should be relatively light);
- the areas from under the knocked-out parts are washed with gasoline using a rag or a rag made of soft material;
- After washing, the seats are blown with compressed air.
- The fourth stage is the replacement of the engine valve guides with the subsequent assembly of the entire mechanism:
- the block head heats up;
- a repair kit of new bushings is pre-cooled in a regular freezer;
- mounting holes for bushings are processed using a reamer;
- New guide elements are placed in the machined holes.
- The fifth stage is pressing, which is carried out by hammering using a mandrel.
If such a procedure causes difficulties for a car enthusiast, then it is best to contact a car service center.
Final stage - development
It happens that when installing valves, they do not fit into the new bushings. This is due to the fact that when pressed in, the guides may slightly change their internal diameter. This is where reamers come to the rescue, with which our spare part is bored to the required diameter. We apply sequentially one after another in an increasing manner. At the same time, measurements are taken after each use. It is better to take diamond reamers straight away, since steel ones deteriorate much faster.
Reaming guide bushings 8.022 mm
As mentioned at the very beginning, valve guides, despite their apparent simplicity, are one of the basic elements of the gas distribution mechanism. Understanding this point, as well as the possible consequences in the event of a malfunction, will save a lot of nerves, time and money.
How to install new bushings
Before installing 2108 valve guides, the actual preload must be determined. In order to do this, you will need to measure the diameters of the bushings and the seats for them in the head. The maximum difference should be 0.05 mm. If the socket is too small, you will have to select a bushing of a smaller diameter, and vice versa.
Immediately before pressing in the bushings, it is necessary to warm up the head and treat the guides themselves with liquid nitrogen. This is not always the only one available in the garage. Therefore, put the parts in the freezer for several hours - as a result of cooling, they will decrease in diameter.
The pressing procedure is performed in reverse order. In order to install the elements, you need to use a hammer (simple or pneumatic) and a mandrel. Using gentle blows, you need to drive the elements into the mounting holes. And it is also recommended to treat the VAZ-2108 valve guides with machine oil to make pressing easier.
Views: 7
How to remove old guides
Before starting repairs, you need to warm up the cylinder head to 100 degrees. Due to the fact that aluminum expands more than brass or bronze, it will be a little easier to remove the guides.
Things to consider when dismantling:
- To remove it, it is best to use a drift (special mandrel). Of course, the cost of the tool is quite high, but with its help you will be able to press the bushing clearly along the axis. But it is allowed to use simple and pneumatic hammers.
- Quite often it happens that the bushing comes out poorly. You will have to resort to using a drill - you need to drill out the guide with it. Often it does not need to be completely drilled out; simply reducing the wall thickness is enough.
- Please note that the landing socket should have as smooth a surface as possible. Scratches, various types of roughness, and other defects, even minor ones, are not allowed.
After pressing out the old bushings, you need to thoroughly clean the internal seating surfaces.
What happens during deformation
As you understand, literally anything can happen when the engine is running. The guide elements overheat, the alignment with the valve stem is disrupted, and as a result, the motor parameters deteriorate. Under constant loads, the element breaks even more, and the seat chamfer is destroyed. And in the best case, you will have to replace the seat and valve, since the latter will burn out.
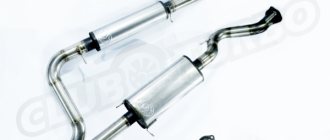
If the valve stem continues to “walk” in the guide, the seals will also be destroyed. They are made of a relatively soft material, but under excessive stress it hardens. As a result, even with a slight displacement of the rod, destruction of the oil seal can occur. The result is that oil enters the combustion chambers, heavy carbon deposits appear, and the level of harmful emissions increases. In addition, the catalyst and lambda probe (oxygen sensor) become unusable. And even if you install new caps, the problem will not go away for long.
The following two tabs change content below.
- Bio
- Latest Posts
admin1
I am a professional in the field of Auto Electrics and Auto Diagnostics. Work experience more than 10 years. I will identify and eliminate faults of any complexity. (Even with cars that Dealers and services cannot handle, as it were, of the highest class). We carry out all types of work on the installation of additional electrical equipment (xenon, multimedia system, special signals, etc.)