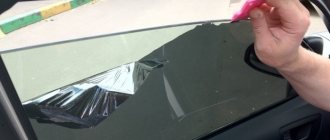
Removing the seal
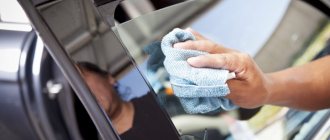
Before installing a new one, the old windshield of the VAZ 2109 must be carefully dismantled. To do the replacement yourself, you will need a slotted screwdriver with a slot width of 10–12 mm. If you plan to reuse the seal, make sure the screwdriver is relatively dull so as not to injure its blade. Before replacing the windshield, it is recommended to remove the windshield wipers. Even bent, they create interference.
Start dismantling the windshield on a VAZ 2109 from inside the cabin, from the middle of the top edge. In profile, the seal resembles the letter “H”. Between the lower halves of the legs of this letter is the edge of the windshield, and between the upper halves of the legs is the edge of the frame, smoothly turning into the roof of the body. You must carefully press the upper leg of the letter “H” closest to you and push it out of the body. Both legs of the upper part of the seal profile will be on the outside of the frame, and you will see the exposed metal of the edge of this frame.
After pushing out the first section of the seal, expand the area step by step. The most difficult step is the first, then the seal goes out almost without resistance. With a little luck, you can push the edge of the seal out without damage. Expand the removal area gradually in both directions from the center until the upper corners of the windshield are free.
If you are replacing the side glass of a VAZ 2109 located behind the rear door, start from the middle of the long side.
Replacement
Replacing the windshield on a VAZ 2109 involves premature removal of the old one.
Replace the windshield of a VAZ 2109
Removing glass from a “nine” is much easier than, for example, from a “ten”. In this case, the glass is not glued directly to the body of the vase. On the contrary, it is fixed with a seal.
Removing the old windshield
To get rid of your old windshield, follow these steps:
- ? Take a screwdriver and insert it into the seal about 5 mm. This should be done at the top of the windshield.
- ? Push out the seal so that part of it can be pulled out.
- ? Move the screwdriver about 5 cm to the side.
- ? Get rid of the sealant step by step.
Note: It is advisable to do this gradually so that the glass does not fall out. Jerking will not lead to anything good.
- ? After the seal is removed to the upper side corner, you can begin to remove the glass itself.
Note: there are two ways to remove it: either squeeze it out from the inside (this will allow you to remove it from the outside), or pull it towards you (for maximum results, pull it slightly upward).
It is usually not possible to save old glass. Even professionals rarely succeed in this. That is, it will be damaged during operation. And why save it? If you decided to carry out work to replace it, then there were reasons for this.
How to prepare new glass
Replace the windshield on a VAZ 2109
Before you begin installing new glass, you must do the following:
- ? Put on the seal. You can use an old seal that was removed from the previous glass. This will make the work easier, since it is already more elastic, so it can be easily installed in the right place.
- ? However, using a new seal will require a lot of force. To do this, you will need to put it on all corners of the glass. Afterwards, you will need to lightly press on it so that it sticks into the side, top and bottom sides.
- ? Now it’s the castle’s turn. This is a small wedge that looks like the letter P. It needs to be inserted so that it is in the center of the seal, but runs along its entire perimeter.
Note: Before installing the wedge, it needs to be stretched slightly. This is done very easily, since it is quite plastic.
- ? You need to insert it like this: first the long part, then the short one. This needs to be done around the entire perimeter of the glass. However, part of the wedge may remain, so you will have to carefully cut it off, because it will interfere if everything is left as it is.
Glass installation
Do-it-yourself windshield replacement for VAZ 2109
To easily install the glass in place, you need to use a rope (it should be quite dense and strong so that it does not break). Everything needs to be done in the following sequence:
- ? Determine by eye where the middle of the rope is located. Insert this part into the seal (outside). Since the seal has two grooves, you should find the one that will be closer to the outside of the glass. This is where the rope is inserted.
- ? Using a screwdriver, insert the rope into the groove until it stops. Insert the rope until the middle of the bottom of the windshield is reached.
- ? On the opposite side, the rope should also be inserted until it intersects with the end of the previous rope.
- ? When they intersect, the end of one must be placed on the end of the other.
Windshield and its replacement
Note: There should be a slight overlap. Its length should be approximately 5-10 cm. In this case, it should be recessed into the seal all the way.
- ? Before you begin installing the windshield, you should pull the loose ends of the rope inside the car.
- ? Now you can lay the glass on the opening. This must be done so that the lower part of the opening penetrates the outer groove (that is, the groove where the rope was previously inserted).
- ? The glass should be pressed lightly, but not inside the car, but down.
Note: This will allow him to sit better.
- ? The rope should be pulled towards you, but not vertically, but horizontally.
- ? The seal easily makes its way into the interior.
Note: You should wipe it off so that it does not get on any parts of the machine. Once it dries, it hardens, so it will be much harder to remove.
- ? Pull half the rope to the bottom corners of the glass.
- ? After this, smoothly seat the glass.
- ? To make it easier to overcome corners, you need to pay attention to the following: to make it easier to go through left corners, you need to “twist” the rope clockwise, and right corners - vice versa.
Note: This is quite difficult to do as the rope is tight. However, the slower this action happens, the better it will be. This way the insulation will fit well on the opening and will hold up well afterwards.
- ? While pulling the rope, you need to carefully seat the glass in the opening. Under no circumstances should you hit the glass with any foreign objects. You can only lightly hit it with your hands (or rather, not even hit it, but gently push it).
Windshield VAZ 2109
- ? When the rope has completely come out, you should carefully check the interior. After all, the seal could come out and glue residue could remain. And besides, he could have landed on the torpedo. To fix this, you should drive it into the opening using a flathead screwdriver.
- ? Finally, you should shrink the glass all the way. To do this easily, you need to place your hand on the top edge, lightly hitting it with your second hand. The same should be done with the rest of the glass area.
High-quality windshields for VAZ 2109
Note: There may be slightly noticeable gaps between the seal and the opening. This is not a big deal, as they could have appeared due to slight movement of the glass. After just a few days, the glass will shrink better and all the gaps will disappear on their own. And the glass will stand completely still.
If you want to save time, you can take your car to a car dealership, where the price for windshield replacement work will be rather high. But, if you want to save your money, you can do the repair work yourself. Of course, before this you should review various photos and videos on this topic. And if you come across instructions somewhere on the Internet, you should not neglect them.
Removing old glass
Further actions depend on whether you have two vacuum glass holders. Glass holders are a pair of vacuum suction cups and a handle between them. Of course, it’s not worth buying this device, since you only need to remove the glass once. But if you borrowed holders, then it’s time to use them and ask your friends for help. Get out of the cabin, install holders on the sides of the windshield in parallel with a friend, “suck” to its surface and, at the same time as an assistant, pull the holders up and out. The rear window of a VAZ 2109 is removed in the same way.
If you don't have vacuum holders and only have a slotted screwdriver, stay inside the car. Carry on with your work calmly.
- Inch by inch, push the seal out.
- When you reach the middle of the racks, ask an assistant to hold the glass from falling out.
- If you do not have an assistant, first place a blanket or other shock-mitigating material on the hood.
- After releasing the seal to the bottom corners, gently push the glass out.
If you plan to install new glass on the old seal, remove it from the dismantled one. Thoroughly clean from dust and dirt, wipe with a degreasing solvent and dry. If you don't need it, feel free to throw it away.
Keep in mind that exposure to temperature, moisture, and ultraviolet radiation will not be in vain: all this reduces the performance properties of the sealant polymer. Reusing this element is associated with risks of cracking, moisture penetration into the interior and complete failure of the element.
What is required for the work
If you decide to replace the windshield on a VAZ-2107, then, first of all, you need to purchase a new product. In addition, you will need to stock up on the following tools and materials:
- screwdrivers;
- textile;
- cord with a diameter of about 4 mm and a length of 5 m.
It is almost impossible to replace the windshield on a VAZ-2107 yourself, so you will need an assistant. You can ask a friend or family member. Next, let's find out where to start.
Removing the product
Before proceeding with the dismantling of a cracked product, a thorough inspection of the new one is required. Of course, this should have been done in the store, but a second inspection never hurts. Now you can begin the process of dismantling the product:
- Initially, you need to remove the lock from the spacer wedge located in the middle of the glass from the bottom. The process is performed using a flat-head screwdriver.
- After this, it is necessary to remove the wedge-shaped rubber insert. This is not difficult to do; to remove it you will need to walk around the entire perimeter.
- Place fabric on the hood. The softer the fabric, the better.
- After this, it is necessary to squeeze out the glass from the interior side. It is necessary to press on the upper corners of the product. An assistant must hold the glass from the back of the passenger compartment so that after squeezing it out, it does not fall on the hood. At the same time, do not forget to remove the wipers so as not to damage them.
- After removing the product, you need to remove the rubber seal and clean the installation groove on the car body. You can use a degreaser for cleaning. The presence of rust is unacceptable, so if necessary, areas of corrosion should be cleaned and painted over.
Preparing the installation kit
Before installation, a number of preliminary works need to be done.
| Stages | Actions |
| First of all, try on the new windshield. | If the fit is not tight, eliminate minor discrepancies in the geometry with light blows of a rubber hammer. If you use a regular steel hammer for straightening, be very careful; strike through a piece of thick rubber or elastic polymer material. |
| After eliminating geometric discrepancies, the frame should be inspected for corrosion. | Treat areas with traces of corrosion with a rust modifier and prime. |
| Prepare the sealant. | Apply a thin layer of sealant to the well-cleaned and dried surface of the internal (glass) groove. Do not use quick-drying sealants. Throughout the entire process of installation and shrinkage, which lasts two to three days, the sealant must maintain viscosity. |
| Install the seal on the new glass. | Generously lubricate the outer (frame) groove with liquid sealant. Use the groove closest to the car interior; this is where the edge of the frame should fit. |
To install glass with a seal into the frame, you will need 4.5 meters of durable nylon cord. The length is determined by the size of the windshield. You need to add 50–70 cm to the perimeter of the frame. The size of the rear window and the size of the side glass are taken into account in the same way. The cord should have a slippery surface and a diameter of 4 mm.
It should be placed in the outer groove of the seal, starting from the middle of the cord and from the center of the top of the frame groove. The cord should be laid symmetrically to the right and left from the center of the upper groove, down along the left and right edges of the element and along the lower edge of the part from the edges to the center. In the middle of the lower groove, the mounting cord should overlap, one end over the other.
The cord should have free ends that should not be tucked into the groove; they are needed during installation.
Welcome!
Most people who periodically use their car have their windshield deformed from time to time, most often this happens from a stone hitting it, a bird flying past, or an accident. The windshield of a car plays a very important role; it creates additional rigidity for the car body, which has a very positive effect in the event of a collision.
Note!
It is not recommended to leave a car without the glass removed for a very long time, because if the windshield is missing for a long time, the car body may become distorted; of course, you won’t see anything by eye, but this will make itself felt when installing a new glass!
Summary:
What other glasses can be replaced using these instructions?
Using this article, you can replace other fixed windows on a Samara family car in exactly the same way, since their replacement is carried out in the same way; fixed windows include:
- Front windshield.
- Rear trunk window.
- As well as small rear side fixed windows.
How to make rear window heating on a VAZ-2106
However, it is quite possible to correct the situation on your own. Let's look at how you can install rear window heating on the “six” if it is not available here. There is probably no need to look for too complicated ways. It is best to immediately purchase suitable glass with heater filaments. On the secondary market it is quite possible to find a normal option at an affordable price. Rear windows break quite rarely, so there should not be any special problems here. Of course, you can supply the threads yourself by purchasing a universal kit. However, there is a very high risk of running into a low-quality product.
The consequences of such an installation can be very serious.
In addition to glass, you will also need:
- terminals are wide and bolt-on;
- circuit breakers;
- wires;
- relay (PC527 or analogue) and a block for it;
- screw;
- rubber tubes;
- on/off button.
Regarding the latter, I would like to add one piece of advice. The button must be purchased with an indicator. Do not forget that heating consumes electricity very seriously, draining the battery. Accordingly, the glowing indicator will remind you to turn it off in a timely manner.
Before starting work, you should remove the negative terminal from the ignition. After this, you can remove the instrument panel and embed a button there. In principle, it is possible to place it in another place, but this is the most optimal option. Moreover, there is enough space there, and the procedure for removing the shield will not take much time.
Next, install the relay and you can start laying the wiring. As experienced craftsmen advise, when calculating the length, add a small reserve, as they say, just in case. Please note that it is necessary to connect only through a relay. Power supply will directly result in extremely undesirable consequences - burnt out contacts and a melted button.
Now we take the hanging fuse and cut the looped wire, stepping back from the edge by about 6 centimeters. Next you need to do one simple manipulation. We crimp the ends of the wire with wide terminals and connect them to the fuse (short end) and to the relay (long).
You can move on to the next stage. We pull 2 wires from the heating switch. The ideal option is a section of 1.5 square millimeters. You attach one of them to the fuse (behind it), the second should be attached to the relay block. Now we remove the left thresholds - front and rear - and pull the wires to the rear window. That's practically all - all that remains is to combine our heating system into one whole. To do this, you need to connect the wire to the glass and to ground.
How to replace the windshield, also known as the windshield, on a VAZ 2108-VAZ 21099?
Removal:
Note!
The glass on the Samara family car is secured with a rubber seal and therefore it is much easier to remove, unlike more modern cars, for example the VAZ 2110, on which the windshield is directly glued into the body!
2) Now use a screwdriver to unscrew the screws that secure the side pads on both sides.
3) And then remove them.
4) Now tuck the edges of the rubber glass seal behind the body.
Note!
After the edges are tucked in, press the upper corners of the glass from the interior and gently push it out. The blown-out windshield should be taken care of by an assistant standing outside!
Installation:
Note!
Before installing new glass, inspect the rubber seal for defects and, if possible, replace it with a new one. But installing a new seal on the glass will be much more difficult, because as a rule, the old seal is more elastic, and therefore can be installed on the glass much easier!
1) At the beginning of the operation, rinse the grooves of the rubber seal with water and then blow it with compressed air, thereby drying it completely from water.
2) After this, put the rubber seal on the windshield.
Note!
After the seal is installed, lubricate the seal groove with WD-40 or something similar, or with soapy water!
3) Then use a strong cord or rope, and then, by hand or using a screwdriver, insert it all the way strictly into the first groove of the seal, which is located closer to the inside of the glass. (If you don’t understand which groove we’re talking about, then play the video below, and you’ll find out everything in detail)
Note!
When the rope is completely recessed into the first groove, be sure to close it so that the ends of the rope overlap at the very bottom of the glass!
4) Next, install the glass together with the rubber seal in the opening in its place. When installing, make sure that the ends of the rope are inside the cabin.
Note!
When you begin to pull the rope, make sure that the edge of the seal is pulled over the edge of the opening. For greater confidence, you should press with your hand from the outside the place where you are pulling the rope from the inside!
Additional video materials:
Removing the windshield from the car is not difficult, but installing new glass in this place will require some effort. Below we have prepared a video that describes in detail the entire process of installing new glass.
Important!
To avoid various injuries, it is best to remove the windshield together with an assistant!
Typically, replacing a VAZ 2109 windshield does not involve any secondary use of this transparent shield. If improved airflow helps prevent thermal cracking, then the risk of catching a road stone is inevitable, whether you have double glass with a polymer layer or single-layer tempered stalinite. It also happens that, for one reason or another, it is necessary to replace the rear window of a VAZ 2109.
Preparatory work
Before replacing your windshield, you need to think through everything thoroughly and prepare it. Find some comfortable, spacious place, and remove everything that might get in the way; there shouldn’t be anything under your feet, otherwise, God forbid, you’ll stumble and then... It’s all down the drain. Important! The room must be at least +15 Celsius, otherwise you may not succeed.
So, let's go!
- Dismantle the frill; to do this, be sure to remove the wipers.
- Next, remove the plugs, then unscrew the screws that are under them.
- There are two “10” nuts along the edges of the frill, under the hood; they need to be unscrewed.
- Now you can remove the rubber seal in the engine compartment and unscrew the screws that connect the frill and sound insulation.
- The frill is fixed with a latch in the center; grab it with both hands closer to the latch and pull it out.
- Lift the frill, cut the clamp and the washer hose in some inconspicuous place, but convenient for later installing the adapter there.
- Finally dismantle the frill.
- After pulling out the molding, hooking it by the edge, remove two triangular-shaped rubber gaskets from the bottom of the glass.
In VAZ cars, replacing the windshield involves so-called sawing, now more about this.
Sawing is done using the string that I mentioned earlier. With its help you need to cut off the old glue. The strings themselves come in two types - square and round twisted, the first one cuts, and the second saws. The principle of operation is this: place one end of the string behind the upper left corner of the glass, and the other remains outside. As I already said, you can’t do without an assistant, because one must pull the string down along the left glass pillar, the second along the roof. Important! Pay attention to the angle at which the string passes, it should go along the edge of the glass, you need to saw until one end of it is in the cabin.
Then one end is brought into the cabin, the assistant sits in the cabin, and you remain outside. The principle is exactly the same as that of a “two-handled saw” (a saw with two handles). The person sitting in the cabin tilts the string in the direction of the cut, the second person stands on the right and pulls the string along the glass, moving it slightly upward so as not to damage the paintwork. Having reached the right corner of the glass about 10 cm, the person standing outside should take the string around the corner and cut along the right post. It is most convenient to cut the windshield of a VAZ from below under the hood; the person cutting from inside must press the string against the glass so that it does not accidentally touch or cut the torpedo.
After finishing cutting the glass, dismantle it, remember about the antenna mount, it also needs to be removed.
Note: to make the old glue easier to cut, heat the glass using a hair dryer, making sure that the heat does not melt the paintwork.
Removing the seal
Before installing a new one, the old windshield of the VAZ 2109 must be carefully dismantled. To do the replacement yourself, you will need a slotted screwdriver with a slot width of 10–12 mm. If you plan to reuse the seal, make sure the screwdriver is relatively dull so as not to injure its blade. Before replacing the windshield, it is recommended to remove the windshield wipers. Even bent, they create interference.
Start dismantling the windshield on a VAZ 2109 from inside the cabin, from the middle of the top edge. In profile, the seal resembles the letter “H”. Between the lower halves of the legs of this letter is the edge of the windshield, and between the upper halves of the legs is the edge of the frame, smoothly turning into the roof of the body. You must carefully press the upper leg of the letter “H” closest to you and push it out of the body. Both legs of the upper part of the seal profile will be on the outside of the frame, and you will see the exposed metal of the edge of this frame.
After pushing out the first section of the seal, expand the area step by step. The most difficult step is the first, then the seal goes out almost without resistance. With a little luck, you can push the edge of the seal out without damage. Expand the removal area gradually in both directions from the center until the upper corners of the windshield are free.
If you are replacing the side glass of a VAZ 2109 located behind the rear door, start from the middle of the long side.
How to Install a Rear Window on a VAZ 2106
1. Remove the trunk mat
2. Remove the spare wheel compartment cover.
4. Remove the front door sill trim as shown in the figure.
5 Remove center side trim as shown
6. Remove the rear side door sill trim.
Models without additional rear seats.
Models with additional rear seats.
7. Remove the rear side door seal.
8 Remove the rear door sill trim.
a) Use the special tool to remove the covers as shown in the picture. b) Use a screwdriver to unscrew the covers. c) Remove the rear door sill trim as shown in the figure.
9 Remove the luggage compartment side panel. a) (models with additional rear seats)
Using a screwdriver, remove the lower rear belt cover.
Note. Before unrolling, secure the screwdriver with protective tape.
b) (Models with optional rear seats) Loosen the bolt and remove the lower seat belt anchor for the optional rear seats. c) Using a special tool, remove the covers and remove the side trim of the luggage compartment.
d) (For the right side of the luggage compartment) Disconnect the connector.
10. Remove the rear pillar trim
a) (Models with optional rear seats) Using a screwdriver, remove the seat belt upper cover.
Note. Before installation, wrap the screwdriver with protective tape.
b) (models with additional rear seats)
Using a screwdriver, remove the trim to secure the rear seat belt, unscrew the bolt and remove the upper seat belt anchor.
Note. Before installation, wrap the screwdriver with protective tape.
c) Unscrew the bolt and remove the upper seat belt fastenings on the rear seats.
d) Using a special tool, remove the covers as shown in the figure and remove the rear column trim.
11, Remove the front side window.
a) Pull the line out of the cabin
b) Secure the ends of the string to wooden blocks
c) Using a string, cut off the adhesive layer and caps.
d) Remove the glass. Attention: When cutting, leave as much glue on the body as possible.
Rear Side Window 1. Seat belt for optional rear seats (models with optional rear seats), 2. Rear door trim, 3. Cargo area mat, 4. Spare tire cover, 5 Rear seat belt, 6. Seat belt trim . with additional rear seats, 7. rear side door seals, 8. center side trim, 9. front door sill trim, 10. side door sill trim, 11. trunk door trim, 12. piston, 13. rear side window, 14 tight rear side window, made of insulated rear pillars 15.
1. Clean and level the housing contact surface.
2. If the glass is removed, it must be cleaned.
3. Install the seal as shown in the illustration.
4. Apply primer to the unprotected part of the body.
5. Apply primer to the glass contact surface.
6. Using a syringe, apply glue to all contact surfaces of the glass, as shown in the figure.
Attention: Make sure the glass installation is complete when using glue.
Removing old glass
Further actions depend on whether you have two vacuum glass holders. Glass holders are a pair of vacuum suction cups and a handle between them. Of course, it’s not worth buying this device, since you only need to remove the glass once. But if you borrowed holders, then it’s time to use them and ask your friends for help. Get out of the cabin, install holders on the sides of the windshield in parallel with a friend, “suck” to its surface and, at the same time as an assistant, pull the holders up and out. The rear window of a VAZ 2109 is removed in the same way.
If you don't have vacuum holders and only have a slotted screwdriver, stay inside the car. Carry on with your work calmly.
- Inch by inch, push the seal out.
- When you reach the middle of the racks, ask an assistant to hold the glass from falling out.
- If you do not have an assistant, first place a blanket or other shock-mitigating material on the hood.
- After releasing the seal to the bottom corners, gently push the glass out.
If you plan to install new glass on the old seal, remove it from the dismantled one. Thoroughly clean from dust and dirt, wipe with a degreasing solvent and dry. If you don't need it, feel free to throw it away.
Keep in mind that exposure to temperature, moisture, and ultraviolet radiation will not be in vain: all this reduces the performance properties of the sealant polymer. Reusing this element is associated with risks of cracking, moisture penetration into the interior and complete failure of the element.
Purpose of the windshield and rear window of a car
A trivial question: “Is it possible to drive a car without a windshield or rear window?” The answer is very simple: “Of course you can.” But in this case you will get maximum discomfort inside the car. Wind, dust, and any precipitation will be directed into the cabin, and the air temperature in it will be the same as outside. In addition, various insects and even birds will fly into the cabin, as well as stones from under the wheels of the vehicle in front. And we can’t even talk about what a car looks like without glass. Protecting the driver of the car and his passengers from external physical and weather factors, this is precisely the main purpose of the windshield and rear window.
Preparing the installation kit
Before installation, a number of preliminary works need to be done.
| Stages | Actions |
| First of all, try on the new windshield. | If the fit is not tight, eliminate minor discrepancies in the geometry with light blows of a rubber hammer. If you use a regular steel hammer for straightening, be very careful; strike through a piece of thick rubber or elastic polymer material. |
| After eliminating geometric discrepancies, the frame should be inspected for corrosion. | Treat areas with traces of corrosion with a rust modifier and prime. |
| Prepare the sealant. | Apply a thin layer of sealant to the well-cleaned and dried surface of the internal (glass) groove. Do not use quick-drying sealants. Throughout the entire process of installation and shrinkage, which lasts two to three days, the sealant must maintain viscosity. |
| Install the seal on the new glass. | Generously lubricate the outer (frame) groove with liquid sealant. Use the groove closest to the car interior; this is where the edge of the frame should fit. |
To install glass with a seal into the frame, you will need 4.5 meters of durable nylon cord. The length is determined by the size of the windshield. You need to add 50–70 cm to the perimeter of the frame. The size of the rear window and the size of the side glass are taken into account in the same way. The cord should have a slippery surface and a diameter of 4 mm.
It should be placed in the outer groove of the seal, starting from the middle of the cord and from the center of the top of the frame groove. The cord should be laid symmetrically to the right and left from the center of the upper groove, down along the left and right edges of the element and along the lower edge of the part from the edges to the center. In the middle of the lower groove, the mounting cord should overlap, one end over the other.
The cord should have free ends that should not be tucked into the groove; they are needed during installation.
Windshield installation
It is better to install the prepared installation kit into the car body together with an assistant and do it in the following order.
- Attach the kit with the seal to the outside of the frame. Pass the free ends of the mounting cord into the vehicle interior.
- Start installation from the middle of the bottom contour of the frame. While your assistant holds the kit pressed against the frame with its bottom edge, you begin to carefully pull the mounting cord into the interior.
- The cord carries along the inner leg of the letter “H”. Due to deformation, it goes over the side of the frame and, as the cord is pulled out, it takes its normal position on the interior side. In this case, the outer leg remains outside, and the side of the frame, as expected, is placed between them.
- Carry out the installation symmetrically, with small movements, alternately pulling out one or the other end of the mounting cord. The assistant should constantly push the installed glass into place with light blows of his palm.
Finally remove the last section of the mounting cord from the middle portion of the top edge of the outer seal groove. Upon completion of installation, it is very useful to knock on the glass on both sides, pressing your fingers on the seal from the outside and inside at different points of the contour.
Start the engine, drive with sharp turns on a not very smooth road. Minor deformation and vibration will help the glass shrink properly in the frame. Installation stresses will disappear, the fit will automatically adjust, and the sealant will harden in a few days.
Replace your windshield wipers and enjoy the stunning views of the world around you through your new windshield.
Replacement of front and rear windshields of VAZ 2106
Removal of the front and rear windshields on a VAZ 2106 car is carried out if they are replaced with new ones, during body work, for example, when painting a car or for tinting them. To remove the glass, we will need the help of an assistant, as well as a blanket or something like that, a screwdriver, and a piece of cord with a diameter of about 4-6 mm. and about 5 meters long.
If everything is there, then you can start repairing:
- The first step in the car interior is to remove all the decorative interior parts that will interfere with us. First of all, these are decorative trims for the front side pillars, remove the interior rearview mirror (see Replacing rearview mirrors on a VAZ 2106), remove the sun visors, and remove the top decorative trim for the ceiling.
- Now, starting from the upper right corner (if it’s convenient for you, you can do both at once), use a screwdriver to pry the edge of the seal and slide it behind the body flange and then manually press the seal while simultaneously pressing on the glass. When performing this operation, it is necessary to remove the upper corner of the glass together with the seal from the body opening and press the corner of the glass from the body from the inside.
- From outside the car, pry the windshield frame (lock) with a screwdriver and remove it from the seal. Next, having previously bent the windshield wipers, you need to move the top and sides of the glass away from the body and remove the glass, placing it on the hood, with a blanket or any other material laid in advance.
How to remove the windshield? Video No. 2
How to remove the windshield? Video No. 3
Related article:
Quite often, when repairing a car, it becomes necessary to remove glass from the openings of the car. With the glass of the classic VAZ it is a little easier, the lock is removed and the glass is squeezed out, but how to remove the windshield or rear door glass on a VAZ 2108 - 2109?
The method below was useful to me when removing the glass from my Golf 2; in this way I pulled out all the glass from the car. It is worth noting that glass is obtained in this way ,
which are mounted on a rubber seal.
Attention! All work with glass is quite dangerous, so we take all necessary measures in order not to harm ourselves!
In order to remove the windshield from the car we will need the following tools:
- A dull screwdriver (this is a very important detail, since a sharp screwdriver will ruin the rubber seal or at least its appearance).
- Construction hair dryer (only needed if the seal is quite rough or the ambient temperature is low)
- Assistant:)
In fact, everything is quite simple - in order to remove the windshield on a VAZ 2109, you need to tuck the inner side of the seal over the protrusion on which the glass is held.
I recommend starting to remove from top to bottom; in practice, it is enough to tuck the entire top and half of the racks over the side. After this, it will be possible to push out the glass, which must be held by an assistant on the other side.
Do not press the glass with a screwdriver; it will inevitably crack. Try to carefully and evenly tuck the seal over the side. It happens that the seal fits very tightly and there is no space behind the side, then you need to push the glass a little, notice which corner is weaker and start removing from there. It was not for nothing that I remembered that you may need a hair dryer, since over time the seal becomes very hard, a hair dryer will help here, just warm up the seal and it will slip out quite easily.
You can also lubricate the inside of the seal with soap to make it easier to remove.
And the last note - be careful with the screwdriver, it is quite easy to puncture the seal, thereby ruining its appearance. See also:
It is known that you can drive a car without a windshield. At the same time, its technical ability to move on roads is not impaired. But both the driver and his passengers will experience maximum discomfort inside the cabin. Dust, wind, all precipitation will enter the cabin. In addition, the temperature inside the car and outside will be the same, which is especially unpleasant in winter. The article suggests getting acquainted with the question of how to install a windshield on a VAZ 2109 in order to protect the interior from all weather and external physical factors, with your own hands.
Replacing the Rear Window of a VAZ 2106
replacement
wind and wind
rear windshield
glass vases
2106
-2103
Removing front and front rear
windshield on station wagon
2106
if replaced with new ones, they are created during body work, for example, when painting a car or for tinting them. To remove the glasses, we need the help of an assistant, as well as a blanket or something similar, a screwdriver, and a piece of cord 4-6 mm in diameter. and about 5 meters in length.
If that's all, then you can start repairing:
- Firstly, in the car interior it is necessary to remove all interior parts that will interfere with us. Firstly, this is the decorative trim of the front side pillars, remove the interior rear view mirror (see replacing
rear mirror type VAZ 2106
), remove the sun visors, remove the ceiling lining.
- Now, starting from the top right corner (which is convenient for you, you can do both at the same time), bend the edges of the sealant using a screwdriver and push it through the housing flange, then manually press the sealant out using pressure on the glass. When performing this operation, the top corner of the glass along with the seal from the body opening and press the corner of the glass
inside the body.
- From the outside of the machine, use a screwdriver to squeeze out the fringed glasses (lock) and remove it from the seal. In addition, after bending the wipers, you need to rotate the top and sides of the housing. glass
and remove the glass by placing a blanket, blanket or any other material over the lid.
Installation of rear and windshield Installation of rear windshield and vase.
Rear installation
or windshield
glass vases
A very simple operation that anyone can do even at home.
replacing glass on vase 2106
Easy and quick to change rear windows
to the classics.
Now that we have removed the windshield, we need:
- Remove the rubber seal from it, start removing it from the middle. Check the seal for mechanical damage and replace it with a new one if necessary. Hardening of rubber sealant is also not allowed. We clean the seal and edge of the glass from dirt and rust.
- Check and, if necessary, clean the seals of dirt, seals and other debris.
- Locate and clean the drain holes in the seal.
Install a new windshield on a VAZ 2106 . Follow the procedure below:
- Install the seal onto the new glass, starting from the bottom corners.
- Then take the pre-prepared cord and insert it into the seal groove that fits onto the flange in the housing opening. Lay the cord in a circle, making sure it overlaps the opposite end by about 20cm.
- Wash down the soapy water with a brush and generously coat the seals and the inside of the case where the glass will sit.
- With a partner, insert the glass back into the hole so that the sealing groove at the cord exit point is on the flanges of the hole and the ends of the cord are in the cabin.
- Now one person remains in the cabin and slowly begins to pull the cord so that the edge of the seal protrudes beyond the flange of the hole; lightly tapping the glass, thereby pushing it into place.
After installing the windshield glass, replace all removed parts in the reverse order.
back the windshield was replaced in the same way, with the exception of some functions:
- The glass should be removed from the lower corners.
- Before removing the glass
, in the lower corner, outside the car, remove the decorative strip using a screwdriver.
Types of automobile glass
Automotive glass for modern VAZ 2109 cars is manufactured using high technology. They differ from simple glasses in their high strength and design features, which allow all road users to be protected from injury during an emergency. There are two types of technologies for making windshields:
- Triplex. This technology is more often used for the manufacture of rear, wind, and hatches. Translated from Latin, triplex means “triple”, and the design involves the production of multilayer glass: more than two layers of silicate or organic glass. At the time of manufacture, they are glued together with a special film and then pressed at a certain temperature. When broken, the broken parts of the glass remain on the film rather than breaking into shards with sharp edges.
- Stalinite. The technology of its manufacture is that the glass is tempered: first it is heated to a certain temperature, and then it is cooled evenly and gradually in the air flow. When glass breaks, it breaks into a large number of fragments with blunted edges; in the event of an accident, they cause minimal harm to the driver and passengers. On modern cars they are used less often, but the temptation of installation elements is the lower price.
Tip: When buying glass, you need to carefully consider its markings. It is applied by chemical etching, located at the bottom right corner, and has a black color, as shown in the photo.
How to remove the windshield of a VAZ 2109
Mostly needed after an accident or unexpected damage to an old one.
On the diagram:
- 1 – rubber seal.
- 2 – windshield.
- 3 – window opening flange.
Before removing the windshield on a VAZ 2109 you need to:
- At the top of the windshield, insert a screwdriver into the seal five millimeters.
- Push out the seal so that part of it can be pulled out.
- Move the screwdriver to the side five centimeters.
- Thus, consistently get rid of the sealant.
Advice: Operations should be done gradually, without jerking, and make sure that the glass does not fall out.
After removing the seal to the upper side corner, the glass can be removed. This is done in two ways:
- By squeezing out from the inside. To do this, gently press on the upper corners of the glass, which is then squeezed out.
- Pull the glass towards you. At the same time, you need to pull it up slightly.
After this, the rubber seal is removed, and the installation groove of the window opening is cleaned of dirt around the entire perimeter. Even professionals practically cannot keep glass intact, but old glass is usually not removed to preserve it.
Advice: It is better not to throw away damaged old glass, but to use it to cover the car when painting the body.
Replacement
Replacing the windshield on a VAZ 2109 involves premature removal of the old one.
Replace the windshield of a VAZ 2109
Removing glass from a “nine” is much easier than, for example, from a “ten”. In this case, the glass is not glued directly to the body of the vase. On the contrary, it is fixed with a seal.
Removing the old windshield
To get rid of your old windshield, follow these steps:
- ? Take a screwdriver and insert it into the seal about 5 mm. This should be done at the top of the windshield.
- ? Push out the seal so that part of it can be pulled out.
- ? Move the screwdriver about 5 cm to the side.
- ? Get rid of the sealant step by step.
Note: It is advisable to do this gradually so that the glass does not fall out. Jerking will not lead to anything good.
- ? After the seal is removed to the upper side corner, you can begin to remove the glass itself.
Note: there are two ways to remove it: either squeeze it out from the inside (this will allow you to remove it from the outside), or pull it towards you (for maximum results, pull it slightly upward).
It is usually not possible to save old glass. Even professionals rarely succeed in this. That is, it will be damaged during operation. And why save it? If you decided to carry out work to replace it, then there were reasons for this.
How to prepare new glass
Replace the windshield on a VAZ 2109
Before you begin installing new glass, you must do the following:
- ? Put on the seal. You can use an old seal that was removed from the previous glass. This will make the work easier, since it is already more elastic, so it can be easily installed in the right place.
- ? However, using a new seal will require a lot of force. To do this, you will need to put it on all corners of the glass. Afterwards, you will need to lightly press on it so that it sticks into the side, top and bottom sides.
- ? Now it’s the castle’s turn. This is a small wedge that looks like the letter P. It needs to be inserted so that it is in the center of the seal, but runs along its entire perimeter.
Note: Before installing the wedge, it needs to be stretched slightly. This is done very easily, since it is quite plastic.
- ? You need to insert it like this: first the long part, then the short one. This needs to be done around the entire perimeter of the glass. However, part of the wedge may remain, so you will have to carefully cut it off, because it will interfere if everything is left as it is.
Glass installation
Do-it-yourself windshield replacement for VAZ 2109
To easily install the glass in place, you need to use a rope (it should be quite dense and strong so that it does not break). Everything needs to be done in the following sequence:
- ? Determine by eye where the middle of the rope is located. Insert this part into the seal (outside). Since the seal has two grooves, you should find the one that will be closer to the outside of the glass. This is where the rope is inserted.
- ? Using a screwdriver, insert the rope into the groove until it stops. Insert the rope until the middle of the bottom of the windshield is reached.
- ? On the opposite side, the rope should also be inserted until it intersects with the end of the previous rope.
- ? When they intersect, the end of one must be placed on the end of the other.
Windshield and its replacement
Note: There should be a slight overlap. Its length should be approximately 5-10 cm. In this case, it should be recessed into the seal all the way.
- ? Before you begin installing the windshield, you should pull the loose ends of the rope inside the car.
- ? Now you can lay the glass on the opening. This must be done so that the lower part of the opening penetrates the outer groove (that is, the groove where the rope was previously inserted).
- ? The glass should be pressed lightly, but not inside the car, but down.
Note: This will allow him to sit better.
- ? The rope should be pulled towards you, but not vertically, but horizontally.
- ? The seal easily makes its way into the interior.
Note: You should wipe it off so that it does not get on any parts of the machine. Once it dries, it hardens, so it will be much harder to remove.
- ? Pull half the rope to the bottom corners of the glass.
- ? After this, smoothly seat the glass.
- ? To make it easier to overcome corners, you need to pay attention to the following: to make it easier to go through left corners, you need to “twist” the rope clockwise, and right corners - vice versa.
Note: This is quite difficult to do as the rope is tight. However, the slower this action happens, the better it will be. This way the insulation will fit well on the opening and will hold up well afterwards.
- ? While pulling the rope, you need to carefully seat the glass in the opening. Under no circumstances should you hit the glass with any foreign objects. You can only lightly hit it with your hands (or rather, not even hit it, but gently push it).
Windshield VAZ 2109
- ? When the rope has completely come out, you should carefully check the interior. After all, the seal could come out and glue residue could remain. And besides, he could have landed on the torpedo. To fix this, you should drive it into the opening using a flathead screwdriver.
- ? Finally, you should shrink the glass all the way. To do this easily, you need to place your hand on the top edge, lightly hitting it with your second hand. The same should be done with the rest of the glass area.
High-quality windshields for VAZ 2109
Note: There may be slightly noticeable gaps between the seal and the opening. This is not a big deal, as they could have appeared due to slight movement of the glass. After just a few days, the glass will shrink better and all the gaps will disappear on their own. And the glass will stand completely still.
If you want to save time, you can take your car to a car dealership, where the price for windshield replacement work will be rather high. But, if you want to save your money, you can do the repair work yourself. Of course, before this you should review various photos and videos on this topic. And if you come across instructions somewhere on the Internet, you should not neglect them.
You can also find out about replacing the rear window on our website.