The engine may completely refuse to start (whether cold or warm), gas failures will become regular, power will tend to a minimum, and throttle response will be lost (going uphill and overtaking will become quite difficult), and gasoline consumption will exceed all permissible standards and become unbearable for your pocket.
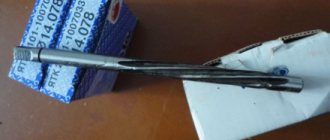
The consolation is that adjusting the level to the desired level is quite simple: the first time you may spend half an hour (to understand the process itself), but after 2-3 times this procedure will take no more than 5 minutes. No complex tools are required, you don’t even need a hole or the help of a more experienced friend. All you need is a caliper (a ruler will also do), a feeler gauge (a small drill or a piece of thin wire would work well) and pliers.
First stage: preparation for the process
- The air filter housing is removed
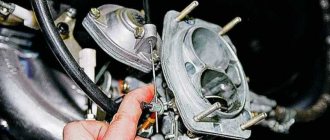
: the nut that secures the cover is twisted, the latches are released (there are 4 of them), the ventilation hose clamp is loosened, and it is dismantled. The filter itself is also pulled out, the pins securing the housing to the Solex are released, and it is removed with the pipe (when there is a hot air supply); - Cover of the carburetor itself
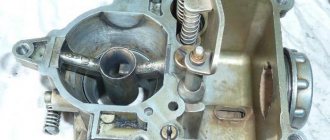
: the fuel hose clamps are released, after which they are removed from the fittings. Next, the wires of the solenoid valve are dismantled, the bolts are unscrewed (there are 5 of them), and the lid is carefully dragged upward so that the floats do not hit the chamber wall. And the lid is turned over and placed on something flat; - Checking the floats
. They are supposed to be parallel to the imprints of the chamber walls in the gasket. If there is any curvature, the floats are brought together and spread to the desired position - so that they do not cling to the walls;
The distance from the gasket to the protrusion on each of the floats is measured It should be 1 mm. (tolerance allowed is 0.25 mm). If the indicator is exceeded or insufficient, adjustment is needed.
Float adjustment
On some carburetor models, such as Solex, this is not a difficult task. It does not require experience or special tools. For this reason, every motorist must learn how to adjust the fuel level.
Ways to set up a float
A ruler, a feeler gauge and pliers - nothing else is needed to carry out the operation. There is no need to remove the carburetor from the car, just remove its top part and cover.
The adjustment algorithm is as follows.
- The VF housing is dismantled. To do this, you must first remove the filter cover by unlatching the 4 latches. Then the VF itself is removed, which is secured with four nuts.
- The upper part of the carb is removed. First, remove all gasoline supply pipes, then turn off the power to the solenoid valve. The cover is held on by screws that just need to be unscrewed. It is recommended to remove it carefully, trying not to touch the carburetor walls with the float.
- The lid is turned over 360 degrees and placed on a flat table. You must be careful so that when turning over, the fixing screws do not fall out and get lost.
- The float/s are being checked.
Many experts recommend checking the float level using the stamp on the lid seal. The mark should follow the shape of the part on the gasket. If this is not the case, the float must be bent.
When adjusting, it is important to ensure that the float/s do not touch the walls of the PC, and that the tongue of the part looks parallel to the needle.
Further actions.
- The distance between the tail and the top is measured using a millimeter feeler gauge.
- If the gap is larger or the dipstick does not fit, the liquid level in the PC is adjusted.
Second stage: setting the level
To determine how different it is from what is required, you can measure the depth of the gasoline: it should be 29 mm (plus or minus 1).
You just need to do this immediately, as soon as the lid is removed: the fuel quickly evaporates, and after 5 minutes the data will become unreliable. Naturally, the measurements are not particularly accurate. The adjustment consists of 2 stages. Float height
.
The caliper is set to 34 mm. The upper measurement bar is the carburetor cover, the lower one is the top of the float. If the distance is greater (smaller), then by bending the tongue and levers you need to achieve the specified indicator. If you don’t have a caliper, you can take a ruler (preferably a metal one: a plastic one can dissolve in gasoline, but a wooden one can cause chips that will remain in the fuel). Full float passage
. The measuring instrument is placed strictly vertically next to it; The number of centimeters to the bottom edge is noted. The float rises; the new altitude is measured. Both numbers add up - this is a full move. The same manipulations are performed with the second float. If the data does not match, the protrusion at the back is bent. There is a corresponding tongue there.
Purpose and principle of operation of the carburetor
The carburetor is an important component of an internal combustion engine, responsible for preparing the air-fuel mixture and supplying it to the working cylinder in the required ratio. A scooter engine with an unadjusted carburetor cannot function properly. The stability of speed, the power developed by the engine, gasoline consumption, response to turning the throttle, as well as ease of starting in the cold season depend on the correct settings of the engine power supply.
An important component of an internal combustion engine is the carburetor.
This unit is responsible for preparing the air-gasoline mixture, the concentration of the components of which affects the nature of the operation of the power plant. The standard ratio is 1:15. Leaning the mixture to a ratio of 1:13 ensures stable engine operation at idle. Sometimes it also becomes necessary to enrich the mixture by maintaining a ratio of 1:17.
Knowing the structure of the carburetor and knowing how to adjust it, you can ensure stable operation of the engine on two-stroke and four-stroke scooters.
Thanks to a properly configured carburetor, easy and quick starting of the vehicle engine is ensured, as well as stable operation of the engine, regardless of the ambient temperature. Any carburetor is equipped with jets with calibrated holes, a float chamber, a needle that regulates the cross-section of the fuel channel, as well as special adjusting screws.
The adjustment process involves specially rotating the screw in a clockwise direction or in the opposite direction, which causes, respectively, the enrichment or depletion of the working mixture. Adjustment measures are carried out on a warmed-up engine. In this case, the carburetor unit must first be thoroughly washed and cleared of blockages.
How to check the result of the work?
Without a proper check, if some error suddenly occurs, everything will have to be repeated again - all operations. Therefore, before reassembling, the carburetor cover is placed vertically. The ball should be sunk with a tongue on the float, and the stamping line should be parallel to the cover. If the conditions are not met, you will have to repeat the second stage, since you need to set the fuel level in the Solex carburetor as accurately as possible. And after the check has been completed, you can assemble the assembly as it was, in its original position.
How to Adjust the Fuel Level of a Solex Carburetor
Auto Private
Adjusting the carburetor fuel level on a VAZ 2108, VAZ 2109, VAZ 21099
When do I need to adjust the fuel level in my carburetor? It is necessary to create a carburetor adjustment after:
- Removal of the carburetor floats is complete.
- And also with a disrupted fuel supply to the carburetor .
How to adjust the carburetor fuel level on a VAZ 2108-VAZ 21099?
regulating fuel in the carburetor by adjusting the floats:
1) First, remove the air filter housing from the carburetor. (For more information, see "Replacing the Air Filter Housing" under the "Removal" heading.)
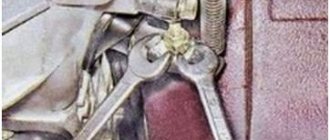
2) Next, using two wrenches, slightly loosen the rod on the damper adjustment lever.
3) Now unscrew the screw that secures the tie using a screwdriver.
4) Then remove the thrust bracket along with the drive rod itself.
5) Next, remove the screws that secure the intake and exhaust hoses and then disconnect them from the carburetor fittings.
The note! The hoses should be left with a small amount of fuel, which is recommended to be drained if possible!
6) Then disconnect the wire end from the solenoid valve output.
7) Using a screwdriver, remove the five screws that secure the carburetor cover.
 Then remove the cover.
The note! Try to carefully remove the cover without damaging its floats and gasket!
9) Then, on top of any flat surface, flip the carburetor cap over the floats so that all the mounting screws fall out of it, and then put it on.
The note! Never cover the lids with the floats, otherwise the fins may be damaged!
10) Then check the relative position of the floats and their longitudinal installation, and also check the gaps between the floats and the surface of the metal gasket.
Checking the relative position of the floats and their longitudinal installation:
1) Inspection of both floats, which are marked “Blue Arrows”, is carried out from above and is carried out using fingerprints that are located on the surface of the metal strip “Red Arrow”.
The note! If one of the floats is delayed, in this case, align it exactly to the edge and relative position. Solex 21083: how to adjust the fuel level and adjust the idle speed. Level the floats yourself!
2) But not in all cases there are fingerprints on the metal gasket, and all because they are formed over time due to wear and tear of parts, if you simply replace the gasket with a new gasket or if it is simply damaged according to the fingerprint, in this case it will not apply on its own using a highlighter or highlighter.
The note! Keep your fingerprints on the metal strip resting on the carburetor body!
3) When installing floats, pay special attention to their location, namely, make sure that the axis of the needle valve is perpendicular to the float lever.
The note! If necessary in this case, use pliers or a screwdriver to align the tongue of the floats perpendicular to the axis of the needle valve!
4) Then, when the tongue assembly is complete, pay attention to the surface of the tongue, if it has any burrs or deformations, in which case you will have to remove the floats and then clean the surface of that tongue in an "A" shape using a pincushion or pliers.
The note! In case of serious damage to the tongue, it is recommended to replace the floats on the bracket with new ones!
Checking the gaps between the floats and the metal gasket:
1) While the cap is on the floats, at this time you use a drill or a piece of 1 mm thick wire, check the gaps of each float between the metal spacer.
The note! When checking the gaps, the shock absorber ball should be deepened, i.e. the floats should be lowered, and the gaps between the two floats between the gasket should be the same and range from “0.25” to “1 mm”!
More precise fuel level control by adjusting the floats:
To do this you will need a caliper and a pencil.
1) First, measure with a caliper 5.7mm from the edge of the spacer using the caliper at the same location as shown in the photo, and then mark it on the spacer itself with a pencil.
2) Next, set the caliper scale to "70.6mm" and then place one jaw on the caliper at the point where you mark it. After this, install both floats thanks to the caliper breaking.
The note! There should be a gap of no more than 1 mm between the caliper lips and the floats!
3) Next to the depth gauge on the caliper, set the value to 34mm, then replace it with the edge of each float.
Setting up Solex
Many drivers strive to install a Solex-type carburetor on their car, since at the moment this carburetor is considered one of the best. It works great in any conditions, even with severe overflow. Many people mistakenly believe that the most difficult thing in this situation is installing a carburetor, but in fact, setting it up and adjusting it is also often difficult.
Some people prefer to delegate the work of installing or adjusting carburetors to specially trained people, however, most motorists strive to do all possible work themselves and have a great interest in this.
Why is a float chamber needed?
In order for the engine to function properly, it is necessary to maintain the set level of gasoline in the carburetor, which is what the carburetor float chamber does. A stable fuel level is necessary for proper engine operation at various load levels.
If the carburetor did not have a device that regulates the fuel level, it would not be able to work normally. The amount of fuel in the carburetor float chamber is one of the key reasons for its stable operation. The operation of the motor at low speeds and in other transient modes of the primary and secondary chambers depends on it, therefore the functioning of the entire motor depends on the correct functioning of the float chamber.
Setting the idle system affects the operation of the engine in all its modes. The amount of fuel in the float chamber is calculated by the manufacturer so that there is no spontaneous leakage of gasoline into the combustion chamber from the carburetor nozzles. In vehicles with a transverse engine, there is a need to compensate for tidal phenomena. To compensate for this, manufacturers install economizers. More expensive carburetors use paired float chambers, which are located on both sides of the carburetor. These chambers are combined with each other by a transverse channel or a common plane.
Most often, two float valves are used, which are located at the edges of the device. The design of the floats can be hollow from two bronze halves, which are soldered together, or made of porous plastic. To compensate for the effect of engine vibration on the gasoline level, float chamber valve dampers are used. This mechanism is called a damper spring and is equipped with a rod or ball. In some carburetors, the float valve is located at the very bottom of the chamber. With this location, it is possible to check the fuel level by removing the top carburetor cover. Many models of carburetors for this mission are equipped with sight windows, which are located on one of the walls of the float chamber. With such glasses, it is possible to monitor the gasoline level directly while the engine is running.
Easy to set up
A poorly tuned carburetor not only increases fuel consumption, but also makes starting difficult. The engine may refuse to start at all. Well, gas failures, reduction in power and loss of throttle response are common in such cases.
It’s good that the designers took care of simple carburetor adjustment. Even an inexperienced driver can set the correct level with his own hands, and then all problems will disappear into oblivion. However, the carb needs to be checked and adjusted periodically.
Carburetor with cover removed
To understand the process of adjusting the carb for the first time, you can spend about 30 minutes or a maximum of 1 hour. Then, when the setup becomes habitual, it will take no more than five minutes. And you don’t need to use any special tools or complex equipment. As a last resort - a pit and an assistant. The usual tools are a measuring probe, pliers and a ruler (preferably a caliper).
It is important to check the gasoline level only after installing the device on the engine. Early models of carbs have a viewing window through which the level can be clearly seen. But in carbs of recent years of production there is no such window, there is only a line drawn along the outer part of the carb.
There is one interesting way to check the fuel level without removing the carburetor cap. It is ideal for models that do not have a viewing window.
- You need to screw a threaded fitting into one of the plugs that lock out access to the jets.
- Place a translucent hose onto the fitting, the other end of which is raised to the level of the marks.
- Pump fuel into the chamber using a hand pump.
- According to the laws of physics, the liquid level in interconnected vessels must be the same.
Fuel level on carburetor Ozone
If the fuel level in the hose is lower or higher, then the carburetor needs a full adjustment.
How to adjust engine idle speed
Work on setting up the power system is carried out after the engine has warmed up to operating temperature. All types of carburetors installed on scooters are equipped with a screw designed to regulate idle speed. Changing the position of the adjusting element allows you to ensure that the engine operates at stable speeds during idling.
Depending on the vehicle model, the adjusting elements are located in different places, so you need to carefully study the instructions and determine where the idle speed adjustment screw is located on the scooter.
Rotating the screw in a clockwise direction allows you to increase the crankshaft speed. Turning in the opposite direction, accordingly, ensures a decrease in speed. To perform adjustment operations, it is necessary to warm up the power unit of the scooter for a quarter of an hour.
Setting the engine idle
Then the screw is screwed in or unscrewed until a stable and precise speed of rotation of the vehicle engine is achieved. The adjustment is made in small increments by smooth rotation. After each manipulation, the engine should be run for several minutes to stabilize the speed.
Alternative way
There is a simpler method for determining the correct position of the floats, which does not require measurements. Place the carburetor cover on a flat table and look at the stampings made on the side surfaces. When the floats are in a normally adjusted position, these strips are parallel to the lid.
Then we lift the floats up and look at their bottom, which after lifting should be parallel to the surface of the lid. If necessary, adjust the position of the floats by bending the tongue.
Adjusting the accelerator pump
Accelerator pump metering systems
The main task of the accelerator pump is to supply a smooth and powerful stream of gasoline through the open throttle valve of the carburetor (dripping and sluggish streams are not allowed). The stream of gasoline should enter directly into the manifold, without touching the walls of the diffuser and throttle valve.
Flowing of gasoline down the diffuser stack or throttle valve is not allowed, since the car will become very blunt and jerky when you press the gas sharply.