Belt faults
Like any other car with a timing belt drive, the Priora belt may have the following malfunctions:
Cracking and delamination of the timing belt working surface is a consequence of:
- long-term operation;
- frequent temperature changes;
- contact with oil or coolant;
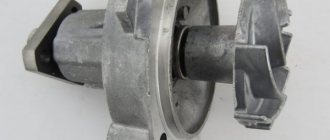
- malfunction of the water pump (pump);
- malfunction of the tension or support rollers.
These same factors, as well as improper tension adjustment, can cause belt deformation and breakage.
What is a “plug-in engine”?
This concept characterizes the likelihood of a collision between pistons and valves, as a result of which the latter are damaged - they bend.
This situation occurs when the timing drive breaks, when the gas distribution mechanism stops, but the crank continues to work by inertia.
“Plug-in” and “non-plug-in” power units are available in the lineup of almost all automakers, including VAZ. At the same time, the second engine option, naturally, is a higher priority when choosing a car.
If we consider AvtoVAZ products, then this manufacturer’s line of power plants is quite extensive, and in some engines, when the timing drive breaks, the valve bends, while in others such a breakdown does not occur.
The problem when choosing to purchase a VAZ car is the fact that the same model can be equipped with both “plug-in” and “non-plug-in” units, which can confuse the buyer.
See below for which engines are installed on some VAZ models.
It is worth noting that the type of timing drive affects the likelihood of valve bending. For example, on the VAZ of the classic family (VAZ-2101-2107) and also the Niva, only plug-in engines were installed. But the engines of these cars use a timing chain drive, which is highly reliable. Therefore, on classic VAZ and Niva, the problem of valve bending due to a collision with the piston is, in fact, not relevant due to the low probability of its occurrence.
Starting from the VAZ-2108 and ending with the latest models - Priora, Granta, Kalina, etc., only a timing belt drive is used. So it can break off and the damage that the motor receives depends on whether it is “plug-in” or not.
Read more: When buying a car, do you need insurance?
Why change the belt?
If you do not notice the problem in time and do not replace the belt with rollers, a break will not take long to occur. If this happens, only a major overhaul will help save the engine. In 90% of cases where the timing belt breaks on a 16-valve Priora engine, the valves fail (bend), as a result of which the cylinder head with the entire valve mechanism is damaged. In addition, the pump may also suffer.
If you notice the slightest damage to the belt, it needs to be changed urgently.
From the factory, 16-valve Prioras come with reinforced timing belts, which guarantee 100 thousand km of safe mileage. However, taking into account our operating conditions, especially in cold regions, as well as possible malfunctions in the operation of the water pump and rollers, it is recommended to replace it at least after 50 thousand kilometers.
It is necessary to change the timing belt on 16-valve Lada Priora engines complete with a tension and support roller.
Tools for work
In order to extract these elements, we need the following set of tools:
- Spark plug wrench 16 mm with rubber seal.
- 10mm wrench with ratchet.
- Ratchet handle.
- Extension. Without him we won't get to the wells.
Initially, the upper engine casing (plastic decorative trim) is removed. By the way, before doing this you need to remove all the ignition coils. To do this, remove the plug from each side and unscrew the bolts securing each of them. Next we move on to the candles. To do this, it is recommended to use a spark plug head with a rubber ring to grip the part from the well. At this stage, the extraction of candles can be considered complete.
Price
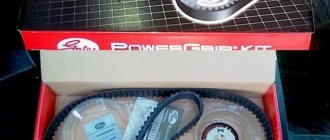
The timing belt itself on a Priora can be purchased in our stores at a price of 1,000 rubles, depending on the manufacturer. The cost of the set (belt + 2 rollers) varies from 2 to 3.5 thousand rubles. Replacement work at a service station will cost from 800 to 1200 rubles.
If you don’t want to spend money on paying for work at a service station, you can change the belt and rollers yourself. This does not require any special skills or tools. But first, let's decide on the choice of spare parts. Below is a table that shows the manufacturers and catalog numbers of the original and best similar timing kits for the sixteen-valve Lada Priora engine.
| Model | Code |
| Lada | 211261006040 |
| Bosch | 1987949662 |
| Conti | CT1137 |
| Contitech | CT1137 |
| Gates | 5631XS |
| Lynx | 137FL22 |
| Optibelt | ZRK1593 |
It is undesirable to use spare parts of questionable quality or unknown manufacturers.
Replacing the belt yourself
- hex wrench 5;
- socket wrench or ratchet head 15;
- 17mm head or wrench;
- special key for rotating the tension roller;
- slotted screwdriver.
1. Place the car on a flat surface.
2. Raise the hood, turn off the ground, remove the engine protective cover.
3. Using a hexagon, unscrew the 6 screws securing the timing belt cover.
4. Disconnect the crankshaft sensor by disconnecting the connector on it.
5.Check whether the marks on the camshaft gears match. They should line up with the triangular notches on the top of the timing case.
6.If they match, check the marks on the flywheel gear. To do this, remove the rubber plug from the upper part of the flywheel (under the thermostat). Below it you will see the flywheel crown with a mark that should coincide with the triangular notch on the left.
7. To be more confident in the correct adjustment of the gas distribution phases, you need to check the position of the mark on the crankshaft pulley.
8.To do this, loosen the generator belt tensioner. We fix the flywheel in the position in which it is located by inserting a screwdriver between its teeth into the hole where the rubber plug was located.
9.Using a 17mm wrench (socket or socket), unscrew the bolt securing the generator pulley. We remove the pulley and set it aside, and screw the bolt back.
10.Under the pulley there is a crankshaft gear, which has a mark; it should match the mark on the side cover of the oil pump.
11.If the marks do not match, you need to turn off the gear in the car, lock it with the parking brake, and with a 17-point key placed on the generator pulley bolt, carefully turn the crankshaft until all the marks match. When the marks coincide, it means that the piston of the 1st cylinder is at top dead center. Now you can remove the old belt.
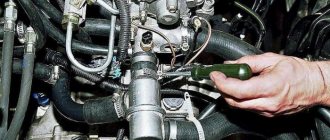
12.Using a 15 wrench, unscrew the bolt securing the tension roller, and using a special tension wrench, turn it counterclockwise. If you plan to replace the rollers, we dismantle it, and then the support roller.
13.Remove the old timing belt.
14.Install new videos.
15. We put a new belt on the crankshaft pulley, pump gear and camshaft gears.
16.Having securely fixed the support roller, tighten the belt using the tensioner roller, rotating it clockwise. If there is no special tool for measuring tension, check it by holding the belt in the middle with your fingers and turning its plane horizontally. A normally tensioned belt can be rotated no more than 90 degrees using your fingers.
17. We take out the screwdriver that secured the flywheel.
18. We turn the crankshaft 2 full turns, after which we check the position of the marks on the camshaft gears and on the flywheel. If they match, we perform installation in the reverse order.
Valve adjustment process
The process of adjusting valves on an engine
Before moving directly to the adjustment process, it is worth noting that this operation is carried out only on a completely cooled engine. Experienced VAZ drivers recommend waiting at least one night.
To make the adjustment, you will need a few tools, namely a set of keys and sockets, as well as a valve cover gasket and a special feeler gauge.
So, let's proceed directly to the operation:
- We disconnect and move to the side the tip of the throttle valve drive.
We dismantle the cable and bracket for fastening the throttle position
Unscrew the clamps and remove the crankcase ventilation hoses.
Remove the valve cover and bearing caps to adjust the valves
We dismantle the timing belt protective cover to get to the crankshaft pulley
Turn the crankshaft clockwise
We adjust the gaps using feeler gauges
Special tool for adjusting valves and replacing shims
Using tweezers, remove the adjusting washer
What types of shims are there?
A set of adjusting washers for all occasions
For cars of the VAZ family there are 125 sizes of shims, but not all are used.
Therefore, let’s consider the most popular sizes of spare parts that are installed on these engines (if you don’t want to run to the auto store again later): 3.30, 3.35, 3.40, 3.45, 3.50, 3.55, 3.60, 3.65, 3.70, 3.75, 3.80, 3.85, 3.90, 3.95, 4.00, 4.05, 4.10, 4.15, 4.20, 4.25, 4.30, 4.35, 4.40, 4.45, 4.50;
Adjusting washers in two sizes: 3.95 and 3.30
What are the consequences of untimely valve adjustment?
When the entire replacement process is considered, it is worth recalling what the consequences of untimely adjustment of the valve mechanism may be:
- Wear of camshafts. Thus, incorrect clearance can lead to premature wear of the camshaft cams.
- Damage to valve tappets when adjusting washers hit them.
- General wear of all elements of the head and timing mechanisms.
- In some cases, it may happen that the timing belt breaks and bends the valves.
Changing the timing belt on a Priora (photo report and video)
Our neighbor came to us to undergo scheduled maintenance on his fresh VAZ 2170, or Priora in common parlance, to replace the timing belt, oil and other little things.
Various recommendations write intervals from 80,000 to 105,000, but we change to 60,000. We check the tension every 20,000 and this is not our whim, because we all know about the quality of our spare parts. And yet, not everyone knows, but on Priorovsky engines alloy connecting rods are installed and when the timing belt breaks, not only the valves bend, but in most cases the connecting rods as well . And if they are not replaced, the car will have a decent oily appetite. Therefore, it is better to play it safe. The pump was replaced about 20,000 years ago, so we don’t touch it, we’ll just check it by twirling it by hand. For those who are interested in how to replace the pump, let’s look at the motor on the 10, they look like twin brothers.
Replacing the timing belt on a Priora 16 valves
Replacing the timing belt on a 16-valve Priora is a little more complicated than on 8-valve engines, however, this procedure is accessible to almost every car enthusiast.
A belt in a car engine is one of the main parts for transmitting torque from one mechanism to another. But it is worth remembering that everything has an expiration date. We will outline the nuances of working and replacing the belt in the article below.
How to eliminate the knocking of hydraulic pushers on Lada Priora
Timely and high-quality maintenance of the engine oil system is the key to flawless operation of the hydraulic compensator mechanism. After all, the unit is designed for use throughout the entire resource of the power plant.
Use of recommended lubricant
When the hydraulic pushers just start knocking, the manufacturer recommends changing the lubricant to a proven option. Therefore, when the question arises of what kind of oil to pour in principle, it is worth analyzing reviews to determine the acceptability of a certain model of oil product for hydraulic compensators.
Of course, the best choice for Lada Priora will be the composition recommended by the manufacturer, specified in the instruction manual. However, not all current popular products are included in the list.
An analysis of opinions shows that, indeed, with the universal viscosity of 10W-40 or 5W-40 specified by the factory, not every oil is suitable. For example, Shell Helix Ultra 5W-40 causes knocking already at 15,000 km, while on Liqui Moly Optimal Synth 5W-40 the hydraulics are silent even at 80,000 km.
Reviews show that it is optimal to choose the following lubricants:
- Total Quartz 9000 Energy 5W-40.
- Mobil Ultra 10W-40.
- Wagner Windigo 10W-40.
Flushing
Many owners, in advanced cases, resort to general engine flushing. However, the effectiveness of such an event in the fight against knocking GCs is low. This is explained by poor oil pumpability in the area of the hydraulic pusher chambers.
If changing the lubricant does not help, the best solution is to remove the cylinder head cover and find which hydraulic compensators on the Lada Priora 16-valve engine are knocking and determine the reason for this. Defective parts are identified by diagnosing running resistance with a wooden wedge. A fast movement speed in comparison with other hydraulic supports indicates wear of the hydraulic module, the presence of a constant gap indicates its coking.
Attention! The wooden wedge must be pressed against the non-working surface of the cams.
Effective removal of carbon deposits inside the cylinders is their local washing. Worn assembly modules cannot be repaired.
Additives
Additive compounds help delay identifying the causes and cleaning the timing belt. There are several products available in the market. The most popular products are from Liqui Moly and XADO. The effectiveness of substances depends on the specific case. Fans of motor additives often equate this class of chemistry with a waste of money.
Why change the timing belt on a Priora
Why this belt is needed, most likely, does not need to be explained. In general, there is probably no need to explain why it should be changed, however, there are inquisitive minds who need a lot of information simply for general development. And with that, let's get started.
So, the belt drives the gas distribution mechanism, namely the camshaft. This, in turn, lifts the valves, which move towards the piston at the moment of the exhaust stroke. But they get into the saddle in time, so nothing bad happens. If the timing phases are disrupted, and it is precisely this disruption that occurs when the belt breaks, it may happen that the camshaft stands in one position when, for example, the intake valve in the first cylinder is open.
The moment the piston goes up, it will simply bend the valve. Repairing a domestic car in this case will cost about 15 thousand rubles, while for repairing a foreign car head you will have to pay from 30 thousand of our wooden ones. Therefore, it is imperative to monitor the belt, or better yet just the mileage. The factory regulates a gap of 70,000 kilometers for this unit. There are fellows who have driven more than a hundred, but the 127 engine bends the valves, just like it bends.
What is needed for adjustment
As already noted above, you can adjust the thermal clearances of the valves on the vase with your own hands. To do this you need a set of washers, some fixtures and tools. You can make a homemade rail, but it is more cost-effective to buy a ready-made fork for setting gaps at the car market.
Heels for adjustment will be needed in the range from 3.40 to 4.05 mm if the guides in the cylinder head have not been changed. If, however, repairs were carried out, or the car runs on gas, you will have to purchase washers in the range of 2.50 mm for the exhaust valves. Intake valves, as a rule, remain at the same clearance; the seats on them do not flush.
Thus, in this article we briefly examined the procedure for adjusting valves on VAZ cars with front-wheel drive. The consequences of untimely tuning and driving on gas were also touched upon.
The VAZ 2114 uses a 4-cylinder in-line power plant, the power system is an injector. The location of the gas distribution mechanism is upper, that is, not only the valves of the mechanism are located in the block head, but also the camshaft. The VAZ 2114 uses an adjustable gas distribution mechanism, that is, the thermal gap is not independently regulated, as is done in a timing belt with hydraulic compensators, but is a strictly fixed value that periodically needs to be checked and adjusted.
On this car, since the timing is adjustable, the thermal gap is fixed; at the intake valve it should be 0.2 mm, and at the exhaust valve - 0.35 mm. A small error of 0.05 mm is also allowed.
The exact value on the VAZ 2114 engine is ensured by the use of adjusting washers of a certain thickness. These washers are placed between the camshaft lobe and the valve lifter.
Measuring valve clearanceAs the engine operates, wear occurs due to friction, causing the thermal clearance to change, so periodic inspection and adjustment is required. If this is not done, then changing its value will lead to disruption of the timing and valve timing. In this case, the VAZ 2114 loses power, gasoline consumption increases, and starting the engine on “cold” or “hot” worsens.
Replacing the timing belt on a Lada Priora 16 valves
Let's get to work. First, unscrew the oil filler neck, then pull off the plastic casing. Then there are two development options. We will look at a more complex one, with air conditioning. Its difference is in the additional video, this has already been said. The whole point is that it also needs to be unscrewed, because it simply interferes with removing the protective cover.
Here you need a 15mm head. Unscrew the roller and remove the alternator belt. On the way, we listen to the video so that it doesn’t buzz, otherwise we need to replace it. Next, the timing belt casing opens before us. Remove the front upper and lower parts of the casing. To do this, unscrew the 8 Torx bolts. There is also a surprise here if you use a ratchet. One of the bolts, the one closest to the passenger compartment, will have to be unscrewed using a simple Torx wrench, because the head with a tip and a ratchet will not fit between the engine and the spar. So, we removed the casing, in front of us is the timing belt and all the rollers.
It is advisable to install the shafts in the desired position in advance. The camshafts have marks inside, they should look at the marks that are on the plastic inner casing, that is, vertically upward. It is best to rotate by the camshaft - it is easier than by the crankshaft. It is not advisable to rotate the camshafts separately from the crankshaft. A maximum of 10 degrees to correct the marks if they misalign by a tooth or two.
Then we turn the wheel all the way to the right, someone removes it, which is not necessary. We unscrew the 4 bolts securing the mudguard using a Torx and one using a Phillips screwdriver to gain access to the crankshaft pulley. Here we need a long extension and a wrench, as well as a 24mm socket. We put the assistant in the cabin, he engages fifth gear and presses the brake pedal all the way. After this, unscrew the crankshaft pulley bolt. It's simple, it couldn't be simpler.
After removing the crankshaft pulley, remove the thrust washer and see if the mark on the crankshaft gear matches the mark on the block. On the gear, this is a small recess left by the core; on the block, this is an ebb.
Now we take the key 15, unscrew the tension roller, while it is advisable to stop the camshafts from turning. We removed the video, looked at its condition, if it is buzzing, be sure to replace it, it may jam.
After the marks match, remove the roller, remove the old belt. It is advisable to remove the deflection roller to check its condition. Now we put the rollers in place and put on a new belt. First we put it on the crankshaft, then on the pump, then on the camshafts.
Now all that remains is to charge the roller. In order to hold it, you can use either a standard wrench, which is quite difficult to find on sale, or circlip pliers. We tighten the rollers, and then assemble them in the reverse order. Before assembly, turn the crankshaft two turns by hand. If it rotates, then everything is fine.
Video on how to replace the timing belt on a Priora 16 valves:
The procedure for adjusting valves on the Lada Granta
- If your car's engine is well warmed up, then before you start adjusting, you need to let it cool to at least 30 degrees.
- We unscrew the spark plugs so that when cranking the crankshaft we do not damage the gas distribution mechanism.
- We unscrew the timing belt cover of the above mentioned timing belt and remove it completely. We also disconnect all the pipes from the valve cover, which also needs to be removed.
- We take a syringe and suck up all the oil that is around the valve lifters.
- We install a device designed for removing washers.
Note! The valve adjustment on the Lada Granta should be performed in the following sequence: 1-3, 5-2, 8-6, 4-7. In this case, the first digit indicates the exhaust valve number, and the second, on the contrary, the intake valve.
- Using the most ordinary key size 17, we turn the engine camshaft in the same direction in which the clock hand moves. It should be turned until the cam of the first exhaust valve is in place.
- We measure the resulting gap using feeler gauges. In order to do this correctly, it is necessary to use the so-called principle of the pass and no pass probe. So, for example, if a 0.2 feeler gauge fits in smoothly, but a 0.25 feeler gauge doesn’t, this indicates that the gap is 0.2 ± 0.02 mm. For intake valves, the normal clearance is 0.25 mm (± 0.05 mm), and for exhaust valves - 0.4 mm with the same error.
- If the clearance of the first or third valve is not within the norm, the washer should be changed. To do this, you need to hold the pusher with your fingers and push it down using a special tool. In this position, insert the clamp between the glass and the camshaft.
- Next, using tweezers, remove the adjusting washer and see what size is written on it. Thanks to this, we calculate the measurement of the washer that needs to be put in its place. So, for example, if the gap on your valve is 0.3 mm instead of the required 0.4 mm, the washer should be 10 mm smaller than it is currently.
- We take a washer of the required size and, using tweezers, carefully place it in the pusher. Next, you need to insert your finger into the hole and make sure that the washer rotates absolutely freely around its own axis.
- We press the pusher down, and then immediately remove the latch. Now you need to measure the gap again in the same way as before. If it is within normal limits, you can proceed to adjusting the next valve.
- After you have adjusted all the valves on the Lada Granta, you should check the clearances again. Thanks to this seemingly unnecessary action, you can avoid mistakes.
- We reinstall the valve cover, having first cleaned it of dirt and installed a new gasket.
When is it necessary to replace the timing belt on a Priora car?
In any case, the condition of the element must be monitored every 45 thousand km . The first signs that a timing belt replacement is already necessary on a Lada Priora are the following factors:
- extraneous noise during engine operation;
- discoloration of exhaust gases;
- problems when starting the engine;
- extraneous vibrations.
Low mileage does not always guarantee trouble-free operation of the car. Quite often in reviews from car enthusiasts you can come across a situation where the belt drive wears out ahead of schedule due to oil and dirt getting on it. These components enter through seals and cracks in the casing, so it is important to eliminate the causes of leaks and inspect the part.
How is a belt drive checked on a VAZ 2170?
The part is a rubber product with teeth located on its inner part. The outer rim shows:
- the type of motor for which the car part is intended;
- number indicating the number of teeth – 137;
- marking indicating the width of the product - 22 mm.
This data will be useful to the owner who does not yet know which belt to buy for the VAZ 2170. All that remains is to prepare the necessary tool for checking:
- inbus key (hexagon) to “5”;
- key to “10”;
- jack.
The drive status check is performed on a cold motor and consists of the following steps:
- Using a hexagon, unscrew the five bolts securing the front upper cover of the timing gear drive and remove it.
- Inspect the part and determine whether the Lada Priora needs to replace the timing belt . To do this, engage fifth gear, lift the right front wheel and rotate it clockwise. The product must be free of cracks, peelings and undercuts exposing the cord threads. If defects are found, the part must be replaced.
- Inspect the condition of the tension roller - there should be no damage to it.
- Check the belt tension by pressing a force of 10 kg on the belt between the camshaft gears and measuring its deflection - it should be no more than 5-7 mm . You can also carry out control by the position of mark 1 on the outer race of the self-tensioning roller, which ideally should be opposite the protrusion 2 . Deviations are permissible within 3-4 mm - they are adjustable, but exceeding these values means the need to replace the belt drive and rollers.
Adjusting the valve clearances of the VAZ-11183 engine of the Lada Granta
To compensate for thermal expansion of the valve, the gap between the end of the valve stem and the camshaft cam is structurally specified.
With an increased gap, the valve will not open completely; with a decreased gap, it will not close completely.
— If the valve clearance is increased, a characteristic loud knock will appear in the upper part of the engine. Vibration will appear.
- If the valve clearance is small, the engine will run very “hard”.
There is such a term (“hard” engine and “soft” engine). The engine runs “hard”, as if the crankshaft is too tight.
The engine is running tight.
The engine is rapidly overheating. And as a result, severe wear of the gas distribution mechanism. The gap is measured on a cold engine (at +20° c) between the camshaft cam (the cam should be directed upwards from the tappet) and the valve tappet shim. The nominal clearance for the intake valve is (0.2±0.05) mm, for the exhaust valve - (0.35±0.05) mm.
The gaps are adjusted by selecting the thickness of the shims.
Washers with a thickness of 3 to 4.5 mm every 0.05 mm are supplied as spare parts.
Counting from the camshaft drive:
- the first, fourth, fifth and eighth valves are exhaust;
- the second, third, sixth and seventh valves are intake valves. It is recommended to unscrew the spark plugs to make it easier to turn the crankshaft.
The retainer must be installed between the camshaft and the edge of the pushrod.
To make it easier to remove the adjusting washer, two grooves are machined in the pusher.
Turn the pusher so that it is easier to pick up the washer.
The thickness of the new washer is calculated by the formula: H=B+AC, where: - A - measured gap, mm; — B — thickness of the old washer, mm; — C—nominal gap, mm; — Н—thickness of the new washer, mm. Example (for intake valve): A = 0.26 mm, B = 3.75 mm, C = 0.2 mm, then H = 3.75 + 0.26 - 0.2 = 3.81 (mm). Within the gap tolerance of ±0.05 mm, select the closest washer in thickness (3.8 mm). Turn the crankshaft clockwise using a wrench using the crankshaft pulley bolt or the generator pulley bolt.
Do not turn the crankshaft using the camshaft pulley mounting bolt.
How to replace the timing belt on a Lada Priora on your own?
The process includes not only the rotation of the rubber transmission, but also the rollers - tension and support - change along with it. Repair kits are usually sold at auto dealerships. To work you will need the following tools:
- head at “17”;
- keys to “15”, “13”, “10”, “8”;
- inbus key (hexagon) to “5”;
- a special key for adjusting the roller or pliers for removing the locking ring.
Next, the process of changing the drive occurs in the following order:
- Unscrew 5 bolts with a hexagon on the upper plastic casing of the gas distribution mechanism and 2 on the lower one, remove them.
- Using the socket at “17”, turn the crankshaft clockwise and align both camshafts at TDC on the compression stroke of the first cylinder according to the marks. This moment is determined by aligning marks 1 on the camshaft pulleys with marks 2, which are located on the rear cover.
- Remove the rubber plug in the clutch housing and check the position of the crankshaft: the marks on the flywheel and the slot on the upper housing cover must match.
- Before replacing the timing belt on a Priora car , you need to remove the auxiliary drive pulley. To do this, the assistant must engage 5th gear and press the brake, and the car owner, using the “17” socket with a knob, unscrew the pulley mounting bolt and remove it.
- For the convenience of subsequent assembly, before dismantling the rubber part, experienced car enthusiasts recommend fixing the camshaft pulleys with a simple wooden wedge, which should be driven between them.
- Using a “15” wrench, loosen the tension roller bolt and remove the belt from the shafts. Next, remove the tension and support rollers.
- Apply fixing sealant to the threads of the bolts of the new rollers. Tighten the support roller to a torque of 35-41 Nm , but do not completely tighten the tension roller. Check the position of the crankshaft using the mark on the oil pump cover.
- Place the toothed rubber drive onto the crankshaft pulley. Pull both branches and put the front part on the support roller, and the back part on the pump pulley and place it behind the tension roller. If a wooden wedge was used, it must be removed.
Important! During the repair process, you need to check the condition of the coolant pump. Its shaft should rotate freely, without play or extraneous noise. Traces of coolant leakage are unacceptable. If one of the factors is present, be sure to change the pump.
How to adjust the drive tension on a VAZ 2170?
The final stage of replacing the timing belt on a Lada Priora car is performed according to the following scheme:
- Use a special wrench or pliers to turn the tension roller counterclockwise.
- Align cutout 1 with mark 2 on the inner roller bushing and tighten the fastening bolt to a torque of 20-15 Nm (see photo above).
- Install the auxiliary drive pulley in its original place.
- Turn the crankshaft 2 turns clockwise using the pulley bolt and check the alignment of the camshaft and crankshaft timing marks, as well as the belt tension. If necessary, repeat the operation.
The tension roller bolt is tightened to a torque of 35-41 Nm , and the auxiliary pulley is tightened to 105-110 Nm . Assembly is performed in the reverse order; we do not install only the upper plastic casing for visual control of the work performed.
Next, we start the engine and observe - indicators 1 and 2 on the roller should not deviate from the norm by more than 2 mm , after which they should take the working position. After checking the functionality of the units, the upper drive casing is installed in place.
The described process is similar and can be applied when repairing Lada Kalina and Lada Granta cars. The technique for replacing the gas distribution mechanism drive is available to any car enthusiast, but requires special care. The slightest displacement of the marks can result in expensive repairs.
