What you need to know
Release bearing
- this is not the weakest link in the clutch system, but for some reason it is precisely this that causes problems and troubles.
Some car owners have gotten used to the whistle and simply ignore it. But this cannot continue for long, since untimely solution to the problem can lead to even more complex and expensive repairs. If the situation gets worse, then a simple replacement will not be enough for you.
The clutch serves to act on the leaf spring of the clutch basket.
It is also called diaphragm, so don't be confused if you hear this designation. Due to this impact, the driven disk is disconnected from the flywheel and the pressure plate of the basket. This disengages the clutch.
If the squeezer is faulty, this can lead to various consequences:
- The clutch fork will be damaged;
- The integrity of the clutch spring petals will be compromised;
- The guide bushings are deformed.
In order not to pay twice, or even three times, promptly react to the appearance of a whistle in the clutch and try to quickly take action.
Causes of bearing failure
The operation of the squeezing device is subject to constant dynamic loads. Engine power depends on speed, because of this the impact on the part is not constant.
Worth remembering:
Torque exerts load only when the pedal is pressed. Based on this, we highlight the most common symptoms of a faulty release bearing, described below.
- Holding the clutch in the disengaged state for a long time. Uneven transmission of force leads to increased wear of the part.
- Sharp throws and pedal presses. This style is typical for lovers of aggressive driving. Great force is immediately applied to the part, which can cause breakage.
- Incorrect setting of the cable stroke or rod of the working cylinder. The nickel ends up in constant contact with the forks.
All causes of malfunctions come down to the human factor. Improper handling of the pedal results in sudden loads on the part. There are frequent cases of complete destruction of the VP.
Is noise a sign that replacement is needed?
Not really. If noise occurs, this does not mean that you should immediately replace the element. But it is strongly not recommended to delay repairs. Let's just say this is a signal for certain actions, which you will have some time to complete before the consequences become catastrophic.
In some cases, the noise occurs when the engine is started, and it persists until the car warms up, after which it disappears. In other cases, the noise returns every time you try to disengage the clutch.
The worst option is a grinding sound. This sound indicates that the element is rubbing against the leaf spring, and wear will form on the petals. If you are “lucky enough” to encounter such a situation, there is no time. Replacement needs to be done quickly.
By the way, there is no point in repairing it. Release bearings cannot be repaired, so the only solution is replacement.
Signs of a faulty release bearing on a VAZ 2114
THE MAIN SIGN THAT THE RELEASE BEARING IS FAILED IS KNOCKING AND WHISTLING WHEN THE ENGINE IS RUNNING, WHEN YOU TRY TO TURN ON THE SPEED.
If such a sound appears in winter, this does not always mean that the VAZ 2114 clutch release bearing has failed. The release body is made of high-quality steel, which is resistant to temperature changes and has a low coefficient of thermal expansion. The guide bushing is made of ordinary steel, so it will respond to temperature changes. But if the noises, knocks, and whistles continue to intensify, it is necessary to repair or replace it.
In most cases, the culprits of premature failure of the “release” are the drivers themselves. Such a bad habit as keeping your foot on the pedal has a very bad effect on the service life of the bearing.
The bearing itself is quite strong, and premature failure occurs due to the fault of drivers, especially beginners. We have looked at possible signs of a malfunction in the VAZ 2114 clutch release bearing; now let’s talk about what to do in such a situation. The release bearing of the VAZ 2114 is very noisy; in this case, it cannot be repaired; the release bearing must be replaced.
Several decades ago, this method of repairing a “squeezer” was still practiced when it was boiled in motor oil, and its performance was restored for some time. Today this method cannot be applied. The design of the power unit has changed significantly, the motors have become much more powerful, the engine speed has increased. Because of this, the design of the “release” has also undergone changes, so you only have to change the release bearing.
Bearing removal
To remove this device, you will have to perform a series of sequential actions.
- Raise the car or drive it into a hole to gain access to the underbody of the car.
- Use appropriate tools to remove the gearbox.
- Squeeze the special clamps from the release bearing.
- Remove the element from the gearbox shaft.
- Press the locking tabs to remove the spring holder.
- After this, it will not be difficult for you to remove the damaged release bearing from the clutch.
The complexity of the process lies in the fact that in preparation for removing the release bearing it will be necessary to dismantle several components and mechanisms, such as:
- Accumulator battery;
- Clutch cable;
- Air filter box together with air flow sensor;
- Upper gearbox fixing bolts;
- The nut responsible for fixing the starter.
Installing a new element
When you have completed the entire range of dismantling work, you can move on to the final stage - installing a new component.
- The first thing to do is check the condition of the new clutch release bearing. For some reason, many car owners forget to make sure that the bearing that replaced the old one is actually in good working order. This is easy to check. Rotate the bearing, pull it in different directions. If there is no jamming during rotation, and there is also no play, then you bought a really serviceable, good release bearing.
- Insert the new part into the coupling. This must be done so that the protruding part of the inner ring is directed towards the coupling.
- After inserting the element, secure it using the holders.
- Before inserting the new release bearing onto the bushing (guide), do not forget to lubricate it with a grease. The layer of lubricant should be thin, do not overdo it.
- Secure the coupling and bearing using a spring lock.
- Place the gearbox and other dismantled elements in their rightful places.
- The entire repair process is completed by adjusting the clutch.
Replacing the release bearing yourself is not very difficult. The main problem is removing the gearbox. All other events cannot be called difficult. However, you will need to be careful, consistent and careful.
Do not ignore the most useful thing that you can need when repairing your favorite VAZ 2110 - the instruction manual.
Literally everything a car owner needs to know is described in detail there. With its help, you can even perform complex repairs, the cost of which at a specialized service station would be prohibitive.
The clutch plays the role of a link in a car between the transmission and the engine. This element of the internal combustion engine takes on the “impact” and all the loads that arise when transmitting torque from the engine to the gearbox. Therefore, the clutch can be conditionally classified as consumables, since it wears out quite often and requires immediate replacement. It is impossible to influence the wear of the clutch, unless you manage to change gears without its participation, although in this case it will not go unnoticed in relation to other parts of the engine.
Clutch release bearing :: SYL.ru
To replace the release bearing on VAZ cars, you need to completely remove the gearbox. There is no way to do without this procedure. The bearing is very small and can cause a lot of problems. This article will tell you how to carry out replacement on front- and rear-wheel drive Lada cars, and what you need to do for this.
What is a bearing needed for?
It is necessary to transmit the force exerted by the driver on the pedal to the clutch petals located on the crankshaft flywheel. The clutch release bearing is installed on the input shaft of the gearbox. It can move along it: towards the engine under the influence of force from the pedal; in the opposite direction it is moved by a spring of a peculiar shape. It clings to the lugs on the fork and to the bearing housing. This device is needed to smoothly open the crankshaft and gearbox.
How the mechanism works: general principle
When the pedal is depressed, the bearing moves relative to the box and engine block. It turns out that the internal part of the mechanism, which is located directly on the input shaft, is stationary. But the outer one rotates when it touches the petals of the basket. Thanks to this force, it is possible to open the primary and secondary discs so that the car remains motionless when the crankshaft rotates.
Typical unit failures
What can happen to such a small and completely metallic element? Whatever! The most tragic consequences are possible. Most often, a faulty release bearing can be determined by the presence of an extraneous sound coming from it. Sometimes when you press the pedal it disappears and you can only hear the engine running. What does this mean? First of all, the rollers are very worn out and there is a gap between the inner and outer races.
But the saddest outcome is the complete destruction of the element. Yes, this also happens - under the influence of excessive force, the bearing bursts and breaks into several pieces. In this case, of course, the fork does not reach the petals of the basket and the pedal falls through, the input and crankshafts do not open. And to repair the car, you need to remove the box. This is not an easy task, especially on front-wheel drive cars (they have a much larger gearbox mass).
How to remove the transmission on a rear-wheel drive car?
And now briefly about how to replace the clutch release bearing of a VAZ 2101-2107 (cars with rear-wheel drive). To work you need a pit, an overpass, a lift. Secure the car and begin repairs - disassemble the gear shift lever, disconnect the battery and remove the starter. It is possible that the exhaust manifold will also need to be disconnected. It may cause slight interference.
Disconnect the tire that connects the car body to the box body and climb under the car. Here you disconnect the working cylinder, unscrew the outboard bearing and the cardan flange nuts. You knock the latter out of the coupling on the gearbox shaft. After unscrewing the nuts on the box cushions, lower it a little. Place it on a reliable support. Using keys “19”, unscrew all four bolts that secure the engine block and gearbox housing.
Removing the box on front-wheel drive cars
In this case, several nuances appear. First, it is advisable to drain the oil from the box. Secondly, after removing one of the CV joints, it is imperative to plug the hole with at least a rolled-up newspaper. Otherwise, the entire differential mechanism will fall apart and there will be even more problems. In general, the procedure is very similar. There is only a small feature - the gearbox lever is not directly connected to the shift mechanism, but through a rod and a special device - the backstage.
Replacing the release bearing on a front-wheel drive car is as simple as on classic models. And even the clutch basket in this case is installed on the crankshaft flywheel in exactly the same way. The gearbox is secured to the body using two cushions. And it is attracted to the engine block by three bolts and one stud with a nut. All threaded connections can be disassembled with 19 mm wrenches. Moreover, you need to use not only end connections, but also open-end ones - the convenience is different everywhere.
Replacing clutch elements
Replacing the release bearing of a VAZ 2101-2107 is a simple procedure. It is enough to remove the old one and install a new one in its place. There should be no problems with this; you can handle it in a matter of seconds. Of course, if the box is removed. But if you already got in here and dismantled the gearbox, then it would be a sin not to install a new clutch kit - basket, disc. Please note that you cannot use the same bolts twice, this is unsafe.
When installing a new set, you should pay attention to the tightening process - you need to do it carefully, crosswise, trying not to deform the basket or destroy the working surface of the disk. Also, be sure to install the guide bushing. Without it, it will not be possible to properly center the mechanism. Therefore, you will not install the gearbox normally afterward.
Conclusion
As you can see, replacing a release bearing is quite a hassle. It can be done in a few hours. But if you send the car to experienced technicians at a service station, they will do everything in less than an hour. But for convenience and speed, of course, you will have to pay some money.
Clutch replacement is necessary in the following cases:
- If the clutch begins to “lead”, that is, when engine power decreases.
- If the clutch is not fully engaged, that is, it “slips.”
- If you hear extraneous sounds when turning on - clicks, jerking, etc.
- In case of unauthorized disengagement of the clutch.
- In case of vibration when pressing the clutch pedal.
In this article I will tell you how to replace the VAZ 2110 clutch at home without removing the box and draining the oil.
To work you will need:
- Jack;
- Inspection pit or lift;
- Set of socket and open-end wrenches: “19”, “17”;
- Mount or amplifier pipe.
Signs of malfunctioning parts
The release clutch can fail not only due to improper use, but also due to natural wear and tear. Knowing the operating principle of the device, you can determine its technical condition based on its characteristic symptoms.
Typical symptoms of a malfunction are:
- The occurrence of extraneous noise when pressing the clutch pedal. The destruction of the node is accompanied by a grinding or loud crunch.
- Gear shift drive sticking. Sometimes it is impossible to turn on the desired speed.
- Excessively free play of the clutch pedal.
- Incomplete engagement or disengagement of the clutch. The situation may be accompanied by an unpleasant burning smell.
Additional signs of a breakdown are: increased fuel consumption, engine overheating, and jerky movement of the vehicle. The service life of the part is reduced due to dust and dirt getting into the bearing, increased temperature and lack of lubrication.
Signs of a defect cannot be ignored, because... This can lead to serious consequences when driving with a faulty transmission.
Control check
You can diagnose the condition of the squeezing device in the following way:
- Start the car engine. Listen to your work for any extraneous noise. If available, determine the location.
- Depress the clutch pedal. If an extraneous sound appears, the part will need to be replaced.
The bearing cannot be repaired. The problem is solved by replacing the defective part.
Consequences of malfunction
The element has sufficient strength, so it cannot fall apart instantly. However, there is no point in delaying the elimination of the defect, since failure leads to misalignment of the disks and uneven wear. As a result, problems will arise with the transmission, which will negatively affect the technical condition of the vehicle.
If the part falls apart, the driver will not be able to engage the desired gear and move away. If such a defect occurs while the vehicle is moving in the city, the services of a tow truck will be required.
Replacing the VAZ 2110 clutch step by step instructions
1. “Tear off” the left wheel mounting bolts, then jack up the front of the car and place it on the sawhorses.
2. Remove the wheel and unscrew the two lower bolts.
Do-it-yourself VAZ 2110 clutch replacement video:
Owners of the domestic VAZ 2110 often encounter a whistling noise in the clutch
, the cause of which is the release bearing of the unit. Moreover, this is a problem not only of the “tens”, but also of other cars from different manufacturers, the clutch design of which involves the use of this element. Therefore, replacing the release valve on a VAZ 2110 is not at all an exceptional problem. But it needs to be solved.
Release
What you need to know
Release bearing
- this is not the weakest link in the clutch system, but for some reason it is precisely this that causes problems and troubles.
coupling
Some car owners have gotten used to the whistle and simply ignore it. But this cannot continue for long, since untimely solution to the problem can lead to even more complex and expensive repairs. If the situation gets worse, then a simple replacement will not be enough for you.
The clutch serves to act on the leaf spring of the clutch basket.
It is also called diaphragm, so don't be confused if you hear this designation. Due to this impact, the driven disk is disconnected from the flywheel and the pressure plate of the basket. This disengages the clutch.
If the squeezer is faulty, this can lead to various consequences:
- The clutch fork will be damaged;
- The integrity of the clutch spring petals will be compromised;
- The guide bushings are deformed.
In order not to pay twice, or even three times, promptly react to the appearance of a whistle in the clutch and try to quickly take action.
Is noise a sign that replacement is needed?
Not really. If noise occurs, this does not mean that you should immediately replace the element. But it is strongly not recommended to delay repairs. Let's just say this is a signal for certain actions, which you will have some time to complete before the consequences become catastrophic.
In some cases, the noise occurs when the engine is started, and it persists until the car warms up, after which it disappears. In other cases, the noise returns every time you try to disengage the clutch.
The worst option is a grinding sound. This sound indicates that the element is rubbing against the leaf spring, and wear will form on the petals. If you are “lucky enough” to encounter such a situation, there is no time. Replacement needs to be done quickly.
By the way, there is no point in repairing it. Release bearings cannot be repaired, so the only solution is replacement.
Bearing removal
Broken
To remove this device, you will have to perform a series of sequential actions.
- Raise the car or drive it into a hole to gain access to the underbody of the car.
- Use appropriate tools to remove the gearbox.
- Squeeze the special clamps from the release bearing.
- Remove the element from the gearbox shaft.
- Press the locking tabs to remove the spring holder.
- After this, it will not be difficult for you to remove the damaged release bearing from the clutch.
The complexity of the process lies in the fact that in preparation for removing the release bearing it will be necessary to dismantle several components and mechanisms, such as:
- Accumulator battery;
- Clutch cable;
- Air filter box together with air flow sensor;
- Upper gearbox fixing bolts;
- The nut responsible for fixing the starter.
Installing a new element
When you have completed the entire range of dismantling work, you can move on to the final stage - installing a new component.
- The first thing to do is check the condition of the new clutch release bearing. For some reason, many car owners forget to make sure that the bearing that replaced the old one is actually in good working order. This is easy to check. Rotate the bearing, pull it in different directions. If there is no jamming during rotation, and there is also no play, then you bought a really serviceable, good release bearing.
- Insert the new part into the coupling. This must be done so that the protruding part of the inner ring is directed towards the coupling.
- After inserting the element, secure it using the holders.
- Before inserting the new release bearing onto the bushing (guide), do not forget to lubricate it with a grease. The layer of lubricant should be thin, do not overdo it.
- Secure the coupling and bearing using a spring lock.
- Place the gearbox and other dismantled elements in their rightful places.
- The entire repair process is completed by adjusting the clutch.
Replacing the release bearing yourself is not very difficult. The main problem is removing the gearbox. All other events cannot be called difficult. However, you will need to be careful, consistent and careful.
Do not ignore the most useful thing that you can need when repairing your favorite VAZ 2110 - the instruction manual.
Literally everything a car owner needs to know is described in detail there. With its help, you can even perform complex repairs, the cost of which at a specialized service station would be prohibitive.
The VAZ clutch is a fairly reliable mechanism and has been tested for almost 50 years on our roads. Fiat engineers put a lot of effort into fine-tuning the design, but they could not even imagine that almost the same mechanism would be successfully used almost half a century later on a front-wheel drive car.
How to change the clutch bearing yourself?
When replacing any part of the clutch mechanism, it is recommended to install a new release device. Its price is low, so you shouldn’t skimp on buying a part, even if it has not reached its intended service life. The work of replacing the clutch release bearing is not too complicated, so you can do it yourself if you have the necessary tools and some repair skills. To install a new part, you need to perform the following steps sequentially:
- Remove the gearbox and disconnect the pressure fork from the clutch.
- Remove the bearing from the transmission input shaft.
- Remove the spring clip from the piece of the outer body of the part.
- Check the new part for ease of rotation and presence of lubrication.
- Install the spring retainer onto the coupling.
- Place the assembly onto the gearbox shaft.
- Connect the plug to the coin and secure with a spring.
- Reinstall the gearbox.
After assembly is completed, adjust the drive if necessary . To check the operation of the replaced unit, you need to start the engine and squeeze the clutch. If no extraneous sounds are heard, it means the work was done correctly.
Replacing a unit at a service station should be carried out in cases where there is no confidence in the quality of the operation with your own hands.
Clutch diagnostics on a VAZ-2110
The VAZ-2110 received the mechanism from the eight and nine virtually unchanged, only the downforce was adjusted, which corresponds to the engine torque.
Clutch diagram.
Nevertheless, every clutch has its time. The resource of the unit greatly depends on the driving style and operating conditions. And besides, from the kit manufacturer. By the way, it is not at all necessary to change the clutch assembly due to a failed driven disk or release bearing; it is expensive.
But replacing any element of the mechanism, as well as the entire clutch, at a service station will cost at least 3-5 thousand rubles
, not counting the cost of materials. Therefore, it makes sense to do the repairs yourself. This is not the simplest operation, but it is quite accessible even for a novice driver.
Clutch kit: basket, disc, bearing and mandrel.
Symptoms of a problem
Before removing the clutch on a VAZ-2110, you need to find out its condition based on the following signs:
- The clutch is slipping.
This means that when the engine speed changes, part of the torque is lost when the clutch of the driven disk slips - the speed increases, but there is no traction. There may be several options - either the friction linings of the driven disk are worn out, or the adjustment of the free play of the clutch pedal is impaired. In the first case, disk replacement is necessary. - The clutch is driving.
When the pedal is fully depressed, the clutch does not disengage. That is, part of the torque is still transmitted to the gearbox; the drive and driven disks do not open. In this case, either adjusting the same pedal free play will help, or replacing the release bearing or clutch basket if the adjustment does not produce results. - The clutch vibrates.
We observe vibrations in the gearbox area at certain speeds or constantly. In this case, the clutch needs to be replaced; most likely, the basket has failed. - The clutch is noisy.
Increased noise when pressing the pedal, extraneous sounds when changing gears. Most likely, either the entire clutch assembly, or the basket or release bearing has failed. The kit needs to be replaced.
If one of these symptoms appears and, having made sure that the adjustment does not produce results, we proceed to disassemble the clutch with our own hands, so as not to disturb the specialists, whose time and labor will cost us a lot of money. We ourselves can replace the clutch assembly in an hour, maximum two.
How to change the release bearing on a VAZ 2114 with your own hands
After removing the gearbox, it is important to inspect the discs, clutch basket, and also evaluate the condition of the gearbox housing from the inside. Remove dirt and excess used oil, make sure that the ear of the release bearing has not broken, then proceed to replacing the clutch. Below is a diagram of the clutch layout.
The principle of operation of the part is as follows: when you press the clutch pedal, the applied force is transmitted to the fork (4) through a cable (3), which moves the release lever along the guide sleeve of the input shaft (1), then the ball bearing housing transmits the force to the pressure plate (basket) (6), After this, the driven disk is disconnected, then the unit is disconnected from the engine to change speed.
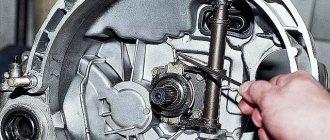
- The guide sleeve, which is shown in the photo, fixes and guides the coupling during its operation. To dismantle the old part, find the edges of the clutch spring, lift them with a screwdriver, remove the clutch VP from the VAZ 2114, the replacement of which is required.
- Using CV joint grease, apply it to the bushing splines, and also lubricate the new bearing and seating surfaces.
- We put the new VP on the guide shaft, then fasten the part with a spring. Check the clutch travel by moving the fork. Unscrew the element with your hands and make sure that there are no rolls or problems with ease of rotation.
- At this point, the replacement of the VP clutch is completed; we install the gearbox in place in the reverse order.
Replacing the clutch on a VAZ-2110 without removing the gearbox
As a rule, tens of clutches, like other front-wheel drive VAZ cars, are carried out without removing the gearbox.
Complete dismantling of the gearbox is necessary in cases where we have problems with gear engagement or with the gearbox. By dismantling the box completely, the work is almost doubled; you have to drain the oil, remove the axle shafts and carry out a lot of other work. Therefore, if the checkpoint does not bother us, we will not remove it.
Conditions
It is most convenient to change the clutch on a lift, inspection pit or on an overpass. You can do it in the field, but it is naturally inconvenient and time-consuming.
To work, we will need a standard set of tools, a jack, several wooden spacers and a mandrel, without which it will not be possible to install the driven disk. This mandrel follows the shape of the gearbox input shaft and centers the disk in relation to the flywheel.
Exact replacement algorithm
We carry out the work in the following sequence:
- Disconnect the negative terminal of the battery, remove the wire block from the mass air flow sensor.
We remove the negative battery and the connector from the mass air flow sensor. - Remove the air filter assembly.
- Unscrew the bolt securing the ignition module bracket, unscrew the upper bolt securing the starter.
Unscrew the upper starter bolt. - We remove the clutch cable with the fork - unscrew the two bolts, unscrew the speedometer cable and remove the block from the speed sensor.
- We unscrew the left gearbox mounting bolt and only after that the right one.
- Unscrew the starter nut.
Unscrew bolt 1 securing the starter. - Remove the left front wheel and jack up the car.
- Remove the engine protection.
- We unscrew the extension, the two ball joint bolts and the lower arm.
We remove all this from the car. We remove the stretcher along with the lever. - On the gearbox, disconnect the connector for turning on the reverse lights.
- Unscrew the lower nut securing the gearbox near the right CV joint.
- We unscrew the two bolts securing the jet thrust (triangular plate).
Remove the torque rod bolts. - Mark the location of the gearbox control drive mechanism.
- Loosen the nut on the clamp and remove the control rod from the box.
Remove the control drive rod. - We place the stop under the engine pan and unscrew the two nuts securing the rear support.
We place a block so that the engine does not tear off the interior heater hoses. - Carefully disconnect the gearbox housing from the cylinder block.
It is advisable to take it as far as possible and place it on a stand, although the box will hang on the drives anyway. We take the box away and put it on the floor. - We get full access to the clutch mechanism.
We definitely change the bearing (1), the springs (2) and linings (3) are worn out - the disc needs to be replaced, the surface of the basket (4) will survive another disc.
Peculiarities
At the same time, we check the condition of the flywheel.
Next, we act according to the situation. If it is necessary to replace the entire clutch assembly, unscrew the basket from the flywheel and install a new set
. To properly install the driven disk, we will need a mandrel, which we have already discussed. When installing, you need to tighten the bolts securing the new basket, then insert the mandrel into the driven disk and get into the flywheel. This way we maintain the alignment of the gearbox input shaft and the flywheel.
And only after this can you tighten the clutch basket mounting bolts. Assembly is carried out in reverse order.
New clutch basket and disc.
Good luck to everyone and good grip!
Let's look at what a clutch on a VAZ 2110 is, what role it plays in the car's control system, which system and from which manufacturer is best to choose. And also how to check the functionality and troubleshoot problems.
Clutch release bearing - signs of malfunction and replacement
The clutch release bearing is a mechanical part of the vehicle transmission designed to separate the clutch disc from the pressure plate. Simply put, it engages and disengages the clutch.
The design and principle of operation of the release bearing
Such bearings come in two varieties: roller, which uses a fairly rigid connection between the rods, and hydraulic, which uses the force of the clutch hydraulic system.
Regardless of the make and model of the car, the clutch works on the same principle everywhere. It provides a smooth connection between the car’s engine and its transmission to ensure smooth operation of the car when the gear is engaged and eliminate the possibility of rapid wear of the elements connecting the engine and transmission.
The clutch is a pressure plate that attaches to the housing and presses the driven disc against the flywheel. The disk hub is connected to the input shaft and can move freely along it. Damper springs are located on the hub body, which act as vibration dampers and ensure smooth running.
To create the required pressing force, a spring with petals is used, on which the release bearing acts. It is the connecting link between the drive and the clutch, since a fork with a lever is attached to it, at the end of which a cable or other lever leading to the clutch pedal is attached.
Video - How to check the clutch release on a car
Signs of a faulty release bearing
Torque is transmitted to the release bearing only when the clutch pedal is depressed. He goes back and pulls the clutch disc behind him. This is why the clutch pedal should not be held for too long when the gear is engaged. This leads to the appearance of unstable loads on it, which leads to rapid wear of the part.
A clear sign of wear on the release bearing is the appearance of various sounds when the clutch pedal is pressed in the form of rustling and knocking sounds. However, there is no need to worry if such sounds appear during the cold season. The fact is that this part has a low expansion coefficient at low temperatures. This is due to the high strength of the steel from which the bearing is made. The glass in which the entire assembly is located, on the contrary, has a large expansion coefficient. Therefore, when the engine warms up, the sound disappears.
In addition to this, there are a number of other signs, of which it is worth noting incorrect gear shifting. Some gears simply do not turn on, or they turn on and, at the same time, jerk the car, both at the start and while driving.
Video - Replacing the clutch release bearing VAZ 2109
Operating procedure
1. Drive the car into the pit, put on the handbrake and install the wheel chocks. Then remove the terminals from the battery and put it away so that it does not interfere with the work. Also, disconnect the wire connecting to the clutch housing ground.
2. Unscrew all the bolts that secure the engine protection. Disconnect the protection. This way you will create unobstructed access from below to all nodes.
3. Unscrew the gearbox drive rod (link). To do this, use a 13mm wrench to unscrew the clamp bolt and move it to the side. Then disconnect the drive from the transmission.
4. Disconnect the sensor that turns on the reverse lights and disconnect the clutch cable.
5. Loosen the hub nuts and lift the front wheels. Remove the wheels and unscrew the hub nuts completely. After this, unscrew the ball joints and turn the hubs out so that it becomes possible to dismantle the CV joints. Remove the clamps and boots of the internal grenades and remove them from the gearbox.
Attention! Before removing the CV joints, be sure to drain the oil from the gearbox!
6. Leave some kind of support under the engine so that it does not fall over after removing the box. After this, unscrew all the bolts that secure the gearbox to the engine and unscrew the gearbox mounting bracket. It is recommended that only two people perform this work, since the gearbox is quite heavy. Pull the box out of the engine with extreme caution: the input shaft should not touch the petals.
7. Pull out the ends of the spring clip using a screwdriver and pull out the clutch.
8. Move the petals back and remove the old release bearing.
9. Install the new release bearing in reverse order. To do this, it is installed on the coupling in such a way that the protruding component is directed towards the coupling.
10. Fix the new part using the clutch holder and lubricate the entire shaft with engine oil.
After replacing the bearing, install the gearbox in the reverse order, insert the CV joint into place, secure the ball joints and tighten the hub nut. After this, install the wheels, tighten the wheel bolts and lower the car. After this, tighten them and the hub nuts. Don't forget to pour the oil back into the gearbox; it is best to replace it with new one.
This completes the process of replacing the release bearing. Good luck on the roads!
Operating principle and components
The clutch is single-plate, with a central pressure spring.
Drive – cable. The housing is attached to the flywheel and pressure plate. There is also a driven disk.
For dozens, the “native” clutch system is VIS, and although many reviews criticize it, there are also many who believe that there is no better VIS (VAZINTERSERVICE) for VAZ.
The main components are:
- casing;
- Pressure and driven disks;
- Carter with bottom cover. It also has support planes with which the crankcase is attached to the frame;
- Release bearing for disengaging the clutch;
- Flywheel;
- Power plug;
- The cable lead that goes directly to the clutch pedal (far left).
This, in brief, is the clutch device of the VAZ 2110.
Methods for checking clutch failure:
- The first method
is best done with an assistant. The car can be placed on an overpass or raised on a lift. While one of you is pressing the clutch pedal with the engine not running, the other is listening for noises and knocks from the clutch. If there are various extraneous knocks and creaks, it’s worth considering whether it’s time for maintenance.
- The second method
is quite easy. Start the engine, press the clutch pedal and engage reverse gear. When turned on, no grinding or noise should be heard. If, on the contrary, it is necessary to replace the driven disk.
- Third way
. When driving, accelerate the car to a speed of 30–40 km/h and sharply press the gas pedal. If the speed of the car increases in proportion to the number of engine revolutions, then everything is in order. But if the engine speed increases faster than the vehicle speed, then you need to contact a service center.
If the clutch is hydraulically driven, then you should pay attention to the components included in the hydraulic drive for the presence of fluid leaks from the system. If necessary, replace and bleed the system.
The listed methods for determining clutch failure will help save time, prevent unnecessary repairs and expensive investments. And if at least one of the signs appears, you should not waste time, but immediately contact a service station.
Selecting an Alternative
As an independent study shows (based on online voting reviews), KRAFT-TECH is recognized as the best kit for the top ten, followed by LUK, then VALEO, SACHS. In fifth place was the Russian-made VIS (VAZINTERSERVIS) clutch - for those for whom the native one is better, clearer, and cheaper.
In addition, this system is easier to repair: having detected a malfunction, the VIS only needs to adjust the pedal, tighten the cable, and you can continue driving. And if you need to replace the entire assembly, it comes out much cheaper.
However, regardless of which set you have chosen for yourself: VIS or one of the European ones (we are not discussing China), or maybe a “prefabricated” one, you need to know how to identify faults and respond to them.
Troubleshooting and Correction
Let's talk about how to detect malfunctions based on special signs, as well as correct them.
1. If the clutch is leading, the following may be to blame:
- Insufficient pedal travel, possibly too tight. Adjusting the drive will help;
- Deformations in the driven disk. If straightening is not possible, then the disk must be replaced;
- The driven disk hub periodically jams. You can try washing and then lubricating the splines on the input shaft. If they or the shaft are worn out, replacement is needed;
- Rivets are loose or friction linings are broken. In this case, it is best to change the casing along with the spring and disk;
- The pressure plate is warped or warped. Replacing the linings will help, but before that, check for any deviations in the end runout of this disk;
- Something is wrong with the cable. The cable needs to be tightened or replaced, depending on wear.
2. It slips, that is, it does not turn on. Possible reasons:
- The friction linings of the driven disc are burnt or worn. “Cure” by replacement;
- The surfaces of the flywheel and both disks are oily. These signs also indirectly indicate that it is time to change the engine and gearbox seals. You also need to check if there is any oil leakage through the bolts securing the flywheel. In this case, it is better to place them on sealant. And rinse the oily parts (white spirit is usually used);
- The drive jams. Check and replace what is damaged.
3. It works, but in jerks. This clutch operation can be caused by:
- Oil getting on surfaces, as mentioned above;
- Jamming in the drive. Trace the “chain”, troubleshoot;
- Deformations or damage in the pressure disk, requiring replacement of the casing along with the disk.
4. It makes a lot of noise when it turns on. Most likely, these are signs that the springs in the damper have broken. Replace the entire driven disk assembly.
5. It makes a lot of noise when it turns off. The first suspect is the release bearing. It can wear out, become damaged, and lose oil. Therefore, naturally, it is better to replace such a bearing.
6. During prolonged operation, the clutch may suddenly disengage. The reason most often is that the release bearing is stuck. It is located on the gearbox guide sleeve. A worn bearing must be replaced with a new one.
There are also other problems. For example, the clutch is very tight, or it disappears when overtaking. With such a problem, you can still slowly drive to the garage, but if the clutch is completely lost, you can’t go, you need to call a tow truck.
The details of changing the gearbox oil yourself are discussed in this article:
Let's look at how to properly dismantle it, repair it, and then reassemble it.
Clutch assembly design and bearing arrangement
Mechanical clutch has two main elements:
- Pressure disk. It is often called a basket. Leaf springs are built into the body. They are connected to a round plate that presses the driven disk. Pressing on the springs is carried out by the outer ring and causes the platform to shift along the axis.
- Driven disk. It consists of friction sectors, a splined groove for connecting to the input shaft, and a radial disk. Damper springs are installed all around to absorb shocks.
The release bearing disengages the driven disk. It is installed on the input shaft. The body of the part is fixed to a fork, which fits into the protective bell of the gearbox. Pressing the pedal moves the bearing towards the petals of the basket.
Squeezing devices are technologically similar and consist of:
- inner race (mounting hole for the shaft);
- rolling mechanism (roller or ball);
- external housing with a pressure pad.
Depending on the design, the rolling elements are made of hardened metal. The coupling body is cast from steel or cast iron.
