Replacing the VAZ 2107 clutch
Unfortunately, lately it has been quite difficult to find a good master. At every second service station, the staff sets themselves only one goal - profit. Negligence and lack of experience lead to poor quality of work performed. In addition, the services of good specialists cost decent money. Self-repair allows you not only to save a little on services, but also to have a good time doing something interesting. It is worth noting that without the skills and knowledge of transport design, it is not recommended to carry out repair work. In this article we will talk about how to replace the VAZ-2107 clutch, and also look at how to independently diagnose this unit.
Self-diagnosis of the clutch disc
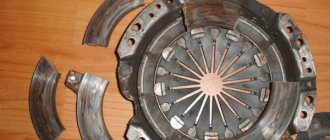
The main disadvantage of the clutch is that this mechanism does not have a specific service life. That is, its condition depends only on the driver and driving style. No manufacturer gives any guarantees or exact deadlines after which it needs to be replaced. Experienced technicians recommend diagnosing this mechanism every 80,000 km. Statistics show that the most vulnerable parts are the slave and master disks. The most common defects in the driven disk may be mechanical deformations, breakage of damper springs, wear or damage to hub splines, and abrasion of friction linings. Most of the breakdowns described above cannot be repaired. In these cases, as a rule, the VAZ-2107 clutch disc assembly is replaced.
Signs of a broken clutch
- Clutch not disengaging.
- Clutch slipping.
- The occurrence of vibration and extraneous sounds when the clutch is disengaged.
- The clutch pedal fails (does not return).
Disk diagnostics can be performed in two ways. The first involves the presence of a special device with which you can measure the thickness of the part. To do this, you will need lifts and a gauge that is attached to the mechanism being measured. Read the instructions for how to use the tool.
The second method is “folk” and should not be abused, as it reduces the service life of the part. Put it in the last gear and start the engine. Press the gas on the clutch; if the engine does not stall, the disc needs to be replaced.
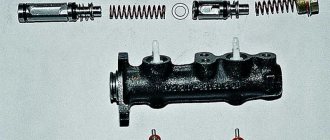
If the pedal does not return (falls through), the VAZ-2107 clutch cylinder may need to be replaced.
Replacing the VAZ 2107 clutch (video)
Replacing the clutch can be done in several ways. The first requires dismantling the power unit, the second requires removing the gearbox, which requires an inspection hole, a lift or an overpass. In the first case, it is necessary to use special equipment in the form of a lift. To remove the engine, you will also need to completely drain the coolant, disconnect the pipes from the radiator, and in the end you will spend a lot of time disassembling the parts. Therefore, it is advisable to use the second method, during which you can avoid all unnecessary operations. Let's look at how to replace a VAZ-2107 clutch step by step.
Removing the gearbox
Since we chose the second replacement method, dismantling the gearbox will be the initial step. The car must be placed above the inspection hole. A lift or overpass is also suitable. First you need to disconnect the cardan from the elastic coupling. It can also be removed completely if it is in the way. To dismantle the cardan, you need to bend the clamps located on the seal ring, after which it can be easily pulled out. Then you need to remove the clutch drive. Disconnect the springs and unscrew the bolts.
After this, the starter is removed; as a rule, it is secured with three bolts. Before performing this task, you must disconnect the terminals from the battery. Finally, we dismantle the lever in the cabin, the cable on the speedometer and the brackets securing the exhaust pipe. After completing these operations, to dismantle the box itself, you need to unscrew the 4 bolts on the power unit casing.
Setting the mark
The next stage is no less important and should not be neglected. The marks are placed to avoid vibration that may occur when installing a new part. This is due to the fact that during operation the factory balancing loses its meaning and the marks are the only way to install the basket in its place. Factory parts do not provide special marks, since their installation is carried out with high precision. To apply the notch, you can use a thin chisel or use regular chalk.
Removing the disk
After completing all the above operations, you can begin dismantling the basket. First you need to unscrew the six bolts located around the mechanism; they secure the disk to the flywheel. To prevent the part from turning, hold it with your hand; the whole procedure will take at most 5 minutes. If you do not have enough strength to hold the basket, you can fix it with a large screwdriver. After all the bolts have been unscrewed, you need to remove the part. Gently pull it, holding it with both hands. It is worth knowing that the disk is not fixed at this moment; it must be held, otherwise it may fall to the floor. Inspect the disk carefully; if it is in good enough condition, it can be repaired.
Installing the disc
We insert the new clutch disc in place of the old one. When installed correctly, the large protrusion should press against the release bearing. After making sure that the part is installed correctly, perform all the above operations in reverse order. You can use the gearbox input shaft as a guide. If you don’t have one, you can make one; it won’t take much of your time. The main rule is that the manufactured shaft can be easily pulled out by hand after installing the part. Finally, we screw the clutch basket, focusing on the previously made marks.
VipWash.ru
Clutch installation
After dismantling the gearbox and the clutch itself, it is advisable to check all components and carry out their maintenance. So, in particular:
- the surfaces of the flywheel and discs are degreased;
- the shaft (or rather, its splines), on the contrary, is lubricated.
Next, the installation of the basket begins.
It is important here during installation to accurately align its centering holes with the pins located on the flywheel. It is necessary to tighten all the bolts correctly - they are evenly tightened one turn at a time. If everything is mounted as it should, the mandrel will come off very easily. The disc should be inserted into the basket with the protruding side. Work order:
- insert a mandrel into the holes on the flywheel;
- mount the driven disk;
- install the basket;
- tighten the bolts.
Next comes the turn of the bearing. The stage is performed like this:
- Treat the input shaft splines with Litol-24;
- attach the release bearing to the shaft;
- insert the plug;
- push the bearing away from you until it is secured by the tendrils.
Then the gearbox is installed. Don't forget to remove the mandrel and move the crankcase towards the engine. After that:
- tighten the bottom bolts;
- return the lever from the front axle to its place.
It is important that the fork fits under the retaining ring located on the release bearing.
How to change the clutch disc on a VAZ 2107?
Many VAZ 2107 car owners carry out repair work on their car on their own. And the clutch mechanism is no exception. Although this task is labor-intensive and cannot be called simple, the owners of 2107 have long learned to do it on their own. Today we will tell you how to replace the clutch disc of a VAZ 2107: the video will be presented at the end of the material.
The clutch in a vehicle plays the role of ensuring smooth gear shifting by briefly disconnecting the VAZ engine from the transmission system. It is precisely because the car has a clutch that it can move off smoothly without overloading the engine and helping to increase the service life of most of its elements. This includes the gearbox itself.
VAZ 2107 car
Clutch disc cost
How much does it cost to replace a clutch disc (hereinafter referred to as DS)? This question was probably asked by every car owner who encountered a breakdown of this element. We will try to give you the most current figures, those that are found on the market.
Today, on the Ukrainian car market it is quite possible to purchase a domestically produced DS for 2107 for an average of 210 hryvnia. If you're lucky, you'll find it cheaper. But, depending on the stores, this price can vary and reach 250 hryvnia.
In Russian car stores this element costs about 500 rubles. This cost is average, so you can find DS both cheaper than this price and more expensive (mostly up to 700 rubles).
We make a replacement
If you decide to change the element yourself, but do not have enough knowledge and experience to do this, then it does not matter. Many motorists use the instructions on our website when carrying out certain repair work for the first time - and most of them are satisfied with the results. Even if you have never changed this element, just follow the instructions and you will succeed. But if you are not confident in your abilities and open the hood of the car only to add washer fluid to the expansion tank, then it is better to entrust this matter to specialists.
New DS for VAZ 2107
When do you need to change the DS? This may be needed in several cases:
- you notice that the clutch pedal does not engage or disengage completely;
- the coupling system does not work correctly: there is significant jerking when changing gears;
- When you press the pedal you hear new noises.
The process of replacing the DS involves dismantling the gearbox. However, we have a simpler option. We will look at the process of changing the clutch component without removing the transmission.
What will you need?
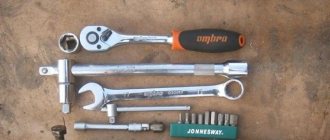
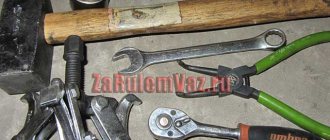
Prepare everything you may need during the repair process, namely:
- set of wrenches;
- prybar or crowbar;
- jack;
- rags;
- some gasoline;
- mandrel for centering the disk.
We will need rags and gasoline to lubricate the DS, and a mandrel to center it. It is not expensive and is sold in any car store. When replacing the DS, this point is very important, since the new element necessarily requires alignment. Having collected everything you need, you can start working.
A set of wrenches for carrying out repair work on changing the DS of a VAZ 2107 A pry bar that will be needed during the repair process A jack for carrying out the work A little rag for lubricating the DS A little gasoline for lubricating the DS: this amount is quite enough A special mandrel for centering the DS: sold in any car store
Replacement instructions
If you decide to replace the DS yourself, then you will need the help of another person. You need to drive onto a hole or overpass, otherwise the repair will not be possible.
- Before you begin replacing the driveshaft, you need to disconnect the driveshaft. To do this, remove the brake drums and pads from the wheels. Take a 12mm wrench and unscrew the axle shaft mounts and then pull them out.
- Before unscrewing the fastening screws, the positions of the cardan flange and gearbox must be noted. This is done so that subsequent assembly will maintain their original position in order to prevent imbalance. So, unscrew the bolts and disconnect the driveshaft.
- Now you need to disconnect the wire contacts from the sensor that turns on the reversing headlights when reversing.
- There is a clutch mechanism casing on the cylinder head - they need to be unscrewed with a wrench, and the casing must be removed. In addition, you need to remove the cross member of the car's underbody.
- Now take a 13mm socket wrench and use it to unscrew the two bolts that hold the gearbox cushion. Take off this pillow.
- Next, take a crowbar or pry bar and move the gearbox power unit to the side opposite the engine. Here you will need the help of another person, since the unit must be moved very carefully, this can cause some difficulties. Do this until the shift lever is near the rear edge of the hole in the bottom of the vehicle.
- As a result, it should turn out that the transmission unit of your VAZ 2107 car will be located on the receiving tube. Here you will need a jack that will act as a support. It must be placed under the gearbox so that it does not slip and sag on the wires, thereby protecting the unit from damage.
- Next, you need to remove the clutch basket from the flywheel of the VAZ engine. To do this, you need to take a crowbar or pry bar and use it to fix the flywheel in place. When this is done, using a “13” wrench, unscrew the basket fastening bolts one by one.
- Having done this, carefully move the basket to the side with a crowbar and remove the DS that needs to be replaced. Remember which side the element is installed in order to place it the way you need it.
- At this point, the dismantling of the DS can be considered complete. Take the new disk and install it in place of the old one. Before installing the element, you need to wipe it with a clean rag, which must first be soaked in gasoline. All subsequent assembly must be carried out in reverse order. If necessary, replace other system elements.
1. Using a socket wrench, unscrew the nuts securing the casing 2. Take a pry bar and carefully move the gearbox away from the engine 3. Take a wrench at “13” and unscrew the nuts securing the mechanism basket 4. Dismantle the old DS, do not forget to pay attention to Which side is it installed 6. Center the new DS: the mandrel should freely enter and exit the hole 5. Place the new DS and insert a special centering mandrel into the hole
Important: do not forget to center the disk when it is already installed. To do this, use a special mandrel. If the DS is installed correctly on the mechanism, the mandrel will move freely into and out of the bearing when the basket mounting bolts are tightened. Don’t forget to also coat the gearbox input shaft splines with a thin layer of lubricant. Don't forget to also adjust the pedal free play.
Video “Replacing the clutch on a classic”
This video describes the process of replacing the clutch on a VAZ 2102 car. The process of replacing the element, and, accordingly, the clutch disc, is identical for all classic car models, including the VAZ 2107.
AvtoZam.com
Replacing the hose
Clutch hoses often fail, which leads to loss of fluid in the hydraulic drive. All this interferes with normal gear shifting.
Signs of a hose failure are:
- the car shakes after fully depressing the pedal;
- drops appear at the ends of the tube all the time;
- puddles remain at the parking site;
- The pedal, when released, stays in the down position.
Replacement is carried out as follows:
- first of all, remove all fluid from the hydraulic drive;
- then remove the fastenings of the expansion tank and move it;
- unscrew the nuts connecting the hose and clutch tube;
- remove the bracket from the bracket;
- discard the end of the hose;
- from the bottom, disconnect its other end from the working cylinder;
- dismantle the unusable element.
Then all that remains is to replace it with a new one. All work is carried out in reverse order:
- a hose is attached to the cylinder;
- its second end is connected to the clutch hydraulic system;
- the tank returns to its place;
- fresh liquid is poured in.
As you can see, replacing the clutch on the 2107 model, although troublesome, is not too difficult. You will need a new unit and a completely normal set of tools. At the same time, remember - if you do not have confidence in your own abilities, then it is better to contact a service center. This way you are guaranteed to avoid troubles and even greater expenses.
Replacing the VAZ 2107 clutch with your own hands is easy and simple
If the car starts to slip under load, most likely the problem is in the clutch. It is dangerous to move with a faulty unit, so it should be changed as quickly as possible. The article provides detailed instructions on how to replace a VAZ 2107 clutch, which device to choose, and also includes a video demonstrating the process.
The clutch system allows the car to move off smoothly, removing the load from the engine, which reduces wear on its parts and extends its service life. Overloads are caused by an inertial moment formed during the rotation of parts of the power unit if the crankshaft speed has sharply decreased.
VAZ 2107 assembly diagram
There is no specific time frame for replacing the unit, since the service life of this device mainly depends on operating conditions and the driver’s driving style. It is recommended to diagnose the device after 80 thousand km.
Symptoms of a problem
The need to repair the clutch assembly is determined by the following criteria:
- extraneous noise occurs when changing speeds;
- the device slips, especially under load;
- the clutch does not disengage completely;
- rattling;
- jerking when starting to move;
- The clutch pedal falls out.
If the described signs appear, it is better not to delay repairs in order to avoid unpleasant surprises along the way.
This video shows the process of replacing a unit on a VAZ classic.
Causes of VAZ 2107 clutch failure
Driven and driven discs are subject to the greatest wear.
Clutch failure can be caused by the following reasons:
- wear, oiling, defects on the surface of friction linings;
- too large gaps or lack thereof in the clutch release drive;
- air entering the hydraulic drive system;
- fluid leakage from the master cylinder and hydraulic drive system;
- loosening rivets;
- disc deformation;
- jamming, wear of the driven disk hub splines, clutch drive mechanism;
- bearing wear;
- malfunction of the driven disc damper springs;
- breakdown of the release fork or its release spring;
- wear of the sealing rings, which impairs the seal.
To eliminate these problems, in each individual case you need to change worn parts; it is better to replace the clutch system assembly.
Visual inspection of the disk
What's the best way to change?
It is best to replace the device by placing the car on a lift, overpass or inspection groove. If this is not possible, then you can raise the car using a jack to get to the unit from below. For safety, you need to fix the wheels so that the car does not roll or put on the hand brake.
Tools
To carry out repairs, you need to prepare the appropriate tools:
- set of keys;
- screwdrivers;
- pliers;
- clean rags;
- jack;
- new consumables.
When choosing a new replacement kit, you need to buy original parts, preferably assembled.
Stages
The replacement procedure consists of the following steps:
- Having opened the hood, first of all you need to turn off the power to the car.
To do this, you need to remove the negative terminal from the battery. Engine compartment of VAZ 2107 - Then you need to dismantle the air filter housing and unscrew the starter mounting nuts.
- Next in the cabin, you should remove the covers from the gearshift knob, floor mats and sound insulation. Then the gearshift lever must be disconnected from the gearbox. To do this, you need to press on it and use a screwdriver to pull out the white plastic sleeve.
- To perform further repairs, you need to move under the car.
- When removing parts, you should carefully inspect them for wear and defects. Change them if necessary.
- At the next stage, we disconnect the exhaust pipe, the working cylinder, the universal joint, from which the wires should be disconnected.
- Then we dismantle the starter, which we unscrewed, and remove the gearbox. The gearbox could simply be moved to the side, but it is better to remove it to check the condition of the oil seal. If necessary, the oil seal should be replaced. It is better to remove the gearbox with an assistant, as this is a labor-intensive process. It is advisable to wash the gearbox after removal.
- Next, you can remove the basket and clutch disc.
In this case, you need to remember how the disk was installed in order to install it correctly when reassembling. Removing disks from a node - Now you can evaluate the state of the components of the node. The anthers and driven disk are subject to the most wear. The master cylinder and clutch fork should be replaced.
- You can only change worn parts, or you can change the entire assembly.
It is advisable to replace the clutch assembly, since, having replaced the old parts, there is no guarantee that after a short period of time you will not have to reassemble and disassemble to replace broken parts. Installing a new drive - Further assembly is carried out in the same order as disassembly.
After the repair is completed, the vehicle system should be checked for functionality.
Cost of clutch assembly
As mentioned above, it is better to change the clutch assembly. The question arises, which device is better.
We can offer four options for assembled units with approximate costs:
- Sachs – 4200 rub.;
- VazInterService (VIS) – from 2400 rubles;
- Valeo – 4200 rub.;
- KraftTech – from 2400 rub.
Video “Clutch Review”
This video gives an overview of clutches.
AvtoZam.com
Step-by-step description of adjustment
Clutch adjustment can be done from inside the vehicle by adjusting the gap between the master cylinder piston and the pusher. This adjustment is not difficult and can be done in just a few minutes. At the same time, we note that you can adjust the clutch from the passenger compartment with a minimal lift.
For more precise adjustment, you should still work with the pusher of the working cylinder. The easiest way to perform such a service is to drive the car onto a viewing hole or overpass. The cylinder we need is connected to the clutch by a pusher and comes out of the gearbox. There is also a return spring located here, the main purpose of which is to return the fork to its original position when the clutch pedal is not pressed. First of all, you need to check the free play of the fork. You will need to pull the fork away from the pushrod and then measure the free play. The free play standard is 4-5 millimeters. If the gap differs from this standard, it is necessary to adjust it. To do this we do the following:
It is necessary to remove the spring, which is responsible for bringing the clutch fork to its original position.
The locknut on the pusher should be loosened.
Next, you will need a 10mm wrench, which is used to hold the pusher in place and screw an additional thrust nut on top, which will allow you to achieve the required clearance.
We fix the screwed-on thrust nut using a locknut. After this, we check the gap again, if it is in the range we need, we install the spring in place.
This completes all service work. You just need to make sure the work is done correctly. To do this check, you should start the car, then engage the gear and smoothly release the clutch pedal. If the adjustment is made correctly, the car will begin to move away at approximately half the full pedal travel. However, in each specific case, the pedal travel is adjusted depending on the preferences of the car owner. Some people like the clutch to engage higher or lower. But at the same time, remember that it is unacceptable to engage the clutch at the very bottom or at the very top of the pedal stroke, as this leads to serious damage to the car.
How to replace a VAZ-2107 clutch
Before you begin replacing the VAZ-2107 clutch, you need to determine what this part is. The mechanism consists of a basket, a disk and a release bearing; if at least one of the listed components fails, it’s a disaster. However, other parts of the clutch mechanism in a domestic car can also wear out. Therefore, if the main cylinder, the plug responsible for shutting down, or the supply hose are faulty, then it’s time to take on the repair work yourself.
Be prepared for the fact that at the final stage you may additionally need to adjust structural components, whether they are old parts or new ones.
Is it necessary to remove the gearbox?
Car enthusiasts on the forums warn that it is impossible to replace the basket or disc without dismantling the VAZ-2107 gearbox, but experts immediately correct it - it is not always necessary to remove the gearbox; in most cases, it is enough to slightly pull out the gearbox and do this so that the input shaft comes out unhindered clutch baskets.
This option is the most convenient, but only if you are sure what exactly the problem is. Auto mechanics, when getting to work, prefer to inspect the entire device; there will probably be shortcomings, which will also soon make themselves felt, and therefore the clutch will have to be changed again. A visual inspection should be carried out for the following components:
- clutch housing;
- oil seal suitable for the primary type gearbox shaft;
- crankshaft oil seal located at the rear.
Check the serviceability of the brake system; in the VAZ-2107 it often malfunctions.
Classic step-by-step instructions for replacing the VAZ-2107 clutch
In various blogs you can find proposals from craftsmen for quickly replacing the clutch on a VAZ-2107, but experts do not recommend experimenting. The machine is a structure with a complex structure, so manipulations that do not comply with traditional generally accepted repair technology can lead to breakage of other parts.
Basic clutch elements
To replace the clutch, you should accurately understand its structure. In the VAZ-2107, this unit is controlled using a pedal located under the steering wheel. Pressing it disconnects the clutch from the gearbox, and releasing it reattaches it. The unit in question is easy to adjust and easy to change.
The VAZ-2107 model is equipped with a single-disc clutch equipped with a central spring. This scheme has a number of advantages:
- reliability;
- low cost;
- ease of care.
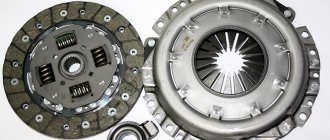
The clutch itself consists of a release bearing and a pair of discs. The first of them is the leading one, mounted on the flywheel. The slave is in the basket. It is connected to the gearbox (its input shaft) using splines.
It is not difficult to replace the “original” wheels with those that are installed on other VAZ models. Fully matched parts for:
- 2103 (engine capacity up to 1.5 liters);
- 2121 (up to 1.7 l).
The VAZ clutch driven disc is called the “drum”. It has pads and special slots on both sides that increase elasticity. There are also 8 springs that reduce dynamic load.
Useful tips
Don't forget to put labels when replacing the disk. Factory balancing will be disrupted if assembled in a different sequence, which will lead to extraneous noise. Mark the marks with chalk or a chisel if replacement is not planned in the near future. To prevent the basket from rotating during disassembly, it can be secured using a large screwdriver or a piece of pipe. Replacing the clutch disc on a VAZ 2107 on your own is quite possible.
The procedure can be performed both in the pit and on supports and jacks. The main thing is not to forget about safety precautions, show a little patience, have minimal knowledge of the structure of the car and the appropriate tool.
labavto.com
The clutch system in every car is one of the key components of the control system, in the event of which failure it is impossible to continue driving. The clutch is controlled using a pedal. It’s probably not worth saying that this is a complex system that requires systematic care and attention, and any driver should be able to adjust the VAZ 2107 clutch.
Thanks to a correctly adjusted clutch, the risk of premature wear of clutch parts, for example the release plate, is significantly reduced.
