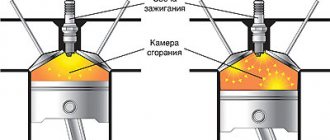
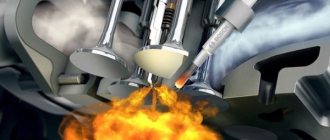
The history of the most famous four-cylinder diesel engine with turbocharging and direct injection began in 1991. It was this year that Audi presented the world with a modernized “eighty”, equipped with a new 1.9-liter turbodiesel, designated by the now legendary TDI index. This engine is a downsized version of the five-cylinder 2.5-liter engine that appeared in the Audi 100 in 1989.
On our YouTube channel you can watch a video disassembly of a 1.9 TDI engine with a very interesting malfunction - a timing belt jump.
The first versions of the 1.9 TDI engine were offered in two power levels - 90 (1Z, later AHU) and 110 hp. (AFN). In general, all engines are structurally almost identical, they differ in control programs.
You can choose and buy a 1.9 TDI engine for Audi, Skoda, Sean, Volkswagen in our catalog.
The heart of both fuel systems was a Bosch VP37 pump. The 110-horsepower engine was distinguished by the presence of a variable geometry turbine (the younger one had a turbine with a bypass valve) and a dual-mass flywheel. The 1.9 TDI engines turned out to be long-lived - they were installed under the hoods of VAG cars from 1991 to 2004.
Broken attachment belt
The rivulet belt can break not only due to overuse, but also as a result of a breakdown of the tension roller. As a rule, the roller warps and begins to rub against the timing belt casing. The behavior of the tensioner should be observed at least once a month (it should oscillate with a minimum amplitude); there should be no suspicious signs of friction of the roller on the timing belt casing. Often, a tensioner fracture is associated with a breakdown of the generator overrunning clutch.
When the drive belt breaks, it wraps around the crankshaft pulley. In the most unfortunate cases, the belt or its fragments fall under the sprocket of the timing belt, which instantly causes it to slip with very sad consequences. Valves and pistons “meet”, causing damage to each other.
Fuel pump Bosch VP37
On 1.9 TDI engines (with direct injection), an electronic fuel injection pump of the Bosch VP37 distribution type is used. The pump is reliable and not capricious, but it contains a lot of electronics that can malfunction. During operation, the pump collects information from 5 sensors, including the accelerator pedal position sensor, which is electronic. This injection pump is easily diagnosed.
The fuel quantity control mechanism is located in the “head” of the Bosch VP37 injection pump.
In the fuel injection pump housing of the 1.9 TDI engine there are many sealing gaskets, rings and seals that wear out over time. The pump may slowly leak fuel and suck in air. The main sign of the slightest air leak is white-blue smoke from the exhaust pipe. If the air leak is strong or the fuel pressure pump is too airy, the engine will not start at all.
When the plunger pair wears out, the injection pump operates with noise.
You can select and buy a Bosch VE / VP37 fuel pump (fuel pump) for the 1.9 TDI engine of Audi, Volkswagen, Skoda and Seat cars in the catalog on the website ]"AutoStrong-M"[/anchor].
Removing and installing a timing belt
Diesel engine timing gear drive
1 – fastening clip; 2 – upper toothed belt casing; 3 – toothed belt. Before removing the timing belt, it is necessary to mark it with an arrow indicating the direction of the timing belt; 4 – nut, 20 Nm; 5 – eccentric; 6 – toothed belt tension roller; 7 – bolt, 45 Nm; 8 – camshaft pulley; 9 – bolt, 25 Nm; 10 – guide roller; 11 – bolt, 10 Nm; 12 – rear toothed belt casing; 13 – fuel pump; 14 – bracket; 15 – console; 16 – fuel pump pulley; 17 – nut, 55 Nm; 18 – fuel pump pulley of two sections; 19 – intermediate shaft pulley; 20 – crankshaft timing belt pulley; 21 – crankshaft pulley mounting bolt, 90 Nm+ tighten to an angle of 90°; 22 – bolts for fastening the composite pulley of the high-pressure fuel pump, 20 Nm+ tighten to an angle of 90°. When installing, you must use new bolts; 23 – lower toothed belt casing; 24 – vibration damper/auxiliary drive belt pulley. Installation of the pulley is possible only in one position after aligning the holes.
All operations for removing and installing a timing belt on a diesel engine are similar to those for removing and installing a timing belt on four-cylinder gasoline engines. The remainder of this subsection describes operations that are specific only to 1.9-I-TDI engines.
EXECUTION ORDER
1. Using a wrench, turn the poly V-belt tension roller all the way counterclockwise and in this position of the roller, remove the upper timing belt casing.
2. Rotate the engine crankshaft to position the piston of the first cylinder at top dead center. 3. To block the camshaft and high-pressure fuel pump pulley at the TDC position of the piston of the first cylinder during the compression stroke, special locking tools must be used. 4. Install the locking tool into the groove in the end of the camshaft.
5. With the locking tool installed in the camshaft, rotate the camshaft (turning the crankshaft clockwise) so that one side of the locking tool is pressed against the surface of the cylinder head. Using a feeler gauge, measure the gap between the second end of the locking tool and the cylinder head. Turn the camshaft slightly back and, on both sides, between the blocking tool and the cylinder head, install two feeler gauges with a thickness equal to half the previously measured gap. 6. Through the hole in the clutch housing, check that the TDC mark on the flywheel is aligned with the pointer.
Engines with monobloc fuel pump pulley
EXECUTION ORDER
1. Insert the locking pin through the mounting hole of the high pressure fuel pump pulley into the hole in the bracket behind the fuel pump pulley.
2. The locking pin can be made by yourself according to the dimensions. Engines with a two-piece fuel pump pulley
EXECUTION ORDER
1. Lock the fuel pump pulley with the locking pin. 2. Unscrew the bolts (1) from the fuel pump pulley and screw in new bolts in their place, tightening them to a torque of 20 Nm. Do not unscrew the central nut securing the fuel pump pulley, as this may cause the pulley to move.
3. Loosen the tension of the toothed belt by unscrewing the nut securing the tension mechanism pulley.
4. Unscrew the bolt and remove the timing belt guide roller.
To reinstall the timing belt, mark the direction of its rotation. 5. Loosen the camshaft pulley bolt by half a turn. Remove the camshaft timing belt pulley from the camshaft mounting cone using a drift through the hole in the rear timing belt housing. 6. Install the timing belt guide roller and secure it with a bolt, tightening it to a torque of 25 Nm. 7. Install the timing belt on the crankshaft pulley, fuel pump pulley and camshaft pulley. 8. Install the timing belt with its flat side on the intermediate shaft pulley and tension roller. 9. Remove the high pressure fuel pump locking pin. 10. Check that the front part of the timing belt is tight and the belt slack should be on the tension roller side. 11. Using a wrench, turn the timing belt tensioner clockwise until the marks on the pulley and the tensioner hub align. 12. Check the tension of the timing belt by turning it in the center between the intermediate and camshaft. In this case, the belt should only turn 90°. 13. After adjusting the toothed belt tension, tighten the locknut of the tension mechanism to a torque of 45 Nm. 14. Tighten the camshaft pulley bolt to the required torque. 15. Remove the camshaft locking tool. 16. Rotate the engine crankshaft two full revolutions in the normal direction of rotation and reinstall the piston of the first cylinder to TDC on the compression stroke. Check that the locking pin can be installed in the installation hole of the high pressure fuel pump pulley. Check and, if necessary, readjust the toothed belt tension. 17. Install the timing belt guards, vibration damper/auxiliary drive belt pulley, and cylinder head cover. 18. Install the serpentine auxiliary belt. 19. Check the injection timing of the high pressure fuel pump. Warning On the fuel pump gear, consisting of two sections, after setting the injection timing of the fuel pump, tighten the three bolts securing the gear to a torque of 20 Nm, and then tighten them to an angle of 90°.
Removing and installing the cylinder head (1.9 l diesel engine)
Cylinder head of 1.9-I-TDI diesel engine
1 – cylinder head cover; 2 – oil filler cap. If the cap is leaking, replace the gasket; 3 – sealing gasket. If the gasket is damaged, it must be replaced; 4 – Belleville washer; 5 – nut, 10 Nm; 6 – cap; 7 – to the intake manifold; 8 – clamp; 9 – pressure regulation valve; 10 – sealing sleeve. If there is damage, a new sealing sleeve must be used.
11 – cylinder head cover gasket; 12 – crankcase ventilation hose; 13 – cylinder head mounting bolt. New bolts must be used during installation. Bolt tightening torques are the same as for a four-cylinder petrol engine; 14 – clamp; 15 – sealing ring. When installing, you must use a new O-ring; 16 – conical sealing ring; 17 – pipelines for supplying fuel under high pressure to the fuel injectors. Pipelines must be replaced as a set. Do not bend the pipelines. Tighten the connecting nuts of the pipelines to a torque of 25 Nm; 18 – cylinder head; 19 – cylinder head gasket; 20 – bolt, 20 Nm; 21 – eye for lifting the engine
All operations for removing and installing the cylinder head of a diesel engine are the same as the operations for removing and installing the cylinder head of gasoline four-cylinder engines. This subsection shows only the differences for diesel engines.
EXECUTION ORDER
1. Remove the timing belt. 2. Disconnect the voltage supply bus from the glow plugs. 3. Clean the connections of the pipelines to the fuel injectors and the high pressure fuel pump. Unscrew the connecting nuts and remove the fuel lines. Seal the holes with suitable plugs. 4. Unscrew the glow plugs and fuel injectors from the cylinder head. 5. To unscrew the cylinder head bolts, you must use an appropriate socket wrench (for example, HAZET 990 Sig-12). 6. Tighten the cylinder head bolts in the same sequence and to the same torque as on four-cylinder gasoline engines. Warning The cylinder head of a diesel engine must not be machined. 7. If new pistons are installed on the engine, it is necessary to measure the protrusion of the pistons from the cylinder block and, based on the amount of protrusion of the pistons, it is necessary to select the thickness of the new cylinder head gasket.
Four-cylinder petrol engine
Toothed belt The tension of the timing belt in four-cylinder gasoline engines is carried out by a roller of an automatic tension mechanism, which maintains optimal belt tension, ...
Engine 2.3-I-VR5
Gas distribution mechanism drive Gas distribution mechanism drive 1 – camshaft sprocket; 2 – pulse rotor for the Hall sensor; 3 – the sprocket mounting bolt will distribute...
Other on the site:
Removing air from the fuel supply system After removing water from the fuel supply system, it is necessary to remove air.
Diesel engine (55 kW/75 hp) Unscrew the vent plug located on top of the fuel filter... Tool care and storage A good tool is a valuable investment, so it is wise to ensure that it is kept clean and ready for use at all times. work. After using the tool, before...
Removing and installing a radio antenna PERFORMANCE ORDER 1. The car models in question are equipped with a wire-type antenna mounted on the rear window. The signal received by the antenna is amplified by an electromagnetic coil, ...
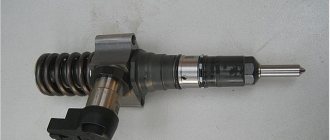
Injectors
The injectors are mechanical, one of them is a control one, with an injection advance angle sensor. If the sensor fails, the engine goes into emergency mode and practically does not pull after 2000 rpm. Diagnostics clearly indicate a lack of communication with the needle lift sensor.
You can select and buy injectors and a control nozzle for 1.9 TDI engines of Audi, Volkswagen, Skoda and Seat cars in the catalog on the website ]"AutoStrong-M"[/anchor].
Powerful versions of 1.9 TDI: what do you need to know about the nuances and “sores”?
“I want to buy a SEAT Leon FR 1.9 TDI ARL 150 horsepower or 1.9 TDI ASZ 130 horsepower. What is the difference between these motors? Service? Are there any “diseases?”
In terms of design, as well as the parts used (pistons, connecting rods, injectors, etc.), both engines are identical. The only differences are in the firmware of the electronic control unit and, accordingly, in the declared characteristics for maximum torque and power, namely: 96 kW (131 hp)/4000 rpm and 310 Nm/1900 rpm for ASZ and 110 kW ( 150 hp)/4000 rpm and 320 Nm/1900 rpm for ARL.
In general, the 1.9 TDI engine family is famous for its reliability and service life. In principle, this can also be applied to engines with pump injectors (Pumpe Duse), with the important note that this fuel system requires the use of appropriate motor oil and high-quality fuel, otherwise the consequences will not be long in coming.
Thus, refueling with low-quality fuel risks failure of the pump injectors. The cost of a new one is around 1,800 rubles, a used version will cost 10 times less. By the way, when installing injectors, it is important to ensure their exact installation, otherwise there is a risk of breaking the seat in the head, and this can lead to the replacement of the cylinder head.
It is worth noting that ASZ and ARL engines are characterized by wear on the camshaft cams. It is believed that this occurs due to "oil starvation", insufficient oil pressure in the camshaft area - either due to the design features of the engine, or due to the use of oil that does not meet the manufacturer's specifications. Be that as it may, the problem requires replacing the camshaft (a used one will cost 300-500 rubles).
Another component that may require close attention and is sensitive to the quality of the oil and the timing of its replacement is the variable geometry turbine. The turbine itself is quite reliable and has a good service life, but over time the geometry control system can become capricious, resulting in either insufficient or excessive boost. Depending on the scale and severity of the problem, the issue can be resolved either by cleaning and adjusting the system, or by repairing or replacing the turbine.
And most importantly, do not forget that we are talking about a car that is at least 10 years old and has a real mileage of 300 thousand km or more. Moreover, the car is initially fast - the most powerful diesel versions in the line are not taken to save money! Over time, many of their owners are no longer satisfied with the factory characteristics, and with the help of chip tuning they gain additional Newton meters and “horses,” which certainly does not increase the service life and reliability of the engine.
This means that you need to approach the issue of buying such a car seriously. Was there any tuning? What is the condition of the engine, fuel system, turbine? How was the car serviced? Remember that the main vulnerable points are the pump injectors, camshaft, turbine and its geometry control system. The “hardware” itself has a good resource, but only if all the juices have not been squeezed out of the engine or there has been no work done with a faulty fuel system or an “overblown” turbine.
Ivan KRISHKEVICH Photo from the ABW.BY editorial archive
You have questions? We have the answers. Topics that interest you will be expertly commented on by either specialists or our authors - you will see the results on the website abw.by. Send questions to [email protected] and follow the site
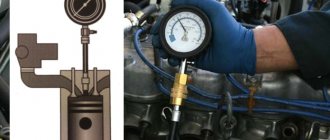
Compression reduction
Typically, the culprit for a decrease in compression in 1.9 TDI engines is not a “sagging” cylinder-piston group, but burnt-out valve seats. In this case, you can remove the cylinder head, change the seats, and put everything back together. You can also buy a good used 1.9 TDI engine block head. You will find a large selection of cylinder heads for the 1.9 TDI engine for Audi, Volkswagen, Skoda, Seat cars in the catalog on the website ]"AutoStrong-M"[/anchor].
Reduced engine power 1.9 TDI
In most cases, a decrease in power of the 1.9 TDI engine is associated with a failure of the N75 valve, which controls the boost, or destruction of the vacuum tubes connecting the turbine, valve, or vacuum pump. How to carry out diagnostics yourself is described further in the text.
Also, the reason for the decrease in power of the 1.9 TDI engine may be the flow meter or incorrect values of the amount of intake air measured by it. More precisely, the malfunction of the mass air flow sensor is checked with a diagnostic tool.
If, at idle speed, the 1.9 TDI engine runs smoothly, easily spins up to the “cut-off” when the car is stationary, but does not pull at all while driving, then most likely the malfunction is associated with the EGR valve, which simply does not close. On this engine it should close at engine speeds above 1500 rpm. If the valve does not close and exhaust gases continue to enter the intake, the engine will not be able to develop full power.
Volkswagen Touran 1.9 TDI: a convertible for adults
Volkswagen has family cars for almost every taste - from the Golf Variant station wagon to the Sharan minivan and T5 multivan. It would seem, what else can be “stuck” into this line. It turned out it was possible. And Touran is a clear confirmation of this.
Touran is a 100% newcomer to our market. At the beginning of the year, they teased Europe with it, took it to exhibitions, held a number of national premieres, and finally, in September, offered it to the Russians. Believing in success, like in the rising of the sun, the bosses of the concern announced grandiose plans related to the new recruit: this year alone, 130 thousand people should be “turanized.” Isn't it a bit much for a car that has barely entered production?
Not really believing the advertising, I decided to “try on” the Touran for myself. And on the way to the car showroom, I remembered that Volkswagen began building vans shortly after the Second World War: in 1950, the first VW Bus Typ 22 appeared. Since then, “loaves” have become the company’s specialty, not only cargo, but also passenger ones. By the way, the name of the new model can be interpreted as a fusion of two terms: TOURing (station wagon) + ShaRAN (one of the company’s most successful minivans). And now a question for experts: what class should Touran be classified in if the boundaries between market segments have long been blurred? We are looking for the answer together.
In terms of dimensions, the Touran is a typical European “middle peasant”. The Germans themselves compare it with the VW Golf Variant station wagon. Their length is almost the same, the Touran is inferior in width by almost 6 cm, but in height it exceeds its “colleague” by 16 cm. The innovative compact van (and this is exactly how the VW Touran developers position it) is created on the fifth-generation VW Golf platform. This means not only class affiliation, but also technical excellence. It is expressed, for example, in the fact that the galvanized steel body is laser welded. We read between the lines: good assembly increased the rigidity and impact resistance of the machine, at the same time improving the acoustic performance. The degree of noise penetration into the cabin is moderate: 72 dB when parked and 79 dB when driving. However, there is no feeling of euphoria about this.
The sudden rain revealed three advantages in the car at once. The first one is Fr. They do not walk parallel to each other, but towards each other - like “golden handles” in a snowplow. Due to this, the glass is cleaned quickly and efficiently - like a caring housewife during spring cleaning. The second is high. In a matter of seconds, it disperses the area of glass fogging and improves visibility. True, it takes time to create a microclimate in the cabin: after all, the internal volume is quite decent. Finally, the third plus, noticed right off the bat, is excellent lighting. The headlights allow you to select the optimal mode for driving in cloudy weather, and the large rear lights will not be confused even by a colorblind person a kilometer away with a traffic light. And now - acid to the souls of skeptics, corroded by arrogance, who consider such machines “frivolous”. In order for skepticism to disappear like ether, it is enough to carry out several demonstrative operations to transform the interior. Just think: the VW Touran has about 500 of them! During the test, we did no more than 20 and were already delighted. Would you remain indifferent to the almost fakir transformations right before your eyes? Judge for yourself. The three seats in the middle row are separate, and they can be moved longitudinally, reclined, folded, adjusted in width and quickly removed. If you want a dining table, please: fold down the middle chair. I needed to install a refrigerator instead - no problem. The third row seats can be hidden in the trunk floor to create a spacious cargo area. It is not forbidden to remove all the “extra” seats and turn the seven-seater Touran into a single-seater. Amazing versatility!
In the interior of this transformer there are no frills such as wooden inserts and leather seats. The interior, typical for the company, is adapted for transport purposes and is therefore extremely utilitarian. And in fact, if the owner has to travel mainly to the dacha and on business, practical plastic will suffice. But the equipment of the car is quite decent. The standard equipment includes ABS, ASR, electronic stabilization system ESP and electronic differential lock EDL.
The steering column is adjustable in height and reach, the front seat headrests are active, and the airbag for the front passenger is deactivable.
You could write an entire dissertation on little things. There are about three dozen glove compartments, pockets and shelves alone, if not more. There are three cup holders: two in the front and one in the back. The door pockets are so spacious that you can put a liter bottle of drinks and three or four more 0.6 liter containers in them. The trunk has lighting and an additional recess. The side seats of the second row are equipped with an Isofix device for attaching child seats - couples will appreciate this. Are you tired yet? But I didn’t talk about the reading lights in the front and back, about the three ceiling “closets” for sunglasses, about the armrest in the middle part of the seat with a drawer and two nozzles for supplying air at the rear. He didn’t say a word about the red night lighting for the switches, didn’t mention the indication of the need for the next maintenance, and didn’t hint about the drawers under the front seats and at the feet of the second-row seats. Yes, but there is also a 12-volt socket in the rear and in the luggage compartment, a rear door with a remote control lock, a buzzer for headlights that are not turned off, and much, much more. But it’s better to see all this once. Well, what is the Touran like on the road?
The 1.9 TDI engine makes a good impression. The turbodiesel with direct injection has an output of 100 hp. at 4000 rpm, and a peak torque of 250 Nm is subject to it already at 2500 rpm. In other words, for good acceleration in the city you don’t need to throttle hard. Two valves per cylinder seem somewhat archaic, but the first impression is deceptive: the engine is economical and environmentally friendly - it meets Euro-4 standards. Before being installed on the VW Touran, it proved its worth on the Polo and Golf models. With the acceptable European limit for such engines being 5.9 l/100 km, the Turan 1.9 TDI consumes 0.7 liters less for every hundred kilometers traveled. This is thanks to a turbocharger with variable turbine geometry and cooler, as well as unit injectors with a conical injection hole and an exhaust gas recirculation cooler. Theoretically, with a tank filled under the neck, the VW Touran can travel 1,154 km without refueling. In practice, of course, less. The Germans themselves put the figure at 1000 km. For our conditions, I think it will be less, but still the result is not bad: from Moscow to Smolensk and back - without refueling.
Truly unprecedented for this market segment is the 6-speed gearbox. It has a magnesium alloy crankcase, cable drive and a short shift lever throw. If you follow the speed limit, then there is simply no place to engage 6th gear in the city. And outside the city, the traction force seems sufficient for a confident “steering feel.” However, this is true for a car with one driver and passenger, and it’s difficult to say how a fully equipped Touran will behave.
The indisputable advantage of the gearbox is the absence of the need to maintain it: oil is filled for its entire service life. But with motor oil the situation is different. Firstly, it requires 4.3 liters - the volume is not very convenient for self-service, since most oils are sold in four-liter cans. This means you need to buy another liter “beaker” or use the services of a branded service station. Secondly, the engine oil needs to be changed every 7.5 thousand kilometers. For comparison: for most modern passenger cars, an oil change interval of 10-15 thousand km is considered normal, and for some brands it is even longer.
Well, now let’s see how the “German” behaves on Russian roads. The suspension has proven itself to be surprisingly soft, perhaps even too soft. No, Touran is in no hurry to bow to every turn. But the sporty clarity of drawing the radius is also not observed. In general, the “golden mean”. Another concern is that the front suspension is attached to the body on an aluminum subframe, and this material succumbs more often and faster on bumpy roads than conventional steel. There are also concerns about the rubber-to-metal joints on which the wishbones rest. It is clear that they increase the lateral stability of the car and dampen vibrations in the steering. But they allow longitudinal displacement of the wheels, and on bad roads this is a sure way to accelerated tire wear. The rear axle is also attached to the body on a subframe. The four-link design is very compact and well thought out. Suffice it to say that the springs and shock absorbers are installed separately, and not in the usual way (shock absorber inside the spring). When the spring is compressed, the wheel rotates relative to the longitudinal axis and forms a toe angle, which compensates for the change in handling conditions on a loaded car. To improve the driving characteristics of a loaded vehicle, the shock absorbers are widely spaced transversely and installed not vertically, but at an angle. In short, the engineers squeezed everything they could out of this design.
Summing up the first acquaintance with the VW Touran, I just want to pat the Germans on the shoulder: despite the inexpressive design, they managed to endow the newly-made “family man” with a decent set of advantages. And they did it so skillfully that the compact van found its niche. Apparently: the appearance of the VW Touran will not reduce the number of buyers of other models of the concern. Most likely, one of the competitors will not count the buyers of their “transformers”. Otherwise, where would the sales forecast of 130 thousand VW Touran come from this year alone? What then can we expect from the next, full-blooded year of sales?!
Turbocharger malfunctions
The power of the 1.9 TDI engine may drop due to failure of the turbocharger. Often its breakdown is accompanied by the emission of clouds of black smoke. The performance of the 110-horsepower turbocharger may be reduced due to jamming of the geometry. Also, problems can be caused by valve N75, which controls the vacuum and drives the turbine actuator (it drives the bypass valve or geometry mechanism).
You can select and buy a turbine for the 1.9 TDI engine of Audi, Volkswagen, Skoda and Seat cars in the catalog on the website ]"AutoStrong-M"[/anchor].
How to check the functionality of the vacuum system and turbine geometry on a 1.9 TDI engine?
If engine power decreases, you can carry out simple diagnostic actions that do not require special equipment.
- If the check engine light comes on on the instrument panel, and the engine has stopped developing power and does not spin above 3000 rpm, then there is almost certainly a problem with the vacuum: there is a leak or a broken hose somewhere, therefore it is impossible to control the turbine. In this case, the ECU simply turns on the “emergency” mode. We immediately go to the service or independently look for the “depressurization point” of the vacuum hoses.
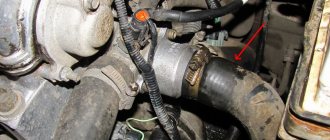
- If the 1.9 TDI engine simply does not pull, then you should look for charge air leaks. The weak point is in the intercooler - over time it is simply wiped with a plastic diffuser.
- Next, you can check the performance of the turbine geometry. To do this, with the engine running, simply remove the vacuum hose from the actuator (“fungus”). The rod should go down sharply. Then you need to put on the hose and monitor the behavior of the rod: if it rises quickly and smoothly, then everything is in order with the geometry. If the rod moves jerkily, then the geometry jams.
- If the rod does not move when manipulating the vacuum hose, then the N75 valve is almost certainly faulty. You can test it using a diagnostic tool.
- You can check the vacuum created by the vacuum pump. Very rarely, but it also fails. Normal operating vacuum is -0.6…-1.0 atm.
Diesel engine 1.9-I-TDI Volkswagen Passat B5
- Repair manuals
- Repair manual for Volkswagen Passat B5 1996-2005.
- Diesel engine 1.9-I-TDI
3.5.1 Diesel engine 1.9-I-TDI Drive of the gas distribution mechanism of a diesel engine 1 – mounting clamp;
2 – upper toothed belt casing; 3 – toothed belt. Before removing the timing belt, it is necessary to mark it with an arrow indicating the direction of the timing belt; 4 – nut, 20 Nm; 5 – eccentric; ... 3.5.2 Removing and installing the cylinder head (1.9 l diesel engine) Cylinder head of the 1.9-I-TDI diesel engine 1 – cylinder head cover; 2 – oil filler cap. If the cap is leaking, replace the gasket; 3 – sealing gasket. If the gasket is damaged, it must be replaced; 4 – Belleville washer...
↓ Comments ↓
1. Controls, instruments and equipment
1.0 Controls, instruments and equipment 1.1. Keys
2. Maintenance
2.0 Maintenance 2.1 Technical characteristics 2.2. Maintenance frequency 2.3. Engine oil 2.4 Checking the exhaust system 2.5. Engine cooling system 2.6. Spark plugs 2.7 Draining water from the fuel filter (diesel engines) 2.8 Replacing the fuel filter (diesel engines) 2.9 Checking the tightness of hoses and fluid leakage 2.10 Replacing the air filter element 2.11 Checking the condition of the poly-V belt 2.12 V-belts 2.13 Measuring the wear of timing belts on diesel engines 2.1 4 Gearbox/final drive 2.15 Checking the drive shaft protective boot 2.16 Visually checking the gearbox for leaks 2.17 Checking the oil level in a manual transmission 2.18 Checking the oil in the final drive of automatic transmissions 2.19 Checking/replacing the oil level in an automatic transmission 2.20 Checking the front suspension and steering controls 2.21 Checking the dust covers of the front suspension joints 2.22 Checking the shock absorber 2.23 Checking the radiator 2.24 Checking electrical circuits 2.25. Brake fluid 2.26 Checking the front brake pads 2.27 Checking the rear brake pads 2.28 Checking the brake hoses 2.29 Checking the handbrake cables 2.30 Checking the fluid level in the power steering 2.31 Dust filter 2.32 Battery 2.33 Door hinges 2.34. Window washers 2.35 Wiper blades 2.36 Checking the initial position of the wiper arm 2.37 Checking the angle of the wiper arm 2.38 Replacing the battery in the remote control key 2.39 Resetting the Service indicator
3. Engines
3.0 Engines 3.2 General information 3.3 Lower splash guard of the engine compartment 3.4. Four-cylinder petrol engine 3.5. Diesel engine 1.9-I-TDI 3.6. Engine 2.3-I-VR5 3.7. Engine 2.8-I-V6
4. Cooling system
4.0 Cooling system 4.2 Adding coolant 4.3 Coolant mixture 4.4 Replacing coolant 4.5 Thermostat 4.6 Radiator 4.7 Water pump (1.8-I and 1.6-I ADP engines) 4.8 Cooling system hoses 4.9 Cooling system malfunctions
5. Fuel system
5.0 Fuel system 5.2 Fuel pump/fuel level sensor 5.3 Fuel filter on models with gasoline engines 5.4 Accelerator cable adjustment (gasoline engine) 5.5 Additional adjustment (automatic transmission) 5.6. Diesel engine fuel system
6. Motor control
6.0 Engine management 6.2 Operation of the engine management system 6.3 Checking the fuel injection system 6.4 Sensors and actuators of the engine management system 6.5. Ignition system 6.6. Fuel line and fuel injectors 6.7 Main malfunctions of the engine management system
7. General information
7.0 General information 7.2 Catalyst 7.3 Operation of vehicles with a catalyst 7.4 Turbocharger 7.5 Replacing the muffler 7.6 Oxygen sensor
8. Transmission
8.0 Transmission 8.1. Clutch disc 8.2. Manual gearbox 8.3. Automatic transmissions
9. General information
9.0 General information 9.1. Shock absorber strut 9.2. General information 9.3. general information
10. General information
10.0 General information 10.2 Airbag 10.3 Steering wheel 10.4 Tie rod 10.5 Installation of the power steering pump 10.6 Front wheel alignment angles 10.7 Basic suspension and steering problems
11. Brake system
11.0 Brake system 11.2 General information 11.3 ABS/EBV/EDS/ASR/ESP systems 11.4 Checking the vacuum brake booster 11.5. Replacing the front brake pads 11.6 Replacing the rear brake pads 11.7 Checking the brake disc 11.8 Brake disc 11.9 Bleeding the hydraulic brake system 11.10. Brake pipelines and hoses 11.11 Brake light switch 11.12 Handbrake lever 11.13 Handbrake adjustment 11.14. Front-wheel drive cars 11.15 Basic brake malfunctions
12. General information
12.0 General information 12.2 Body care 12.3 Upholstery and carpet care 12.4 Repair of minor body damage 12.5 Repair of severe body damage 12.6. Front cross panel 12.7 Front bumper 12.8 Removing the hood lock lever 12.9 Adjusting the side guide bracket of the bumper 12.10 Rear bumper 12.11 Front fender 12.12 Front wheel well trim 12.13 Air intake grille 12.14. Hood 12.15 Radiator grille 12.16. Hood lock opening cable 12.17 Hood lock 12.18 Interior door trim 12.19 Differences when removing the right front door trim 12.20 Door mechanism control unit 12.21 Door seal 12.22 Side trim of the luggage compartment of Sedan models 12.23 Side trim of the luggage compartment of Station wagon models 12.24 Rear trim of the luggage compartment of Sedan models 12.25 Trunk lid upholstery 12.26 Trunk door upholstery 12.27 Luggage compartment floor covering on Station wagon models 12.28 Trunk lid 12.29. Trunk lock 12.30 Adjusting the position of the trunk lid/rear door 12.31. Rear door lock on Station wagon models 12.32 Front door 12.33 Front door lock cylinder 12.34 Outside door handle 12.35 Door lock 12.36 Manual door window lowering 12.37 Door glass 12.38 Door bracket 12.39 Interior rear view mirror 12.40 Center console 12.41 Front ashtray 12.42 Rear ashtray 12.43 Decorative trim lever (automatic transmission) 12.44 Decorative trims under the radio 12.45 Lower trim of the instrument panel on the driver's side 12.46 Glove box 12.47 Interior decorative trim for the exterior rear view mirror 12.48 Ceiling handle 12.49 Sun visors 12.50 Door sill trims 12.51 Windshield and rear windows 12.52 Front seats 12.53 Headrest 12.54 Side airbags 12.55 Rear seat 12.56 Left rear seat backrest 12.57 Carpet 12.58 Interior trim 12.59 Outside rear view mirror/mirror glass 12.60 Outside mirror housing 12.61 Roof guard/curb 12.62 Body side trim 12.63 For replacing rubber bands for windshield wiper blades 12.64 Windshield washer nozzles glass 12.65 Wiper arms
13. Heating, ventilation
13.0 Heating, ventilation 13.2 Ventilation nozzles 13.3 Heater control panel 13.4 Central damper lever 13.5 Heater control unit 13.6 Heater resistor unit 13.7 Heater and air conditioning control unit 13.8 Air conditioning compressor 13.9 Heater fan
14. Electrical equipment
14.0 13 Electrical equipment 14.2 General information 14.3. Electrical circuits 14.4 Fuses 14.5 Battery care rules 14.6 Checking the battery 14.7 Charging the battery 14.8 Battery 14.9 Charging system 14.10 Generator 14.11 Replacing generator brushes and voltage regulator 14.12 Engine starting system 14.13 Starter 14.14 Starter traction relay 14.15 Replacing lamps External lighting glasses 14.16 Replacing interior lighting bulbs 14.17 External lighting devices 14.18 Actuator motor for headlight range control 14.19 Headlight adjustment 14.20 Low-beam headlight discharge lamps 14.21 Instrument cluster 14.22 Multifunction steering column switches 14.23 Switches 14.24 Radio 14.25 High-frequency loudspeakers 14.26 Low-frequency loudspeakers 14 .27 Antenna 14.28 Checking the rear window defroster 14.29 Windshield wiper motor 14.30 Rear window wiper motor 14.31 Windshield washer pump 14.32 Central locking system 14.33 Main generator malfunctions 14.34 Main starter malfunctions 14.35. general information
Oil on the pallet
Typically, the 1.9 TDI engine pan gasket does not cause oil marks to appear on it. The culprit of this “cosmetic malfunction” is the cracked lower flange of the crankcase ventilation tube. Oil seeps out through a crack in the tube and is inflated by gases circulating in it. This problem can be resolved by replacing the tube.
Intermediate shaft
The 1.9 TDI engine has an intermediate shaft driven by a timing belt. The shaft drives the vacuum pump and the oil pump. In the engine block, the shaft is held and rotated in bushings. These bushings can wear out. The shaft tip of the oil pump itself is also subject to wear. These are quite rare malfunctions that lead, first of all, to a decrease in oil pressure. You can select and buy an oil pump for 1.9 TDI engines of Audi, Volkswagen, Skoda cars in the catalog on the website ]"AutoStrong-M"[/anchor].
You can choose and buy an Audi 1.9 TDI, Seat 1.9 TDI, Skoda 1.9 TDI, Volkswagen 1.9 TDI engine in our catalog.
Review of Volkswagen Passat Variant 1.9 TDI (2008)
Instead of the wrenching burps of the Korean auto industry, a Hyundai Terracan with a 2.9 engine was purchased at a Ford showroom from a trade-in Volkswagen Passat 1.9 diesel station wagon with a clear history and a mileage slightly over 60. Under the ululations of colleagues “Diesel is a reliable car,” the operation of the Passat began unpretentiously - with a reduction in replacements oil for 8000 km, replacing it with a normal one instead of Pan - Liqui Moly and completely picking up the snot as a replacement for absolutely live shock absorbers and support bearings. Chip tuning was also carried out and firmware was installed (135 hp). After installing the firmware, roaring noises appeared when driving at full throttle at rpm from 1700 to 2000, which was attributed to excessive performance of the injectors. Otherwise, after 3000, the engine got a second wind, and when overtaking on the narrow and winding Priozersk highway, I regularly began to bump into the stern of more powerful gasoline vehicles. The only thing that bothered me was the noise of the tires through the wheel arches, which was clearly undignified for this class of car. This became a habit over time.
And then came that magical hour of the X, when a magical bang was heard at the roundabout and the engine began to run on three cylinders, cheerfully blowing smoke in the manner of the Emelya Stove and shaking the insides of the cabin, asking for forgiveness for my grandfather who died at Stalingrad. A subsequent autopsy at the service revealed a hole in the block opposite the 4th cylinder and connecting rods with inscriptions in marker - therefore the engine had already been repaired. In a fit of impotent anger, a used engine with a mileage of 30,000 km was ordered for 70,000 rubles (actually 230,000 km) from a St. Petersburg office. Because the cost of a rebuilt engine at the factory was 380,000 rubles, and the short block was 180,000 rubles. Having brought ammonia to the nose of my roommate and explaining that I was on my next summer vacation in the gold mines of the Far North, I went on an erotic walking journey to a new place of work, while arriving there under my own power and lost 5 kg.
After the delivery of another engine, a problem arose - all engines with pump injectors have the following design flaw, for which German engineers should have been burned in a muffle furnace in one day with additional payment for processing and overtime - mechanical wear was observed under the injector seats, in which, over time, diesel fuel it would go into the oil. Moreover, the wear on my engine was less than on the imported one. The cure for this is potassium cyanide and a can of gasoline - a new head for 120,000 rubles. As a result, with little effort and with the help of an air freshener from the toilet (since the original booster pump is weak), the engine was started with a garland of errors on the dashboard, disappearing idle. The invited diagnostician for 3000 rubles mumbled something incomprehensible about an error in the crankshaft position sensor.
After a short consultation, I decided to take the car to the talented electricians under my own power, which I later regretted, because the car stalled at every intersection, was difficult to start and did not want to move on the starter due to the built-in foolproof protection. Among talented electricians, a diagnosis was given - a short circuit in the wiring of the oil sensor and crankshaft position sensor, different voltage in the circuits, due to burnout of the engine control unit microcircuit and replacing it with a used one. After surfing the Internet, the problem of fraying the wiring in the corrugation turned out to be quite common, the next rays of diarrhea were sent to the engineers, the car was revived and put on wheels. Along the way, the curvature of the firmware and the gentle grin of the owner of the car service were revealed.
As a result of the story, the car was sold for 150,000 less than the purchase price, a lot of nerves were spent, time wasted looking for a special device for installing injectors, timing belts and other things, money and, as a result, a decision was made to buy only new cars. By the way, the boss on the A6 had the 2.4 engine replaced three times under warranty, so he and I came to the same conclusion - no Das Auto, let the Bavarian sausages suck.
