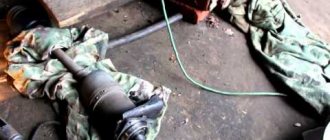
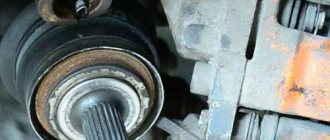
CV joint or constant velocity joint (popular name “grenade”) is a device that transmits torque from the engine to the wheels and simultaneously turns them. Most often, these designs are installed on front-wheel drive passenger cars. But it can also be found in the rear wheels of SUVs. The boot, shaped like a corrugated “pear”, is a rubber cover that is put on the CV joint and protects it from dirt and dust. The hinge itself is a rather complex device, and the ingress of foreign particles into it, acting as an abrasive, will sooner or later cause a breakdown. Boots are put on the outer and inner CV joints. However, most often the first one breaks. Next, we consider step by step how to replace the boot of an external CV joint as well as an internal one in a garage.
How to inspect the case
This can be done without removing the wheel: just turn it all the way in any direction and shine a flashlight on the part for better visibility. Also feel it with your hands: you will feel the tears immediately. The best inspection option is to remove the wheel (for example, when you are repairing a tube, a tire at a tire shop, or doing a seasonal tire change). Everything will be more noticeable here. Also, for one reason or another, you probably have to put the car in the inspection hole: for example, when changing the oil, adjusting the hand brake, etc. Here, also take the opportunity and inspect the CV joint covers: this can be done more carefully than in previous cases.
You can tell that the cover needs to be replaced by the appearance of thick grease on the suspension parts and on it itself.
Is it possible to drive with a torn boot - CV joint (grenades), steering rack, ball
I already have articles on each of the subtypes of the front suspension - CV joint, steering rack or ball, and in them I briefly touched on the topic of anthers . But there are a lot of questions from readers, perhaps the most common is “is it possible to drive with torn protective elements, or do you still need to replace them?” I have already answered several dozen times in the comments, and therefore I decided to write this material. There will be answers about all the elements, so read on...
THE CONTENT OF THE ARTICLE
First, I would like to say - GUYS, if the boot was not needed, then it simply would not have been installed as an unnecessary element. But if they are in the design, that means they must be there, and in a WHOLE, UNTorn condition.
Cost of anthers
The price range is quite wide: from approximately 150 to 1000 rubles. and higher. It all depends on the make of the car and the manufacturer of the part. Non-original spare parts are cheaper. However, it also happens that the cost is unreasonably high: for example, because of the brand. Thus, the price of covers for a Toyota Land Cruiser reaches 8,000 rubles. The same can be said about other prestigious car brands. But not all car owners are eager to pay that kind of money for essentially an ordinary rubber band, albeit of high quality. Therefore, many simply select covers from other cars that are suitable in size and cost.
Causes of boot rupture:
- constant driving through water and mud;
- high torsional load (regular sharp turns);
- careless (unprofessional) repair of suspension parts.
Temporarily update the CV joint boot
The CV joint boot broke. Before replacing it, I wrapped it in film and secured it with electrical tape. I walked more than one thousand kilometers on duct tape until the long-awaited boot arrived and everything was “OK”.
For temporary use, enough to get to a workshop or garage.
You can use a bag or a glove instead of film. This makeshift is used to avoid losing the hub and bearing later.
In theory, if the boot is torn, there is already water and sand there. It is necessary to remove, wash, new grease and a new boot.
In general, the road repair of the boot is described. Only with cling film is it much more convenient, faster and, in principle, really lasts for a long time. Jeepers and ATV riders know.
Replacing the boot of the outer CV joint
The process is the same for most front-wheel drive passenger cars. It is better to carry out work in a viewing hole. After purchasing new covers and (if necessary) clamps for them, prepare the tool:
- jack, wheel chocks and safety stands;
- keys (preferably heads) with a crank in accordance with your car model;
- hammer and wire brush for cleaning rust;
- mount;
- clean rags;
- special lubricant;
- gasoline for cleaning.
Drive the car into the pit, for insurance, engage 1st gear, raise the handbrake. Loosen the wheel bolts and, after removing the boot, unscrew the hub nut (usually a 30mm wrench). To do this, you need to open it up - remove the bends that fit into the groove. Place the car on a jack, place jacks and safety stands under the rear wheels and remove the wheel from the desired side. Further:
- if there is crankcase protection, it must be removed;
- unscrew the bolts securing the lower ball joint - usually there are two of them;
- turn the steering wheel all the way so that the CV joint becomes minimal in length;
- move the steering knuckle to the side and pull the drive out of the hub;
- remove the clamps and pull out the torn boot or cut it;
- remove old grease;
- knock the grenade off the shaft: the process is not easy, you need to hit its outer contour with a hammer, while simultaneously pulling the CV joint towards you with the other hand.
If you manage to do this, inspect the retaining ring at the end of the shaft: you may have broken it (you will have to replace it): if not, just fix the part. Now use a wire brush to clean the drive, especially where the boot was. Fill the grenade with lubricant (for example, CV joint-4 or "Hado"). Next, put the boot on the shaft. Then hammer the grenade back through the wooden spacer and pull the boot over it, secure it with clamps. Reassemble everything in reverse order.
Don’t forget to lubricate the shaft splines entering the hub, and when tightening its nut, drill the sides into a special recess.
What to do if the grenade does not go astray
Screw the hub nut directly into the drive: when tightened, it will push the grenade out. If things get tight, ask an assistant to hold the shaft with a gas wrench so that it does not turn. In the case when the grenade still does not come off the shaft (fanaticism is not welcome, since the bearings in the part located in the gearbox can be damaged), there is a second way to replace the boot, which involves completely removing the drive, but this will be discussed below , in the section on replacing the inner joint boot.
How to replace the outer CV joint boot without removing it
This is also possible, at least on domestic cars, but you will have to acquire (or borrow) a special device that stretches the boot. The device is a housing with movable arms attached to it and a connected hose for supplying compressed air. A rubber cover is put on them and they stretch it. All that remains is to pull the device through the grenade removed from the hub and release the levers. The process is worth watching in more detail in the video.
Anthers in the car
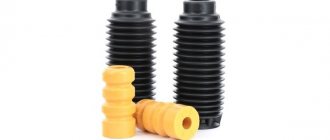
The boot is a protective cover made of rubber or silicone. It is designed to protect moving parts from dirt and moisture. The use of protection allows you to increase the service life of quickly wearing parts tens of times. And the price of the casing, which is an order of magnitude less than the product where it is installed, makes it possible to replace it several times during the life of the part itself.
In cars, protective caps are used mainly on moving parts of the front and rear suspension. They are set to the following:
- shock absorbers - limit the penetration of abrasive substances onto the cylinder rod;
- constant velocity joints (CV joints) - to protect power transmission components;
- ball joints and tips - to isolate the friction pair from the influence of foreign substances;
- steering rack - protect the shaft from sand, moisture, and dust.
Replacing the inner CV joint boot
To do this, you will have to remove the drive shaft completely. But first you need to remove the outer CV joint, as described above, that is, pull it out of the hub without removing the grenade. Next, drain the oil from the box. After this, unscrew the nuts securing the inner joint (usually there are 6 of them) and insert a flat mounting between the gearbox and the CV joint - the part should come out of the socket. Clamp the part in a vice, then:
- remove the retaining ring using a flat screwdriver;
- pull out the inner CV joint housing and carefully pick out the balls located in the separator;
- remove the clip stopper and the clip itself;
- wash all parts in gasoline;
- install a new boot and, having generously treated everything with lubricant, reassemble in the reverse order;
- install the drive, tighten the drain plug and pour oil into the box.
Complete removal of the drive is also recommended if the grenade was not knocked down when trying to replace the outer CV joint boot. In this case, you can use a vice and achieve your goal. If you don’t need to knock down the grenade to replace it, just put on the cover after removing the inner CV joint, remembering to wash it first and apply new grease to the outside (the part cannot be repaired - it is not removable).
“Is it possible to change the anthers yourself?”
This question is often asked to our expert consultants by car enthusiasts who would like to save money. Here is their competent answer:
Anthers are a non-repairable part! When changing them, the auto repairman partially disassembles the assembly protected by the boot, performing a number of important operations. They are produced in strict sequence, the correctness of their execution is controlled by a specialist who has a special tool. Replacing the boot may involve
- Removing and reinstalling a wheel
- Partial suspension disassembly
- Removing the corresponding clamps
- Lubricating the hinge
What to do if the boot breaks on the road
The situation is not uncommon: you had to change a tire while on the road and you noticed that the boot was torn. It is highly not recommended to leave “everything as it is” and go to the nearest car service: CV joint is not a cheap part at all, especially if it is on an expensive foreign car. Options:
- Place the car on a jack (if it is not already on it), pull out the old contaminated grease through the hole and fill the boot with grease until it stops, and to prevent it from falling out when driving, wrap the problem area with a plastic bag and tighten it along the corrugation with a rope.
- Wrap the torn case with opaque tape or electrical tape. This “alternative” will last for 500 kilometers until the boot is changed.
CV boot
CV joint (constant velocity joint) is one of the most critical suspension components of a front-wheel drive vehicle. It is he who transmits torque from the transmission to the wheels and sets them in motion. There are 4 such units in the car:
- 2 external ones, located near the drive wheels;
- 2 internal, installed in the gearbox area.
Accordingly, four boots are used, which protect the CV joints from the effects of external adverse factors.
The longevity of operation of the components as a whole, as well as the safety of vehicle movement, depends on their integrity. If the cover is damaged, then abrasive particles (dust, sand, dirt) getting on the ball bearing assembly lead to an increase in working clearances. In addition, moisture entering the unit causes corrosion, which accelerates processes that destroy the internal parts of the mechanism. As a result, the mechanism may simply jam, which will cause the drive wheels to lock and lead to loss of vehicle control. The first signs indicating that the CV boot is torn are a characteristic crunching and clicking sound. They are clearly audible when turning the front wheels.
Ball joints
The ball joint is a hinge mechanism, the weak point is the polymer inserts in which the metal pin with a spherical tip moves. If the boot breaks, then moisture, dust and dirt gets between the ball mechanism and the polymer insert, thereby destroying the support from the inside. It starts knocking after 500 - 1000 kilometers.
The danger of a broken support is that the “finger” can fly out of the body, thereby causing the car’s wheel to simply lie on its side. You especially need to pay attention to rear-wheel drive cars; they usually have a multi-link front suspension, and it has more ball joints than a MacPherson strut suspension.
To summarize, after the boot breaks, any unit works within 500 - 1000 kilometers, and then repair or replacement. But to change, say, a rack, oh, it’s not cheap!
Hence the moral - you can’t drive with torn boots, even on a CV joint, ball or steering rack.
The anthers will be much cheaper - by changing them, we extend the service life by many thousands of kilometers.
That's actually all I wanted to say. Read our AUTOBLOG, there will be more useful articles and videos.
( 6 votes, average: 5.00 out of 5)
Similar news
What is a spring? What is it used for on a car?
Beam or multi-link. What's better? Comparing the rear suspension
Add a comment Cancel reply
Comments
Good day everyone, I decided to write my review of the 2010 Toyota Avensis. Just want…
TOP articles for the month
I have many different articles and videos on various gearboxes, for example here...
I already have an article on the website about choosing memory cards (you can see it here), it’s very...
In the article - is it possible to open windows when the air conditioner is running (you can read it here), I was asked...
«>
What is it made from?
A special wear-resistant compound is used. Previously, these were high-quality rubber, now silicone materials have been added.
The material must withstand several challenging environments:
- High temperature, should not tear or melt
- Low temperature, must also be intact, not cracked by frost
- Friction, must withstand prolonged rubbing loads
- Kink. Should not tear when exposed to fracture. By the way, this is why they make it in the form of an accordion, such an element evenly distributes the load
