Any car battery has a limited service life, after which it begins to gradually fail. If the replacement is not carried out in time, the car may not start at all at the most inopportune moment.
To prevent this from happening, you should replace the battery when the first problems appear. You can carry out this procedure with your own hands, without labor or special tools.
When repairs are required
This is most common on trucks. The need for repair will be indicated by poor contact with the battery wires. Since large currents flow in trucks, in areas with poor contact the terminal burns and melts. At one point, the current collector either breaks off or melts completely. This can often happen when a car owner connects two batteries in series and there is poor contact at the junction of one of the batteries.
You may be interested in: Replacing a brake pipe with your own hands
The second common case follows from the first. The terminals are destroyed due to poor contact of the battery negative wire with the car body. People call this “bad mass.” If the contact with ground is unreliable, then the positive contact heats up and burns out or requires repair.
The third case when a car battery needs to be restored is mechanical damage to the terminals. There are many options for damage. More often it happens that the battery is installed on the car, then the contact terminals with wires are put on. Then tighten the bolts on the terminals tightly with a wrench to achieve better contact. When the bolt is already sufficiently tightened, the car owner tightens it again and again. The current leads are made of lead, and from such force influences they bend and break off.
Here is another popular example of mechanical damage. The battery is not secured under the hood of the car. And when the driver drives on the roads, the battery dangles the way it wants and bounces merrily on bumps. The car owner has no idea what might happen to him. But often the terminals cannot withstand such abuse and break.
The last option is short circuits. As a result, huge currents are generated that can melt not only lead terminals, but also a wrench at “13”.
Repairing a maintenance-free battery yourself
The very word maintenance-free for a battery means that it is impossible to measure the density of the electrolyte or add water to the jars. The methods proposed by craftsmen are associated with a violation of the tightness of the case, violation of the ventilation ducts located under the top cover. It is possible to restore the battery without destruction, but the hole must be made not in the cover, but on the side. You need to add distilled water with a medical syringe to the desired level, and seal the holes.
To restore capacity, you can use cyclic charging. In a maintenance-free Ca battery, during deep discharge, gypsum is partially formed, which does not dissolve. That is why one deep discharge can damage the battery.
Perhaps your experience in repairing a maintenance-free car battery yourself will help you. Watch the video.
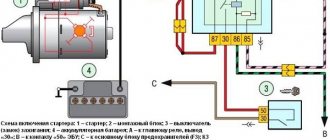
The power plant of any car, be it gasoline or diesel, is started using a special power electric motor - a starter.
But for the starter to start working, it needs to be powered with electricity. For this purpose, the car is provided with an external source of electricity - a rechargeable battery (accumulator, battery).
The main task of the battery is to briefly supply significant power to the starter to ensure the start of the power plant.
In addition, the battery provides energy to all electrical appliances of the car until the engine starts, after which the on-board network is powered from the generator.
Currently, several types of batteries are produced that are used in cars: acid, alkaline, and recently gel ones have also appeared.
Acid batteries are the most common in cars, so we will consider them.
Further use of the battery in a car if it is damaged is impossible. But if a relatively new battery has been damaged, you should not replace it immediately; you can try to restore it.
First, let's figure out what the design of an acid battery is.
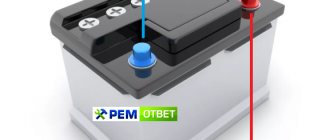
If you look at it externally, it consists of a closed plastic case with two terminals.
Structurally, the batteries are serviceable or maintenance-free.
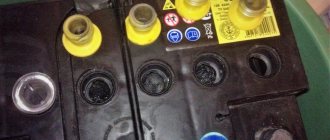
Serviceable batteries have plugged holes in the upper part of the battery case.
Maintenance-free batteries are not equipped with such holes; there is only a small hole for gases to escape.
They are located variably, that is, there is a positive plate, next to it there is a negative one, then there is a positive one again.
Additionally, to prevent possible contact of these plates, a separator is located between them.
The battery itself does not generate electricity; it is, in fact, just a storage unit for electricity.
When charging the battery, the electrical energy supplied to the terminals from the charger or generator is converted into chemical energy. And when discharged, the opposite effect is produced.
Deposition of POS-30 solder
To work you will need a powerful soldering iron. Solder is an alloy of lead and tin. POS solders, including this option, melt when the temperature reaches 183 degrees. Also for work you will need a special shape similar to the diameter of the terminal. Using a soldering iron, melt the solder into a mold and fuse it onto what is left of the terminal on the battery.
This method is definitely good and deserves respect; POS-30 solder has low melting temperatures, and compared to analogues, it is not dangerous for polypropylene cases of modern batteries.
Among the disadvantages of this method is the fusing process itself. The temperatures that are sufficient to melt factory lead-antimony terminals are higher than the melting point of POS-30. In this case, a strong connection of the new terminal with the rest of the old one will not work. This renovation deserves the right to life, but it is more decorative. Even if it is possible to connect wires to the battery, under the influence of vibration and heating from high inrush currents, such a restored terminal will collapse within a few months.
Restoring lead-acid battery terminals by soldering
Hello!
Prehistory. One day, in 2001, our partners brought a wildly heavy and expensive armored battery for charging, it seems 560 amp/hours. According to the terms of the contract, it was supposed to be “set and go.” They poured it in and let it soak. But when connecting to the charger, the goofy worker confused the ends of the klkmm. Short. One of the terminals melted to the ground. I really didn’t want to become the owner of this battery, I had to find reserves and get out, because the property of the gouge, even after dry-cleaning and selling the panties, would not be enough for 10 elements of this battery.
The battery had soldered hard jumpers. Not like now, with threads. Those. Replacing a piece with a melted terminal would be very noticeable. + wait about another week until they bring it from Bulgaria (then in 2001).
Therefore, I carried out the following activities:
1. Cleaning traces of melting from plastic and stripping the remains of the terminal. It was lucky that most of the terminal material spilled onto the cardboard placed to insulate the terminal crocodile. It wasn't noticeable.
2. Tinning the remaining terminals with a shortened tip of an EPSN-100 soldering iron.
3. Filling the tin mold with pos. 60 solder using the same soldering iron. Slowly, in small portions, stirring the solder.
4. Making a cutter from a piece of 0.5" water pipe and a lying rotor, with the ability to adjust the cone.
5. Milling the soldered bean using the device from step 4.
6.The work is akin to a sculptor, a file, a shoemaker’s knife, skins of different grain sizes. To give the terminal its original presentation.
7. By spreading electrolyte, we remove excess shine. So that they don't burn.
The battery was successfully passed, we drank with joy and to relieve stress. By the way, she was doing her due. Then they brought it to me for scrap, in 2004.. 2005.
In fact, the recovery process has already been described. with the exception of paragraphs. 1, 6 and 7.
The idea came to use the above-mentioned experience and equipment in everyday life. Word of mouth. As it turned out, in our city it hurts and no one does it. And if it does, it falls off. I had to redo it. I’m not being rude with the price, it’s better to spend 400..500 rubles. than buying a new battery for 5000 (190, for example, is the cheapest in wholesale).
The main contingent are trucks, which are carelessly started with loose and oxidized terminals. The main time is winter, when people light up. Although crooked car enthusiasts are also not uncommon.
I have been working with batteries since 1989 (starter, traction, uninterruptible, alkali). Battery workshop - filling, charging, starting a full cycle.
Now they just brought it to restore it. I'll share.
1.Initial.Cleaned art. brush, shoe knife, until shiny.
2. Put on the mold. Better, of course, from ferrous metal. to galvanized sometimes it bothers you. but they get lost all the time.
3. Flux, Soldering iron, Milling cutter. The cutter is convenient for cleaning heavily soured terminals of old batteries. The flux is better than LTI-11. Liquid. Solder melting point decreases noticeably (feels like). But it's over. And rosin will do.
4. When milling the terminal, we control the size of the cone with a new terminal.
The main trick here is not to melt the plastic of the case. The trick will not work with a graphite pencil. And it needs to be thoroughly warmed up at the same time.
Some collective farmers say: “It’s so expensive, I’ll melt the lead myself at the fire and pour it.” Depending on my mood, I either send or lie about the “Wood’s alloy”, half consisting of silver. Sleight of hand again. Perfection of movements.
Tired of typing. I’ll write about the bolt terminals when they arrive. Ask, I will be glad to help.
Antimony solders POSS
Here's how to restore a battery terminal using other materials. You can use solder, or you can use old sawed-off current collectors from worn-out batteries. Apply solder slowly with a soldering iron; this is preferable to pouring molten alloyed lead. In the first option, there is a possibility that the remnants of the factory current collection will melt and a metal-to-metal connection will occur. If you quickly pour lead, then what is left of the old terminal will not have time to heat up and again you will end up with a fragile decorative repair.
The disadvantage of this restoration of battery terminals is that the melting temperatures are too high compared to the melting point of the polypropylene from which the battery case is made. It is important to carry out the work very carefully so as not to burn the battery cover. Liquid lead will very quickly leak inside the battery and short-circuit the battery. Even if a short circuit does not occur, the contact between the housing and the current terminal will not be tight and the electrolyte will escape from the housing, and the terminals will oxidize.
Do-it-yourself car battery case repair
For the manufacture of car battery housings for budget models, polyethylene is used, for premium models – polypropylene. The second material can withstand temperatures up to 140 0 C, has a viscous structure, and is not prone to cracking. Both materials are inert to the effects of acid aerosols up to 60 0 C, then destructive changes begin. At high temperatures, gasoline entering the housing leads to corrosion. Therefore, a protective casing will not interfere with the car’s battery either in summer or winter.
Basically, the battery case is destroyed when the electrode plates short-circuit or during deep defrosting. Is it possible to repair the battery case with your own hands? Materials and equipment required:
- construction hair dryer with a crevice nozzle and smooth temperature control;
- soldering iron with a power of 100 W with a flat tip;
- rods or polypropylene tape.
It is necessary to drain the welding site by lowering the electrolyte level by withdrawing through a siphon, but not by draining and tipping.
The crack must be cut using a V-shaped groove. Drill very thin stop holes at the ends. On both sides of the gap, secure and tighten the gap with staples every 10-15 mm. The staples must be heated to a temperature of 400-450 0 and fit into the body like a knife into butter.
Protect the battery case with a paronite screen. The material should be secured to the plane and a slit should be cut above the crack. Roll the solder into a thin rope, thick enough to fill the groove. Starting from one edge of the crack, solder the softened strip into the groove, pressing the dough with force.
A less labor-intensive way to repair a car battery case with your own hands is to apply a patch to a surface filled with a solution of polystyrene in dichloroethane. Before applying the sticker, the area around the crack must be sanded and degreased.
Garage technologies
Here's how to repair a battery terminal using a graphite electrode and lead. This is the most barbaric method, but accessible and inexpensive. He is barbaric in relation to the battery being repaired.
The bottom line is that the current collector terminals are connected to each other in short circuit mode. The only resistance in this circuit is the graphite electrode. You can gut a thick AA battery or use an old starter brush. The solder is melted into a shape similar in diameter to the terminal. Melting occurs with an electric arc. Such battery repairs can be carried out even in the field, but you need to remember that a weak battery will not allow an electric arc to ignite.
Constant voltage battery repair
This method is somewhat similar to exposing a battery to high voltage, but has its own characteristics. A discharged battery is supplied with a stable charge of approximately 15 V. You cannot increase it, but you should not decrease it either. The battery should remain in this state for 12-13 hours, after which it must be discharged slightly. Under constant voltage, battery repair gives almost 100 percent results in the form of volume restoration. This procedure can be repeated twice, and then measure the voltage in the battery. If it is approximately 13 V, this means that the element is working and can be used. If this indicator does not exceed 10 V, then the battery can be thrown away. The battery is mechanically faulty and no other repair method will help it.
Desulfation by CTC method
As a result of sulfation, lead sulfate settles on the surfaces of the plates, preventing the electrolyte from penetrating deep into the active mass. For this reason, some part of the mass no longer takes part in the chemical reaction. Therefore, an increase in internal resistance is observed in the battery, due to which the capacity decreases. The battery cannot be fully charged and loses its charge very quickly.
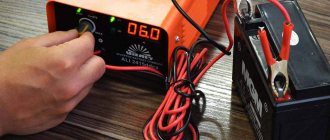
One of the main methods for solving the problem of how to restore a car battery is considered to be a control-training cycle, with the help of which sulfation can be eliminated at an early stage and the battery capacity can be restored. The essence of the method is charging and discharging, which are performed in a single cycle. It is necessary to prepare a charger, a voltmeter, a hydrometer, and a consumer as a load in advance and you can restore functionality.
First, the battery is fully charged. For this purpose, a current strength of 10% of the rated capacity of the battery is used. That is, a 60 ampere-hour battery will require a current of 6 amperes. At the end of charging, the density of the electrolyte in all banks is checked, which should normally be 1.27. If the indicator is less than the nominal value, it is necessary to increase the density to the desired level and charge the battery for another half hour to mix the electrolyte.
Next, a control discharge is performed using a load connected to the terminals. In this case, the electricity consumed is no more than 10% of the battery capacity. During the discharge process, periodic voltage measurements are performed, which should decrease at the terminals to 10.2V. This indicator corresponds to a fully discharged device. At the same time, you need to monitor the discharge time. A new battery takes approximately 10 hours to do this. A shorter discharge time corresponds to a greater loss of battery capacity. Thus, the problem of how to restore a car battery is solved.
Connection rules
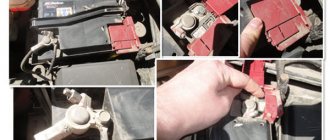
Having figured out how to replace the battery in a car without losing the settings, let’s get started:
- It is important to understand that you cannot disconnect the connections of the battery terminals as you please, the order is of great importance. First of all, the “plus” is connected and only then the “minus”. The manufacturer recommends doing exactly this and not otherwise. Thereby preventing short circuits.
- In essence, the body is the “mass” of the car. If you start disconnecting from the “plus”, there is a high probability of accidental contact of the car with the wrench, which will inevitably lead to a short circuit. As a result, sad consequences in the form of burnt out wires, fuses and failure of active electrical appliances cannot be avoided.
What to do if the original battery is not enough
Modern cars already require multiple batteries. But so far this has been implemented in specialized vehicles and models with a powerful generator. The rest have to resort to makeshift methods to install an additional power source.
In most cases, the difficulty lies in choosing additional installation space and correct connection. The advantage of the method is obvious: By installing an additional battery, you can forget about frequent battery changes.
A few words about the car’s electrics and ECU
Before removing the battery from the car, you need to read the instructions or "operator's manual". It often indicates exactly how to dismantle the battery. The point here is this: on expensive, elite cars, such as, say, Infinity or Lexus, removing the battery just like that is not recommended. They have several ECUs that control certain functions of the car, often the audio system or some kind of auxiliary ones. If you disconnect the battery, the settings in the auxiliary ECU may be lost, so it is recommended to disconnect it at the station of an authorized dealer. When after servicing your battery, the settings can be restored. However, these machines have strict recommendations in the “operating instructions”.
In other cars, there are special toggle switches that turn off the power system before removing the battery - THEY ARE ALSO RECOMMENDED TO USE!
If we take 80% of the remaining cars, then removing the battery is really simple (I would even say elementary). as firmware it contains basic settings that do not get lost when the power is turned off. However, only the clock, radio station settings, and the equalizer will be lost, but all this can be set up in a couple of minutes. Therefore, 80% of cars do not require any special skills, remove your battery as much as you like.
There are also “tales” that if you remove the battery from the car, this will have a bad effect on the electrical system, in particular on the “wiring”. How and in what way is not indicated! Let's think logically - if you disconnect the batteries in a flashlight, will it immediately break - OF COURSE NOT! Install new ones and it will shine again as before, also with a battery. Oh, I don’t know where these rumors come from, but again - In 80% of cases, nothing bad will happen.
What usually happens when removing a battery
Every car owner has to deal with removing the battery, the reasons for this may be different. Be it replacement, maintenance or temporary storage during the winter, if the car is not used for a long time. Such a seemingly simple manipulation can lead to unpleasant consequences in the form of settings failure.
Basically, modern models stuffed with electronics are susceptible to this. First of all, the settings of the on-board computer and clock are lost, the power windows, the multimedia system and other components of the components “die”. It will take time to bring everything back to its original state. However, by knowing a few simple rules and following consistency, such problems can be avoided.

