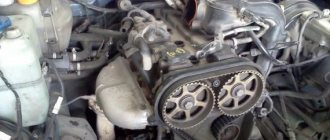
One of the most important components in an engine is the timing system. Today, manufacturers are increasingly switching to belt drive. However, many domestic cars are still equipped with a chain gas distribution mechanism. Chevrolet Niva is no exception. The manufacturer recommends replacing the timing chain on the Chevrolet Niva every 100 thousand kilometers.
There are also indirect signs. This means increased fuel consumption and increased noise level of the internal combustion engine. This car is quite simple, so you can replace the timing chain on a Chevrolet Niva with your own hands. We’ll look at how to do this in the article.
Peculiarities
It must be said that replacing the chain involves partial disassembly of the engine. Therefore, for those who have not yet had experience in repairing a car themselves, this procedure may seem overwhelming.
Some people replace the timing chain on a Chevrolet Niva without removing the front cover. But it is not recommended to do this, since the drive gears need to be changed. Since the teeth are worn, they will not interact well with the new chain. In addition, the chain tensioners must also be changed.
Symptoms of a problem
It is almost impossible to say exactly when replacement is required, and to understand that it has stretched, you can only disassemble the engine, but this is not an easy task. Therefore, you can understand that the chain is stretched by the operation of the engine; during operation, if stretched, a ringing sound will be heard, it may resemble the operation of a diesel unit. As a rule, it needs to be replaced at a mileage of about 100-150 thousand kilometers. In case of wear, not only the chain changes, but also:
And if they are not changed, this can lead to it breaking during movement. Only replacing all elements of the system will guarantee its high-quality and long-term operation, and it is somehow impractical to disassemble the engine floor to replace one part.
What do you need to prepare?
In order for the replacement of the timing chain on a Chevrolet Niva with injection to be successful, you need to prepare:
- a special wrench for the crankshaft pulley nut, some people make such a device on their own - using a wheel wrench for truck wheels (32 by 38 millimeters) as a basis;
- heads of different sizes (from 8 to 22);
- spark plug key;
- pliers;
- clean rags;
- hammer;
- negative screwdriver;
- brake pipe wrench.
We will also need new parts:
- the chain itself;
- three gears (for the camshaft, crankshaft and oil pump shaft);
- front crankshaft oil seal;
- timing chain damper and tensioner;
- timing cover and water pump gasket.
Let's get started
So, we have all the necessary materials and tools. First of all, you need to install the car on the handbrake and put anti-roll bars under the wheels. It is advisable for the car to be in a pit.
Next, you need to remove the engine and gearbox protection (if any). Afterwards, you need to prepare a container for draining the antifreeze and dismantle the radiator along with the fans. If you are replacing the timing chain on a Chevrolet Niva with air conditioning, you also need to drain the refrigerant from the system. Some people do not drain it, but simply carefully move the radiator blocks to the side. Then the damper control drive is switched off. The air filter housing is removed. The crankshaft sensor is removed.
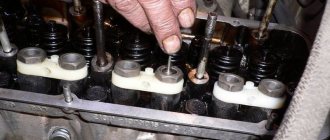
It is necessary to loosen the generator and remove the accessory drive belt. Then the bypass and tension roller is removed. The upper camshaft cover is removed. The top of the engine must be covered with a clean rag to prevent debris from the street from getting inside. Next, use a minus screwdriver to bend the lock washer and rip it off with the head of the 17 bolt. Unscrew the water pump mount. The latter also needs to be removed. To remove the front cover, you need to unscrew seven bolts around the perimeter and two more on the top. Then the bolt of the generator bracket is unscrewed.
What's next?
The car is placed in fifth gear. Use a special 38 mm wrench to remove the nut on the crankshaft pulley.
Unscrew the spark plugs and make marks on the crankshaft, as well as on the camshaft gear. Then dismantle the pulley and unscrew the fastenings of the lower frontal cover. They are located on the engine sump. Unscrew the two damper mounting bolts. The last one is removed too. The oil pump gear clamps are bent. Then the bolt is unscrewed with a 17mm head.
The oil lines are removed from the tensioner using a brake pipe wrench. Afterwards you will need to unscrew the nut of the low oil pressure sensor from the tee. To do this, you will need a 22mm wrench. This procedure is required when using the “Pilot” tensioner.
Using a spark plug wrench, the tee is removed and a pressure sensor is installed instead. Using a 10mm wrench, unscrew the two tensioner nuts. The last one is removed from the place. The top nut is removed. It can be obtained with pliers or a tubular wrench.
The next step is to remove all three gears, as well as the chain. Use a screwdriver to remove the old crankshaft oil seal. It is necessary to thoroughly wipe the oil seal seat from dirt.
You will need a clean rag. It is also advisable to wipe the lid. After these procedures, a new oil seal is pressed in. To make it go in easily, you will need to pre-lubricate the elements with oil. An old oil seal is used as a mandrel (so that the part fits evenly into the hole).
Install a new tensioner shoe. In this case, it is necessary to ensure a minimum gap between the bolt and the body. The tensioner should move normally over the bolt without any play. This is the only way to properly tension the timing chain.
The oil pump and crankshaft gears are put on. At the same time, do not forget about installing locking and spacer washers. The tenon of the locking washer should be bent at a right angle. Afterwards the bolts are tightened. If the tenon is difficult to fit into the gear, it needs to be slightly sharpened.
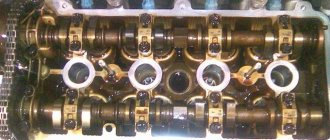
The gear fits onto the camshaft. The marks on the back of the gear should match those on the head. A new damper is installed and the crankshaft is set to the top dead center position. There is a label for this. It is located opposite the keyway.
The new chain is wetted with engine oil before installation. You need to know how to put it on correctly. The chain is put on from the crankshaft, then passes through the oil pump and goes to the camshaft. This installation scheme will ensure uniform tension. In this case, only the oil pump shaft can be rotated.
The tensioner is installed. The mating surfaces must be lubricated with sealant. In this case, the hole that is in the tensioner body (the spring is visible in it) should be in the upward direction.
Quick replacement of the timing chain on a Chevrolet Niva
Recently, an old friend of mine came to see me in his old Chevrolet Niva with the characteristic sound of an extended chain.
In addition to the timing kit, I had the foresight to purchase even a front cover gasket, a crankshaft oil seal and a kilo of marinated meat. I could not refuse such an offer. So, Niva Chevrolet replaced the timing chain and front crankshaft oil seal.
First, let the engine cool to an acceptable temperature. Remove the pipe by unscrewing the bolt by 10 and loosening the clamps.
Next, we unscrew the eight nuts by 10 and move aside the throttle cable and all the pipes that will interfere with us, remove the valve cover.
Remove the air conditioner belt by unscrewing the bolt 13 of the tension roller.
Then loosen three 13mm nuts and one bolt of the generator belt tension roller and remove it.
Now comes the fun part. To unscrew the pulley nut, we need a 38mm socket. Since the elongated head does not fit under a regular wrench (the radiator is in the way, but we don’t want to remove it), we use a pry bar, carefully sawed off from the hub key of some large car.
Everything fits perfectly. Unscrew the nut and remove the crankshaft pulley.
Unscrew the deflection roller.
We dismantle the reinforcing plate.
We unscrew the six nuts securing the front timing chain cover to the block and the three bolts securing it to the pan and remove it.
Set the top dead center. The key on the crankshaft should align against the mark on the block.
The mark for the camshaft sprockets is against the ebb of the camshaft housing.
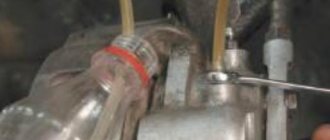
Next, unscrew the oil supply pipe and two nuts 10 of the chain tensioner.
The tube is secured with a hollow bolt and copper washers on both sides. Don't lose them.
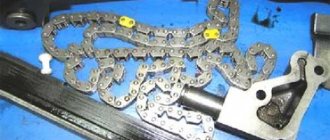
Next, unscrew the tensioner shoe, damper and remove the timing chain.
Compare the new and old timing chain. It could be worse.
New timing kit.
Reinstall the chain, guide and tensioner shoe. We tighten the chain by hand and check that the marks match.
To make it convenient for us to check the marks after installing the front timing cover, we find the factory mark on the crankshaft pulley and mark it with a white marker. This mark at TDC should be opposite the center of the crankshaft sensor.
We install the front cover, crankshaft pulley and tensioner. Let's check the marks again. We install all the removed parts in the reverse order of removal. Fill with fluids, start the engine and enjoy.
How does the installation proceed?
At the next stage, you should check the degree of chain tension, as well as the coincidence of the marks. You need to pull the pin out of the tensioner. The shaft is rotated several turns to ensure that the marks match. The bolts securing the pump gears and camshaft are tightened, then the stoppers are bent. The front cover is installed. At the same time, the mating surfaces and gasket are lubricated with sealant. The mounting nuts are tightened and the generator bracket is installed. The pulley is installed in place, the cover mounting bolts are tightened, and the valve cover is on top.
How is the timing chain replaced on a Chevrolet Niva? At the next stage, experts recommend checking the condition of the tension rollers and the auxiliary drive belt. If there are defects (noise during rotation in the first case and breaks in the second), the elements are changed.
Next, the pump is mounted with a new gasket. The pulley nut is tightened with a special wrench to 38 millimeters. The belt is put on and all the connectors that were removed earlier are connected. How is the timing chain replaced on a Chevrolet Niva? The radiator is put in place and antifreeze is added. All remaining parts are installed.
note
If you are replacing the timing chain on a Chevrolet Niva with a two-row one, it is important to check that the ignition is installed correctly. It is set along the crown on the flywheel of the internal combustion engine. There is a section on the crown that is missing one tooth.
If the piston of the first cylinder is at TDC, this section should be located at the bottom. In this case, the 20th tooth, when counting counterclockwise, is opposite the DPKV.
When is it time to change?
As you know, the timing chain is a more reliable element of the gas distribution mechanism than the belt. Unlike a belt, it does not wear out so quickly and the likelihood of it breaking is quite low. However, sooner or later, every owner of a Niva Chevrolet faces the question of the need to replace the chain and set the marks according to the standard.
Niva Chevrolet car
As for the timing, the manufacturer does not regulate the frequency of replacing the mechanism chain on a given car model. As a rule, this happens no earlier than after 100 thousand km. But if, during operation of the internal combustion engine, a sound appears that was not there before, this may cause the chain to stretch. If the chain cannot be tensioned using the usual method, this may indicate the need to replace it.
Phase diagnostics may also indicate the need to change the chain. If the mark on the camshaft sprocket does not match the one on the bearing housing, the element should be replaced. Likewise, if chips have formed on the bushings.
In addition, if you find cracks directly on the chain itself, then this, of course, also indicates the need to replace the component.
