Lada 2108 White Eight RWD › Logbook › Injection fuel pump for carburetor
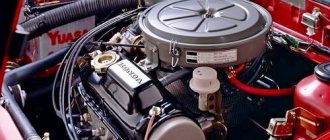
Electric fuel pump, filter ZMZ 406, two tees. Powered via a 4-pin relay from the ignition coil, there is a separate button on/off the pump in the cabin.
see also
Comments 20
Is this a regular turbine from such a pump? or I'm wrong?
No. This is a remote pump from the Volga
The circuit is unclear, does the return flow go to the carburetor? Does the valve come from the carb?
The carb is written through the return line, otherwise the needle will not withstand the pressure
Aaaaah, that is, you just made circulation in a circle, and from it you took food for the carb. What kind of valve is marked in green? Does it come from the carburetor return fitting?
the pump pumps gasoline in a circle, and the carb is fed vice versa (through the return line) the stock valve
Why didn’t your family suit you?
injection camshaft without pump drive
I didn’t install a pressure regulator or anything like that)))? Does the carb handle it?
works without problems without regulator
Interesting connection diagram. But for this, the return flow must create a certain resistance to the fuel so that the carb has the pressure it needs (0.1-0.2 atm).
And as for installing the pump so high, it will make it worse, they don’t like working with air in the fuel, but there will be air. Even if there is no leak anywhere, everything is perfect - after the ignition is turned off, fuel flows back into the tank. Yes, and a filter in front of the pump. The bourgeois specifically write - no filters in front of the pump, and if there is nowhere to go for dirty fuel - install a coarse filter (from diesel cars). Is there a check valve in the pump itself?
I don’t know about the valve in the pump, the pump itself is located below the filter and the gasoline remains there both in the pump and in the pipe
Interesting connection diagram. But for this, the return flow must create a certain resistance to the fuel so that the carb has the pressure it needs (0.1-0.2 atm).
And as for installing the pump so high, it will make it worse, they don’t like working with air in the fuel, but there will be air. Even if there is no leak anywhere, everything is perfect - after the ignition is turned off, fuel flows back into the tank. Yes, and a filter in front of the pump. The bourgeois specifically write - no filters in front of the pump, and if there is nowhere to go for dirty fuel - install a coarse filter (from diesel cars). Is there a check valve in the pump itself?
Why can't there be a filter in front of the pump? I heard, on the contrary, that there is no filter after the pump.
These pumps do not provide good suction. Just a bit. And any resistance reduces this opportunity to zero. And all fine filters in the injectors are located after the pump.
By the way, yes, exactly. I'm just seeing this too. I try to park the car facing down.)) otherwise, I have to take out a tambourine and...)) But I’m not an engineer. pump, but a carb pump.
First, I placed a carb filter (vane type, capable of suction) next to the engine and attached a coarse filter to its inlet, the main idea was that it was transparent so that you could see what was pumping and what was wrong with the air. There was a lot of air. And the pump did not work for a long time. Stopped sucking altogether. And since it’s too awkward to put it below the tank on an UAZ - the tanks are already the lowest points of the body, I put it in the tank. While the mileage is not high, it works.
What if you put a check valve in front of the pump so that the fuel doesn’t leak?
Usually it is installed after the pump, and in injection pumps this valve is often built-in.
First, I placed a carb filter (vane type, capable of suction) next to the engine and attached a coarse filter to its inlet, the main idea was that it was transparent so that you could see what was pumping and what was wrong with the air. There was a lot of air. And the pump did not work for a long time. Stopped sucking altogether. And since it’s too awkward to put it below the tank on an UAZ - the tanks are already the lowest points of the body, I put it in the tank. While the mileage is not high, it works.
Electric fuel pump for carburetor: installation features
Let's start with the fact that the carburetor is a mechanical component of the power supply system of a gasoline engine. The main task of the carburetor is to prepare a suitable fuel-air mixture, as well as to dose the finished working mixture when supplied to the engine.
Naturally, many solutions are borrowed from more modern systems. Quite often on carburetor cars you can find electronic ignition or an electric fuel pump. Next, we will talk about what advantages an electric fuel pump provides for carburetor engines, how to connect an electric fuel pump to a carburetor engine, as well as what subtleties and nuances need to be taken into account during such an installation.
Fuel pump design
Depending on the type of drive, fuel supply pumps are divided into two large groups: mechanical and electrical. The former are used only in carburetor engines, and also as booster pumps in diesel engines. The latter are used for both gasoline and diesel engines.
Mechanical fuel pumps
Mechanical fuel pump design
The mechanical pump is located on the engine and driven by a special eccentric. Structurally, it consists of the following elements:
- frame;
- diaphragm;
- pusher;
- stock;
- return spring;
- valves on the suction and discharge channels;
- filter;
- eccentric.
In cars equipped with rear-wheel drive, the eccentric is located on the oil pump drive shaft, and in cars with front-wheel drive it is located on the engine camshaft. The movement of the diaphragm in such a pump ensures the movement of fuel. When the diaphragm is at its lowest point, a vacuum occurs in the working chamber, and the latter is filled with liquid. When the diaphragm moves to the upper position, fuel is pushed into the discharge pipe. The valves prevent the fuel from flowing back.
For diesel engines, such systems are often used as low pressure pumps. They perform the function of pumping fuel and are located next to the high pressure pumps (HP pumps). On the practical side, this allows you to overcome the hydraulic resistance of the filtration system and create a stable excess pressure.
Electrically Driven Fuel Pumps
Roller fuel pump. 1 – check valve; 2 – safety valve; 3 – electrical connector; 4 – electric motor; 5 – impeller
Electric pumps are installed on engines with distributed and direct injection. They are driven electrically by a battery or generator. According to their design, electric pumps are divided into the following groups:
- Vacuum. Such a pump has a similar design to a mechanical one, but the eccentric that drives the working units is replaced with an electric drive.
- Roller. In such a device, fuel moves due to the rotation of the rotor (movement of the rollers). At the moment when the distance between the roller and the rotor increases, a vacuum occurs, the suction valve opens, and the fuel is sucked in until it is completely filled. At the next moment, the rotation of the rotor ensures that the distance decreases, and fuel is supplied to the engine through the opened injection valve.
- Geared. Suction and injection of fuel is realized through the rotation of the rotor gear. It is located eccentrically with respect to the stator gear. The teeth of the gears form chambers through which the fuel passes. During rotation, the volumes of the chambers constantly change, which ensures the required pressure.
- Centrifugal. Such a pump has an impeller equipped with blades that move fuel from the suction to the discharge channel. Pressure is created due to the turbulence that occurs when the blades act on the working fluid.
- Plunger Gasoline pumps of this design are rare. Such systems are mainly used in diesel vehicles as injection pumps. They have pairs of plungers driven by a cam shaft. As the plunger moves upward, the outlet and inlet holes are closed sequentially. This forms the pressure necessary to open the injection valve and subsequently supply fuel to the engine injectors.
Electric fuel pump for a motor with a carburetor
So, an electric low-pressure fuel pump on fuel-injected cars is located in the gas tank and takes fuel from the fuel tank, after which it supplies it under a certain pressure to the injectors. As a result, the engine operates stably regardless of the load, and accurate and timely injection is also achieved.
In both the first and second cases, the pump supplies fuel to the metering systems (injectors or carburetor). It is quite obvious that if you install an electric pump instead of a mechanical pump, you can achieve trouble-free operation of the carburetor and a stable fuel supply.
However, it is important to understand that the electric fuel pump on the carburetor must operate at low pressure to avoid fuel overflow. As for the installation itself, in some cases the electric pump is installed under the hood, and not in the tank (as on an injector). Also quite common is the option when the pump section is integrated directly into the gas tank.
Installing an electric fuel pump on a carburetor
Let us immediately note that installing an electric fuel pump on a carburetor internal combustion engine is associated with a number of difficulties. Please note that without proper experience in carrying out such work, it is not recommended to carry out the specified modifications to the fuel system yourself.
Now let's look at a common installation method with an example. First of all, you need to select the most suitable electric fuel pump in terms of performance for the specific type of internal combustion engine and the carburetor installed on the car.
In addition to the pump, you should also prepare the following items:
- hose 5 meters long, internal diameter of the hose is about 8-9 mm;
- an additional relay will be required;
- you also need to have a 3 or 4 mm drill;
- you will also need a fuel filter from injection systems;
- fuel filter for carburetor systems;
- steel tube 7 mm with a wall of 0.8 mm and a length of 25 cm;
- fuel hose with an internal diameter of 12 mm;
- adapter fitting from 8 mm to 12 mm;
Having prepared everything you need, you can proceed to installation. First you will need to remove the fuel level sensor in the gas tank. Then a hole is drilled in the sensor cover, then a 7 mm tube is soldered into the hole with a soldering iron. It is important to bend the tip of the tube so as to drain the return as far as possible from the fuel intake.
Also, the upper end of the tube is bent parallel to the outlet of the fuel intake. Now a modified fuel level sensor with an intake and return should be installed in the tank. It should be taken into account that the rubber tube will need to be connected to the installed return fitting from the standard fuel line.
Now one end of a hose with a length of 5 meters is put on the fuel intake fitting. After the rubber fuel supply hose has been connected, the said hose is securely attached to the metal tube. This can be done by using clamps.
Gasoline pump: main types
This device, as the name implies, is designed to supply liquid gasoline from the tank directly to the combustion chambers of the engine. The main task of any pump is to pump liquid under the required level of pressure, which is necessary for the motor to operate as stably as possible. Modern technologies are slowly but surely taking over the world. Innovation is also coming to the automotive industry, but mechanical pumps are still used on carburetor engines. The mechanical device was created exclusively to work with the carburetor. But the electric fuel pump is designed for injection engines. The mechanical element is most often installed outside the tank, but the electrical element can be found inside it.
It's submersible. An electric fuel pump for a carburetor is not the fruit of modern technology. This is a find of the motorists themselves. The fact is that the electric pump increases the efficiency of the carburetor and the engine as a whole.
Advantages and disadvantages of installing an electric fuel pump on a carburetor engine
In the list of main advantages after installing an electric pump on a carburetor, we should highlight the ease of starting the internal combustion engine. The engine starts quickly, both cold and hot, reducing the load on the battery and starter. As for operation, if connected correctly, there is not so much smell of gasoline in the cabin, and fuel is also consumed more economically.
If we talk about the disadvantages, then it is worth noting only the complexity of installation and the need to purchase the pump itself. Also, for normal operation of the pump, the vehicle’s electrical systems must be in good working order, as well as a normal battery charge level.
Pros of an electric fuel pump with carburetor
There are many reasons why an electric fuel pump is installed on a carburetor.
One of the major advantages is the way the engine starts. Now the engine will start quickly, almost instantly. The pump turns on as soon as the driver turns the key in the ignition. The operating noise is significantly reduced. The electric pump makes virtually no noise. The interior will no longer smell like gasoline as before. And finally, the main advantage is the ability to reduce fuel consumption by a small percentage.
Tips and tricks
It should be noted that before purchasing a gasoline pump, you must carefully study its characteristics in terms of performance and pressure, current consumption, etc. In some cases, a situation may arise when the device is not able to work normally with a particular carburetor.
The fact is that clogged filters increase the load on the pump, as a result of which the device may overheat or fail. As a rule, in case of problems with filters, first the pump’s performance drops, then the engine may begin to work unstably, power is lost and traction deteriorates. Ignoring these symptoms not only makes it difficult to operate the car, but also significantly reduces the service life of the electric fuel pump.
Mechanical and electric fuel pump, design and principle of operation of the device, types of pumps and main malfunctions, operating features
How to determine why the fuel pump does not pump or works poorly. Fuel rail pressure, pump diagnostics. Wiring, relays, fuel pump fuses.
The causes of whistling and increased noise during operation of the fuel pump are overheating of the pump. How to diagnose and fix the problem yourself. Tips and tricks.
Why is it necessary to clean the fuel pump mesh? When is it better to change and how to clean the fuel pump mesh? How to properly remove the fuel pump, subtleties and nuances.
How to change a fuel pump. Location of the fuel pump, releasing pressure in the system, unscrewing the fuel lines, removing the pump, reassembling.
Why does the fuel pump grid need to be changed? How to remove the fuel pump yourself to replace the filter. Features of reassembly after replacing the fuel pump mesh.
source
Gasoline pump for carburetor VAZ 2107
VAZ-2107 cars from the release of the first model until 2005 were produced with a carburetor fuel supply system. The main element that performs the function of supplying fuel to the carburetor is the fuel pump. It works based on mechanical actions. But about the principle of operation a little later. This article is dedicated specifically to the carburetor-type “seven” fuel pump. Most drivers sometimes encounter this problem when they try to start the engine, but it does not start at all. And often the problem lies precisely in the fuel pump, which is most likely clogged and does not pump gasoline from the tank. Therefore, we will consider the main problems of fuel pump breakdowns, its repair and replacement.
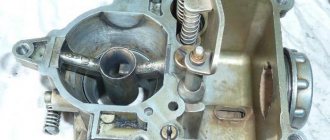
What is the device
The gasoline pump is a cylindrical barrel measuring 20x15 cm, located under the hood of the car in the carburetor area. It has two tubes, one of them pumps gasoline, and the other supplies it to the carburetor. It also has a lever that is designed for manual pumping of fuel if the mechanical system is not functioning.
The design of the device includes:
- The chamber into which fuel flows from the tank.
- Fuel inlet and outlet valves.
- Diaphragm.
- The ghost lever operates the pumping mechanism.
- Return spring.
- Fist.
- Camshaft
- Sealing gasket.
The operating principle will tell you what each part does.
Operating principle
It works quite simply, just like regular water pumps. In order for the device to begin to function, a mechanical action is applied to it, carried out by the diaphragm. It moves up and down due to the effects of vacuum and pressure. During the downward stroke, a vacuum is created and fuel is sucked into the chamber. When the diaphragm moves upward, it creates pressure and the suction valve closes, and the discharge valve opens, through which fuel flows into the carburetor. The return spring performs the function of causing the movement of the diaphragm.
What are the causes of malfunctions?
The main problem that causes malfunction of the fuel pump of a VAZ-2107 car lies in the sealing gasket. It creates a sealed chamber where the phenomenon of rarefaction and pressure occurs. When this gasket wears out, the seal is broken and not only gasoline, but also air is sucked into the chamber. When the diaphragm moves back, fuel leaks out through a loose seal. Another reason for the pump not to function is clogging of the inlet valve channels. But, this problem was solved by installing a special filter element in front of the gas pump, which extends the service life of the fuel injection device much longer.
Rupture of the internal membrane also poses a threat to the performance of the element. If such a problem occurs, it is very difficult to start the engine even when pumping fuel manually.
How to determine the malfunction?
For a VAZ-2107 car, it is easy to find out if the fuel pump is not working. To do this, you need to disconnect the tube from which gasoline enters the carburetor. Next, manual pumping is carried out and if liquid leakage is observed, then the cause of the malfunction is not in the fuel pump. If fuel does not come out of the tube, then the device is faulty, or rather, the problem most likely lies in the inlet valve. You can check this as follows:
- Remove the intake valve tube.
- Close the inlet port with your finger.
- Press the pump lever.
If you feel a vacuum on your finger, then the device is working properly and there is no point in disassembling it.
Fuel pump repair
The device for pumping fuel into the carburetor is subject to repair, unless, of course, the service life of the device is very long. Repair includes disassembling the device, cleaning and replacing worn parts. So, repairs are best carried out with the device removed from its seat, but there are also simple breakdowns that can be repaired without removal.
Repairs are carried out in the following sequence:
- The main semicircular cover, which is secured with a bolt, is removed.
- After removing the cover, we carry out a visual inspection. The filter is removed and needs to be washed and blown out for cleaning.
- Further analysis of the device is underway. The six bolts are unscrewed using a screwdriver and the device is separated into two parts.
- The intake and exhaust valves are cleaned. You can wash it in gasoline or solvent and spray it with a stream of dense air.
- To remove the diaphragm, you need to rotate it 90 degrees and carefully remove it.
- Next, we repair the diaphragm, unscrew it and remove all the components.
- Only flexible membranes are damaged, so it is these that need to be replaced.
- When the replacement is made, it is important to assemble the diaphragm in the same sequence as originally.
- The device itself is assembled in the reverse order of removal.
- When installing the filter, it is necessary to ensure that the hole in it is located above the valve.
- By connecting the two parts, a gasket is installed, which can be additionally lubricated with sealant.
The repair is complete, all that remains is to install the fuel pump in its seat and check its functionality.
Replacing the device
If the fuel pump has outlived its usefulness, then it is better not to torture yourself and the car, but install a new part. Replacing a fuel pump on a VAZ-2107 is not difficult even for a beginner. First, disconnect the fuel hoses, then use a head to unscrew the two nuts securing the fuel pump. After this, disconnect the pump from the engine block. Before installing a new pump, clean its seat from dust and dirt. Initially, it is necessary to put a sealing gasket on the cleaned area, the thickness of which should be 0.7 mm or more.
Important! Next, a thermal insulation gasket is installed, which has a thickness of about 0.3 mm. The thickness of the two gaskets is necessary to achieve a minimum pusher exit clearance of at least 0.8 mm. Therefore, it is better to use new gaskets rather than suffer with old ones.
If the thickness is less, this may result in improper functioning of the fuel pump due to the incorrect position of the pusher. After this, the device is installed and tightened with nuts, two hoses are inserted and secured with clamps. All that remains is to check the functionality of the installed equipment.
Knowing not only how the replacement is carried out, but also the operating principle of the fuel pump of your VAZ-2107, you can easily carry out any repairs without using the help of specialists at a service station and thereby saving your money.
provaz07.ru
Installation of fineness pump and chips
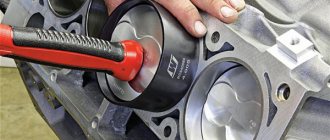
We install the EBN only vertically!
The location of the pump under my hood is as far as possible from the engine, since it also gets hot and it would be desirable for there to be airflow to the pump. I placed the filter in front of it; it is not advisable for debris to remain in the pump. A full return to the tank is also connected. Here, too, people write differently. The fact that it is not needed, since the pump, after filling the float chamber with fuel, begins to work on its own, and with the return line it will constantly oil. Others write that a return line is needed to make it easier for the pump to work, and the carburetor won’t overfill if the needle doesn’t hold well. Theoretically, both versions are correct, but I installed everything backwards
For installation, we need a soldering iron, a multimeter, wires, a chip for a 4-pin relay and the relay itself, as well as a chip for a fuse, respectively, and the fuse itself is needed for 15A. A fuel pipe and a couple of clamps.
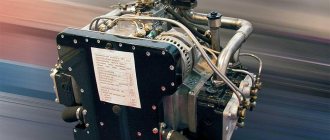
The engine compartment of the M41 is not small, so the space for installing an EBN is quite sufficient.
Connection diagram
The circuit is very easy to connect.
Even if this is your first time connecting a relay, all the contacts are numbered and it is unlikely that you will make a mistake by mixing up the wires.
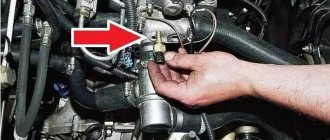
The pump was installed strictly vertically immediately behind the radiator fan.
Since our EBN is vibrating, it makes a loud sound if you don’t put a rubber gasket under it. Initially, I cut out a piece of strip from a bicycle tube, folded it several times, and attached it all with 2 bolts. As a result, the sound of the pump was audible even when the car was moving, very loud. Next, I cut out the gaskets from the fuel pipe and installed it all on the car.
The sound has become quieter, you can’t hear it when moving, but this is not the end result. In the future I will make a rubber cushion of 1 cm or more. For the experiment, I removed the EBN from the mounts and simply hung it behind the hose with a wire and screwed it to the body, so that the pump was not fixed, but simply hung on the fuel hose.
I was surprised by the result. The pump worked almost silently when the ignition was on; when the engine was running, you couldn’t even hear the pump running. I tried attaching springs instead of rubber tubes, after which I simply attached a pump to the springs, but the sound was even louder, so this is the only unpleasant situation with the EBN.
I laid all the wires in corrugation. We also do not forget that it is better to pull the + from the relay directly to the + terminal of the battery and put a 15A fuse there.
I didn’t know how much fuel it pumps from the tank, since everyone has a different length of the fuel line, different filters, maybe even more than one, so the result will be different. So far everything is fine regarding work. At speed and high revs, there is enough fuel and the car does not jerk, the spark plugs are clean. In fact, I didn’t notice any difference in operation between the EBN and the baker, the only thing is that it no longer stalls in the heat and, as it seemed to me, idling is better in cold weather.
Electronically controlled carburetor
When using a simple float carburetor, the more air is sucked into the cylinders, the more fuel is supplied to form the TV mixture. The main disadvantage of such a mixture formation system is the nonlinear relationship between the mass of air entering the engine and the amount of atomized fuel, i.e. The stoichiometric composition of the TV mixture is not maintained at different engine speeds. To compensate for this shortcoming, it is necessary to introduce electronic control into the carburetor design. Such a carburetor is called electronic.
An electronic carburetor allows you to better implement the following functions:
• stabilization of idle speed. The idle speed of the internal combustion engine is maintained constant at a fairly low level in order to save fuel and reduce the toxicity of exhaust gases. In this case, the engine should not stall. Regulation is carried out by a stepper motor. The idle speed can be changed by a signal from the automatic gearbox, from the air conditioner clutch relay and another signal about an increase in load;
• warming up the engine. When the engine warms up, the idle speed is maintained increased until the corresponding signal is received from the coolant temperature sensor;
• enrichment of the TV mixture during warming up. A rotating choke or other type of valve is used to enrich the mixture depending on engine operating conditions and ambient temperature;
Figure 1.5 – Main components of an electronically controlled carburetor
Figure 1.6 – Block diagram of the electronic carburetor control system
• shutting off the fuel supply at high engine speeds. To shut off the fuel supply, a shut-off electric valve is used, which is activated when the engine temperature is above a set limit or the engine speed is above the permissible value when the accelerator pedal is released (case - engine braking).
Changing the composition (quality) of the TV mixture is carried out in any carburetor by mechanical means and is difficult to control electronically.
In Fig. Figure 1.5 shows the main components of the electronically controlled carburetor used on some early Rover models. In Fig. Figure 1.6 shows a block diagram of the carburetor control system. As usual, the control system includes a set of necessary sensors, an information processing device, and actuators.
In such a system, engine speed is determined by the frequency of the pulse signal coming from the negative terminal of the primary winding of the ignition coil, as in many other systems.
The coolant temperature sensor (thermistor) is located in the engine water cooling jacket; the same sensor is used in the ignition control system.
The ambient temperature is determined by a thermistor located under the front bumper or behind the headlight. In later systems, the intake air temperature is measured by a sensor installed in the intake manifold.
The throttle position sensor is located under the accelerator pedal and is activated when the pedal is released, i.e. the throttle valve is closed.
The main actuator in an electronic carburetor is a stepper motor. The stepper motor changes the position of the throttle valve in accordance with commands that are generated in the ECU, taking into account the engine operating mode, coolant temperature and intake air.
When the engine speed exceeds the permissible value, the ECU uses an electric valve to equalize the pressure in the float and mixing chambers and the fuel supply is stopped.
The ECU also sends a signal to the engine temperature gauge, which is installed on the driver's instrument panel.
Electronic carburetor control has proven to be ineffective compared to fuel injection systems that are widely used in modern cars.