HomeUsefulHow to replace a car engine?
In this article, we will look at the main types of automobile engines and touch upon issues of selection, removal, installation, as well as the need for legal registration of units.
Many drivers are faced with the problem of replacing the engine of their car. This need is mainly associated with wear and tear of the old engine or the desire to increase the power of the car. This process is far from simple, which is why most car enthusiasts turn to a service station. But there are also many who do this in their garages on their own. To achieve success in this work, it is recommended to study all the features of the vehicle being repaired and the engine being prepared for replacement.
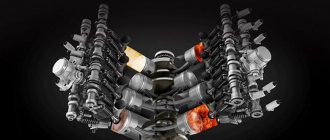
Main types of automobile engines
The most common are internal combustion engines running on gasoline, which are divided according to the method of supplying fuel to the cylinders - using a carburetor or injector. In carburetor engines, gasoline is combined with air under the influence of aerodynamic forces. In engines with injectors, the fuel mixture is injected under pressure through injectors.
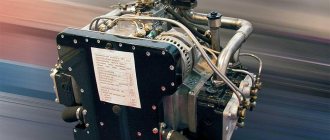
No less popular engines are units running on diesel fuel. Their functioning is ensured by spraying diesel fuel, which is mixed with a hot portion of air under high pressure.
All engines have both positive and negative aspects. For example, diesel engines, as opposed to gasoline engines, have excellent traction at low speeds, are the most economical, and do not have distributors or spark plugs. As for the shortcomings, this is a fuel system that is very sensitive to the quality of diesel fuel; comparatively worse acceleration dynamics; problems with starting at sub-zero temperatures; increased vibration and noise.
Gasoline engines, which make it possible to start sharply and drive at high speeds, also have their weak points. For example, the ignition system is one of them.
Removing an injection engine from a car without disassembling
To remove the injection engine from the car, you need a lifting device with a lifting capacity of at least 300 kg and slings (chain)
- We install the car on the inspection hole
- Removing the hood from the car
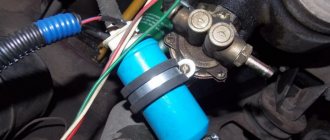
- Relieve the pressure in the power system and disconnect the fuel hoses from the fuel rail pipes
- Removing the battery from the car
- Disconnect the wire connectors from the throttle position sensor, coolant temperature sensor, mass air flow sensor, ignition module, crankshaft position sensor and oxygen concentration sensor
- Disconnect the wiring block from the idle speed control and the injector wiring harness block from the engine harness.
- Disconnect the throttle drive cable from the sector and remove the cable holders from the receiver and the cylinder head cover bracket
- Disconnect the brake booster hose from the receiver fitting and remove the hose holder from the cylinder head cover bracket.
- Disconnect the fuel vapor supply hose from the throttle body fitting. Having loosened the clamp, disconnect the air supply hose to the throttle body from the pipe
- Having loosened the clamp, disconnect the hose for supplying crankcase gases to the throttle body from the air duct pipe.
- Unscrew the bolt securing the plastic bracket to the cylinder head cover
- We disconnect the plastic holder for the crankshaft position sensor wire and the adsorber hose from the cylinder head cover bracket.
- Remove the air filter housing from the rubber supports and remove it along with the air supply ducts
- Disconnect the wire tip from the coolant temperature gauge sensor
- Disconnect the wire tip from the oil pressure sensor
- Disconnect the ground wire from the right exhaust manifold mounting stud and remove the wire
- Remove the coolant inlet and outlet hoses from the heater radiator pipes
- Removing the radiator from the car
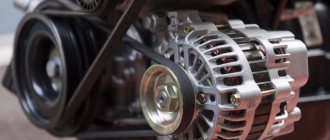
- Removing the generator
- Removing the gearbox from the car
- Using a standard bolt, we attach the eye, which was removed when dismantling the gearbox, to the upper left hole of the cylinder block.
- After disconnecting the wires, remove the starter from the engine compartment of the car.
- We attach the slings (chain) to the injection engine: on the right side - behind the front eye; on the left side - behind the rear eye, attached to the cylinder block. We hang the fuel-injected car engine on the hook of a lifting device
- We unscrew the nuts of the lower fastening of the front supports of the injection engine to the cross member
- We lift the engine and remove the support studs from the holes in the cross member. We remove the injection engine from the engine compartment of the car
Installing an injection engine on a car
Installing the engine and all removed parts is performed in the reverse order
Engine selection
It is necessary to start choosing a new engine based on the technical characteristics of the old one, since it is necessary to adhere not only to the specified dimensions, but also, expediently, to the volume of the unit. All data can be gleaned from the technical description of the car. It happens that the engine is the same in volume and other characteristics, but not in the mounts. This happens if you do not take into account the year of manufacture of the engine (engine generation). This point must be taken into account, since subsequently problems will arise with the installation of attachments and devices. To avoid such nuances, you need to be very careful when selecting an engine.
When buying an engine from strangers, it is extremely important to take care of checking it on a special stand. Car enthusiasts often pay crazy amounts of money for a non-working engine. Typically, a used engine in good condition costs up to 30% of the appraised value of the car itself. The price of a new engine should not exceed 50% of the above cost. You can purchase the unit from official representatives of the car brand (car dealerships, service centers), they offer quality, warranty and service. But all this costs a lot of money. It is much cheaper to purchase an engine at a disassembly site, the automotive market or online. But these options increase the chances of buying a “pig in a poke” several times. You also need to remember that when making a transaction via the Internet, you need to prepare to pay a considerable amount for delivery (the hardware is quite heavy).
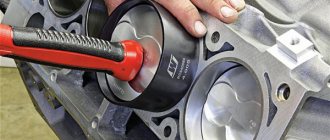
After completing the transaction, it would be useful to take care of the necessary consumables, such as filters, oil, exhaust manifold gaskets. In addition to consumables, you will also need a device for lifting the unit from the machine (for example, a winch), as well as sets of various wrenches and screwdrivers. This is important so as not to waste time searching and selecting the necessary tool. There is no point in relying on your own strength when replacing the engine. This process is quite labor-intensive, so it is better to find an assistant, preferably one who already has experience in such work.
Removal and installation of a gasoline engine Moscow
In our service center, which is located in Moscow, we provide a motor replacement service; our prices are lower than the market average. The range includes all the necessary equipment for high-quality work. Competent specialists will help you find a profitable solution to any technical problems. If necessary, it is possible to use the services of searching for contract motors to order. Our service serves all brands of foreign cars of famous brands. All clients are provided with quality guarantees. You can contact the service in the area: Eastern Administrative District, Shchelkovskaya, Bogorodskoye, Metrogorodok, Izmailovo, Golyanovo, Ivanovskoye or Sokolniki.
Engine removal procedure
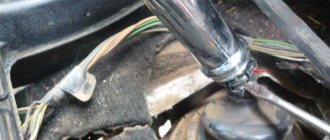
To make it easier to remove the unit and prevent scratches on body parts, first of all, you need to dismantle the hood of the car. After this, you need to disconnect all electrical wires from the motor. And first of all, disconnect the battery terminals. Next, we remove the battery itself.
If you are not sure that you will remember the assembly order, then it makes sense to take notes or photographs of complex components in the engine compartment. This will be a good help when installing a new unit.
The next step is to drain all engine fluids (oil, antifreeze), after which we disconnect the exhaust system elbow, transmission gear and the gearbox itself.
The next step is the most important - directly dismantling the engine. To do this, you need to decide how to implement it. There are two options for solving the problem. The first is to use a winch to lift the engine up, move it to the side or roll the car away. And the second - with the help of a lift, we raise the car, and the pre-jacked engine remains below on a special cushion. This method is usually used at service stations where the necessary equipment is available.
After deciding on the method of dismantling, preparing a place for the old engine and removing all fastenings of the unit to the car frame, you can proceed directly to the excavation.
Do-it-yourself engine repair. 68 models of VAZ cars (V.V. Volgin, 2010)
Engine dismantling
1. Place the car over the inspection groove or on a lift, put supports under the front wheels and hang the rear axle on one side or both. Release the parking brake and place the gear shift lever in neutral. Disconnect the wires from the battery.
2. Remove the hood, disconnect the wires from the battery and from electrical equipment installed on the engine. Remove the battery and engine compartment lamp.
3. Drain the liquid from the radiator, cylinder block and heater, to do this, unscrew the plugs on the left side of the cylinder block and on the lower radiator tank, open the heater valve, remove the plugs from the expansion tank and radiator.
Warning
To avoid damaging the radiator, when unscrewing the drain plug, use a second wrench to hold the plug fitting soldered into the radiator. The plug must be unscrewed with a socket or socket wrench so as not to tear off the edges of the plug.
4. Remove the fan shroud. Disconnect the coolant inlet and outlet hoses from the engine and remove the radiator along with the thermostat and hoses.
5. Remove the air filter by first disconnecting the hoses from it, removing the cover and filter element.
6. Unscrew the nuts securing the front muffler pipe to the exhaust manifold.
7. Remove the front floor mat and outer shift lever cover, then remove the plastic cover and seal.
8. Press down on the shift lever rod and, using a screwdriver, remove the locking sleeve from the groove on the lever rod and remove the rod.
9. Disconnect the suspension pipes and mufflers at the rear of the car, and then the muffler pipe from the exhaust pipe. Disconnect the clamp securing the exhaust pipe to the gearbox. Unscrew the nuts securing the front muffler pipe to the exhaust manifold and remove the pipe.
10. Unscrew the lower bolts securing the clutch housing cover.
11. Disconnect the ground wire of the clutch housing and the wire from the reverse light switch.
12. Unhook the release spring from the clutch release fork and remove the cotter pin from the pusher. Disconnect the slave cylinder from the clutch housing. In this case, the cylinder connected to the pipeline going to the clutch release master cylinder remains in the car, which eliminates the loss of brake fluid.
13. Remove the propeller shaft safety bracket. Disconnect the speedometer flexible shaft from the speedometer drive.
14. Place clamp A.70025 on the elastic coupling and tighten it. This will facilitate the removal and subsequent installation of the flexible coupling. Unscrew the nuts and, turning the propeller shaft, remove the bolts securing the elastic coupling to the flange of the secondary shaft of the gearbox. Lower the front propeller shaft with coupling and move it to the side.
15. Using a hinged socket wrench, unscrew the bolts securing the starter to the clutch housing and release it.
16. Unscrew the clutch housing cover bolts.
17. Disconnect the rear engine mount from the cross member, and then remove the cross member, holding the gearbox from below.
18. Place a jack, trestles or other suitable support under the gearbox housing. Using a hinged socket wrench A.55035, unscrew the fastening bolts and remove the gearbox along with the clutch housing, moving it to the rear of the car so as to remove the gearbox input shaft from the front bearing and from the clutch driven disc hub.
Warning
When removing or installing the gearbox, it is strictly forbidden to rest the end of the input shaft on the thrust flange of the clutch pressure spring, so as not to deform the clutch connecting plates.
19. Disconnect the carburetor throttle drive rod and the choke control cable from the engine.
20. Disconnect the fuel supply hose and the hoses going to the heater from the engine.
21. Hang the TSO-Z/379 traverse on the hoist and strap the engine on the right side to the bracket installed on the front exhaust manifold mounting pin, and on the left side to the clutch housing mounting hole.
22. Lightly tighten the hoist chain, unscrew the nuts securing the front engine mounting mounts to the front suspension cross member and remove the engine from the compartment.
23. Remove the starter heat insulation shield, starter and hot air intake along with the supply hose. Remove the two side brackets with the front engine mount mountings from the cylinder block.
24. Unscrew the clutch mounting bolts and remove it.
Installation of a new engine
The installation procedure for a new engine is carried out in reverse order. Before starting installation, it is recommended to replace the special cushions on which the motor is mounted.
After completing the installation work, it is necessary to fill in all motor fluids. Of course, reusing merged ones is strictly not recommended. The new engine must be accompanied by a service book, which indicates the brands and quantities of fluids recommended for use for this unit. If you are installing a used motor, it is advisable to determine what fluids were used in it. Typically, stickers are glued to the engine, indicating the brand of fluid and the date of filling (last replacement).
Before starting the engine, you need to carefully check all connections for leaks, carefully inspect all fasteners and the correctness of the electrical wiring. We must remember that errors in installing the motor can lead to its failure. And this, in turn, will negate all the work, not to mention the lost money.
Registration of a replaced car engine
After solving the problem of replacing the engine, the question arises of legalizing it on a new car body. To do this, you must enter the number of the supplied unit in the vehicle registration certificate. A discrepancy between the serial number on the engine and the number in the technical passport may result in administrative penalties, including confiscation of the vehicle.
If the new engine is more powerful than the previous one, then in this case it is necessary to make documented changes to the design of the car. Therefore, before starting a replacement, it makes sense to seek advice from an expert to clarify which units are allowed for use on a given car.
If you are alerted by a light on the parting panel that will light up and not go out. You shouldn’t worry or panic right away, but be prepared for the fact that the car will now behave as if it does not have ABS. If the light comes on and then goes out, and this happens often, then in most cases some contact in the circuit is to blame. Check all wires and contacts; if you do not find the reason for the blinking light, then contact service.