A TV is an indispensable attribute of every home, apartment, and today even many cars. Hello, dear friends! Is your vehicle equipped with this kind of technology? I think every driver dreams of supplementing an already boring radio with a full-fledged TV. A TV antenna for a car is an important device without which broadcasting is impossible. The quality of the picture shown to you depends on its type and characteristics. Let's figure out what nuances to pay attention to when purchasing it, as well as how to install the device correctly. As a bonus and alternative, I will share with you the design of a homemade car antenna. So, let's go!
What is an antenna for a car TV?
I would like to note right away that the signals: radio, -TV, - GSM, - GPS, are received at completely different frequencies.
An antenna is needed to catch, in our case, TV waves and to amplify them. The principle of operation of a car antenna for a TV is the same as that of a home antenna; they differ in dimensions, types of mounting, and appearance. Such antennas receive the signal and feed it to the device, which, in turn, processes and displays the signal in the form of a picture. No matter how good your TV is, the image quality very much depends on the antenna, so you should be as careful in choosing it as you are in choosing the TV itself.
What are there
Car TV antenna can be active or passive. Active – has a built-in signal amplifier, this allows it to be used without additional equipment. Just select an active antenna that matches the parameters of your TV and you can watch your favorite programs.
But active antennas will require separate power from the vehicle's network. In principle, this is not such a big problem in a modern car. Most often these antennas are located indoors. This is another plus in their favor.
A passive antenna is an ordinary metal conductor of a special shape that allows you to pick up a signal passing through it. The advantages are ease of installation and use, low cost, cheap repairs.
However, the disadvantages more than outweigh: mediocre signal quality, poor signal stability, strong susceptibility to weather conditions. You can also choose a special car amplifier for a passive television antenna. It must be connected to the network, and the signal will be almost as good as an active antenna.
In addition, antennas can be divided into external and internal. They have a variety of mounting locations. This is worth paying attention to, as it affects not only the quality of the signal, but also the appearance of the car. You can attach them: to the windshield and rear window, windshield pillars, drainage channels, on the roof, hood, trunk... and the list is not limited to this.
The advantages of external placement are better signal quality, but they are subject to weather conditions, affect aerodynamics and can simply be stolen or broken by unscrupulous citizens.
Internal ones minimize the disadvantages of external ones, but the quality of their signal may be worse and you need to pay attention to the instruments and devices of the car itself, which can create interference and worsen the quality of reception.
Types and methods of their installation
Antennas - both for the radio and for the car TV - can be active or passive. The former have an amplifier and require a separate power supply. Depending on their location in the car, devices can be external or internal.
As for the latter, they are active and have good reception due to the amplifier. The service life of indoor ones is much longer than that of external ones, since they are less subject to mechanical damage, precipitation and other unfavorable factors.
Outdoor antennas are often passive. It is necessary to purchase and install an additional cable extension and amplifier.
Some believe that the external structure has much better reception, but the issue is controversial, since it is not the height of the device that influences, but other factors.
The disadvantage is that measures have to be taken to maintain the integrity of the device due to exposure to moisture - corrosion is considered the main problem. Silicone sealants can be used for protection. You should not use electrical tape for wrapping contacts, and you should not put various plastic containers on the antenna. This will make her performance worse.
A good installation option is a mortise design, that is, only the receiving rod will not be protected by the body.
In addition, combined models have been created.
They are classified as active indoor ones, but at the same time they have an external output for good reception of the UHF-MV signal.
An important aspect is the cable connection. To do this, installation work is carried out using a shielded coaxial cable. Moreover, it is recommended to use only whole pieces. You need to check it with a tester first. The cable must be laid as close to the housing as possible. You need to make sure there are no kinks.
How to choose and what to pay attention to when choosing
Before choosing an antenna, decide what functions it will perform. You can choose an antenna that will receive not only TV signals; these are so-called combined antennas, which allow you to receive different types of signals.
It is also worth paying attention to the fact that in Ukraine, for example, analogue signals from television towers will soon cease to exist altogether. They will be completely replaced by a digital signal, and although the analog antenna will receive the signal, the TV must have a T2 tuner, or an external tuner, which, of course, will not be entirely convenient for use in a car.
First of all, you should pay attention to the instructions for the TV; this is where the main criteria for choosing an antenna for the model of your TV should be. Consult with representatives of the store where you will make the purchase.
Look for the model you are interested in on the forums, read reviews.
It should be understood that each antenna has a zone of reliable reception and there are places where reception is simply impossible due to the banal lack of transmitting towers or a large amount of interference.
Advantages of a homemade loop car antenna
See the advantage. It is unlikely that our DIY car antenna will have too long a range or show miracles of reception, but it is competitive with some factory models that are mounted on the roof and have a height greater than that of a passenger car. Plus, in the forest, the city won't hurt. In addition, there is no need to wind the matching device. This is not easy; in addition to the exact number and pitch of turns, you will need to find the desired thickness of the wire. The structure will have to be sealed; the event will require the purchase of a number of additional materials.
Anyone who once held a walkie-talkie with their hands will understand the meaning. The antenna is covered with a thick sealant; the devices will allow you to broadcast, at best, for a couple of kilometers. If the terrain is not rough. In our case, ease of installation, ease of design, and accessibility for the average user are achieved.
A capacitor is required: the circuit is shortened. According to the author of the idea, the coefficient is 0.3. The middle cables are used to electrically extend the frame to the desired size; the capacitor dampens the reactance to match the RK-50 cable and will allow the system to be tuned to resonance. The author claims that the antenna is broadband. In most cases, it is possible to install it on the rear window of any car without major changes to the design. The setting is carried out to the minimum standing wave ratio.
In some cases, buying an antenna for a car and installing it will be more expensive, more complicated and will provide poorer reception quality. There is nothing difficult in the above design, and every car enthusiast can try the accessory at his leisure. A two-meter mast is not suitable for a passenger car; it would be more appropriate for a tank! Which, as you know, are not afraid of dirt.
For several decades now, an antenna for a car radio has been included in the list of indispensable accessories for any vehicle, providing high-quality reception of radio signals. In Fig. Below is a Moskvich-408 car from the late 60s, above which rises a flexible meter-long radio antenna rod.
Note! Many cars for various purposes are equipped with mobile radios. In this case, the antenna performs the additional function of transmitting a radio signal.
In this article, we select for consideration only antennas operating in the mode of receiving radio wave radiation.
Review of the best models
The quality of an antenna largely depends on how much you are willing to pay for it. There are a lot of cheap Chinese-made “no name” antennas that, if you take them, do so only at your own peril and risk and, most likely, they will not show their best side. You will make your choice yourself, and we will help you pay attention to models that are popular among other car enthusiasts.
Calearo ANT 71 37 122 is an active indoor antenna. The advantage is that it receives both digital and analog signals, is installed on the inside of the windshield on a self-adhesive base, transparent and almost invisible.
Main characteristics: TV connector – 3.5 mm monojack; TV cable; wide television frequency range; gain 14 ± 2 dB. Power is supplied via the TV cable so that no additional slots are required for recharge. The average cost is 5,700 rubles.
A more budget option Prology TVA-400 . This is an active internal antenna. Characteristics: simultaneous operation in the ranges MV, UHF, DV, SV, HF, VHF, FM, gain no less than 30 dB; two outputs (VHF/FM and TV). It is attached to the glass, it is better to be on the back so it will be less distracting, since it is opaque, and there is less interference. The average cost is 1700 rubles.
Triada 655 Profi – internal active antenna. Characteristics: 9 mm connector, 3.5 mm (adapter), range – MV + UHF, DVBT, DVBT-2; The amplifier has a large dynamic range HDR; reception range up to 80 km. It is also mounted on glass, transparent and does not interfere with the view. The average cost is 1600 rubles.
Prology TVA-100 is an internal active antenna. Characteristics: gain 30 dB; reception range: up to 80 km; power supply: 10 - 15 V. It is also attached to glass, but it is not transparent and will most likely only fit on the rear window; a cable length of 3 meters may not be enough for every car and the cable will have to be pulled under the trim. Average cost 850 rubles
Calearo ANT 77 27 085 – external active antenna. Suitable not only for TV, but also for radio and GPS. Made in Italy with appropriate price and quality. Includes TV and GPS cable 5 meters. Excellent signal, versatility and unusual shark fin appearance. All this will cost about 14,000 rubles.
Types of car antennas
We mentioned the types of car antennas, but here is a redundant classification:
- Purpose:
- Radio reception.
- TV reception.
- Reception of satellite information from navigation systems.
- Communication car antennas.
- Method of installing antennas on a car:
- Magnetic.
- On a suction cup.
- Mortise.
- Threaded connection.
- On a clamp.
- Built-in.
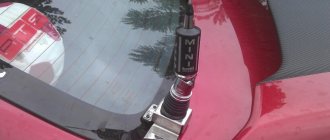
Connection diagram for a car antenna under the rear fender
- By location:
- External car antennas.
- Salon (internal).
- Type of gain:
- Active.
- Passive.
Surely an experienced car enthusiast will be able to add a couple of signs, but we will limit ourselves to the specified classification. FM antennas fit inside the cabin. Hobbyists make accessories with their own hands, using pieces of cable with a characteristic impedance of 50 Ohms. The braid is electrically connected to the car body (ground). Be careful of catching lightning while driving through a field. The thunderstorm chooses the point closest to the sky.
The size of the car antenna depends on the range. Communications (walkie-talkies with a frequency of 27 MHz) are large. Powerful varieties reach a length of 2 meters (they are placed on trucks); according to science, they should be made 50 cm higher. To reconcile the differences between the actual size, a quarter of the wavelength is an “extension” coil at the base. For use, the car antenna for communication is installed vertically. Determined by the type of polarization. The communication antenna can be tilted by means of a thumb or lever, so as not to break it when driving through a forest or overcoming the spans of a low bridge. Communication antennas are mostly used by drivers of large trucks. It is allowed to equip jeeps and civilian cars, but at times the appearance will be unsightly.
Note. Factory antennas are tuned to the wavelength. The mustache is shortened, equipped with a protective cap at the end. The operation is carried out according to the instructions. The guide includes a chart of recommended sizes. The violation causes a decrease in reception sensitivity.
The digital car TV antenna looks like a police flasher and is made in a different color scheme. The device is devoid of unnecessary bells and whistles and accepts a frequency of hundreds of MHz. The first multiplex in Moscow chose 559 MHz. The digital car antenna on a magnet is placed on the top (roof), the wire passes over the door without any modifications. A horizontal polarization signal; the device’s task is to receive an arbitrary azimuth.
Broadcasting antennas are rarely boasted of being large, since the wavelength is higher and the dimensions are larger. Small height pins, like those decorating portable radios. Beware of accidentally buying a car radio antenna intended by the manufacturer to decorate a television receiver. For fear of making a mistake, read the technical specifications in the store:
- Radio is designated FM, AM (frequencies 70 - 108 MHz).
- Television - DVB - T (frequencies below 900 MHz).
- Navigation – GPS (about 400 MHz).
- Radio communication – SV (27 MHz).
Sometimes dealers forget to indicate the antenna capabilities. The range of 400 – 530 MHz is given, it is mentioned that “the option of receiving GPS signals is available.” One can only guess what the copy can do; the first Moscow multiplex passes by. Frequencies above 400 MHz are used by portable radios and departmental communications of the Ministry of Internal Affairs.
It remains to pay attention to the connector. It matches the vast majority of devices for which it is intended; it would be useful to check the compatibility issue. They say that an external car antenna provides better reception; the question concerns mainly urban reception. While racing along the highway, the windows of a typical passenger car will not create serious obstacles to the passage of electromagnetic radiation. Installation of interior car antennas is simpler. Accessories are lower than external ones, hence the worse quality.
The store will provide all sorts of hybrid models, including options a la All in One. You can switch reception from city to highway. It is distinguished by sensitivity and interference suppression features. The suburban reception range increases to 80 km. They sell unique tandems. A pair of similar looking pins are laid out, one of which picks up television broadcasts, the other – radio, communications. Using the delights of the set requires the purchase of appropriate receiving equipment.
How to install and configure
If you follow the manufacturer's instructions, installing the antenna will not cause any difficulties. The method of installing an outdoor antenna will depend on the method of its mounting.
Mortise mount - requires a hole drilled in the body, this may stop many, but if you still decide, do not forget to treat it with anti-corrosion material.
Magnetic mount - practically nothing can stop you. The main thing is that the cable length is enough. But remember that a long cable makes the signal weaker.
Pin fastening - made on the drain of the car.
These methods apply to external antennas. Internal antennas are mainly attached to the glass and have an adhesive surface under the sticker; they can be attached not only to the glass, but if the instructions allow it, it is important how close certain car devices will be.
Cable selection for AUGRA
Radio antenna devices permanently installed on the car (mortise and pin mounts) have good contact with the metal of the body. The input impedance of commercially produced antennas is 50 Ohms, and a standard RG-58 coaxial antenna cable with an outer diameter of 5.0 mm fits perfectly with them. A cable length of more than 5 meters is not recommended due to the increasing attenuation of the received signal.
Automatic gearboxes installed on a car magnetically are not electrically connected to the body. To connect them with the radio, we recommend cables RG-213 or RK 50-7-11 with an outer diameter of 10.5 mm. The cable length is determined to be 360-390 cm. Changing the length in any direction from this indicator leads to the loss of the possibility of high-quality configuration of the equipment.
How to make it yourself
We will look at how to make an active antenna without resorting to special expenses. For this we need:
- two telescopic antennas (from an unwanted home antenna, radio, or buy for a penny);
- housing for the antenna (plastic box, you can also use an old antenna);
- antenna mount (magnet, glue);
- amplifier (from an old antenna or buy a special one for a TV antenna).
First you need to supply power to the amplifier. We take the connector for the active television antenna and solder the wire. Then we pass the cable so that it does not bend or rub anywhere. After that, solder it to the connector. We connect the wire soldered to the connector to the +12 output, which includes an amplifier or antenna.
We adapt the mount to the antenna box using bots and glue of your choice.
How to make your own radio antenna for a car
For those who like to do things themselves, it is quite possible to make a radio antenna yourself. You can make it internal and external. The simplest way is to lay the wires and fix the antenna under the rear window seal. You will also need a capacitor, cable and other equipment.
Many people wonder how to make an external mounting antenna with their own hands. The installation process itself is not that complicated. The materials you will need are copper wire, hot glue, and the tools you will need is an M5 screw. A spiral is twisted from the wire, which is mounted on a screw with a nut. And then the whole thing is wrapped with hot glue. After complete drying, the unnecessary glue should be sanded off to ensure the smoothness of the part.
Now you can install the antenna on the car and connect all the wires. This option for installing an external structure for a car is quite common. However, in addition to the homemade design, you will need to purchase a special amplifier. Now the antenna for the car radio is ready.
Antenna amplifier
As was written earlier, amplifiers are used when the signal level is weak, when remote from the city and signal sources. It is worth considering that excessive amplification can lead to the creation of interference, which is no better than a weak signal. It’s good when there is a mute button for the amplifier; if the signal is strong, you can simply turn it off.
Amplifiers are only needed if you have a passive antenna and you are unhappy with the signal quality; active antennas already have one built-in. It’s difficult to give specific advice here, because in every city and town the signal level is different and the need for amplifiers is also different, and sometimes completely absent. Consult with motorists from your city or sellers from local stores, but you shouldn’t really trust the latter.
Connecting the antenna to the radio
Connecting the automatic control gear to the radio is an electrical connection that ensures reliable contact of the sound-reproducing equipment with the antenna. In general, the car’s passive radio antenna is connected via a plug or connector to the ISO standard antenna socket in accordance with the instructions for installing and connecting the standard antenna system.
When installing an active automatic control gear, equipped with two wires for connecting the power supply and a terminal for connecting to the radio, the connection algorithm is more advanced:
- the black wire of the receiving device must be connected to the car body, creating a negative contact;
- the blue wire (as a variation of red) connects to the radio;
- The amplifier's power cable is connected to the head unit.
Note! With this connection method, power will be supplied to the amplifier only when the radio is running.
The simplest DIY TV antenna. DIY indoor antenna
It is possible and quite easy to make a simple antenna for a TV using improvised materials. On the Internet you can find many interesting instructions that will help you make a variety of DIY TV antenna options. There are many options for making television antennas with your own hands.
The most popular type of antenna, which is made by craftsmen from the common people, is definitely considered to be a homemade TV antenna made from beer cans. It is easy to do, there is no need to look for hard-to-find materials, and very little time is spent on the entire manufacturing procedure. An ideal option for a homemade antenna, given the fact that there will be more channels and the picture quality will be an order of magnitude higher.
The simplest option can definitely be called an indoor TV antenna, for the manufacture of which you only need wire. Of course, the number of channels that can be viewed when connected will be very limited, and the picture is unlikely to be very pleasing, but these inconveniences are compensated by other circumstances: extreme ease of manufacture, minimal time consumption and the use of a minimal amount of materials. However, the number of channels and the quality of the pictures can be adjusted by attaching the second end of the wire to clotheslines, which will help catch more channels.
There are other DIY options, but they cannot be called popular. Some require more complex manufacturing procedures. In other cases, you may come across extremely negative reviews from people who have tried to make them. So it’s better not to waste time describing their production. You won't find anything useful in this. Some instructions for constructing satellite dishes at home are simply not true.
Amplifier selection criteria
You can choose a suitable antenna amplifier for your car radio by taking into account various recommendations. They are as follows:
- To begin with, pay attention to the fact that the device must be located in close proximity to the antenna.
- The operating band must cover the required frequency range. Due to this, you will be able to listen to all available radio stations.
- The amplitude-frequency response should be as uniform as possible.
- The gain is selected in the range of 15-25 dB.
- Stability of operation must be ensured when the supply voltage varies.
- The dynamic range is selected taking into account the need to protect the device from overload.
- The noise figure is much less than the signal-to-noise ratio.
- It is recommended to give preference to devices from popular brands. They last much longer and have more attractive properties.
The FM frequency, when installed with a suitable amplifier, will be virtually interference-free. However, in some cases there is a possibility that such an element will cause noise at a high signal level.
Read more: Car removal for scrap metal without documents
DIY antenna for digital TV made from cable. Antenna for digital TV from cable
Homemade simple antenna for digital TV from a cable: photo of step-by-step making of a homemade product.
To receive digital television channels, you can make a simple homemade antenna from a coaxial cable; you will spend a maximum of five minutes on manufacturing; the homemade antenna receives television channels no worse than industrial analogues.
Antenna manufacturing
To make a homemade product, you will need about half a meter of coaxial cable.
We retreat 5 cm from the edge of the cable and remove the top insulation.
Then remove the insulation from the central core of the cable.
Now we all twist the central core and braid together.
Then, we step back from the edge with the insulation removed 22 cm and cut out a piece of insulation 2 cm long, we also cut off the shielded braid with foil, but do not touch the insulation of the central core.
From the end of the cut we measure another 22 cm and make a cut 1 cm wide and remove the top insulation, but there is no need to remove the cable screen.
Next, we take the end of the cable from which we started, wrap it very tightly to the braid of the last cut, and make a circle from the cable.
The antenna is ready to receive digital TV; we connect it to a digital set-top box or directly to the TV if it has a built-in digital tuner. Then we point the antenna at the nearest television tower, experimentally, by rotating the antenna.
It is recommended to place the antenna outside a window, since the walls of the house partially dampen the high-frequency signal.
Alternatively, you can make a circle out of plastic or plywood and attach a loop to it.
Setting up digital channels on the TV.
Do-it-yourself meter range TV antenna. Balancing antennas
Balancing devices prevent radio frequency currents from entering the outer area of the outer conductor (braid) of the coaxial wire. It is impossible to connect without such a device, as this leads to curvature of the antenna radiation pattern and a decrease in reception noise immunity. When the input impedance of the antenna differs from the characteristic impedance of the wire, then such a device is also used as a matching device.
It is not difficult to make a matching device for an antenna yourself. Usually a quarter-wave bridge or a wave U-elbow is used. The bridge is a two-wire short-circuited line with a length of Lcp/4, connected to the vibrator terminals. The bridge consists of two tubes, an insulator and a short-circuited shunt. A cable is passed through one of the tubes (for example, the left one). The outer conductor (braid) is connected to the left tube of the vibrator and the left tube of the bridge, the central contact is connected to the right tube of the vibrator.
The wave bend is made of cable and consists of two sections with a characteristic impedance of 75 Ohms, respectively, lengths Lc/4 and Lc/3, where Lc is the average wavelength in the cable. There is no need to maintain a certain distance between cables. The operating frequency band is 12–15 percent.
And a wire-wire transformer can also be used. It transforms the antenna's input impedance to an impedance of 73 ohms. Two pairs of transformer coils are wound alternately on two frames with a diameter of 5–7 mm. The winding is continuous, in two wires. The gap between the frames is 15-20 mm. Installation is carried out on a metal board, to the ends of which the feeder braid and the ends of the windings are soldered.