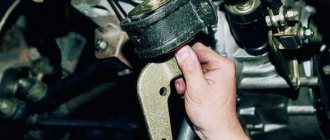
, you don’t need to have great qualifications for this. The only thing that is required is a subsequent check of the wheel alignment angles; for this you will have to visit a specialized service.
Technical features
Replacing the boot and steering rack seal is not such a rare job. This is due to the design features of this steering part. Before we deal with the replacement, let's determine where the oil seal and boot are located, and what affects its serviceability.
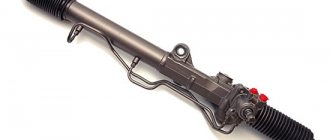
The steering rack consists of 2 main parts; in fact, there are much more elements, but we are only interested in the rack body and its shaft. The main working element is the rack shaft. It is he who transmits the forces to the steering knuckles of the wheels. The purpose of the steering rack housing is to protect the shaft, and also on models with hydraulic booster, it is a working container for hydraulic oil. To ensure the tightness of the housing, seals are installed at the ends. They allow the shaft to move freely. They also protect the inside of the case from dirt getting there and prevent lubricant from leaking out. The boot is put on the end of the rack and covers the oil seal from mechanical influences.
Steering rack design - what do you need to know?
The steering rack is connected to the wheels of the car using ball ends. The characteristics of the steering rack are directly affected by the type of control - hydraulic and mechanical. The mechanical type is often found on domestic cars, as well as on some older foreign cars. Hydraulic is mainly found only in the design of imported cars.
All car parts are subject to wear and tear. But most of all this applies to the steering rack mechanism. It is its mechanism that takes all the blows and impacts into deep holes that arise due to uneven roads. No matter how careful a driver you are, a breakdown will happen sooner or later.
To determine whether the steering rack is broken and whether it needs to be repaired, you need to make sure that the rest of the vehicle's chassis is in good condition. This can be done at any specialized car service center. When identifying certain causes of breakdowns in the chassis of the car, it is best to eliminate them on the spot, without putting it off until tomorrow.
The main signs of a breakdown or malfunction in the steering rack should be learned like twice two - this knowledge will save you from many troubles. So, problems in the rack are often caused by a significant increase in effort when turning the steering wheel. For hydraulic cars, you need to constantly monitor the fluid level and, if necessary, add the missing fluid.
Symptoms of a problem
The condition of the oil seals is especially important on models with power steering. It uses fairly liquid oil, which, if the oil seal is damaged, will begin to leak out quite quickly. As a consequence of this problem, you will get a “heavier” steering wheel, as well as accelerated wear of the rack parts. You can determine a leak by simply placing the car on clean asphalt for a while. After a couple of hours, you will see oil streaks under the steering rack; if it is not possible to test on asphalt, then place cardboard under the car.
In the case
of an electromechanical amplifier
or a car without an amplifier, damage to the oil seal does not lead to a sharp deterioration in controllability. But, in the long term, dirt that gets inside the case will lead to failure. And here the diagnosis is somewhat more complicated. The fact is that a lithol type lubricant is packed into the housing; it is thick enough and no leaks occur. Therefore, the only way to identify the problem is a visual inspection. Experienced mechanics recommend inspecting the rack once every 3 months; this is enough to promptly identify and eliminate the malfunction. You should also check if knocking occurs in the rack when taking gentle turns.
The anthers do not have any obvious signs of malfunction. They just cover the main parts from dust and dirt. Their malfunction can only be determined by inspection. Anthers should be replaced in case of obvious defects, cracks, or tears. Replacements are always made on both sides, this will avoid repeating the work in the near future.
Types of oil seals according to installation location
Consumables for the steering rack include DIS class spare parts. Depending on the installation location, there are two types of oil seals:
- Upper;
- Lower.
The service life of the product depends on several factors:
- Driver's driving style;
- Terms of Use;
- Frequency of car use;
- Is routine maintenance carried out in a timely manner?
If the seal of a rubber part is damaged, cracks or other material defects appear, it must be replaced immediately. You can select new products for repair at https://steering-shop.com/katalog/salnik-rulevoy-reyki.html. The store's catalog offers a wide selection of quality products from well-known domestic and foreign manufacturers at the best prices. Orders are delivered by regular mail or courier services to all regions of the country.
Replacement
Let's figure out how to carry out the work of replacing these structural elements.
Here we will look at repairing a rack with power steering; this option is more complicated, but in general, the process is similar to replacing oil seals on a simple rack without an amplifier. There may also be differences among different car models. But, they mainly relate to removing the rack from the car, as well as the sizes of some parts. Otherwise, all stages will be identical. The first step in replacing the oil seal is draining the liquid.
from the hydraulic booster. To work, you will need a large syringe; it can be used to pump out liquid from the amplifier reservoir. After this, loosen the clamp that secures the hose to the tank. Gently pull off the hose and lower it down. Be sure to place some container under it. It is advisable to place it below the rack so that the liquid can be drained completely. After the final drainage, you need to unscrew the hose from the return line and make sure that the liquid is completely drained.
The next step is to unscrew the rack from the body. Each car will have its own characteristics, so check the owner's manual for your model. Before work, be sure to lubricate all threaded connections with liquid wrench. This will avoid problems during disassembly. It is also important to do everything carefully; the steering rack does not like rough handling. Before removing it, disconnect all hoses (this is not required on a regular rail). On almost all models, it is easiest to remove the rack together with the steering rods.
After removing the rack, you can proceed to replacing the seals. To begin with, the rods are unscrewed. note
Based on their location, it is recommended to place them exactly as they were before. The boot is removed. Next, you can proceed to replacing the oil seal. The complexity of this work differs depending on whether the seal is right or left.
The easiest way is to replace the right oil seal (on right-hand drive cars - the left one). To do this, simply remove the bushing; it is usually secured with a retaining ring. After this, the oil seal is removed. All that remains is to press in a new one, this is done using a tube of suitable size. Afterwards all that remains is to put the bushing in place.
It is much more difficult to change the left oil seal; this will require complete disassembly of the rack. To remove the oil seal, you will need to take a pipe of suitable diameter. It is used as a drift, knocking the oil seal out. After this, a new oil seal is installed and the rail is assembled.
Pay attention to the selection of replacement parts. It is recommended to install an oil seal with the same marking. Even on the same model, different oil seals can be installed; an error in selection will lead to repeated leakage. Since the part will not hold the pressure created by the power steering pump.
Conclusion
. The performance of the steering directly affects traffic safety. Therefore, replacement of the steering rack boot and oil seal must be done in a timely manner. The work is not too difficult, even a novice car enthusiast can handle it. At the same time, timely elimination of oil seal leaks can significantly extend the service life of the steering rack.
How and when to change bushings, boots and oil seals - steering rack bulkhead with repair kit
The content of the article:
Hello, dear car enthusiasts! Of course, it’s not a fact that you are very eager to rebuild the steering rack with your own hands. But, once you are convinced that replacing oil seals, bushings and steering rack boots using a repair kit is not such a difficult undertaking, you may decide to save on car service services.
The steering rack mechanism has the peculiarity that moving elements come out of its body: the steering column shaft, the rack itself. In order to protect these parts from the influence of the external environment, steering rack oil seals, boots and bushings are used.
These protective devices ensure the tightness of the steering column housing against the entry of dirt and abrasive dust particles into the moving and rubbing surfaces of the steering mechanism parts.
In addition, the steering rack bushing and oil seals prevent the leakage of working lubricant from the steering column housing, which helps reduce friction between the rubbing surfaces of the mechanism parts.
Replacing the oil seal, bushing and boot of the steering rack - preparation for repair
Steering rack seals
We will assume that the steering rack mechanism has already been dismantled and removed from the engine compartment. Before you start disassembling the steering rack, you need to buy a repair kit for repairing the steering mechanism at an auto parts store.
A typical steering rack repair kit includes:
- rack seals,
- clamps,
- fluoroplastic and rubber rings on the rail,
- four fluoroplastic shaft rings,
- sealing ring on the plastic bushing,
- internal oil seal on the shaft,
- outer oil seal and steering rack boot.
Of course, we will need a set of tools that will be used to disassemble and reassemble the steering column.
Technology for replacing sealing elements in the steering column
After removing the rack, it must be cleaned of dirt and oil drips, which is important to prevent contamination from entering the disassembled mechanism. And, after that, we proceed directly to replacing the sealing and protective elements of the steering rack.
- Remove the corrugated boots and unscrew the steering rods. Using a special socket wrench (or one made from a piece of suitable tubing), loosen the adjusting nut. Using a screwdriver, remove the boot from the shaft and remove the retaining ring. Use a punch or a screwdriver to knock out the plug, unscrew the shaft nut and knock out the shaft using a soft drift, noting its position in relation to the rack. Remove the oil seal, fluoroplastic rings and plastic bushing from the shaft.
- If defects are detected on the surface, the steering rack boot and other sealing elements are replaced.
- Remove the inner seal. If the bearing has significant play, it is replaced with a new one.
- Let's move on to dismantling the rack. Having turned the caprolan end bushing, unscrew the retaining ring through the existing oval hole, after which you can remove the rack along with the bushing and oil seal.
- Remove the bushing, oil seal, fluoroplastic and rubber rings. Remove the support plastic sleeve and the internal oil seal.
- Troubleshooting and assembly. Wash all parts of the mechanism thoroughly with engine cleaning fluid, for example. Inspect all working surfaces of parts in order to identify defects. The steering rack bushing may need to be replaced. Replace worn or damaged parts that cannot be repaired with new ones. In this case, the steering rack oil seal is replaced.
- Place the oil seal in its place inside the rack body and install the internal support sleeve. Press in the sealing gland using a socket of similar diameter. Replace the fluoroplastic and rubber rings on the rail, and replace the rubber ring on the plastic bushing. Everything needs to be lubricated and put in place.
- Install the internal shaft seal into the rack housing. Place four fluoroplastic rings on the shaft and lubricate with oil. Turn the shaft to the desired angle and place it in place by gently tapping it with a hammer. Tighten the shaft nut, apply grease and install the plug. Put the plastic shaft sleeve in place, press in the oil seal, and insert the retaining ring. Place the boot on the shaft and press it into place. Screw the steering rods, fixing them with a core and put on the corrugated boots.
The rack assembly is complete - it is ready for installation on the car. Thus, the sealing elements of the steering rack have been replaced, which will allow you to not worry about the steering rack for a long time and operate it without failure.
How to change the steering oil seal with your own hands
Many will say that it is best to entrust the repair of racks to professionals - they know exactly how to service these rather complex mechanisms, and have the necessary specific tools and devices for this. Also, the service station often has the necessary consumables and spare parts - repair kits and seals suitable for a specific car model.
But in the absence of the opportunity to visit a service station, if the replacement is carried out independently, it is very important to know in advance the size of the steering rack oil seal in order to purchase a part that will fit the specific element without any problems. If the gaps do not match, the leak will not stop, and may even get worse.
Step-by-step instructions for replacing the steering rack on a Honda CR–V
So, let us now move on to the most step-by-step instructions for replacing the steering rack on a Honda CR - V and for this:
- Raise the front of the car and remove the front wheels.
- We remove the fluid from the power steering, disconnect the return hose from the reservoir, extend it into a bottle, and pump it out a little from the reservoir with a syringe. Remove the hose into the bottle and start the car, turn the steering wheel right to left a couple of times until it stops flowing, the fluid stops flowing - immediately turn it off, the hose goes back to the reservoir.
- We unscrew the tie rods from the tie rod ends.
- In the cabin, we remove the steering joint cover, it is under the trim and is all closed, I just carefully cut out this place and the entire cover is on three nuts, lift it up.
- We unscrew the two bolts of the steering cardan and lifting its top along the steering shaft and remove it to the side for cleaning and inspection.
- We climb under the car, remove the tin that covers the rack, disconnect the exhaust pipe and the catalyst, and leave it hanging.
- We unscrew the inlet and return pipes from the gearbox; they are very difficult to unscrew; you need special keys (I have a professional auto repair kit from FIT (Canada, I think) the thing can’t be done without it).
- We unscrew the rack itself from the body and drop it onto the cardan, unscrew all the tubes that are on it, also preferably with special keys.
- We again attach the rack to the body and from under the hood remove the rack valve block itself with the rod - it will not allow you to pull out the rack without removing the cardan and automatic transmission gearbox.
- We removed the valve block and easily pull out the rack to the right along with the rods.
- We reassemble the rail and wash it thoroughly, I washed it with a solution of water and washing powder and added a little gasoline, it washed very well.
- We remove the valve block again, unscrew the lock nut and take out the oil seal, then the rack itself
- We use a suitable pipe to knock out the distant oil seal with a washer through a cloth.
- I wash everything inside with gasoline, dry it and lubricate it with PSF and install the washer, seals and rack, I replaced the lock nut with a new one, because there was no slight play.
- We disassemble the valve block, it is necessary to replace the upper oil seal, the upper bearing and the lower oil seal; it is better not to touch the rest, do not repeat my mistakes - since I had a complete repair kit, I decided to replace all the plastic seals; they are easy to remove, but new ones are difficult to install, the plastic does not stretch , and when stretched it does not compress back. I heated them with a hairdryer and in boiling water, I thought they would become softer, nothing. As a result, during reassembly, one of my rings bit and broke, I had to disassemble everything again and in the end I slightly bent the new upper oil seal, but I also installed it since there was no other one and I would have to wait another 12 days. So if these seals look normal, it’s better not to touch them.
- We assemble the rack, fasten the rods with covers; if the surface of the rack is not smooth and there is corrosion due to the anthers not being changed at the right time, it needs to be changed.
- We assembled the river without a valve block, cover everything with rags so that no dirt gets in during installation, and also put it on the right side of the car and screw it on.
- Again we place the valve block on top from under the hood; all holes for the pipes must be covered with rags.
- We climb into the hole, unscrew the rail and install two tubes, first the lower one and then the upper one (along the fasteners to the valve block)
- We attach the rail to the body and screw the inlet tube and return hose.
- We put in place the tin covering the rack, connect the muffler, put the steering cardan in place and the steering joint cover in the cabin.
- We screw the rods to the ends.
- We fill the reservoir with fresh power steering oil, once at idle I put a little into the bottle, the oil came out still dirty.
- Then he filled in fresh oil, started the car and shook the steering wheel left and right until it stops several times to remove air.
- We put on the wheels.
