Brief history of the VAZ 2112 car
Since 1999, the AvtoVAZ model range has been replenished with a new model called the VAZ 2112. Replacing its predecessor 2109, it continued the series of hatchbacks, but was able to boast more sensitive controls , which can even be described as sporty.
The VAZ 2112 is equipped with a 5-speed manual transmission, operates on a front-wheel drive system and has the ability to install one of several engines. The standard configuration** uses a 1.5 liter version with 16 valves**, distributed injection and a maximum power of 93 hp. Among the modifications you can find both more budget options and a more serious alternative.
In 2008, the model was removed from production. Unlike other AvtoVAZ cars, it was never transferred to other factories.
What does the VAZ 2112 car engine consist of?
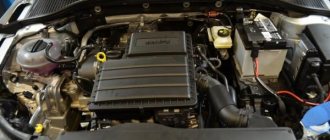
Engine 2112 stands on four supports. The right and left supports are the same as on the VAZ 2110 and 2111, and the front and rear supports are presented in the form of a rod, with rubber-metal cushions. One end of the rod is attached to the brackets on the engine, the other is attached to the brackets on the car body.
When removing the engine, unscrew the bolts securing the rods to the body brackets. Engine repairs must be done by disconnecting the suspension rods from the brackets on the engine.
To remove the accelerator drive cable, remove the receiver screen. Then remove the ignition system wiring harness from the power unit, removing them from all sensors on the engine, from the ignition module and the injector wiring harness, and install the receiver screen back.
The repair will be associated with the replacement of valve lifters on the 16-valve VAZ-2110-2111-2112 engine
Removing the intermediate pipe
We carry out the work on an inspection ditch or on a lift.
Using a screwdriver, bend the edges of the locking plates (two of them are parts of the heat shield) on the three nuts securing the intermediate pipe flange to the collector flange.
Using a 13mm socket, unscrew the nuts securing the intermediate pipe.
Remove the locking plate from the front nut stud
Removing the heat shield
Using a 13mm wrench, unscrew the two bolts securing the intermediate pipe flange to the additional muffler pipe flange.
We take out the bolts with springs and remove the intermediate pipe.
Removing the intermediate pipe gasket
A metal-graphite O-ring is installed at the rear end of the intermediate pipe. Install the removed parts in reverse order
What is a major overhaul and why is it needed?
Overhauling a VAZ engine is quite a labor-intensive job that requires knowledge of the structure and operating principle of the unit.
This process will take a lot of time. You will have to remove the engine from the car and completely disassemble it. All removed spare parts are checked for suitability for further use and, if necessary, replaced with new ones. Particular attention is paid to the crankshaft: it is restored and brought into perfect condition. The existing systems are also checked: cooling, lubrication, fuel supply, and the crank mechanism is repaired.
During repair work, internal combustion engine parts and components are brought to perfect condition. After assembling the unit, its condition and performance should be identical to a new engine just released from the assembly line. Capital is needed if the engine has fully or partially exhausted its service life, and corresponding signs have appeared indicating this. It is impossible not to pay attention to them. With further use of the car, the engine may completely fail and cannot be restored. There is only one option left - purchasing a new part. Naturally, purchasing spare parts is more expensive than repairing them.
The service life of the engine before overhaul can be extended if you follow simple rules when operating the machine.
- Monitor the oil level and change it regularly.
- Monitor the coolant level to prevent the machine from overheating.
- Fill with high-quality fuel recommended by the manufacturer.
- Operate the machine wisely and avoid overloading.
- Limit the vehicle's idling time to a minimum.
- Avoid extreme driving that requires high speeds. Do not allow the tachometer needle to enter the red zone.
Engines
Manufacturers offered five power units for the model, depending on the modification:
- A modification of the VAZ 21122 was equipped with a 1.5-liter 8-valve engine 2111;
- The 1.5-liter 16-valve engine 21120 was equipped with a modification of the VAZ 21120;
- A modification of the VAZ 21121 was equipped with a 1.6-liter 8-valve engine 21114;
- The 1.6-liter 8-valve engine 21124 was equipped with a modification of the VAZ 21124;
- 1.8-liter 16-valve engine with 100 hp. offered for modification of VAZ 21128.
16-valve engines do not have protection against timing belt breakage. The engines are reliable in operation. The average service life of engines before major overhaul is 150,000 km.
Salon
Convenient adjustment of the rear seatbacks - the backrests fold down to transport large loads. In the normal position of the seats, the volume of the luggage compartment is 334 liters, with the backrests folded - 425 liters.
During operation, the stove breaks down - the fault cannot be repaired; a complete replacement of parts is required.
To repair it yourself, you need to read the step-by-step instructions.
The rear spoiler is a poor decision by the manufacturer. Reduces visibility through the rear window and makes noise in potholes.
This is interesting: What are cylinder misfires, and the reasons for their occurrence
Body
The VAZ 2112 has a hereditary disease of all domestic models - corrosion. The lower part of the doors and the entire tailgate and sills are most prone to rust.
You can fight car corrosion on your own. To do this, you need to treat the body elements with anti-corrosion agents. The repair manual lists recommended products to prevent or remove corrosion.
When opening the trunk, the rear reflector often breaks.
Front side of the engine
The front side of the engine is located near the right mudguard. It has a two-piece plastic cover.
Below it are the drives of the gas distribution mechanism and the electric generator. The timing belt includes: camshaft gears, a coolant pump and 2 rollers, one of which regulates the tension of the timing belt. At the end of the crankshaft there is a timing gear, a generator pulley and an oil pump. These components are driven by its rotation.
Signs and causes
It is worth mentioning that the signs listed below may not directly indicate the need for major repairs, but only indicate a malfunction of individual components and mechanisms of the vehicle. But if several of the described facts appeared at the same time, and the mileage since the last repair is significant, then, most likely, they will indicate the need for a major overhaul. So, these include:
- knocking in the crank mechanism;
- decrease in engine oil level and/or pressure;
- increased oil consumption;
- dark blue or purple gas comes out of the car's exhaust pipe;
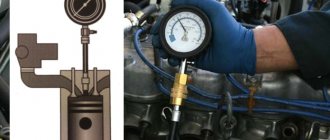
- The compression has dropped significantly (to measure it, you need to use special equipment at home or at a service station).
Now let’s look at what may cause the need for major repairs, that is, the reasons for this:
- contamination and/or aging of the oil in the engine crankcase, coking of the latter (in some cases it is possible to use low-quality oil, simply put, counterfeits);
- complete or partial failure of plain bearings in the crank mechanism or crankshaft liners;
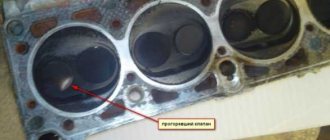
- compression can drop for several reasons - wear of the piston rings, burnout of valves or cylinder head gaskets;
- Engine oil consumption can also be caused by various reasons - failure of valve stem seals, clogging of oil scraper rings with burnt oil, and so on.
Usually the reasons described above do not appear immediately. They are the result of natural wear and tear of individual engine parts, as well as the fact that the car owner did not carry out routine maintenance on time to restore the components and systems of the car. Therefore, in order to delay major repairs, you must follow a few simple rules:
- monitor the level and condition of the oil in the engine crankcase;
- avoid significant overheating of the engine (do not drive at high speeds and ensure that the cooling system is working properly);
- fill with high-quality fuel;
- do not overload the engine for a long time;
- do not allow the engine to idle for long periods of time;
- try to avoid dynamic driving with sudden acceleration and braking.
These seemingly elementary rules, unfortunately, are neglected by many car enthusiasts. And this leads to very sad consequences for the car, and significant financial costs for their owners.
Where to start repairing a VAZ 2112 car engine
Engine repairs on a VAZ-2112 should be done if one or more hydraulic pushers fail. We remove the plastic cover and the receiver. Cover the intake manifold holes with something to prevent anything from getting into it. We remove, if present, the ignition module.
In later models, ignition coils are placed in spark plug wells in the head of the power unit, a similar replacement for the ignition module. If there is an ignition module, remove it by removing the frame on which it is installed using a 10 mm socket. Remove the crankcase ventilation hose from the cylinder head cover pipe. Using a 10mm socket, remove the bolt that secures the injector wiring harness.
Work order
We put the car in the repair bay. We clean the engine using a sprayer and washing liquid. We carry out work to replace the VAZ-21124 engine gasket:
- We remove the protective covers, disconnect the pipelines and equipment power cables.
- Disconnect the battery, drain the antifreeze and oil.
- We fix the 1st piston of the engine at TDC (top dead center).
- Remove the air filter.
- We remove the valve system protection cover by disconnecting the supply systems and unscrewing the fastening nuts.
- Disconnect the exhaust gas system.
- Remove the internal manifold spacers. We disconnect the temperature sensors, oil pressure, injectors, and current supply wires from the spark plugs.
- Remove the timing belt. The timing parts have several marks that serve to tune and adjust the VAZ-21124 engine: on the timing pulley the crankshaft TDC mark is mark A, on the oil pump cover there is control mark B, on the rear protective cover of the toothed belt there are control marks C and F, on on the exhaust camshaft pulley - mark D, on the intake camshaft pulley - mark E.
- To do this, carefully remove the camshaft gear, fix the shaft and unscrew the fastening bolt. All actions are carried out with care so as not to lose the key.
- Remove the thermostat and pipes and disconnect them from the system.
- Loosen and unscrew the block head bolts. We remove the block head and remove the damaged gasket.
- We install a new gasket, having first removed the oil with a rag. The procedure for installing and tightening the bolts should be carried out taking into account the following sequence: the first operation is carried out with a force of 20 Nm, the second - with a force of 65.4 - 85.7 Nm, the third - tightening is carried out by 90 *, the fourth - tightening by 90 *. The bolt tightening order should be done in the following sequence - top row (8, 6, 2, 5, 10), bottom row (7, 3, 1, 4, 9).
- We check the position of the crankshaft and camshaft, which should be at TDC (the valves should be closed). Install the head on the cylinder block.
- We carry out reverse operations on the installation of attachments, connecting hoses and electrical cables.
- We mount the exhaust and intake camshaft pulleys.
- We adjust the tension of the timing belt and generator. Check the condition of the tension rollers. To tension the belt, we use the tension roller (located under the exhaust camshaft pulley) by installing it in the desired position and tightening it to ensure the necessary belt tension.
- We install the valve cover and timing belt protection. We check all connections of power supply systems and electrical wiring. To seal individual components, we use Loctite-574 sealant, which, after application to the surface, hardens within one hour.
Cost of major repairs
One of the main questions that worries car owners is how much it will cost to perform a major engine overhaul. Here are approximate figures as of winter 2017/2018. For a VAZ car model from 2101 to 2112, depending on the amount of work performed, the amount will be approximately equal to 27 to 38 thousand rubles.
It will cost separately to diagnose the engine and ECU for errors with an electronic scanner, and if they are detected, appropriate corrections or simply reset. It also costs some money to measure engine compression. As for foreign cars, it all depends on the make and model of the car. However, the indicated price will need to be multiplied by at least one and a half times.
2.39. Replacing earbuds
Main bearing clearance measurement
Installation of crankshaft thrust bearings
1. THRUST BELS OF MIDDLE MAIN BEARING 2. WOODEN BAR
Measuring crankshaft axial clearance
Measuring the side clearances of connecting rods
Depending on the technical condition of the crankshaft journals, the bearings can be replaced either without dismantling the engine or after removing the engine from the vehicle. If the engine is removed from the vehicle, the bearings should be replaced in accordance with the instructions below and taking into account the characteristics of the specific engine type. Before replacing, you need to check the condition of the main bearings. With the engine removed from the vehicle and inverted, the crankshaft rests on the upper supports. Measure the clearances in the main bearings between the lower bearings and the shaft journals. If the clearances are determined on the engine without removing it from the vehicle, it is necessary to lift the crankshaft upward to select the clearances between the shaft and the upper main bearings, and measure the clearances between the journals and the lower bearings.
Replacing bearings with dismantling the crankshaft
Replacing bearings without dismantling the crankshaft
If defects in the liners are detected, in addition to normal operational wear, it is necessary to carefully inspect the mating parts: crankshaft, main bearing, bearing cap, connecting rod.
In order to correctly determine the size of the bearings, you need to carefully measure the clearances in the bearings. You can use any of the measurement methods described below. However, method A is preferable because it provides more reliable results. Warning
In Method A, measurements are used to calculate the gap. Method B involves direct measurement of the gap. In addition, method B is different in that it does not allow determining the bearing runout.
It is not allowed to install shells of different nominal sizes in one main bearing.
Conclusion
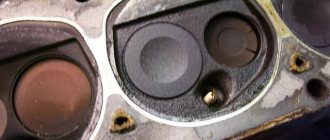
Thus, a major overhaul of the cylinder head of the 16-valve VAZ 2112 engine is being carried out. This process at a car service center will take 1-2 days, but in his garage a car enthusiast can spend much more time, since the lack of tools will affect him. Thus, it is recommended to carry out cylinder head repairs at car repair shops, where everything will be done much faster and with better quality. Of course, this will hit your pocket, since high-quality and major repairs of this part will cost on average about 7,000-10,000 rubles. along with spare parts.
Sources
- https://etlib.ru/auto/vaz-60/211021112112-2009
- https://vsepoedem.com/story/remont-dvigatelya-vaz-2112
- https://remontautomobilya.ru/kak-sdelat-kapremont-dvigatelya-avto-svoimi-rukami.html
- https://bezsto.ru/vaz/2112/
- https://ladamaster.com/kapitalnyi-remont-dvigatelya-vaz
- https://carfrance.ru/vse-shagi-po-remontu-gbc-na-vaz-2112-s-16-yu-klapanami/
- https://prometey96.ru/lada-remont/gbc-2112.html
[collapse]
