How to change steering tips on a VAZ 2109
There is absolutely nothing pleasant about breaking tie rod ends. Therefore, if such a malfunction is detected, it is necessary to take immediate action to eliminate it.
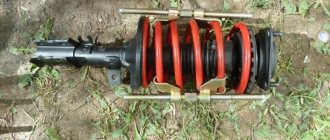
Appearance of elements
It is important to note that the tie rod ends of the VAZ 2109 are in many ways similar to the designs of other representatives of the AvtoVAZ model range. But if we compare, for example, with the VAZ 2110, where the tip is screwed onto the rod, then the VAZ 2109 has the opposite - the tip is screwed into the rod, that is, it has an internal thread.
Symptoms of a problem
Having discovered the primary signs of a breakdown of the steering link ends, you will be able to finally decide for yourself whether to hesitate any longer is dangerous for you and surrounding road users.
Signs of a malfunction of this unit include:
- When turning the steering wheel, the play increases noticeably;
- There is a constant knocking noise coming from the front of the car;
- The car handles quite poorly on the road, even if it is perfectly level;
- The anthers of the rods are torn. This leads to an even greater rate of wear of the element.
Condition assessment
Signs of malfunction of VAZ-2109 steering tips
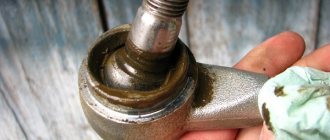
It is the steering tips that most often wear out on a car. To check them, you need to use an overpass, a lift or an inspection pit. It is not very convenient to work by lifting the front part of the car on jacks, since there is not enough space. Carefully inspect the anthers of the steering tips. If they have cracks, it is advisable to carry out repairs immediately. It is unknown how old these cracks are. And in just a few hours, quite a large amount of dust and dirt can penetrate through one.
This will cause the ball joint to wear out more. Even washing followed by applying fresh lubricant and replacing the boot may not save the situation. Check the amount of play in each rod end. It should not exceed one and a half millimeters. If more, then the tie rod ends need to be replaced. Also a sign of wear is the presence of extraneous sounds from the steering.
Causes
There are three main reasons that lead to the need for such an event as replacing tie rod ends.
Cause
Peculiarities
Time spares no one, therefore, as the operating life, diluted by far from ideal road conditions, ends, the tip wears out. It rotates constantly, and wear and tear on rotating, moving elements is completely natural. Therefore, when you know that the service life of your old tips is coming to an end, we recommend that you monitor them more closely. They can refuse at any time
Just like in the case of a ball joint, the tie rod ends of domestic nines are enclosed in a protective boot. During operation, this protective casing often breaks, which sometimes leads to quite sad consequences. For example, if dirt, dust, or debris gets inside the boot, this will cause even faster wear of the parts. Therefore, the tips will definitely not last their entire lifespan.
Insufficient amount of lubricant
What does friction lead to when there is no lubrication? That's right, no good. Therefore, if the tips had a small amount of lubricant, very soon it will be used up and will no longer be able to perform its functions. As a result, the steering system elements wear out and require urgent replacement.
Whatever one may say, under any circumstances, replacing tie rod end switches is a matter of time. To extend this time between replacements, purchase only quality products.
Consequences of untimely replacement
Now that all the main processes have been considered, it is also necessary to talk about the issue of the consequences of untimely replacement of the steering tip, as well as the consequences that this can lead to:
- The worst consequence is a traffic accident. As a result, damage can be caused not only to the car, but also to human life and health. This can happen due to the tip pin breaking off. In this case, the car will be uncontrollable. And this is precisely what will lead to a collision with another vehicle, or driving into a ditch.
- Increased wear. In this case, not only the tires will wear out, but also the shock absorber will require replacement. And the most annoying thing is that wear will also affect the second, opposite tip, since the load will not be distributed evenly. This may result in additional costs.
Checking status
To make sure that all the signs mentioned are caused by the tips, this fact should be checked.
So, let's check if the tips are really to blame. For this:
- Drive the car onto an overpass or place it in a viewing hole;
- Apply the handbrake and install chocks under the wheels. Security measures have not yet been canceled;
- Go under the car and grab the steering rod with your hands. It needs to be pulled up and down with quite impressive force;
- If the element is really worn out, this can be determined with the naked eye, since the play in the hinge will be significant;
- Do not forget to carry out the same operation with the second steering rod end.
When changing rod ends, purchase a pair at once. Leaving one new and one old element in the work is a big mistake that can lead to the most unpredictable consequences.
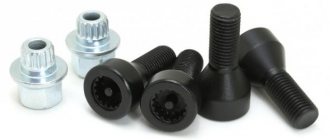
Nuts - they're everywhere
Replacement
Well, now let's proceed directly to the replacement procedure. The work cannot be called difficult, but without a certain set of tools you will not be able to achieve the desired result.
When there is no special puller
Therefore, you should have:
- Reliable jack;
- Balloon wrench;
- Pliers;
- Socket wrenches or open-end wrenches (the first option is better);
- Puller for tie rod ends;
- The Almighty WD40 Rust Remover;
- Hammer;
- Brush for working on metal.
Replacement process
Is everything ready? Begin.
- Place the car on an overpass or inspection hole, install anti-roll bars under the wheels, engage the handbrake and gear. Safety comes first.
- Using a wheel wrench or a suitable socket with a long wrench, unscrew the wheel bolts, but do not completely unscrew them.
- Properly position the jack and lift the vehicle, lifting the wheels off the ground. To increase reliability and stability, it is better to place something like bricks, a stump or other similar support under the car. Having one jack is not enough; it is very dangerous.
- Now you can completely unscrew the bolts and remove the wheels.
- Turn the steering wheel to the side all the way, which will provide you with fairly comfortable access to the place of work.
- Using a metal brush, clean the threads of the tip, and then be sure to treat the area with a rust killer - WD40. Both threads should be processed - the thread where the tip is screwed into the rod and the thread on the finger.
- Wait a while for the product to react. After this, take pliers or pliers, with which you need to unpin the tie rod end connection.
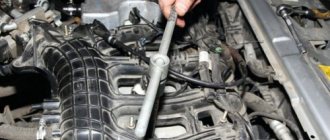
- Using a spanner wrench, unscrew the fastening nuts of the damaged, failed tip. If problems arise when unscrewing, the fasteners do not want to come off, treat with a wedge again, wait and try again. Take a larger lever, which will make the task easier.
- After removing the nut, you need to remove the tip pin from the stand. This is where a tie rod end puller will come in handy. You can buy it or borrow it from friends. But many people don’t have such a puller. Therefore, craftsmen found a way out of this situation.
- To remove it you will need a hammer, physical strength and a pry bar.
- Screw the nut onto the tie rod end pin so that the pin does not stick out.
- Use the pry bar to rest against the protrusion of the stand and begin to pry the rod upwards.
- With precise straight blows using a hammer, begin to knock the tip up. The blows are applied at the junction.
- With this artisanal method of dismantling, the most important thing is your accuracy when striking. Hit as accurately as possible so as not to damage other suspension components of your VAZ 2109.
- When the finger is finally removed, you can proceed to further steps.
- Unscrew the lever from the steering rod. But before that, be sure to measure the screw-in distance of the tip. This way you can more accurately install the new element at the toe angles.
- Measuring the distance is often done by eye, relying on marks from the old tip. Apply a mark or simply use a ruler or tape measure.
- Unscrew your damaged end from the rod. Here you can already do everything manually.
Not difficult, but long
In the process of replacing tie rod ends, many people relax after dismantling the old elements. In fact, reassembly is an equally important stage of repair, on which the overall result largely depends.
Replacing steering tips on a VAZ 2110 with your own hands (video), checking for malfunctions
Car breakdown is a common and commonplace situation. It is not so easy to prevent it, even if you carefully monitor all components and assemblies and carry out preventive work on time.
Each car has its own weaknesses. In the case of the VAZ 2110, these include steering tips. If they are not replaced promptly in case of damage, you may face complete destruction of the entire steering mechanism. It’s hardly worth saying what financial losses you will incur.
How do they look
What to choose?
When starting to replace tips, most owners of domestic tens ask themselves questions: which ones are better?
You have two options to choose from.
| Part type | Peculiarities |
| Factory originals | Good quality, full compliance with the design of your car. |
| Imported, manufactured under contract | There are different manufacturers, so the quality may vary. If you find a good contractor, the level of tips they produce may be higher than the factory original. But the cost will be slightly different. |
As you can see, both options have their own characteristics and advantages. So make the choice yourself.
When choosing tips, pay special attention to the quality and integrity of the rubber boot.
When to change
The design of the elements is such that they are located at the ends of the steering rods. Hence the name - tips.
The rods themselves have a fairly impressive service life, so they are changed quite rarely. The same cannot be said about the tips.
If you follow the instructions provided in the instruction manual, then replacement should be performed approximately every 40 thousand kilometers. But still the figure is average. Depending on the situations, operating conditions and the quality of the currently installed elements, repairs may be required later or earlier.
The following factors influence the degree of wear of steering system components:
- Vehicle operating conditions;
- The quality of the tips used;
- Driving style of the car owner;
- Quality of roads, etc.
Signs of breakdown
At the first signs of a malfunction of the limit switches, appropriate measures should be taken to eliminate them.
You can determine that the elements are damaged and no longer perform their job as efficiently as before by the following characteristic signs:
- The car is difficult to control. This is especially noticeable when entering sharp turns;
- On tires, the tread pattern begins to wear unevenly;
- Uncharacteristic sounds are heard from the front of the car. Moreover, they can come from one side or from two simultaneously.
These signs of breakdown may indicate not only faulty steering tips. Therefore, mandatory verification is required.
Rubber boot
Examination
Yes, in order to accurately determine that the limit switches are the culprit for the uncharacteristic behavior of the car, they should be checked. How to do it? Let's get a look.
- Examine the condition of the node visually. To do this, turn the steering wheel all the way to the right. This will allow you to look at the left tip. To visually inspect the right unit, you need to turn the steering wheel all the way to the left.
- Look at the rubber boot. It fits onto the tip. The presence of signs of rupture or cracks clearly indicates that the steering element needs to be replaced.
- If you do not do this, dirt will penetrate through the gaps and cracks in the boot, which will ultimately lead to very rapid wear of the part and can harm other components of your car.
- You can also lift the car with a jack by hanging the wheel in the air. Grasp the tip with your hands and shake it.
- If there is play, then the replacement will have to be performed on both sides simultaneously.
The defect is obvious.
Experts strongly do not recommend changing the tips separately. Even if the second element is intact, it is better to perform a double replacement.
Replacement
Well, the symptoms of the problems and a direct check of the steering mechanism elements showed that it was the tips that were to blame. Therefore you will have to change them.
Is it difficult to do? If you have at least a little experience, you have already had to disassemble the steering system, then there should not be any difficulties. By doing everything yourself, you can save a lot on the cost of service stations.
Dismantling works
To illustrate the replacement example, we advise you to rely not only on the instructions presented in our article, but also on video materials. Detailed video lessons seriously help you master quite complex stages of work.
To work you will need a set of materials and tools. It includes:
- New high quality steering limit switches;
- The almighty WD40. If you don’t have the money to buy it, use plain brake fluid;
- A set of keys;
- Pliers;
- Brush with metal bristles;
- Puller (if you don’t have a puller, replace it with a small crowbar).
Assembling the unit
Everything you need is ready, so you can safely get to work.
- Use a jack to jack up the side of the car where you plan to do the work to replace the tie rod ends.
- Unscrew the mounting bolts from the wheel and remove it.
- Use a wire brush to clean the joint between the tip and the steering knuckle.
- If this area is heavily contaminated, the simple force of a wire brush may not be enough. This is where WD40 comes in handy. We repeat, if it is not there, try washing off the dirt with brake fluid.
- Use pliers to remove the cotter pin. It performs the task of fixing a bolted connection. A kind of fixative.
- Unscrew the fastening nut.
- Now arm yourself with a crowbar and a small hammer. Although if you managed to find a puller, it would be much better.
- Using the selected tool, you need to remove the finger of your tip from the fist of the stand. In this way, the damaged element is removed from the retainer.
- The unit to be replaced should be carefully unscrewed.
- We recommend that you first measure the current distance between the squeegee and the center of the tip. When reinstalling, this information will be extremely useful.
- Now it's time for the new kit, which you purchased in a store or ordered online.
- Insert in place of the old unit, secure with traction.
- Return the hinge pin to its rightful place - into the steering knuckle.
- Next, you should screw the nut back, tighten it properly and secure the cotter pin in the correct place.
- This instruction fully corresponds to the features of replacing the tip on another wheel. Therefore, the manual is the same for the left and right front wheel of your VAZ 2110.
- The last stage of repair will still require you to visit a service station. This is necessary in order to check the wheel alignment. The probability of its violation is too high, so do not be lazy to spend a little time and money. They shouldn't charge you much for the check.
If you do everything correctly and consistently, it will take you about an hour to replace the steering limit switches. Experienced craftsmen can do it even in 30-40 minutes. But in any case, there is no need to rush.
luxvaz.ru
Signs of a malfunction of the VAZ-2109 control unit
Most often, steering ends fail. To check them, you will need to drive the car onto an overpass or into a garage, and also invite an assistant.
- Drive the car into the inspection hole so that you have access to its bottom. You can install the car on a jack and supports, but this option is not very reliable, and it will not be easy to inspect the rods.
- Use a rag to remove deposits from the rods and steering ends and inspect them for damage. Carefully check all connections and fasteners.
- Inspect the boot to identify any cracks.
- Ask an assistant to turn the steering wheel to the right first, and then smoothly continue its movement in the opposite direction. Pay close attention to the displacement of each tip - if there is play, they move along the finger by 1.5 mm or more.
- Check the second side also. All faulty elements of the steering system must be replaced as soon as possible.
The service life of steering tips expires after 40 thousand kilometers. They can last longer on a VAZ-2109 only when driving on perfectly smooth roads. In any case, after passing this mark, it is recommended to replace these spare parts. Repairs should be carried out without waiting for the service life to expire if you notice:
- the wheels do not follow steering commands (check only at low speed);
- feedback to the steering wheel while driving;
- extraneous sounds (knocking, creaking, howling).
VAZ-2109 owners are recommended to periodically diagnose and inspect their car in an inspection pit.
Analogs
Articles of cheap replacement steering tips on Exist
In addition to original spare parts, there are a number of analogues that are recommended for installation and are fully certified. So, in the table below there is a list indicating the names of manufacturers, catalog numbers and prices for steering tips that can be installed on the VAZ-2114.
Manufacturer's name Catalog number Cost in rubles per piece
| Manufacturer's name | Catalog number | Cost in rubles per piece |
| Kager | 43-0283 | 240 |
| Mapco | 19090 | 330 |
| SCT | TS 587 | 400 |
| Weber | SS 2108-4057 | 400 |
| Ocap | 0190737 | 450 |
| Lemforder | 15458 01 | 450 |
| Quinton Hazell | QR 2275 S | 450 |
| Fenox | SP31083C2 | 450 |
| Teknorot | L-302 | 450 |
| Bzak | BA08-3414057 | 480 |
| Master-sport | 154570-PR-PCS-MS | 500 |
| As Metal | 17LD1550 | 500 |
| Lex | L-0302 | 550 |
| N.K. | 5032335 | 550 |
| Starmann | ST-2442 | 550 |
| Delphi | TA1519 | 600 |
| Pekar | 2108-3414057 | 600 |
| Ruville | 917211 | 600 |
| Pilenga | TS-P 1144 | 600 |
| Finwhale | FJ-483 | 600 |
| Hola | S122 | 650 |
| ABS | 230188 | 700 |
| LYNXauto | C4049L | 750 |
| Patron | PS1197L | 750 |
| TRACK | TR70-103 | 850 |
| Moog | LA-ES-0061 | 850 |
| TRW | JTE 232 | 900 |
| EGT | 302046EGT | 900 |
What is needed for replacement
First of all, you will need to purchase the tips themselves. Car enthusiasts and car service specialists recommend buying these parts from one of the brands:
- AvtoVAZ stock production;
- "Track Champion";
- "Belmag".
“Original” auto parts are the most popular, as they have a long service life. Despite their low price, competent mechanics recommend installing stock on the VAZ-2109. However, it is important to purchase parts from trusted places, from authorized dealers. In markets and small shops they can sell you refurbished components that will not last even a month. In addition to the tips, you will need to replace the boots immediately.
Additionally, you will need to purchase a special puller for hinge joints. If it is not there, then there is a risk of damaging the rods. Prepare the usual tools - a set of spanners and pliers.
How is the replacement carried out?
Prepare jacks for both front wheels. It's best to lift both sides rather than just one side at a time so you have more space to work with. Repairs are carried out in accordance with the following instructions:
- Raise the front axle using jacks and secure it firmly. Remove the wheels.
- Remove the cotter pins holding the nuts with pliers.
- Once the nuts have been released, unscrew them with a spanner.
- Difficulty may arise in disconnecting the tip from the rod. Take a 27 wrench and try to unscrew the retaining nut.
- A special puller will help you remove the steering ends from the mounting hole. With its help they are pressed out of their places. Usually there are no problems at this stage.
- As you unscrew the tip, count the number of turns. This will help you make an approximate alignment adjustment so that after repair you can get to the service station without any problems.
- Install the steering tips and boots. When screwing in new spare parts, you need to make the same number of turns as when disassembling.
- Carry out assembly carefully.
But the replacement is not finished yet; after the repair is completed, you need to contact the nearest car service center. Capable of performing computerized wheel alignment adjustments. This is a very important part to complete the control unit repair.
You can try to make this adjustment yourself, but only if you have the most level area possible. Slightly loosen the tie rods and use a telescopic pin to measure the distance between the wheels of the front and rear suspension. You need to adjust the rods so that these values are the same. If you do the adjustment yourself, then be prepared for the fact that the wheel alignment will take a lot of time. It is best not to skimp and go to specialists for this procedure.
Replacing steering parts along with tuning will cost you about 1,500 rubles. Service center specialists will charge approximately twice as much for this work. If you want to save money, but are hesitant to carry out repairs according to the description, watch the video instructions.
VAZ 2109: replacing the steering tip is easy
VAZ 2109 replacement of steering tips
Starting to lose control on your favorite nine? Has the steering wheel become loose, less controllable, or vibrates? Perhaps the time has come to replace the tie rod ends and please your car with fresh parts? This detailed instruction will accurately describe the details of the tip replacement process, as well as the causes of failure, diagnosis of failure and other tips. A training video will help you see the process with your own eyes. So let's get started. The task is to replace steering tips on a VAZ 2109.
- Causes of tip breakage
- Types of steering faults
- Tools for work
- Replacing tips
- Removal
- Installation
- Conclusion
Replacing steering tips on a VAZ 2110: Step-by-step replacement instructions
The steering plays a very important role in ensuring the safety of your car. An “obedient” steering wheel will allow you not only to park effectively, but also to avoid collisions on busy roads, and perhaps even save your life and health. Checking the quality of the steering should become a regular procedure for every car owner. No part of the car has as much influence on the safety of the car as the steering system. In addition to malfunction and wear of the steering rods, excessive play in the steering wheel can also be caused by wear of the steering tips. One of the signs of such wear may be knocking noises that will be heard when the suspended front wheels of your VAZ 2110 swing horizontally.
You can change the steering tips on a VAZ 2110 yourself; for this you will need a specialized removable device and keys of various sizes. Note that the procedure for replacing steering tips is basically the same for the entire “ten” family.
So, in order to change the steering tips on your 10 yourself, you need to hang up and dismantle the front wheels of your car. After this, proceed to dismantling the old tips. Then remove the special wire tie that secures the nut that secures the steering tip. The easiest way to do this is with pliers. Then proceed with dismantling. To do this, unscrew the fixing nut using a wrench with a dimension of “19”.
Using the specialized removal device, remove the tip pin from its mount. However, instead of a puller, you can use a common crowbar by hitting it with a hammer.
In the next step, remove the tip finger from the fist.
After this, unscrew the bolt using a wrench with a dimension of “13”. After dismantling it, you will be able to unscrew the steering tip.
So, quite simply, you can replace the steering rods and their tips on cars of the “tenth” family. The whole procedure will take you no more than an hour. With this, you can change the steering components on both sides of your car. This will significantly improve its handling, and therefore make your ride safer and more comfortable.
filtrzamena.ru
Causes of tip breakage
Steering nozzles are not such a complex mechanism as, for example, an internal combustion engine or gearbox. Therefore, there are not so many reasons for its failure, but now we will list them.
Replacing steering tips for VAZ 2109
- The first is wear and tear over time. The way the tip is designed is that it works constantly rotating. And here it is that people break from such a life, that tips. Constant friction contributes to rapid wear of parts and, as a result, failure of the working condition.
- It is impossible to completely prevent this process. The only way out is to buy high-quality tie rod ends. But, again, sooner or later they still need to be changed.
- The second reason is a torn boot. Like the ball joint, on the VAZ 2109 the tie rod end is equipped with a protective boot. During the operation of the car, it breaks and entails bad consequences. Which? Dust and sand get inside the connection, which increases wear on the parts and leads to faster wear.
- The third reason is insufficient lubrication. As you know, friction without lubrication does not bring anything good. As a result of the lack of sufficient lubricant, the tip fails faster.
conclusions
Replacing the steering tips on a VAZ-2114 car is quite simple, but the process itself can take a lot of time and effort, since the fixing nut will not always be unscrewed easily. If the described process seems complicated to the motorist, then you need to contact a car service center, where they will always help with replacement. Separately, it is worth noting that the chassis parts must be changed on time to avoid the tragic consequences described in the article.
Didn't find the information you are looking for? on our forum.
We recommend reading:
- How to wash the throttle on a VAZ 2114
- VAZ 2109 consumption per 100 km
- Five-speed gearbox VAZ 2109 device
- Installing contactless ignition on a VAZ 2121
- The window regulators on the VAZ 2115 do not work reasons
- How to connect the cigarette lighter to a VAZ 2107, causes of failure, connection diagram, replacement from a VAZ 2114
- VAZ 2107 stalls at idle, carburetor, injector, identify and solve the problem
- Starter torque VAZ 2110
Tools for work
Replacing the tie rod ends of a VAZ 2109, although not a complicated process, is not done with bare hands. Here's what you need to have to successfully complete the tip replacement:
- Jack
- Balonnik
- Pliers
- Spanners (heads); extreme case - open-end wrenches
- Rust cleaner (WD-40 or equivalent)
- Puller for tie rod ends (preferable, but can be done without)
Replacing the steering end of a VAZ 2109 is more convenient with a puller
- Hammer
- Metal brush
Removing steering rods
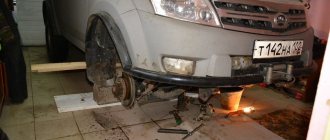
If you need to replace the steering end of a VAZ 2109, you need to drive the car into a pit or overpass. In this case, it is advisable to conduct a complete audit of the condition of the vehicle control system, including the rack that transmits force to the front wheel hubs. In this case, work directly on removing the fastening elements of the steering arms is carried out mainly from the side of the removed VAZ 2109 wheel.
First of all, secure the car in gear and with the parking brake on. Using a wheel wrench, loosen all four wheel-to-hub bolts. Place the jack under the standard place of its support, lift the selected wheel until it lifts off the surface. Secure the jack with a stationary stop to securely fix the car in a raised state. Unscrew the wheel mounting bolts and remove the disc from the hub. Access to the unit will open, and it will be possible to replace the VAZ 2109 tie rod end.
The order of further actions is as follows.
- Unsplit the nut securing the conical surface of the pin in the hub socket. Do not store the cotter pin; it cannot be reused. Unscrew and remove the fastening nut.
- Unlock the nut securing the tip in the rod itself. Please note: the nut is unscrewed clockwise, this unit uses left-hand threads.
- Proceed to remove the pin from the conical socket of the front wheel hub. You will need a special puller. Having placed its groove on the end of the hub, tighten the tip with the bolt and, lightly tapping with a hammer, squeeze it out of the conical socket of the hub.
- Unscrew the tip from the rod. Don't forget about the left-hand thread in this unit. Unscrew this part by rotating it clockwise.
When dismantling, it is recommended to count the number of full revolutions that will need to be performed to disassemble the unit. This will be useful during reassembly.
Replacing tips
Now let's move on directly to the process of replacing tie rod ends on a VAZ 2109 and similar cars.
Removal
We start by removing the tip, which has already served its purpose:
Replacing the tie rod end of a VAZ 2109 using a special puller
- The car should be installed on an inspection hole or overpass.
- We install wheel chocks, put the car in handbrake and gear.
- We take a cylinder head or a suitable head with a longer knob and unscrew the wheel bolts. Do not twist them completely!
- Next, install a stable jack and lift the car so that the wheel comes off the ground. Next, you need to place a stump or something similar under the side of the car.
Remember! Do not work with a car suspended on a jack - it is dangerous for health and life!
- We completely remove the wheel and turn the steering wheel to the side to ensure good access to the workspace.
- Use a metal brush to clean the threads of the tip and spray it with WD-40. Both threads should be cleaned and sprayed - both the thread on the pin and the one that is screwed into the steering rod.
- Next, using pliers (pliers), we uncotter the connection of the steering tip.
- Next, take a spanner and unscrew the nut securing the tip. If it is difficult to unscrew, you need to add WD and apply a larger lever.
- After the nut has been successfully twisted, we begin to remove the tip pin from the shock absorber strut. To do this, we use a special steering tip puller.
- Place the end of the puller behind the shock absorber strut and screw in the pusher until the pin disengages.
Often the average driver does not have such a puller. What to do in this case? There is an exit:
- Without a puller, the tip can be removed as follows. All you need is a hammer, a pry bar and a little effort.
- Screw the nut onto the steering tip pin so that the pin does not stick out.
- Using a pry bar, we rest against the protrusion of the rack and move the steering rod upward.
- Next, with direct blows of a hammer at the joint, we knock the tip up (see photo).
- The most important thing in this process is accuracy. Hit accurately so as not to damage other suspension parts of your favorite car during the repair process.
The finger is out of engagement, and we continue the repair:
- Now you need to unscrew the lever from the steering rod.
- Before doing this, it is important to measure the distance to which the tip was screwed in. This is done to more accurately install the new tip at the wheel alignment angles.
- You can measure the distance by eye, using residual marks on the old tip, putting a mark, or measuring it with a measuring device, if you have one.
- Next, the tip is simply unscrewed from the rod with your own hands.
Installation
VAZ 2109 steering tips must be lubricated
- It is also advisable to put a mark on the new tip indicating how far it will need to be screwed.
- Check the amount of lubricant and add more if necessary.
- We screw the tip into the steering rod until the desired moment.
- We insert the tip pin into the hole in the shock absorber strut.
- We tighten the nut securing the steering tip.
- Install the cotter pin.
- Put the wheel back on and tighten the bolts.
- We lower the car onto its wheels.
That's all - one tip has been changed!
Replacing tie rod ends
After removing the locknut from the old part, replace it with the new one. Screw the nut further along the thread than to its final position in order to be able to accurately observe the number of turns by which the tip will be screwed directly into the rod itself. This should be ensured so that the steering rod ensures that the wheel position after replacing the part is at least approximately corresponding to the previous position.
This is important from the point of view of wheel alignment adjustment. Of course, it is recommended that the final adjustment of the front wheel alignment be performed at a service station. But even in order to get to the station, it is useful to take care of rough preliminary adjustments. It is precisely this rough adjustment that is ensured by counting the number of revolutions when installing the tips of the VAZ 2109.
After installing the tip on the rod, mount it into the conical socket of the hub. Lock the part and secure the assembly with a nut and a new cotter pin. Raise the car on a jack, remove the stationary stop from under it, and attach the wheel rim with bolts.
Lower the car to the surface and finally tighten the wheel bolts.
Replacing steering tips on VAZ 2108, 2109, 21099 cars
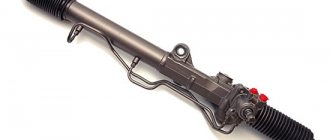
Steering ends (steering rod ends) of VAZ 2108, 21081, 21083, 2109, 21091, 21093, 21099 cars are ball joints consisting of a body, a liner, a liner spring, a pin, and a protective rubber boot (boot).
The tie rod end connects the steering arm on the strut to the inner (long) rod that attaches to the steering rack. Over time, the liners that tighten the movable joints in the tips are destroyed, which leads to an increase in play when the steering wheel rotates and characteristic frequent knocks in the suspension when driving over uneven surfaces. If we identify a failed tie rod end, we replace it with a new one.
Tools needed to replace the tie rod end
- 27 mm open-end wrench , to loosen the locknut of the tip.
- 24 mm open-end wrench , to keep the long rod coupling and the tip from turning.
- 19 mm socket wrench for loosening the nut securing the tie rod end pin.
- Tip puller or mounting spudger for detaching the tip pin from the swing arm on the stand.
- 22 mm spanner for loosening the bolts securing the steering rods to the steering rack.
- Hammer
- Pliers
- We put the car on the handbrake and gear
- We put chocks under the wheels
- We loosen the tightening of the wheel bolts where we are going to change the tip
- Jack up and remove one of the front wheels of the car
- We clean the tie rod end and adjacent parts from contamination.
Replacing tie rod ends
One of the most important components of safe movement is the serviceability of the steering mechanism. This vehicle mechanism consists of various elements, the performance and wear of which affect the comfort and safety of both the driver and his passengers.
Consequently, severe wear of parts is not only undesirable, but completely unacceptable. One of the components of the steering mechanism is the tie rod end , which is the subject of this article. Below we will look at the causes and signs of wear, we will inspect the part and the sequence of actions when replacing it.
Diagnostics allows you to determine when it is necessary to change the tips.
Causes of wear of steering tips
The main cause of wear and tear is the uneven surface of domestic roads. It is because of the pits that the parts are subjected to heavy loads, which reduces their service life. An equally obvious reason may be the driving style of the car.
For example, a sudden change in direction of movement similarly causes steering problems. All this not only applies to the tips, but also extends directly to the rods and steering rack.
Self-diagnosis of steering rods and ends
The easiest way to determine defects in steering mechanisms is to check for play in the steering wheel, or for its free play.
To do this, you need to accelerate the vehicle to 60 km/h on an empty section of the road and start turning the steering wheel to the sides. Before doing this, you should definitely make sure that the maneuvers are safe.
Ideally, the car should instantly respond to the position of the steering wheel; when this happens late, it’s time to think about repairs and replacement of spare parts.
Another fairly simple diagnostic method is to release the steering wheel at low speed, while the car should keep the course strictly straight. If the car pulls to the side, this may be a sign of wear on the steering tips, but this method of checking is not accurate, since even poor wheel balancing or different tire pressures can cause the car to veer off course.
Extraneous sounds coming from the front suspension can also indicate worn parts.
A visual inspection may also help. To do this, you need to twist the steering wheel as much as possible in the opposite direction from the observed wheel to gain access to the tips. Then inspect the part for cracks and rupture of the boot.
For a more in-depth analysis, you will have to use a lift or pit; if this is not possible, it will be enough to lift the car with a jack.
With the car already suspended, you need to check the front wheels for horizontal play; when it is present, this indicates wear of the steering parts. The steering ends will also have vertical play, which can be checked by hand or with a pry bar.
If a defect is detected, the parts will have to be replaced.
Replacing tie rod ends
For example, consider the replacement process on a VAZ car. In general, replacing steering tips for a VAZ 2114 is no different from other models of this manufacturer, and for VAZ 2110, 2112 and other passenger cars it will be similar.
What to eat while working
- jack;
- a set of keys;
- a puller for pressing the tip pin out of the lever; if there is no such thing, a hammer with a pry bar will do, but changing it will be much more difficult;
- calipers;
- copper grease and WD-40.
Tip replacement procedure
First we lift the car, if there is a lift it’s great, if not, then we use a jack. We remove the wheel. For convenience, it is advisable to turn the steering wheel all the way in the opposite direction from the side being serviced.
Next, we clean everything from dirt and dust and take out the cotter pin. Using a 19mm wrench, unscrew the nut securing the tip itself to the swing arm. If the nut cannot be unscrewed, use WD-40.
Now you need a puller to remove the finger from the lever; if there is no such device, then you can use a hammer and a pry bar. True, you will have to work hard, and it is not a fact that everything will work out. Often you have to use a large lever, such as a crowbar.
Now all that remains is to remove the tip itself from the rod. First, use a caliper to measure the distance from the locknut to the edge of the tip. This is necessary so that after replacement the approximate wheel alignment settings are retained.
After this, we proceed to dismantling, first we fix the rod itself with a 24 wrench, and unscrew the lock nut clockwise using a 27 wrench. All that remains is to unscrew the tip itself from the tie rod counterclockwise.
Very important! If you did not use a caliper at first, it is better to count the number of revolutions when removing the part, because in the future this will help maintain approximately the correct angle of wheel adjustment.
Then new parts are installed in reverse order. It is advisable to lubricate all threaded connections with copper grease before installing them.
Replacing the steering tip boot
It often happens that the steering tips themselves are in good condition, but a visual inspection reveals a rupture of the boot. If you leave it in this condition, it will soon become unusable and will have to be replaced.
The sequence of work when replacing the steering tip boot is the same as when completely
the only difference is that after pressing it out of the steering knuckle of the strut, you need to remove the ring securing the boot and replace the damaged one with a new one.
Before this, it is recommended to remove the remaining old grease and fill the new boot with lithol. It is important not to overdo it when doing this, otherwise the new boot may tear from excess lubricant.
Conclusion
As you can see, the process itself is quite simple; if you have the right tools and attention, you can easily change everything yourself. We also recommend that after such repairs, you go to adjust the camber/toe angle.
znanieavto.ru
Replacing the steering tip on a VAZ 2108, VAZ 2109, VAZ 21099
Welcome! Steering ends are the basis of the steering rod, they are made in the form of a hinge that is pressed into the body, this hinge is inserted into the hole in the swing arm of the strut and when you turn the steering wheel, this hinge moves the wheel in the direction you want and thereby turns the car.
Note! To replace the tips, you need to stock up on: A special puller that comes specifically for ball joints, as well as all the keys that you have in your arsenal and pliers with a screwdriver!
Summary:
Where is the tie rod? As we have already said, it consists of a body and a ball joint, the joint at the tip is inserted into the hole (Indicated by a blue arrow), to easily find it, you will have to remove the wheel from the car and look at the telescopic stand, indicated just below in the photo by a red arrow , location of the tie rod end in the chassis of the vehicle.
When should you change the tie rod end? The tip has a boot, for clarity, we indicated it with a green arrow in the photo above, if this boot is torn, then immediately change the tip without thinking, even if in your opinion it is still in good condition, then after a while it will still come out out of order and the sooner you replace it, the better, if the boots are torn, dirt gets clogged into the joint and water gets in, because of this the lubricant is quickly washed out and instead of it, particles of dirt appear in the joint, because of this there is play in the steering wheel, it begins to vibrate and the car begins to respond much worse when turning the steering wheel of the car.
Note! The tips become unusable due to several reasons, the first is when the boot breaks, the second is from time to time, when driving, friction occurs at the ball joint between itself and the hole into which it is inserted (Into the rack), and the third reason is insufficient quantity lubricant that the manufacturer did not really put in or that simply dried out and was washed off over time!
How to Remove the Steering End of a VAZ 2109 ~ SIS26.RU
How to remove the control tip of a VAZ 2109
everything useful is here
Removing the tie rod end
We hang and remove the wheel. Turn the steering wheel all the way in the direction opposite to the tip being removed.
We take out the cotter pin... ...and use a 19mm wrench to unscrew the nut securing the tip to the strut arm.
Use a puller to press the finger out of the lever.
If there is no puller, we do not unscrew the nut completely, insert a mounting blade into the spacer between the steering rod and the strut lever, and with a hammer we strike the end of the strut lever until the pin is pressed out of the lever, after which we finally unscrew the pin nut.
Replacing the steering end of VAZ 2108, 2109, 21099, 2110, 2115, Priora, Kalina
How to change the steering tip
by car
VAZ
2108 - 2115, Kalina, Priora From the beginning we lift the car.
Replacing the steering end of VAZ 2108, 2109, 21099, 2110, 2115
Replacing the steering tip of a VAZ 2109
.
A short video about replacing the tip
.
Holding the coupling with a 24mm wrench, unscrew the nut clockwise with a 27mm wrench (the thread on the outer tip is left-handed).
We unscrew the tip by rotating it clockwise.
To remove the steering rod assembly, unscrew the bolt securing the inner rod end to the steering gear rack. Having pressed the pin of the outer tip out of the swing arm of the strut, remove the rod assembly.
On the removed steering rod, use a 27 wrench to unscrew the lock nut of the inner tip , holding the coupling with a 24 wrench (the thread on the inner tip is right-handed).
Unscrew the inner tip by rotating it counterclockwise.
The hexagonal section on the coupling is shifted towards the inner tie rod end.
Install the rod in the reverse order. When installing, the bushing of the inner tie rod must fit into the hole in the rubber protective boot of the steering mechanism. We carry out this operation by generously lubricating the hole in the case with penetrating lubricant such as WD-40.
After removing the tie rod ends, it is necessary to adjust the wheel alignment angles.
sis26.ru