The role of the sensor in engine operation
The element is a metal rod with a threaded or flanged tip for mounting inside the exhaust tract. A platinum-coated ceramic working part protrudes from the end of the lambda probe, protected from the outside by a steel cap with holes for the passage of exhaust gases. Wires (from 2 to 6 pieces) come out from the other end, transmitting a signal to the electronic control unit (controller).
To understand the question of how to clean the lambda probe and whether it needs to be done, it is advisable to understand how it works:
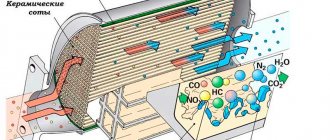
- The sensor's task is to determine the amount of oxygen remaining in the gases after fuel combustion. To do this, the device is placed in the section of the exhaust pipe between the catalyst tank and the exhaust manifold. In new cars, 2 elements are installed - before the neutralizer and after it.
- When the probe detects a large amount of oxygen, the controller “sees” this by a change in voltage and determines that the mixture supplied to the cylinders is lean, after which it adjusts the air-to-fuel ratio.
- If there is little oxygen, then the mixture is too rich and the control unit reduces the supply of gasoline.
If the sensor fails, wires break or contacts oxidize, the controller switches the fuel supply to the average mode. That is, the car can move further, but fuel consumption increases, and the car’s behavior changes for the worse (acceleration dynamics are lost). In general, this is a fairly reliable device, serving 100-150 thousand km on imported cars and 50-100 thousand km on domestic ones.
What is a lambda probe, what is it for and why is it so important that it is in good working order?
A lambda umbrella (also often called an oxygen sensor) is a special sensor-controller that measures (estimates) the volume of oxygen remaining in the unburned fuel mixture (exhaust gases) of the car, compares it with the nominal values and sends the data obtained as a result of this comparison to the fuel system control unit (CU). The control unit, in turn, in order to optimize the composition of the combustible mixture, increases or decreases the volume of fuel supplied to the combustion chamber, thereby affecting the content of harmful substances in the exhaust gases, the dynamics of the car, the stability of the power plant and other characteristics.
From here it is obvious that if the oxygen sensor is faulty, that is, it sends incorrect information to the control unit, then the fuel/oxygen supply will be carried out with errors. As a result, the car will begin to “eat” a lot, accelerate poorly, operate unstably and heavily pollute the environment (more than accepted environmental standards allow). This situation can only be prevented by timely replacement of a failed sensor or by cleaning it in cases where it is permissible - the sensor itself and its base are not damaged, and improper operation is caused by contaminants accumulated on it (lead deposits and soot).
Cleaning procedure
Before cleaning the lambda probe, you need to purchase orthophosphoric acid or a detergent based on it (for example, a rust converter) from a retail chain. Further actions are performed in this order:
- Remove the sensor (or a pair of elements) from the car. To do this, you need to disconnect the battery, disconnect the connector and unscrew the part with an open-end wrench.
- Remove carbon deposits from the metal protective cap mechanically.
- Take a small glass container, lower the probe into it with the working end down and carefully pour acid to the level of the thread of the element. To increase the intensity of the effect, it is better to heat the acid to a temperature close to boiling.
- After 10-15 minutes, remove the sensor from the container and rinse with water, then dry by blowing.
- Place the part in place by applying graphite lubricant to the threads.
There are recommendations online that before cleaning, you need to cut off the protective cap on a lathe, treat the ceramic tip with a soft brush and acid, and then put the protection in place, attaching it with resistance welding. It is not difficult to guess that disassembling a lambda probe in this way can only be done in a specialized workshop, since ordinary motorists do not have lathes or resistance welding machines in their garages. The only option is to widen the holes in the cap with a file to push the brush through.
According to many motorists, a layer of soot on the ceramic tip interferes with the normal operation of the device, since it interferes with accurately assessing the amount of oxygen. By giving the controller inadequate signals, the sensor behaves as if it has failed, which is why the control unit begins to supply fuel in emergency mode, and the Check Engine display flashes on the dashboard.
In fact, cleaning the lambda probe with your own hands helps in 2-3 cases out of a hundred, as evidenced by numerous reviews from car enthusiasts on the forums.
The above signs usually indicate a real breakdown of the part; as a result, it will still have to be replaced. Here are some recommendations:
- do diagnostics at the nearest service station and make sure that the lambda probe is faulty, because the Check Engine light also lights up for other reasons;
- You should not remove and wash a working sensor with acid in order to simply clean it, in this way you can ruin a completely working element;
- if the probe is declared unusable by a car service specialist, clean it boldly, since there is nothing to lose;
- do not use nitric or sulfuric acid for cleaning, they are too aggressive;
- perform the work wearing rubber gloves and safety glasses, and pour the acid carefully, without splashing;
- ensure the room is ventilated.
After drying and installing the part in place, observe the behavior of the car for 2-3 days
. If fuel consumption does not decrease and the Check Engine warning light does not go off, go to your local store for a new device. In the vast majority of cases, it is not possible to restore the lambda probe and there are two ways out of the situation: replace the element with a new one or install a decoy - an electronic simulator of the sensor’s operation.
All parts and components of a car have their own service life. It can be long, short, but never endless, so every element of the car sooner or later needs to be replaced. The lambda probe is no exception. Moreover, unfortunately, it fails quite often, and it is not cheap, so it is not surprising that experienced motorists, bypassing the manufacturers’ recommendations, have found a way (and even more than one) to clean the lambda probe at home, that is, to significantly reduce their costs for repairs. But first things first.
What is a lambda probe, what is it for and why is it so important that it is in good working order?
A lambda umbrella (also often called an oxygen sensor) is a special sensor-controller that measures (estimates) the volume of oxygen remaining in the unburned fuel mixture (exhaust gases) of the car, compares it with the nominal values and sends the data obtained as a result of this comparison to the fuel system control unit (CU). The control unit, in turn, in order to optimize the composition of the combustible mixture, increases or decreases the volume of fuel supplied to the combustion chamber, thereby affecting the content of harmful substances in the exhaust gases, the dynamics of the car, the stability of the power plant and other characteristics.
From here it is obvious that if the oxygen sensor is faulty, that is, it sends incorrect information to the control unit, then the fuel/oxygen supply will be carried out with errors. As a result, the car will begin to “eat” a lot, accelerate poorly, operate unstably and heavily pollute the environment (more than accepted environmental standards allow). This situation can only be prevented by timely replacement of a failed sensor or by cleaning it in cases where it is permissible - the sensor itself and its base are not damaged, and improper operation is caused by contaminants accumulated on it (lead deposits and soot).
How to clean a lambda probe at home: instructions.
The first thing you need to do is find this lambda probe. This can be done under the hood of your car in front of the catalyst. And in modern cars there are two such sensors - before and after the catalyst, so the easiest way to view them is from the pit.
Once you find the lambda sensor(s) in your car, remove it(es) using the appropriate size wrench.
Then move on to cleaning.
Method No. 1 – cleaning with phosphoric acid.
This method could be called one of the simplest and fastest, if not for the need for full/partial access to the ceramic-platinum base of the device, hidden behind a protective metal cap, which is not so easy to remove, given the impossibility of working with a hacksaw , as it may damage the working base. What to do? – Use a lathe for this purpose: use it to cut off the protective cap near the thread at the very base of the lambda probe.
If you don't have such a machine, you can try using a file. Of course, you won’t be able to remove the protective cap with it, but making windows (5 mm holes) in it is easy.
So, when access to the working rod of the lambda probe is secured, you can proceed directly to the procedure for cleaning it.
To do this, take at least 100 ml of orthophosphoric acid (its analogue: rust converter, flux/soldering acid, etc.), pour it into a small glass container (shot glass, jar, glass, etc.), and then lower the core there clogged part.
IMPORTANT: the entire device must not be immersed in phosphoric acid!
Wait 15-20 minutes, rinse the base of the part with clean water, and leave until completely dry. If necessary, repeat the procedure until the black-brown core again acquires a metallic tint.
If you were unable to clean the lambda probe in this way on either the second or third attempt, try increasing the effect of the aggressive liquid with a brush: by constantly wetting and smearing the base, you will very soon notice how the dirt will begin to come off, returning the parts to their original shine.
By the way, if work will be done on a lambda probe with the protective cap removed, then instead of a brush you can use something larger, for example, an old toothbrush.
At the end of the cleaning work, it is again recommended to rinse the oxygen sensor thoroughly with clean water and dry thoroughly.
If the cap was removed, then before installing the part, it is returned to its place using argon welding.
When using this method you need to remember:
- orthophosphoric acid (and its analogues as well) is a dangerous chemical, so it is necessary to work with them, observing all safety rules and excluding its contact with the eyes and inside the body;
- if the lambda probe is heavily clogged, then the mentioned 15-20 minutes may not be enough to completely clean it, so in particularly advanced cases, the time of exposure of the core to acid should be increased to 1-3 hours, and sometimes the whole night (at least 8 hours) ;
- To check the effectiveness of such repairs, as a rule, it takes some time, only it will give the driver the opportunity to evaluate the “behavior” of the car and measure fuel consumption, with the exception of the Check Engine error that lights up on the instrument panel, it is an indisputable sign that it is up to you to resuscitate the clogged lambda probe failed;
- If in your car the protective cap of the oxygen sensor has a double shell (two layers), most likely you will not be able to cut it with a file, so the only option for cleaning the core of such a lambda probe is to soak it in acid along with the protective element.
Method No. 2 – accelerated.
To implement it, you will need the same phosphoric acid and a gas burner or stove. If the choice falls on the latter, it is better to use the smallest burner (it will be more convenient): remove the lid from it, turn it over and place it, slightly moving it to the side, so that it protects (covers) the gas pipe from possible acid entering there.
Then everything is simple: light a fire, dip the oxygen sensor core in acid and heat it thoroughly over this fire. When the acid begins to boil and splash, green-blue salt will begin to appear on the surface of the sensor.
Wait until the aggressive liquid has completely boiled away, rinse the part with clean water, dip it in phosphoric acid again and put it on fire... - repeat these steps until the lambda probe sparkles clean (in our case it took about 15 minutes). Before installation, the threads of the oxygen sensor should be lubricated with graphite grease (so that it does not burn).
Only after this can the part be returned to its place.
Conclusions, or is the result worth the time and effort spent on it?
As practice shows, an oxygen sensor freed from soot and soot begins to work correctly again only in 1-2 percent of cases, so you shouldn’t rely too much on the methods described above to clean the lambda probe at home with your own hands, especially if the mileage exceeds 100 thousand kilometers of travel, however, in order to save your budget, it is still worth trying to revive this device.
Video.
autoepoch.ru
How to clean a lambda probe at home?
All parts and components of a car have their own service life. It can be long, short, but never endless, so every element of the car sooner or later needs to be replaced. The lambda probe is no exception. Moreover, unfortunately, it fails quite often, and it is not cheap, so it is not surprising that experienced motorists, bypassing the manufacturers’ recommendations, have found a way (and even more than one) to clean the lambda probe at home, that is, to significantly reduce their costs for repairs. But first things first.
What is a lambda probe, what is it for and why is it so important that it is in good working order?
A lambda umbrella (also often called an oxygen sensor) is a special sensor-controller that measures (estimates) the volume of oxygen remaining in the unburned fuel mixture (exhaust gases) of the car, compares it with the nominal values and sends the data obtained as a result of this comparison to the fuel system control unit (CU). The control unit, in turn, in order to optimize the composition of the combustible mixture, increases or decreases the volume of fuel supplied to the combustion chamber, thereby affecting the content of harmful substances in the exhaust gases, the dynamics of the car, the stability of the power plant and other characteristics.
From here it is obvious that if the oxygen sensor is faulty, that is, it sends incorrect information to the control unit, then the fuel/oxygen supply will be carried out with errors. As a result, the car will begin to “eat” a lot, accelerate poorly, operate unstably and heavily pollute the environment (more than accepted environmental standards allow). This situation can only be prevented by timely replacement of a failed sensor or by cleaning it in cases where it is permissible - the sensor itself and its base are not damaged, and improper operation is caused by contaminants accumulated on it (lead deposits and soot).
How to clean a lambda probe at home: instructions.
The first thing you need to do is find this lambda probe. This can be done under the hood of your car in front of the catalyst. And in modern cars there are two such sensors - before and after the catalyst, so the easiest way to view them is from the pit.
Once you find the lambda sensor(s) in your car, remove it(es) using the appropriate size wrench.
Then move on to cleaning.
Method No. 1 – cleaning with phosphoric acid.
This method could be called one of the simplest and fastest, if not for the need for full/partial access to the ceramic-platinum base of the device, hidden behind a protective metal cap, which is not so easy to remove, given the impossibility of working with a hacksaw , as it may damage the working base. What to do? – Use a lathe for this purpose: use it to cut off the protective cap near the thread at the very base of the lambda probe.
If you don't have such a machine, you can try using a file. Of course, you won’t be able to remove the protective cap with it, but making windows (5 mm holes) in it is easy.
So, when access to the working rod of the lambda probe is secured, you can proceed directly to the procedure for cleaning it.
To do this, take at least 100 ml of orthophosphoric acid (its analogue: rust converter, flux/soldering acid, etc.), pour it into a small glass container (shot glass, jar, glass, etc.), and then lower the core there clogged part.
IMPORTANT: the entire device must not be immersed in phosphoric acid!
Wait 15-20 minutes, rinse the base of the part with clean water, and leave until completely dry. If necessary, repeat the procedure until the black-brown core again acquires a metallic tint.
If you were unable to clean the lambda probe in this way on either the second or third attempt, try increasing the effect of the aggressive liquid with a brush: by constantly wetting and smearing the base, you will very soon notice how the dirt will begin to come off, returning the parts to their original shine.
By the way, if work will be done on a lambda probe with the protective cap removed, then instead of a brush you can use something larger, for example, an old toothbrush.
At the end of the cleaning work, it is again recommended to rinse the oxygen sensor thoroughly with clean water and dry thoroughly.
If the cap was removed, then before installing the part, it is returned to its place using argon welding.
When using this method you need to remember:
- orthophosphoric acid (and its analogues as well) is a dangerous chemical, so it is necessary to work with them, observing all safety rules and excluding its contact with the eyes and inside the body;
- if the lambda probe is heavily clogged, then the mentioned 15-20 minutes may not be enough to completely clean it, so in particularly advanced cases, the time of exposure of the core to acid should be increased to 1-3 hours, and sometimes the whole night (at least 8 hours) ;
- To check the effectiveness of such repairs, as a rule, it takes some time, only it will give the driver the opportunity to evaluate the “behavior” of the car and measure fuel consumption, with the exception of the Check Engine error that lights up on the instrument panel, it is an indisputable sign that it is up to you to resuscitate the clogged lambda probe failed;
- If in your car the protective cap of the oxygen sensor has a double shell (two layers), most likely you will not be able to cut it with a file, so the only option for cleaning the core of such a lambda probe is to soak it in acid along with the protective element.
Method No. 2 – accelerated.
To implement it, you will need the same phosphoric acid and a gas burner or stove. If the choice falls on the latter, it is better to use the smallest burner (it will be more convenient): remove the lid from it, turn it over and place it, slightly moving it to the side, so that it protects (covers) the gas pipe from possible acid entering there.
Then everything is simple: light a fire, dip the oxygen sensor core in acid and heat it thoroughly over this fire. When the acid begins to boil and splash, green-blue salt will begin to appear on the surface of the sensor.
Wait until the aggressive liquid has completely boiled away, rinse the part with clean water, dip it in phosphoric acid again and put it on fire... - repeat these steps until the lambda probe sparkles clean (in our case it took about 15 minutes). Before installation, the threads of the oxygen sensor should be lubricated with graphite grease (so that it does not burn).
Only after this can the part be returned to its place.
Conclusions, or is the result worth the time and effort spent on it?
As practice shows, an oxygen sensor freed from soot and soot begins to work correctly again only in 1-2 percent of cases, so you shouldn’t rely too much on the methods described above to clean the lambda probe at home with your own hands, especially if the mileage exceeds 100 thousand kilometers of travel, however, in order to save your budget, it is still worth trying to revive this device.
Video.
autoepoch.ru
How to clean the lambda probe and is it worth doing?
A sensor that measures the free oxygen content in exhaust gases (also known as a lambda probe) is present in any modern car. Of all the sensors involved in engine operation, this is the most expensive measuring device. Therefore, when a part fails, motorists try to save money and repair the lambda probe themselves. It consists of cleaning the working part of the element, washed by a stream of smoke and covered with soot. This procedure is of considerable interest to car enthusiasts, as is its final result.
The role of the sensor in engine operation
The element is a metal rod with a threaded or flanged tip for mounting inside the exhaust tract. A platinum-coated ceramic working part protrudes from the end of the lambda probe, protected from the outside by a steel cap with holes for the passage of exhaust gases. Wires (from 2 to 6 pieces) come out from the other end, transmitting a signal to the electronic control unit (controller).
To understand the question of how to clean the lambda probe and whether it needs to be done, it is advisable to understand how it works:
- The sensor's task is to determine the amount of oxygen remaining in the gases after fuel combustion. To do this, the device is placed in the section of the exhaust pipe between the catalyst tank and the exhaust manifold. In new cars, 2 elements are installed - before the neutralizer and after it.
- When the probe detects a large amount of oxygen, the controller “sees” this by a change in voltage and determines that the mixture supplied to the cylinders is lean, after which it adjusts the air-to-fuel ratio.
- If there is little oxygen, then the mixture is too rich and the control unit reduces the supply of gasoline.
If the sensor fails, wires break or contacts oxidize, the controller switches the fuel supply to the average mode. That is, the car can move further, but fuel consumption increases, and the car’s behavior changes for the worse (acceleration dynamics are lost). In general, this is a fairly reliable device, serving 100-150 thousand km on imported cars and 50-100 thousand km on domestic ones.
Cleaning procedure
Before cleaning the lambda probe, you need to purchase orthophosphoric acid or a detergent based on it (for example, a rust converter) from a retail chain. Further actions are performed in this order:
- Remove the sensor (or a pair of elements) from the car. To do this, you need to disconnect the battery, disconnect the connector and unscrew the part with an open-end wrench.
- Remove carbon deposits from the metal protective cap mechanically.
- Take a small glass container, lower the probe into it with the working end down and carefully pour acid to the level of the thread of the element. To increase the intensity of the effect, it is better to heat the acid to a temperature close to boiling.
- After 10-15 minutes, remove the sensor from the container and rinse with water, then dry by blowing.
- Place the part in place by applying graphite lubricant to the threads.
There are recommendations online that before cleaning, you need to cut off the protective cap on a lathe, treat the ceramic tip with a soft brush and acid, and then put the protection in place, attaching it with resistance welding. It is not difficult to guess that disassembling a lambda probe in this way can only be done in a specialized workshop, since ordinary motorists do not have lathes or resistance welding machines in their garages. The only option is to widen the holes in the cap with a file to push the brush through.
According to many motorists, a layer of soot on the ceramic tip interferes with the normal operation of the device, since it interferes with accurately assessing the amount of oxygen. By giving the controller inadequate signals, the sensor behaves as if it has failed, which is why the control unit begins to supply fuel in emergency mode, and the Check Engine display flashes on the dashboard.
In fact, cleaning the lambda probe with your own hands helps in 2-3 cases out of a hundred, as evidenced by numerous reviews from car enthusiasts on the forums.
The above signs usually indicate a real breakdown of the part; as a result, it will still have to be replaced. Here are some recommendations:
- do diagnostics at the nearest service station and make sure that the lambda probe is faulty, because the Check Engine light also lights up for other reasons;
- You should not remove and wash a working sensor with acid in order to simply clean it, in this way you can ruin a completely working element;
- if the probe is declared unusable by a car service specialist, clean it boldly, since there is nothing to lose;
- do not use nitric or sulfuric acid for cleaning, they are too aggressive;
- perform the work wearing rubber gloves and safety glasses, and pour the acid carefully, without splashing;
- ensure the room is ventilated.
After drying and installing the part in place, observe the behavior of the car for 2-3 days. If fuel consumption does not decrease and the Check Engine warning light does not go off, go to your local store for a new device. In the vast majority of cases, it is not possible to restore the lambda probe and there are two ways out of the situation: replace the element with a new one or install a decoy - an electronic simulator of the sensor’s operation.
Tags: ,
autochainik.ru
The principle of operation of the lambda probe
The control sensor measures the remaining oxygen in the exhaust. The sensor signal is used by the engine control unit to adjust the mixture composition. The sensor converts data on how much oxygen is contained in the exhaust gases into an electrical signal. When detecting changes in measurements, the probe transmits an electrical signal to the controller and then compares it with the stored values in memory.
If they do not correspond to the basic ones, the unit adjusts the amount of fuel injection. This ensures engine efficiency, gas savings and reduced emissions.
Based on this signal, the unit also recognizes malfunctions and reports this to the driver on the dashboard.
Functionality:
- ensures ideal generation of the fuel mixture;
- guarantees optimal operating conditions for the catalytic converter;
- reduces harmful emissions;
- maintains estimated fuel consumption.
Every vehicle with a variable catalytic converter has at least one lambda sensor. Modern cars require the installation of at least two sensors. Motorcycles are also equipped with these mechanisms.
Sensor internals:
- Metal contact for connecting connecting connectors.
- Dielectric seal with air hole for safety.
- Closed zirconium electrode inside a ceramic tip, heated to a temperature in the range of 300-1000 °C.
- Gas shield.
How to clean the lambda probe? | Motorist's benefit
The lambda probe (oxygen sensor) constantly analyzes the composition of the vehicle's exhaust gases. Based on its signal, the engine control unit adjusts the working mixture, thus stabilizing engine operation. Over time, combustion products accumulate on the oxygen sensor, which can lead to malfunctions. Installing a new lambda probe is quite expensive financially; the cost of such a sensor can reach 20-25 thousand rubles. Before replacing the oxygen sensor, you can try to restore the old one. Regular cleaning will help in this matter. It is strictly forbidden to clean the ceramic surface of the sensor mechanically, since it contains a thin layer of precious metals. Phosphoric acid is excellent for gentle cleaning of the lambda probe. It removes carbon deposits without damaging the precious metal coating. The sensor must be disassembled before cleaning. This work should only be performed on a lathe, since a metal saw can damage the sensor parts. Using thin cutters, the protective cap is cut off and the wiring is set aside.
We apply a small amount of phosphoric acid to the ceramic rod of the lambda probe. In this case, you can use a thin paint brush; you should not allow the sensor to be completely immersed in acid. A dirty rod is usually black or brown in color and should turn gray after cleaning. The applied acid does not come into contact with the contaminants immediately; it usually takes about 20 minutes. After cleaning, the lambda probe is washed under running water and dried. The protective cap can only be welded into place using argon welding. If such a device is not at hand, then the protective cap is not removed before cleaning the oxygen sensor. Using a file, you need to make two small windows in it and wash the rods indiscriminately.
After installing the cleaned lambda probe in place, it is necessary to test its condition. This check is carried out using a computer scanner. It is worth noting that cleaning the oxygen sensor is only a last resort method, which can be resorted to only if deviations in the operation of this unit are detected.
In this article we will talk about how to clean the lambda probe with your own hands. The design of a modern car contains a large number of sensors. And everyone is responsible for measuring certain parameters. The data received by the sensors is sent to the electronic control unit. It allows you to generate commands that adjust engine operation to the desired conditions.
Do-it-yourself lambda probe cleaning
Finding the second lambda
.
You can
help financially and issues will be published more often!
Sberbank: 4276 8060 4388 0409. And so we revive it! Instructions Difficulty level: Easy Step 1 You can safely clean the LZ by rinsing it in orthophosphoric acid, which for 10 - 20 minutes. corrodes contaminants without affecting platinum electrodes. Lambda hesitated! Is it possible to wash it with something? Is it possible to clean the sensor? Before washing, the sensor must be opened. To do this, carefully cut off a protective cap made of stainless steel at the very base on a lathe using a thin cutter. There are two ways to quickly clean the lambda probe. This method is possible or worth it. You cannot use a hacksaw for these purposes - it can damage the ceramic body of the sensor. Step 2 The cleaning procedure can be speeded up by using a thin natural bristle brush. Orthophosphoric acid is carefully applied with a brush, evenly washing the LZ ceramic rod on all sides. How to clean a lambda probe at home - two ways. You should not immerse the entire sensor in acid - only its working part is washed. As it is cleaned, the black-brown surface of the rod acquires a steel tint: this is the shine of platinum, dusted on the ceramic base. After cleaning, the sensor is rinsed well with water and dried, and the protective cap is secured in place using argon welding. Each lambda probe has its own resource, try to clean the probe without is it possible to clean it. If you don’t have the necessary equipment at hand, you don’t have to cut off the cap. Instead, two “windows” 3–4 mm wide are made in it using a file, and the sensor is washed with acid through them using the same brush. Step 3 The restored sensor is screwed into its place in the car, having first checked the condition of the O-ring. The LZ can be washed repeatedly as it becomes dirty. If the “resuscitation” still does not bring the expected results, this means that the oxygen sensor has completely failed and you have no choice but to go to the store for a new “informant”.
What sensors are installed on the car?
The following sensors are installed on modern cars:
- Speed.
- Temperatures.
- Sveta.
- Oxygen (also called a lambda probe).
- Oil pressure.
The oxygen sensor will be discussed in this article. The lambda probe allows you to perform several important functions at once. It significantly improves engine performance due to the correct metering of fuel. It also helps reduce the harmfulness of exhaust gas. More precisely, it improves the performance of the catalyst and significantly extends its service life.
Sensor design features
There is nothing complicated in the design. There are two electrodes - external and internal. There is a platinum coating on the outside. This significantly increases its sensitivity to the gas being measured - oxygen. The internal element is made of zirconium.
The exhaust gas passes through the active part of the part, while the external electrode records the oxygen content in it. The electronic control unit understands how much oxygen is in the exhaust tract by the potential difference between the internal and external parts.
Some devices use heating elements. The problem is that normal operation of the sensor is possible only at very high temperatures - about 600 degrees.
Is cleaning necessary?
As you can see, the lambda probe's work is quite important; without it, the engine will not be able to function correctly and economically. Yes, it is precisely in order to save fuel and reduce toxicity that this device is installed on a car. The lambda probe can be cleaned with phosphoric acid. But this is necessary if the active elements are contaminated.
During long-term operation, even under absolutely ideal conditions, carbon deposits accumulate on the electrodes, which interferes with measurements. It should be noted that for some cars the cost of a lambda probe can reach up to 30-40 thousand rubles. Therefore, in order not to spend money on expensive repairs, it is recommended to carry out timely maintenance and cleaning. You can do it yourself, no problems will arise during the work.
Removing the sensor
Before cleaning the lambda probe with acid, preparation must be done. The most important thing is that surfaces should not be treated with any abrasive compounds or brushes (even soft ones). Any physical impact can damage the integrity of expensive platinum coating. Of course, after such cleaning the oxygen sensor will not work.
It is recommended to use phosphoric acid during work. It is able to remove all carbon deposits as delicately as possible, without harming the active parts. But first you have to disassemble the lambda probe. This can be done on a lathe. Try not to damage the element, as it is impossible to restore it. Only thin incisors should be used. Use them to cut off the cap and remove all the wiring.
What's next?
After disassembling the device, you need to find the ceramic rod in its design. It is this that will have to be cleaned: apply a little orthophosphoric acid to the surface using a regular paint brush. But it is forbidden to completely immerse the sensor in acid, as this can only cause harm.
If the level of contamination is high, the rod will have a brown or black coating. Cleaning should be stopped when the rod turns grey. This indicates that all dirt has been removed from the surface. The effect of acid on contamination does not begin immediately; you must wait 15-20 minutes. Next, you need to clean the lambda probe with running water. And do not forget to dry the element well before assembling and installing it on the car.
What if you don't have a lathe?
It should be noted that it is not always possible to use a lathe. And cutting off the cap with a hacksaw is unlikely to be possible accurately; you can accidentally damage the active part of the sensor. And then only replacing the device will help. A problem may also arise when installing the cap in its old place, because this process also has special requirements that cannot always be met.
To weld the cap (the one you cut on the lathe) efficiently and reliably, you need to use argon welding; simple welding will not help. If it is not possible to use either a lathe or argon welding, the lambda probe must be cleaned without cutting off the cap.
To do this, you need to make two windows in the cap using a file. Next, you just need to wash the element without completely disassembling it. Of course, the quality of cleaning will be much worse, but most of the soot will still be gone. After carrying out the work, you need to put the sensor in place and check it using a diagnostic scanner. Please note that you should clean the sensor only as a last resort, when you find deviations in normal functioning.
The sensor plays a very important role in the operation of the motor. It increases its performance due to the correct dosing of the amount of supplied air and significantly extends its life. Unstable operation can have a bad effect on the dynamics of the car. But still, cleaning is a last resort measure, which is used only if very serious failures are detected.
Lambda probe, or oxygen sensor as it is also called, is located in the exhaust manifold and is necessary to regulate the ratio of air and gasoline in the air-fuel mixture. Depending on whether a lean or rich mixture is supplied to the combustion chambers, the car will behave differently, but in both cases not as necessary.
The oxygen sensor sends signals to the electronic unit about how much oxygen the mixture contains, and it in turn regulates the ratio of fuel and air. The good condition of the sensor is the key to proper and long-term operation of the engine.
Like any other element of the car, the oxygen sensor can develop malfunctions. Each lambda probe has its own resource, after which it is exhausted, it may begin to work incorrectly, or simply break. It may also simply become clogged, in which case you can try to restore it, but first you need to check it.
REASONS FOR FAILURE AND DIAGNOSTICS OF THE LAMBDA PROBE
Despite the high reliability of the lambda probe, it is recommended to replace it after a mileage of 80,000 km. And although the probe remains operational for a long time, its sensitivity decreases and the performance of the motor deteriorates.
Reasons that interfere with the operation of the lambda probe may be:
- Case overheating.
- Violation of the tightness of the connection with the collector pipe.
- Internal depressurization.
- Clogged contacts when using low-quality gasoline.
- Oil getting into gasoline.
- Incorrectly set ignition timing.
Article on the topic: How and when is it time to change the ignition spark points on a VAZ 2114
If during the operation of the VAZ-2114 signs appear that characterize the incorrect operation of the lambda probe, then it is necessary:
- Find out which sensor is installed on the car.;
- Visually inspect the lambda probe;
- Check the functionality of the sensor.
All these operations are easy to perform yourself:
- Depending on the year in which the VAZ 2114 was produced, both single-wire sensors and sensors equipped with a heating device (four-wire) are installed in its manifold. If a decision is made to replace the lambda probe, then it is desirable that the new sensor be of the same type.
- When conducting a visual inspection, it is advisable to check the operation of the fuel supply system and the voltage of the on-board network. In addition, you need to make sure that there is no external damage to the wires and housing. If it turns out that the tip is covered with soot, lead or carbon deposits, the sensor will most likely have to be replaced.
- Check the functionality of the lambda probe with a digital voltmeter. To do this, you need to connect it, in parallel with the voltmeter, to the fuel supply system. When the speed of a warm engine increases to 1500 rpm, the voltmeter readings should be at 0.5 V. Other indicators indicate that the sensor is not working.
Checking the oxygen sensor with a voltmeter
Of great importance for determining the reasons that caused the breakdown of the oxygen sensor is the correct interpretation of parameters such as “lambda probe error”, which are issued by the on-board computer of the VAZ 2114. The most common is “error 0134” (no response from the sensor).
It is when such information appears that you can try to repair the lambda probe yourself.
Reasons leading to lambda malfunction
The following reasons can lead to breakdowns of the oxygen sensor:
- One of the main reasons, especially relevant in our country, is the low quality of gasoline and the high lead content in it. Alas, it is impossible to check the quality of gasoline at a gas station;
- contact with brake or coolant fluid on the oxygen sensor housing;
- an attempt to clean the probe without knowledge of the matter, or with means not intended for this.
In general, the oxygen sensor is a disposable part and should not be subjected to attempts to clean, rinse, or other manipulations, the purpose of which is to restore functionality. But, nevertheless, cleaning it is a very common procedure.
Signs of a malfunctioning oxygen sensor
Before you start cleaning, you need to check its functionality and make sure that it really needs to be cleaned. The main signs of a malfunctioning oxygen sensor look like this:
- fuel consumption (consumption) of a car increases significantly;
- car jerks when driving;
- engine operation becomes unstable;
- premature failure of the catalyst.
If you have the problems listed above, it is likely that the oxygen sensor has failed; it needs to be checked; it is quite possible that it needs cleaning or replacement.
Diagnostics
How to check the lambda probe? You can try to diagnose the functioning of the device visually. A simple and clear option on how to check the lambda probe. Necessary:
- inspect the wiring input connectors - there must be a clear and reliable fixation of the connections;
- carefully inspect the sensor itself for the presence of soot, shiny deposits (gray, white sediment).
Possible visual signs:
- Soot. Formed from a malfunction in the device heater/combustion of an excessively rich fuel-air mixture. Then the clogged sensor belatedly determines the composition of the exhaust gases.
- Brilliant sediment. High levels of lead in fuel. It is necessary to change the device, because there is a high risk of catalyst failure.
- White and gray sediments are only for replacement. The cause of deposits is the use of additives in fuel and motor oil.
There is a test of the lambda probe using instruments. How to check a lambda probe with a digital voltmeter (with DC detection mode activated)? Need to:
- Bring the engine to operating temperature (warm up).
- Find the oxygen sensor under the hood.
- Examine it. If there are soot deposits (others), replace only.
- Make sure there is no damage.
- Start the engine by first disconnecting the device from the connectors and connecting its signal wire with a digital voltmeter.
- Increase the operating speed of the power unit to 2500 rpm and take your foot off the gas pedal.
- Remove the vacuum tube from the fuel pressure regulator.
The serviceability of the device is determined by the voltmeter readings: at 0.8 V and below, the failure of the component can be stated. What to do next in this case? Diagnostics of the composition of the combustible mixture (to check whether it is lean) is required using a vacuum tube - to create a draw in air.
A working device will have readings around 0.2 V (or lower). If these indicators are not achieved, replacement is required.
How to check the sensor
To complete the picture, it is worth clarifying that there are several types of sensors. Broadband (more modern) and two-level. A broadband lambda probe cannot be checked independently without special equipment. The description is only suitable for a more primitive, two-level sensor.
The first step is to check it visually. A tip clogged with soot and covered with a coating of lead indicates that the quality of the fuel you are using leaves much to be desired.
For further diagnostics we need a voltmeter. The operation is checked only on a warm engine, otherwise the readings will be inaccurate.
We connect the device to the lambda (plus to the signal wire of the sensor, minus to ground). The readings of the device should fluctuate in the region from 0.2 to 0.8 V, the oscillation frequency is about 10 times in 8 seconds (slightly more than once per second). If this happens much less frequently, if the range of fluctuations is greater than specified, or the readings stay at the same level, the sensor is faulty, its performance is impaired, and it’s time to change it.
This applies to a sensor made of zirconium oxide, the signal from it can be from 0 to 1 V. A lambda probe made of titanium oxide operates in the range from 0 to 5 V.
DIY crafts for car enthusiasts
In this post we will talk about repairing the Luda probe, a sensor that a modern car cannot do without, and how to repair it with your own hands in a garage.
So, preface: I had some adventures with my first lambda. In general, I then changed the first lambda to the Bosch one and the problems disappeared.
But time does not stand still, and just now, while sorting out the trash in the garage, I came across a box, and in it there were already 3 lambdas. 1st - dear. She is completely “ales” 2nd - supposedly the original. I checked it with a multimeter - there is no voltage on the signal wire. (mine is gray) we can assume that there is a break somewhere inside. 3rd - from disassembly. We check with a multimeter - the heater is broken.
Let me remind you that almost all cables have 4 wires, two are the sensor heater and two signal wires.
It was decided: the 1st one will be cut, and then we’ll see, maybe out of the 2 remaining ones with different problems I’ll make one, but a working one.
native lambda, or rather what’s left
Preparing the tool
Everything you need
Next comes peeling. First, we cut the 3rd lambda, remove the cap and see our heater breakage
This is how we see a broken heater and a broken ceramic shell
closer
heater fragment
Next we need to remove the remaining heater fragment. We will do this using part of a “musical instrument”
Here is the fragment, just removed
He's without a needle
Now we take the 2nd lambda with a broken signal wire and cut it in exactly the same way as the previous one and remove the working heater from it.
drank the 2nd lambda
CAREFULLY, with surgical precision, without haste, extract the working heater into the light. Here he is
Working heater on top, broken off on bottom
We wipe the working heater from dirt and dust simply with a dry, clean cloth WITHOUT CHEMICALS, because she can do her nasty thing. We wiped it and, with the same care as when we removed it, we pack it into the probe body with a working signal wire.
Assembled LZ before soldering Now you can solder everything, recheck it and install it. Soldering with a jewelry torch using copper-phosphorus solder. Unfortunately, there is no photo of the finished product. We put it on the car. And we check everything with the engine running using a multimeter. We are glad to have a spare sensor for a rainy day.
Author; Ilya Shirokikh Alchevsk, Ukraine
Popular;
- Do-it-yourself lambda decoy
- A simple electric heater for a car with your own hands
- How to balance a wheel in a garage.
- How to make a simple lambda probe or oxygen sensor
- DIY washer tank heater
- Charger for a car from a power supply from an LED strip
- How to make a washer reservoir heating with your own hands
- How to easily make car lamps brighter.
Cleaning and restoring the oxygen sensor
There is constant debate about whether it can be cleaned. Cleaning (restoration) with phosphoric acid is the most common advice. Although they tried to clean it with anti-rust and other chemicals. There are more than enough stories about this, but it is difficult to verify how effective it is, and whether the restoration of performance occurs after this.
Soak
You can simply soak it in acid (not the whole thing, but only the working part of it). Some people are content with just soaking, others are completely unsatisfied with the result, and outwardly the lambda does not change at all, the plaque remains where it was. Perhaps the percentage of acid concentration plays a role.
Acid cleaning with removal of protective cap
The protective cap must be carefully removed without damaging the ceramic part. Use a soft brush to rinse until the black coating is completely washed away. After this, the sensor is dried, and the cap is attached back by welding.
Without removal
This method is less troublesome and virtually eliminates the possibility of damage to the sensor when cutting off the cap. Periodically dipping the oxygen sensor in the same acid, we expose the tip to heat over a fire.
During the heating process, a reaction may occur; the products of this reaction can be washed off with water. We repeat the procedure until it is completely cleared of plaque.
Whichever of the listed cleaning procedures you prefer, installing the sensor in place will show how effective it was, but it is also difficult to check this right away. Time will tell how well the recovery went. You may have to go get a new sensor, but at least you tried.
REPAIR OF OXYGEN SENSOR (LAMBDA PROBE)
An oxygen sensor is a fairly expensive device. Therefore, car owners try to repair the lambda probe themselves. Most often it comes down to cleaning it. Do-it-yourself cleaning of the lambda probe is carried out by removing carbon deposits from the platinum electrodes of the ceramic rod. It can be carried out in one of the following ways (after carefully unscrewing the sensor from the collector pipe):
- Heat up and then cool down the sensor quickly. The carbon deposits should crack and fly off.
Helpful advice: do not try to clean the ceramic rod mechanically. This will damage the thin layer of precious metals and ultimately cause the sensor to fail.
- In the protective cap, without disassembling the sensor, carefully widen the existing slots with a file and wash the electrodes with phosphoric acid.
Article on the topic: Selecting and installing rear disc brakes on Priora
Important! Complete immersion of the lambda probe in phosphoric acid is not allowed.
- The electrodes can be thoroughly cleaned only by removing the protective cap. To do this, you need to have a lathe, with which you carefully cut off the protective cap, and an argon welding machine to put it in place. These works require a certain skill and are best carried out in a specialized workshop.
Attention: It is not recommended to use a metal saw to remove the protective cap. In this case, as a rule, damage to the lambda probe parts occurs.
Sometimes the lambda probe stops working due to broken wires (error 0140). In this case, you can also repair the oxygen sensor yourself. Having found the break point and restored the electrical circuit, it is advisable to check all contacts that may be oxidized. You can clean them with WD-40.

