Winter
- this is the time of cold weather, snowballs, ice-skating/sledding, evening walks, when the soft snow crunches so pleasantly under your feet,
BUT
we are drivers, everything is different for us. For us: I woke up, ate, got dressed, went out to the car, warmed it up for about 20 minutes + cleared the snow from the body and the ice from the windows, and only then drove off. But the most unpleasant thing is when you go out and meet on the same road with some idiot driver in a hurry.
Yes, we are all sometimes in a hurry to get somewhere, but in a hurry you have to think with your head about each of your maneuvers on the road, but alas, sometimes such drivers can cut you off, fail to turn on the turn signal, honk at you, saying “ why are you so slow, son?”
?
and so on. In winter, meeting with such comrades is more dangerous than at other times of the year. They can abruptly start to change lanes in your lane, without turn signals, and then start to slow down, and in order not to kiss them on the rear bumper you have to brake, but in winter it’s useless (it’s icy, well!), that’s why everything turns out so sad. I’ve already met with drivers who are thoughtlessly rushing a couple of times, and it so happens that the picture repeats itself over and over again: I’m driving on the far left, and on the far right they begin to change lanes without any signs/signals. They change lanes because there is a parked car on the far right. Why change lanes in advance when you can “stick your nose” sharply in front of a standing car into the left lane? Well, I can’t find an answer to this question. And every time it happened on a one-way road, and I had to climb onto the curb just to avoid crashing into that person in a hurry. Of course, many will say, “ Why are you damaging the suspension, because you can just hammer it and crash.”
You will get the money from his insurance company, because he will be at fault .”
But I will answer such comrades this way: “ You yourself think what you say, crash.
But you never know what could happen next because of this ice. For example, we may be scattered in different directions of the road, or we may turn over. But what about health? No, I’m not a kamikaze, I feel sorry for myself .”
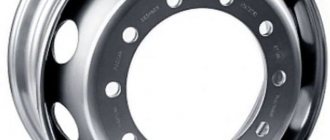
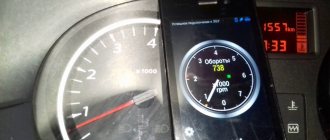
Today I’m on my way to study at about 7 am and suddenly I heard a strange noise, it sounded like a hum, like “Goooooooooooooooooooooooooooooooooooooooooooooooooooooooooooooooooooooooooooooooooooooooooooooooooooooooooooooooooooooooooooooooooooooooooooooooooooooooooooooooooooooooooooooooooooooooooooooooooooooooooooooooooooooooooooooooooooooooooooooooooooooooooooooooooooooooooooooooooooooooooooooooooooooooooooooooooooooooooooooooooooooooooooooooooooooooooooooooooooooooooooooooooooooooooooooooooooooooooooooooooooooooooo’ and so on. I listened a little and realized that the sound was nothing strange, it was the bolts unscrewing from the wheel, and so it made such a sound, like, “ Bro, help, otherwise I’ll jump off and the car will end up on its belly
.” I stop and begin to inspect the front left wheel: the bolts are unscrewed, which means everything is screwed up. I'm trying to tighten the bolts a little and I'm already driving on emergency lights to the spare parts store, as they say, without leaving the cash register). There I had already stopped completely and decided to jack up the car. I started to unscrew the bolts, but they were very difficult to unscrew. Having unscrewed all 4, I realized that the bolts were screwed, and so were the threads on the hub.
What it is?
Almost every make (model) of car has its own wheel bolt pattern. To designate the parameter, the abbreviation PCD is used, next to which numerical designations are indicated.
In simple words, the bolt pattern is the diameter along which the holes are made for attaching the wheel.
As a rule, car enthusiasts do not pay attention to this parameter and often install wheels with an inappropriate bolt pattern.
As a result, the wheel becomes incorrect. It is difficult to visually identify the problem, but the consequences can be very dire.
Sequencing
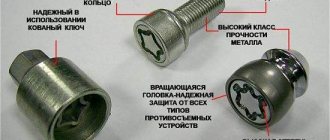
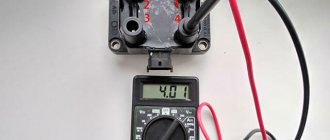
- The hub nut is loosened using a 30mm socket and a wrench. After this, use a 22mm socket to slightly loosen the mounting bolts on the wheel.
- Wheel chocks are installed under the front wheels, and the car is in first gear. After this, the rear wheel with the faulty bearing is jacked up and removed.
Brake drum cover visible
Disc labeling
When choosing a disk, you should take into account not only its bolt pattern, but also a number of other key parameters.
Let's say you have a disk with parameters in front of you - 6.5Jx15 H2 5x100 ET45 d54.1
. For an inexperienced car enthusiast, this is a common set of numbers. In fact, here is complete information about the product:
- 6.5 is the width (W), measured in inches (and not centimeters, as many people think);
- 15 is the diameter (D). Here the unit of measurement is also inch;
- 5*100 is a designation that indicates the number of landing bolts (5) and diameter (100).
Another example.
It is the diameter that interests us most (this is the PCD parameter that we mentioned above).
PCD size is given in millimeters:
- ET45 is a parameter by which you can judge the disc offset. Essentially, this is the distance between the plane that is pressed against the hub and the axis of symmetry of the product. ET45 means an overhang of 45 mm.
- d54.1 – indicates the diameter of the central hole (DIA, measured in millimeters). It has become fashionable among many manufacturers to overestimate this parameter.
In the future, special rings are used that eliminate vibration.
Regarding the digital designations “ J
" and "
H2
", they are used only by specialists.
The first parameter provides information about the design features of the side edges, and the second is a symbol for the annular protrusions on the rim (humps).
Features of measurements
As we have already mentioned, PCD is the diameter of the circle on which special holes for fastening the wheel are located (we have already looked at the example with disk markings).
So, we have the PCD 5*100 parameter. The first number is clear - it indicates the number of bolts used to secure the wheel.
As for the diameter of the circle, here you can use a simple calculation method.
Take a caliper and take measurements between the walls of the holes located next to each other.
So, for each bolt pattern there is a different calculation:
- for three holes the diameter is X * 1.55,
- for four holes – X*1.414,
- for five holes – X*1.701.
It is advisable to check the resulting number with the data in the manufacturer’s special tables. This will ensure that the measurements are correct.
Please note that on standard steel wheels the bolt pattern dimensions are not indicated - their marking is carried out taking into account the internal factory code.
To clarify the parameters more precisely, you can contact an official dealer.
Many drivers have a question about how to find out the wheel bolt pattern.
Below are the parameters of popular car brands.
VAZ cars.
Fit Features
The wheel rim bolt pattern must comply with the manufacturer's recommendations. What to do if your car has PCD 100*4
, but did you really like the disc with
PCD 98*4
? Experts recommend refusing such a purchase.
But why, is it impossible to visually determine the difference? The discrepancy will definitely show itself.
After one of the bolts is fully tightened, the remaining holes move slightly to the side.
Of course, the bolts can be tightened somehow, but due to incomplete fit on the hub, you can’t dream of a high-quality tightening (we’ll look at some solutions to the situation below).
Remember that mounting a disk with different bolt patterns is dangerous. At first a slight beating appears. It may seem insignificant, but over time it leads to the destruction of the steering mechanism and vehicle suspension.
It can be even worse - due to poor-quality broaching, the wheel unscrews while driving and then an accident cannot be avoided.
Many car enthusiasts are interested in the question of what wheel bolt pattern is on domestic VAZ cars.
Here PCD is standard - 4*98. But such a bolt pattern has one big disadvantage - there is no room for flight of fancy and the possibility of choosing a more unique disc.
At the same time, “next door” there is a PCD standard - 4*100, where the choice of disks is much wider. So is it possible to take a risk with a replacement? As we have already mentioned, with standard tightening methods this is unacceptable, because even a small error will not allow the screws to be properly tightened.
There are car enthusiasts who take certain risks. They use longer screws or do not tighten one of them at all. But this is dangerous - such methods can lead to serious consequences (including road accidents).
But there is a way out.
To install 4*100 wheels on VAZ cars, you can use special bolts with an offset center or an eccentric (they are easy to find in car stores or on the Internet).
In addition, studs from the VAZ 2108 cylinder head type are often used.
The peculiarity of the installation is that the studs are screwed directly into the hub, and the disc is tightened with the help of other nuts (you can “borrow” it from Niva).
Another option is to bore a hole in the hub. In this case, it will be possible to install disks with different PCD bolt patterns - 4*100 or 4*98.
Disassembly
Required : engage first gear and place shoes under the wheels. Prepare a narrow chisel, a 30mm socket, pliers, a needle file and a standard set of tools. The wheel bearing can be replaced on a level surface, but it is more convenient to do so on an inspection ditch or a lift.
Procedure:
- Remove the hub cap.
- Straighten the dented shoulder of the wheel bearing nut in two places using a narrow chisel.
- Loosen the hub bearing nut using a 30mm socket. The head and driver must be strong enough to transmit the required force.
| If while driving you notice that there is something humming in the front suspension, then most likely the problem is in the front wheel hub, in the bearing. You can replace the front wheel bearing yourself, but this will require some experience. |
Loosen the wheel mounting bolts, and then hang both front wheels, otherwise the anti-roll bar will interfere with dismantling, pushing the suspension elements up. Remove the wheel, the brake pad guide together with the caliper and the brake disc (tie them so that they do not hang on the brake hose).
Conclusion
Wheel rim bolt pattern is an important parameter that should be taken into account when choosing. Remember that any PCD discrepancy and installation errors are, first of all, a big risk for your life.
So, in your quest to decorate your car at any cost, weigh the pros and cons. Maybe it’s worth abandoning dangerous changes in favor of another type of tuning.
Safety on the road directly depends on the condition of the wheels of the “Seven”. Therefore, you need to take a responsible approach to the choice of wheels and tires, monitor the condition of the tread and tire pressure. To do this, you need to know the parameters of the wheels, the nominal tire pressure, and the type of tread suitable for specific weather conditions.
Bolt pattern VAZ 2107
The first thing you need to pay attention to when installing wheels is the bolt pattern of the VAZ 2107. The design of the “seven” provides for the wheel pattern “98x4” - fastening with four bolts, the holes of which are located on a circle with a diameter of 98 millimeters. Many foreign cars have a close bolt pattern - 100x4. In the first case, the distance between the centers of the bolts is 69.3 mm, in the second - 70.7 mm. An error of 1.4 mm does not make it possible to properly fasten a “non-original” disk, which over time will lead to damage to the disk, bolts or mounting holes.
There are ways to attach 100x4 wheels to a VAZ 2107 using studs, eccentrics, spacers or extended bolts. But all of them either worsen the reliability of fastening or complicate it unnecessarily. Unless absolutely necessary, it is better to install “native” disks. Improper wheel mounting can cause imbalance and vibration, and in the worst case, a wheel falling off while driving can cause an accident.
How to unscrew the hub nut without ruining the threaded connection
First of all, stock up on quality tools. An ordinary wrench is not suitable for plumbing work, although many car owners stubbornly use them to repair CV joints (the size is the same, but the cost of the tool is lower). An open-end wrench can only be used to unscrew an already “undermined” nut, this is really more convenient.
For the hub (CV joint), only a union head is used. The end cap can be cast or stamped (the second option is cheaper), and exactly match the size of the nut. If you “lick” the edges using a tool with backlash, you will be working with an angle grinder, and you will have to say goodbye to the CV joint.
- Thoroughly clean the surface from corrosion and dirt. If a spline-shoulder pair is used, you need to pick out everything that is in the holes;
- Treat the joint with a penetrating compound for soured threads. For example, WD-40 liquid, or regular kerosene. You may need to "soak" the thread for several hours;
- Remove all fixing devices;
- Place the socket on the nut and try to turn it using the lever. At this stage, it is better not to use handles with ratchets, as the mechanism may be damaged;
- After “undermining”, the nut can be unscrewed with any wrench that is more convenient.
Throw away the old nut and stud. Clean the threaded connection from rust and traces of fixing compounds.
It is this method of fixation that most often leads to “licking” of the thread. VAZ drivers know what they are talking about. An inexperienced master, delighted at the easy movement of the nut, will ruin your grenade in 2-3 turns of the key.
For proper release, you need a special punch that exactly matches the size of the spline collar. You won’t find them during the day with a fire, so it’s wise to make a useful tool yourself. For example, from an old file. With its help, you can unscrew the nut while maintaining the threads on the axle shaft.
Tire pressure VAZ 2107
The nominal tire pressure depends on the type of tire and the load on the vehicle. If the wheels are overinflated or low, the contact patch between the tire and the road changes. This causes deterioration in controllability and an increase in braking distance. In addition, uneven accelerated wear of the tread begins. Over-inflated tires increase wear on the center of the tire, while under-inflated tires increase wear on the edges.
It is recommended to check tire pressure after 500 km, but in practice it is better to do this more often. Small tire punctures, disc and spool defects cause air to escape from individual tires. In this case, the car may drift off course, especially when braking.
The nominal pressure in VAZ 2107 tires depends on the tire size:
- 165/80R13 - 1.6 for front, 1.9 for rear wheels;
- 175/70R13 - 1.7 for front, 2.0 for rear wheels.
In hot weather and when driving, tire pressure increases. With an aggressive driving style, taking sharp turns at high speed, the pressure can increase to 3-4 atmospheres. The tire material is designed for this and can withstand such changes. But if there is a hernia or cut on the tire, it may explode. A front tire explosion is especially dangerous, after which it is very difficult to keep the car on the road.
As pressure decreases, rolling resistance increases, which leads to increased fuel consumption. The tire also bends and the car becomes less responsive when maneuvering.
If the tire pressure is too low, the tires may even fall apart when cornering sharply.
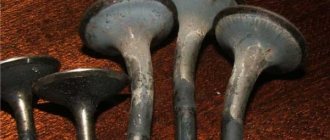
Broken thread in the front wheel hub of VAZ 2101 -2107
Hello! Today I want to talk about the problem of licking the threads in the front wheel hub of the VAZ 2101 -2107, this also applies to the threads in the axle shaft. And it was like this...
While driving, a humming noise appeared from the front right wheel. After certain tests, the cause of these sounds was identified - the hub bearings were worn out. The diagnosis is natural - the bearings and seal need to be replaced. But everything turned out to be not so simple. Upon closer inspection, it became noticeable even by eye that the hub had become a little egg-shaped, that is, oval in shape.
The wheel was difficult to remove from the hub!!! As we later found out, this could have happened due to jamming and excessive heating, sudden cooling occurred, as a result of which the hub began to move. I had to change that too. But another problem is where to get it in the middle of the night? And I don’t want to spend money on a new one, although this is everyone’s business.
Broken thread in the hub
As a result, a hub was found in which 3 (!!!) of the 4 threads in the holes were torn off. The action plan was like this:
- Take the old hub and wash it from dust and dirt.
- Drill a hole.
- Cut a thread for a bolt from a Moskvich 2141 car.
- Drill holes in the washer that fits onto the top of the brake disc.
- Take it easy!
Well, I immediately hear the cries of opponents, but within the limits of a small family budget, this is the most profitable option. And if the thread in the hub is not very good, then you can use my advice.
First of all, we bought 3 bolts from Muscovite 2141, they are thicker than the Zhiguli ones - M14, pitch 1.5. Corresponding taps, a tap holder, and a drill were also found. Taps No. 1 and No. 2 were used, the difference is in the depth of the threads on the tap, that is, the first one does not make the entire thread profile, but only outlines them, while the second one displays the full profile.
It is, of course, better to drill on a drilling machine, but you can easily get by with an electric drill and a vice in which you need to secure the hub with the broken thread. After cutting the thread, we check whether the bolt fits well. If everything is done well, the bolt should be screwed in by hand without jamming. The last step is to drill the holes in the washer.
A few photos for the article about the broken thread in the hub:
tuningvaz.in
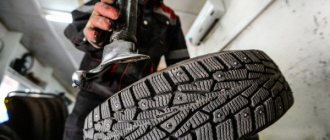
Tire selection and storage
- The tire type must be appropriate for the season and road surface conditions. When the average daily temperature is below 5 degrees, you should switch to winter tires, and when it is warmer, to summer tires.
- Summer tires harden at low temperatures and lose grip on the road surface. Winter ones wear out intensively at high temperatures.
- You should not buy studded winter tires if you have to drive on city streets cleared of snow without leaving the city. The studs are good on snow and mud, but do not perform well on asphalt.
- Before storage, tires must be cleaned of dirt and washed.
- Tires should be stored upright on the floor or rack without any sharp edges that could damage the rubber.
- It is unacceptable to store tires hanging from the inner surface - in this position, the edge of the tire adjacent to the rim will be deformed.
- Do not store tires in direct sunlight or outdoors.
- It is unacceptable to place heating devices near tires.
gsnake
29-03-2014 21:19
ASDER_K
29-03-2014 21:54
There are wheels with alloy disks, where the hole parameters are 4x98, but on a car you need 4x100. Do you think this is possible? I have studs on the hub. I read that you can’t do this with bolts, but for some reason it’s better with studs.
Kroilovo leads to Padalov.
greed is one of the most vile vices. conclusion. sell these discs. corresponding to the size buy. and don't skimp on condoms. treatment is more expensive.
gallak
29-03-2014 21:57
It will be bad. In the 90s, the former market In the USSR, a ton of new and used 4*100 disks appeared - many VAZ employees rushed to install them, but an obliquely twisted bolt (in this case, a nut (because studs)) quickly broke the fit of the disk and sometimes the disk broke off at the most inopportune moment...
HARON
29-03-2014 22:04
It is forbidden. On the contrary, no matter what, it’s impossible.
ASDER_K
29-03-2014 22:29
On the contrary, no matter what, it’s impossible.
on the contrary, it didn’t go anywhere either
HARON
29-03-2014 22:34
ASDER_K
29-03-2014 22:43
quote: Originally posted by HARON: They put it the other way around, but since the vehicle wants it, it doesn’t. I didn’t come up with this, I’ve seen it on the Internet many times.
so not from a great mind.
and out of great greed... at best, the cutting wheel will lead to the replacement of the hub... Union_Jack
29-03-2014 23:32
someone recently rubbed in that 98 are suitable instead of 100
HARON
30-03-2014 08:45
quote: Originally posted by Union_Jack: someone recently said that 98 are suitable instead of 100
Maybe I got it wrong too.
polex
30-03-2014 10:01
quote: sell these discs. corresponding to the size buy.
Couldn't have said it better
HARON
30-03-2014 11:54
If the landing diameter is what you need, I would try it.
gsnake
30-03-2014 12:02
I just assume that these two millimeters will go into tolerances...
HARON
30-03-2014 12:07
They won’t go away, but it should fit. If the central diameter does not match, then there is no point in trying it on - screw it on, but it will beat.
Volga sky
30-03-2014 17:48
quote: Originally posted by gsnake: where are the hole parameters
There are only black holes, and only in space. Everything else is holes.
Kroilovo leads to Padalov.
I already told him this, he doesn’t believe me.
quote: Originally posted by HARON: but it should fit.
It will fit, but then, when the nut enters the cone, it will begin to bend the stud towards the center of the cone.
There are a lot of potholes on the roads... HARON
30-03-2014 17:54
quote: Originally posted by Volga sky: It will fit, but then, when the nut enters the cone, it will begin to bend the stud towards the center of the cone. There are a lot of potholes on the roads...
Well, all the studs will bend a little; they all work in tension, not shear. If the landing gear is identical, I would install it, since there are disks.
Comrade Beria
30-03-2014 18:10
Try boring it in the machine so as not to lose alignment. When unpleasant consequences occur, think about post number 2.
gsnake
30-03-2014 18:23
thanks for the advice. I won't do that.
But then another question - if the wheels fit on the studs, and the central hole is hefty - is that acceptable?
HARON
30-03-2014 18:27
Acceptable, you need to buy or grind an adapter.
gallak
30-03-2014 18:37
quote: if the rims fit on the studs, and the central hole is hefty, is that acceptable?
This is the situation with most “aftermarket” alloy wheels - because
Different automakers have different centering diameters, it is expensive to make wheels only “for Nissan” or “Toyota”, they make them with the largest diameter, and offer adapter rings for smaller ones. These adapters are always available in stores/car service centers that sell discs. If you know the manufacturer of your disc, it’s easy to find the corresponding rings. Their cost is 2-3 dollars apiece - cheaper than turning them... Kir*
31-03-2014 12:48
ASDER_K
31-03-2014 01:28
Bolts are possible. Easy and relaxed. 1 mm on each side is nothing. You need to pull evenly. But how to tighten the disc onto the studs?
muhaha.
don’t forget to write a will in advance and buy wheel bearings... Kir*
31-03-2014 01:43
muha ha or not mu ha ha but 3 years everything is OK
Kir*
31-03-2014 01:44
As for the wheel bearings, it’s completely nonsense.
Ramil
31-03-2014 07:10
Tazovskie to Nexia - this is no longer poverty, this is drug addiction nonsense
Maxim V
31-03-2014 07:29
And these people teach me how to live... Never once did such a thought occur to me - nailing the wheels with a hammer...
Pavel_A
31-03-2014 08:00
There were similar disks. They didn’t fit on the basin, so I sawed all 5 pieces with a grinder and sold them for scrap.
About the centering rings - nonsense. They do not center anything if tapered nuts or bolts are used.
If you don’t want to lose your wheels, don’t even think about installing them.
HARON
31-03-2014 08:09
And so many connoisseurs... And if you didn’t have to tighten the Fiat size, then with the centering rings you have run tens of thousands... Connoisseurs will be even more surprised - these rings also come in plastic. And they are so scared - the hubs will fall apart, and a will is necessary...
Pavel_A
31-03-2014 08:26
quote: Originally posted by HARON: And so many experts... And if I didn’t have to tighten the Fiat size, then I’ve run tens of thousands with the centering rings.
The topic of rings was already discussed here several years ago.
There are two types of wheel alignment. By the hub and by bolts/studs. It makes no sense to mix these two alignment methods. Kir*
31-03-2014 11:55
As I remember now. In '94 or '95, my father bought himself a new Omega and gave me a VW Jetta. So I screwed the alloy wheels from the TAZ onto it. Until 1998, she rode them safely without any problems. When I bought my wife a pointer with a 4x100 bolt pattern, I remembered that I had a 15 forging with good summer tires from a 8 lying around at my dacha. And I remembered that Jetta felt great with the same problem. I bought good original cone bolts. Screwed it on. This summer will be the 4th that the car will be driven on these wheels.
PS What is the most important thing in a bolted wheel? So that it is well pressed with its inner seating plane to the hub/brake disc.
Makc k-113
31-03-2014 13:15
On a disk with mismatched holes for bolts/studs, you can slowly and sadly get to the place where it will be replaced with a standard one. Driving on such a disk as on a standard one - well, in principle, Kutlhu does not prohibit it. But he doesn’t forbid Russian roulette either - he doesn’t care about the fun of two-legged people.
HARON
31-03-2014 13:19
Okay, I’ll offer an option - adapter spacers. From any size to any desired, and studs and bolts... Well, the stem will most likely change and the cost is inhumane, but is it an option?
ASDER_K
31-03-2014 13:31
quote: Originally posted by Kir*: When I bought my wife a pointer with a 4x100 bolt pattern, I remembered that I had a 15 forging with good summer tires from a 8 lying around at my dacha. And I remembered that Jetta felt great with the same problem. I bought good original cone bolts. Screwed it on. This summer will be the 4th that the car will be driven on these wheels.
You have to be so greedy...
Kir*
31-03-2014 13:31
It's not something to joke about with takeout. Here the load on the bearing is increased. And all the factory suspension settings are down the drain. It’s okay when there’s still a 3-5 mm difference in the offset on the disc itself. But the spacer is at least 15-20 mm.
However, on the Porchik I had spacers at the back of 5 centimeters on each side. And 10 inch wheels. and nothing.
ASDER_K
31-03-2014 13:44
quote: Originally posted by Kir*: Why should good things go to waste? a set of wheels cost about fifty dollars. Forging with Toyo 888.
This is exactly what I’m talking about...
Kir*
31-03-2014 13:48
quote: Originally posted by ASDER_K: this is exactly what I’m talking about...
Yes, we are Jews like that
perstkov
31-03-2014 14:13
Of course you can, just buy a tap to correct the thread, and insure your life, it’s a small thing, but your relatives will be pleased
Kir*
31-03-2014 14:20
ASDER_K
31-03-2014 14:24
quote: Originally posted by Kir*: By the way, if we are talking about wills and insurance: I would be more wary of screwing wheels with a universal 2nd 3rd drill onto the car. So there this knot is weakened
is this like that?
Kir*
31-03-2014 14:36
quote: Originally posted by ASDER_K: all sorts of crap happens... is it like that?
ASDER_K
31-03-2014 14:52
The most important question is - nakera one nada?
Kir*
31-03-2014 15:04
quote: Originally posted by ASDER_K: the most important question - nakera one nada?
HARON
31-03-2014 15:15
quote: Originally posted by Kir*:
Wow! Yes, but this is a homemade thing, but there are factory wheels of this kind. Moreover, if the Japs, at the very least, make them more or less durable, then China is generally tough...
ASDER_K
31-03-2014 15:18
quote: Originally posted by Kir*: One disk for different machines. Versatility.
what for?
HARON
31-03-2014 15:38
quote: Originally posted by ASDER_K: why?
ASDER_K
31-03-2014 15:46
quote: Originally posted by HARON: One article instead of three to five.
those.
for the convenience of the manufacturer and seller? why buy such disks for their convenience? Kir*
31-03-2014 15:48
quote: Originally posted by HARON:
Isn’t there a piece of iron in luminthium?
Well, I didn’t cut such a disc with a grinder. But I highly doubt that there is anything inside. This will further weaken the structure. It’s at least reinforced aluminum as a monolith, but inside there’s a plate that’s in no way connected to the aluminum.
HARON
31-03-2014 15:57
I didn’t saw with a grinder either... But judging by the fact that someone is practicing this, the alloy is not homogeneous, there are inserts... However, when buying recyclable materials, there is a separate price list for alloy wheels, they are sold as is.
ASDER_K
31-03-2014 16:07
quote: Originally posted by HARON: the alloy is not homogeneous, there are inserts...
I’ve seen broken ones more than once... there were no irregularities in the broken parts.
HARON
31-03-2014 16:13
ASDER_K
31-03-2014 16:14
quote: Originally posted by HARON: Why then go through the trouble of sawing luminium with a grinder, so that you can then get three kopecks in a metal purchase?
I can’t know
Kir*
31-03-2014 16:54
quote: Originally posted by HARON: Why then go through the trouble of sawing luminium with a grinder, so that you can then get three kopecks in a metal purchase?
Probably so that people don’t buy them whole and then sell them whole... Or maybe they’re too lazy to remove the rubber during installation.
ASDER_K
31-03-2014 16:56
quote: Originally posted by Kir*: Or maybe I’m too lazy to remove the rubber during installation.
not laziness, but worth the money...
HARON
31-03-2014 17:08
quote: Originally posted by ASDER_K: not lazy, but worth the money...
Is it really that expensive? Anyone who has ever cut aluminum with a grinder will not save on tire fitting.
ASDER_K
31-03-2014 17:18
quote: Originally posted by HARON: Is it really that expensive? Anyone who has ever cut aluminum with a grinder will not save on tire fitting.
As the example of even this topic shows, greed has no limits.
Kir*
31-03-2014 17:28
quote: Originally posted by ASDER_K: as the example of even this topic shows, greed has no limits.
HARON31-03-2014 22:30
quote: Originally posted by Makc k-113: How is it not? 4*98 - all VAZs except all-wheel drive. And 4*100 - almost all other cars with 13-14″ wheels.
Not just vases. I'm sure Fiat also uses 4/98.
Any owner of a VAZ-2109 sooner or later has a question: what is the bolt pattern on the rims of their car? It is usually asked at the moment when they begin to think about replacing these important wheel elements that ensure traffic safety and the image appeal of the vehicle.
In general, the concept of “bolt pattern” implies the distance from the center of one disk mounting hole to another. For the most part, this parameter is the same for all products of the Volzhsky Automobile Plant, but in general no standard values have been developed. That’s why the holes for the bolts on the hubs are located differently among different manufacturers.
Stories from our readers
“Fucking basin. "
Hi all! My name is Mikhail, now I’ll tell you a story about how I managed to exchange my two-wheeler for a 2010 Camry. It all started with the fact that I began to be wildly irritated by the breakdowns of the two-wheeler, it seemed like nothing serious was broken, but damn it, there were so many little things that really started to irritate me. This is where the idea arose that it was time to change the car to a foreign car. The choice fell on the melting Camry of the tenth years.
Yes, I had matured morally, but financially I just couldn’t handle it. I’ll say right away that I am against loans and taking a car, especially not a new one, on credit is unreasonable. My salary is 24k a month, so collecting 600-700 thousand is almost impossible for me. I started looking for different ways to make money on the Internet. You can’t imagine how many scams there are, what I haven’t tried: sports betting, network marketing, and even the volcano casino, where I successfully lost about 10 thousand ((The only direction in which it seemed to me that I could make money was currency trading on the stock exchange, they call it Forex. But when I started delving into it, I realized that it was very difficult for me. I continued to dig further and came across binary options. The essence is the same as in Forex, but it’s much easier to understand. I started reading forums, studying trading strategies. I tried it on a demo account, then opened a real account. To be honest, I didn’t manage to start earning money right away, until I understood all the mechanics of options, I lost about 3,000 rubles, but as it turned out, it was a precious experience. Now I earn 5-7 thousand rubles a day. I managed to get the car buy after half a year, but in my opinion this is a good result, and it’s not about the car, my life has changed, I naturally quit my job, I have more free time for myself and my family. You’ll laugh, but I work directly on the phone)) If If you want to change your life like me, then here’s what I advise you to do right now: 1. Register on the site 2. Practice on a Demo account (it’s free). 3. As soon as you get something on the Demo account, top up your REAL ACCOUNT and go to REAL MONEY! I also advise you to download the application to your phone, it’s much more convenient to work from your phone. Download here.
- Remove the washer by unscrewing the wheel bearing nut all the way.
- Insert bolts (about 130mm long with M12x1.25mm thread) into the two holes of the brake disc. Screw the bolts into the hub holes to a depth equal to its thickness.
- We press out the hub by sharply hitting the bolt heads with the brake disc.
- Unscrew the fastening of the ball joint to the steering knuckle and remove the CV joint from the bearing hole.
Is it possible to install 4x100 disks?
This option can be seen quite often on the VAZ-2109. However, in reality this solution is not correct.
The problem is that the standard bolt pattern of the model in question differs relatively little from the factory one. It seems to many that these couple of millimeters do not matter. However, it is impossible to secure a 4×100 disk properly with ordinary bolts. There is a thickening on them (under the head) - it is this that does not allow the fasteners to be screwed in completely. Moreover, if you try to do this by force, most likely you will break the thread in the hub.
The engineering staff of any automaker carefully calculates the compatibility and ability of the vehicle to withstand the design loads for all systems. A vehicle of the declared weight and dimensions must satisfy its technical characteristics, dynamic and load-carrying parameters. One of the most critical parts is the wheel hub, which bears at least 25% of all permanent, long-term and short-term loads that act on the car. This is how the wheel bolt pattern parameter is created.
Bolt pattern is a calculated characteristic of wheels, which determines the number of mounting holes and the diameter of their location circle. This characteristic is the same for almost all AvtoVAZ models and depends on the following vehicle indicators:
Wheels for VAZ 1111
- The weight of the car in running order, that is, fully equipped, with passengers and the maximum possible weight of cargo in the trunk.
- The nature of the vehicle’s operation, namely how important overloads are for a given vehicle. If we are talking about a city sedan, then a bolt pattern of 4 studs is quite enough for it, but a crossover or SUV is certainly equipped with 5 or 6 threaded rods, because off-road driving can temporarily increase the load on the wheel several times.
- Dynamic properties of the car. When entering a turn at high speed, as well as getting into holes, the impact increases the load on the hub studs exponentially.
Automotive plant engineers prescribe the bolt pattern depending on the maximum load on the vehicle with the required safety factor.
Wheels for model 2104
Video text
HOW TO CORRECTLY TIGHTEN THE HUB NUT OF VAZ 2109, 2114, 2110, 2112? VAZ hub nut tightening torque
Front wheel hub mounting nut Thread M20x1.5
Tightening torque, N•m (kgf•m) 225.0–250.0 (22.5–25.0)
Rear wheel hub bearing nut Thread M20x1.5
Tightening torque, N•m (kgf•m) 190.0–225.0 (19.0–22.5)
The service life of wheel bearings should have a fairly long mileage (at least 100,000 km). But the condition of our roads can lead to a fairly early replacement of the wheel bearing on the VAZ 2109, 2110.
Information on wheel bolt patterns on domestic VAZ vehicles
All VAZ cars from the very foundation of the plant to the present day had only 3 main types of bolt patterns, since most modifications were made on a single platform, only their appearance changed. The bolt pattern for most Lada models looked like this:
- The smallest representative of the automaker - VAZ 1111, popularly called "Oka", was produced in the Russian Federation for 20 years - from 1987 to 2008. Considering that the weight of this especially small class car was only 975 kg, and the load on the wheel was less than 250 kg, Oka became one of the few representatives in its class for which a bolt pattern of 3 studs was used.
The final parameter was 3x98, with a mounting hole diameter of 58.1 mm. This was quite economical for the Oka owners.
It was quite problematic to find a similar wheel size on the market, so stamped products with a radius of R12 and R13 were often re-drilled in order to successfully fit on the hub.
Bolt pattern VAZ 2107 4x98
- The vast majority of models of the AvtoVAZ concern, starting from 2101 and ending with the Lada Priora or Kalina, were produced from the assembly line in the form of sedans, liftbacks, hatchbacks or station wagons of the compact or subcompact class.
On a note.
The wheel load and dynamic parameters of these vehicles are very similar to each other.
Starting from 1966, when the concern released its first “penny”, and ending in 2020, the wheel bolt pattern for these cars was 4x98 mm, the diameter of the central hole was 58.1 mm.
The most popular Lada models today, for which wheels with a 4x98 bolt pattern are still sold, are VAZ 2106, 2107, 2109, 2110, 2112, 2114.
- The latest VAZ models, such as Vesta, Granta and X-Ray, produced since 2020, have a wheel pattern as close as possible to the international standard for compact cars. This parameter on the specified modifications is 4x100.
However, this difference does not mean that the 4x98 bolt pattern does not allow the installation of X-Ray wheels on older cars. On the contrary, all products are fully compatible; drivers do not even need to use spacer plates, since the nut can be screwed all the way and securely fixes the wheel.
- Among all the products of the AvtoVAZ concern, such models as the VAZ 2121, or the classic Niva and all derivatives of this SUV have always stood out: the 5-door Taiga, Chevrolet Niva and other models. Due to increased loads on the hubs and wheels due to unsatisfactory road conditions, for which all parameters of the Niva were designed, these compact all-terrain vehicles traditionally had a disc bolt pattern of 5x139.7, with a central hole diameter of 98.5 mm.
These increased indicators allowed the wheel to freely resist bending moment, absorb large loads when the center of gravity is shifted to one side when moving on an inclined plane or when the wheels are forced to hang, and also allowed the car to transmit more torque to the tire treads when driving uphill without the risk of breaking parts .
Wheels for VAZ 2114
Despite the paucity of assortment when equipping vehicles and a small selection of cars of different classes, the plant has achieved maximum versatility in compatibility and the possibility of interchangeability of rims for cars produced in 2020 or 50 years ago.
Features of wheel sizes for the most popular VAZ models
Among several dozen VAZ modifications, the most popular models over the entire 50 years were only 2 of them, as can be judged by the number of copies sold. The wheel sizes for these cars had the following parameters, which varied depending on the year of manufacture, technical equipment and equipment of the car:
- VAZ is the latest modification of the “classic”, produced on the plant’s conveyors for 30 years: from 1982 to 2012. During this time, it never changed its appearance, and the disc bolt pattern was the same - 4x98 with a central hole diameter of 58.6 mm.
The width of the rim varied slightly depending on the model year.
If in 1982 the plant produced models with tire dimensions ranging from 5J to 5.5J, then at the end of production the concern increased the permissible size to 6J.
The radius of the wheels invariably varied from R13 to R15, which made it possible to alternate them by season, periodically changing the side profile of the tire, or immediately use all-season tires with a diameter of R14.
The VAZ 2107 tire size invariably consisted of only 3 main parameters - 175/70/R13, 185/60/R14 and 185/55/R15. The last of the listed parameters was actively in demand among lovers of fast driving on smooth city roads.
On a note.
As for the R13 rubber, it allowed the driver to feel as comfortable as possible when driving over rough terrain, as well as in winter, when the high cord profile took part in adhesion to the road surface. But the most popular parameter remained the universal size R14 and the largest number of tires were sold in this dimension.
If we look at the concern’s earlier cars, we can see that the wheelbase of the Zhiguli has remained virtually unchanged for more than 40 years. This leads to moral backwardness of the technical equipment of the plant's products. At the same time, the lack of new developments greatly reduces both the speed of release from the assembly line and the cost of engineering equipment, which leads to a very attractive retail price for the vehicle.
- VAZ 2114. Produced in a smaller range - from 2001 to 2013. The car was just a restyled modification of the classic “nine”. The legacy of the outdated model did not affect the high popularity of this Lada, and all the wheels that were installed on hubs in the basic version had the same traditional bolt pattern 4x98, DIA 58.6 mm.
European standard bolt pattern 4x100 for Lada X-Ray
- Like the bolt pattern of the VAZ 2114, the width of the wheel rims was not much different from the “seven” and fluctuated between 5J – 6J for the entire production period. As for radius, the concern has completely eliminated the 15-inch diameter from the factory equipment, without prohibiting drivers from installing this parameter as an option. The bolt pattern of VAZ 2114 wheels in the current size also made it possible to install standard 4x100 wheels in accordance with the sizes usual for Europe.
Not a single Lada model has ever looked aggressive; the hallmark of the product was practicality and reliability in operation. The concern did not use extreme overhang indicators, and the wheels were always hidden under the body arches. The average ET limit values for both VAZ 2107 and 2114 were ET25...35 mm, and deviations from this characteristic obligated drivers to install additional mudguards on the side parts of the body and change the design of the hubs, making them more durable to avoid deformations.
The bolt pattern of the VAZ 2114 wheels, as well as all other dimensions of the hub and disks, were used on the brand’s followers - Kalina and Priora. With the arrival of new management at the domestic concern, this parameter ceased to exist altogether, since the plant had a new orientation to the West and possible import of products to the nearest CIS countries.
5 studs on VAZ 2121 wheels
Replacement methods
We recommend watching a video on how to remove a wheel bearing from a VAZ 2110. This will allow you to better understand the nuances of the work. A clear example will never be superfluous.
Installation
As for the replacement, there is also a video teaching how to do this process. Craftsmen use three replacement methods, each of which has its own characteristics and advantages. Therefore, it would be correct to talk about each of them.
First way
We take out the locking ring
- You will definitely need a puller to remove the bearings.
- Carefully remove the bearing with a specialized tool and replace it with a new one.
- Upon completion of the shift work, the unit is reassembled.
The advantage of this method is that the camber adjustment bolt does not need to be touched. If you violate its geometry, move it from its rightful place, it will be quite problematic to put it back.
But there are also disadvantages - you will have to take a position that is not the most comfortable to perform the operation. Therefore, it is strongly recommended to carry out work with a lift or using an inspection pit. But even so, you can forget about comfort.
Second way
Here you have to complete the following steps:
- Carefully remove the steering knuckle to remove the bearing. After this, the hub is completely removed;
- Next, use the workbench;
- On the workbench, replace the element and then put it in place;
- It is important to follow the correct reassembly sequence
From an execution point of view, the second method is easier than the first. But here you can affect the camber. If this happens, adjustment may become difficult. Do not rush to remove the bolts securing the knuckle to the strut. Make marks with chalk or a marker to later find their original position. Based on the marked marks, it will be much easier to put the unit back together.
Even a professional cannot achieve a perfect match of marks, but it is more than possible to minimize deviations.
We recommend you take several steps:
- Place tags. The first is the position of the adjusting bolt on the strut, and the second is the previous position of the knuckles;
- Knock out the knuckle bolts;
- Remove the fasteners from the lower ball joint;
- Knock the bearing out of the hub;
- Remove the retaining rings;
- Press out the bearings with a vice;
- When you put the assembly back together, generously lubricate the cavities in the fists with lubricants.
This method is relevant for cases where a full repair of the chassis is performed. This way you can easily replace not only the wheel bearings, but also ball joints, steering ends, lever silent blocks, etc.
Bolt pattern compatibility table for Zhiguli wheels
Taking into account the above descriptions of bolt patterns, they can be easily combined into one informative table, according to which every car enthusiast who owns one or another Lada model will always be able to choose the correct wheel rim parameters.
This table of correspondence of geometric characteristics to brands and modifications of domestic cars is given below:
The bolt pattern of VAZ wheel rims is a very important indicator of the model, which significantly limits the range of products offered for sale. If the driver suddenly takes a fancy to a disc that has different characteristics, he will have to completely change the design of the hub and install the studs in a new order. Experts say that such a practice is fraught with unpredictable consequences during the operation of the vehicle.
| Make and model VAZ | Disc diameter, inches | Rim width, inches | Wheel offset, ET, mm | Bolt pattern, pcs x mm | Central hole diameter, mm |
| VAZ 1111 (“Oka”) | 12, 13 | 4; 4,5; 5 | 35, 40 | 3x98 | 58,1 |
| VAZ 2101…2115, “Kalina”, “Priora” |
Replacing the VAZ 2110 hub
The instructions will tell you how to replace the hub on your car yourself. If the chassis is faulty, then this can have a negative impact on the safety of your car; the main thing here is not to sleep and immediately start replacing the part. What are the causes and signs of a hub failure on a car? On a VAZ 2110 car, usually the very first sign of a hub failure is loud noise while driving. Another sign is that the wheels are weakening, the car is jumping, not driving smoothly and veering to the side. When you see that such symptoms have appeared, you need to urgently replace it. The hub can, of course, be damaged by a less-than-quality wheel replacement. It is also possible that it may break due to the fact that the threads could be damaged when screwing the bolts. When you remove the hub bearing, be sure to look at how the new bearing fits in, if the movement is free then!!! you need to replace the hub with a new one. Otherwise, if you leave it, bearing play will form. As a result, the wheel will dangle on the new bearing. We check the condition of the hub and install a new one: We need sandpaper that will help clean the surface from grease and dirt, sand all burrs thoroughly. Check the condition of the hub to see if there is any mechanical damage, or perhaps cracks and other causes of wear have formed there. If one of the signs is detected, the hub must be urgently replaced. Procedure: - First of all, we carefully apply a very thin layer of lubricant to the back of the o-ring, then the hub needs to be installed on the steering knuckle axle. — The next step is to install the steering knuckle axle. — Install the fixing nut and carefully press the bearing ring. — When installing the hubs, be sure to adjust the play of the axial bearing of the hub. — After you have adjusted, tighten the tightening bolt thoroughly, it is this that secures the nut. — Now install the brake disc, if there is an anti-lock system, then install the sensor. Below we will tell you how to replace it yourself and what we will need to dismantle and install a new part: - A pair of wrenches for “seventeen”, a wrench for “nineteen”, and “twelve”. — The key we will use to remove the bolts on the wheel at “thirty.” — Special puller for balls. - Jack. — A small piece of wire, as well as a string. — Hammer with pliers.
The car needs to be placed on a jack. Next, tighten the handbrake, place the car in first gear, and install anti-roll wheels under the remaining wheels.
Remove the hub caps. Take a narrow chisel and you can loosen the collar of the hub bearing nut. Take the head at “thirty” and loosen the bearing nut. The nut was tightened tightly, take a head or a knob, they are strong, and with their help we will tighten it stronger.
Carefully loosen the bolts that hold the wheel.
We dismantle the wheel.
We take the key to “seventeen”, with its help we will unscrew the bolts that hold the brake caliper bolts. Two are located below, one is located above.
Take a flathead screwdriver and use it to spread the pads apart.
Remove the brake caliper together with the caliper.
Tie the caliper so that it is not stretched on the brake hose.
Using a key set to twelve, unscrew and remove the brake disc.
Unscrew the bearing nut and remove the washer.
Using a "seventeen" wrench, we need to unscrew a pair of bolts that hold the ball joint.
Take the key to “nineteen” and unscrew the steering end nut.
We will install a puller that will press out the steering tip.
We take out the steering tip.
Unscrew the fastening elements of the ball joint, then remove the CV joint from the hole.
We begin to knock out the hub using a “nineteen” socket.
To avoid any force majeure, take a punch and protect your fingers.
We need to knock the hub out of the fist.
Using a screwdriver, pry up and remove the dirt protection ring.
When you press out the bearing, you will see that there is a ring left on the hub; it is difficult to remove it due to the fit. A puller will help you here; install the paws in the grooves located on the hub.
Install the mud ring, now secure it to the new hub.
Install the hub and reassemble in reverse order.
- Which car to choose in 2020? Diesel, Petrol or Electric?
See all photo news >>