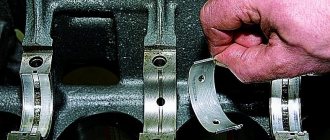
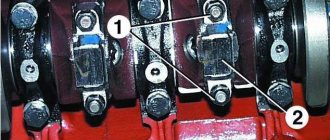
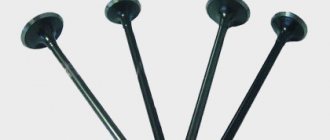
The crankshafts are not new, they have traces of installation, damage on the cheeks and axles does not affect operation, but they were selected, repressed and checked by specialists at the Moto43Team motorcycle workshop. It is worth considering that the bearings do not sit rigidly, this “drawdown” is NOT a problem/defect for IZ Jupiter. Can be used as is, but it is recommended to place it on a sealant, for example: https://triboplast-nn.ru/p198880077-anaerobnyj-germetik-vysokoj.html
USS connecting rods from Minsk were installed, as they have a longer service life and better lubrication. Will fit into any Izh Jupiter crankcase without modifications.
1. The shafts on the cheeks become wider than the standard one by no more than 0.5 mm, which will require additional attention during installation.
2. These shafts require careful running in.
3. The fingers are turned out and matched to a specific finger.
Write a review
Register by leaving product reviews and you can earn bonus points!
Your feedback:
Attention: HTML is not supported! Use plain text.
Grade:
Bad Good
Enter the code shown in the picture:
Usually the problem of replacing a connecting rod in the crankshaft is faced by owners of two-stroke equipment, these are motorcycles Minsk, Voskhod, IZH, Krosoviki, Snowmobiles, scooters and mopeds. The crankshaft is screwed up, the question arises of how to repair the crankshaft of a motorcycle, the answer is, first, buy a new crankshaft, second, replace the connecting rod, pin and needle bearing (separator) on the broken crankshaft.
Buying a new crankshaft is of course easier, but the price of a crankshaft is five times more than the price of a connecting rod with a pin and a needle bearing. Here the problem immediately arises of how to press the crankshaft yourself at home, and then compress it and eliminate the runout. Of course, to eliminate runout, any master will look for a lathe, but this is an extra problem. There is a way to eliminate crankshaft runout at home without a lathe, which I came up with.
If you decide to replace the connecting rod in the crankshaft of a motorcycle yourself, then this article is for you. Why pay extra money for a new crankshaft when changing the connecting rod will transform a broken crankshaft into a new one.
Just don’t try to heat the crankshaft, everything is done cold.
Frequent breakdowns
Repairing the crankshaft of a Ural, MT or Dnepr motorcycle most often involves replacing a part made from a solid casting . In second place, in terms of frequency of occurrence, is the failure of connecting rod or main bearings. As a result of malfunction of these parts, play may appear in the lower head of the connecting rod. Another sign of a breakdown is a change in the position of the crankshaft, which prevents it from being seated correctly in the engine crankcase.
Even if you are not a specialist in engine repair, the occurrence of this problem can be felt due to the appearance of knocking sounds in the lower part of the engine. With the engine disassembled, it is easier to assess the degree of bearing wear - grab the connecting rod and try to forcefully rock it from side to side. If the connecting rod dangles and there is a certain freedom in its movement, then it’s time to change or repair the shaft.
A less expensive repair of the crankshafts of Java, Minsk or Dnepr motorcycles may consist of replacing the main bearings. To assess their performance, it is necessary to use the connecting rods and try to move the shaft using them.
The problem may be the rather large forces required to crank the engine. If this is relatively easy to do on a Java motorcycle, then heavier motorcycles like MT or Dnepr will require considerable diligence. Connecting rod bearings can only be replaced after disassembling the shaft, unlike main bearings.
[sc:ads3]
Those who have disassembled a motorcycle engine or held a crankshaft in their hands know that it consists of several sequentially pressed parts. That is why repairing the crankshaft of a Minsk motorcycle or other engines of a similar design can only consist of replacing the part after unpressing.
Raspresovka kovala
You can press the crankshaft in different ways at home. I prefer to crush the crankshaft cheeks using a chisel or any conical iron bar. The photo below shows crushing the crankshaft cheeks using a chisel and hammer. The principle is this: cones are inserted on both sides of the connecting rod, then blows are applied to them alternately, the cones push the crankshaft cheeks apart. If the width of the cone does not allow the crankshaft cheeks to be moved apart until it separates, you can additionally place a piece of metal under the cheek.
Photo. Motorcycle crankshaft before pressing.
After disconnecting the crankshaft cheeks, you can remove the old connecting rod and bearing. Usually the crankshaft pin comes out from one cheek of the crankshaft, but remains in the other; it can be knocked out using a strong mandrel slightly thinner than the crankshaft pin. Knock out the finger with a heavy hammer; if you try to knock it out with a light hammer, the process may take longer. The old finger is knocked out from the outside of the crankshaft cheek.
Pressing out the crankshaft
For repressing the Minsk crankshaft, there are a large number of devices, both specialized and homemade, invented by those who had to carry out repairs at home. The most reliable and easiest, especially for those who are performing depressing for the first time, is a method based on crushing the crankshaft cheeks using a chisel or any other tool approximately suitable in shape.
Before pressing, it is important to record the values of the gaps between the surface of the connecting rod and the surface of the crankshaft cheeks. To do this, use a rod to measure the gaps and write down the data obtained.
In order for the Minsk crankshaft to be repressed, you must first remove the crankshaft itself; to do this, follow the instructions below:
- — Install two metal cones on both sides of the connecting rod, then successively apply medium-force blows to each of them. This will cause the crankshaft cheeks to corrode under the pressure of the cones.
If the cone itself is not wide enough and is not enough to fully open the crankshaft, you can place a small metal bar or plate under the cheeks.
- — Once the crankshaft halves are separated, access to the connecting rod will open. Remove it together with the separator.
- — Now pull out the motorcycle crankshaft pin. This should not be difficult and there can only be one problem. Sometimes it happens that the finger comes out only from one of the crankshaft cheeks and remains securely fastened in the other. In this case, it must be tapped using a strong mandrel. Its thickness should be approximately equal to the thickness of the finger itself. In order to knock out a finger, you should use a heavy hammer, since a light one may not be enough. Please note that you need to knock out your finger from the outside of the cheek.
Pressing the crankshaft
It’s not difficult to press the crankshaft, I didn’t bother pressing the good crankshaft, I’ll explain everything in words. It is advisable to press the crankshaft on an anvil or an old cast-iron car block. Hammer the new finger into the crankshaft cheek in which the finger remained when pressed, this will make it easier to press in the second cheek. The new pin is driven from the inside of the crankshaft to the end. Place the new needle bearing and connecting rod on the pin. Place the crankshaft cheek with the hammered pin on the anvil so that the pin rests on the anvil. Place the other cheek on your finger and hammer in with a heavy hammer as shown in the photo below.
When you put the second cheek on the crankshaft, be careful not to hit the threads or the cone of the crankshaft axis. At this point, there is no need to worry too much about the alignment of the crankshaft shafts; it is enough to roughly position it correctly.
The koleval has been pressed, now check the size between the cheeks with a caliper, if possible, spread the cheeks less, if more, beat the cheeks to the desired size.
Also, be careful that the crankshaft pin does not come out from one of the cheeks; if it comes out, drive it in with a mandrel.
Photo. Pressing a motorcycle crankshaft
Detailed instructions for balancing the crankshaft at home
To save costs on maintenance at a car service center, you can balance the crankshaft in a garage. The article describes options on how you can balance the crankshaft yourself.
Content
[ To uncover]
[Hide]
Why is crankshaft balancing necessary?
When the crankshaft is unbalanced, the mass is distributed unevenly along and across the axis, that is, the balance is upset: one edge is lighter than the other. The main cause of lateral imbalance is wear of shaft parts during prolonged use.
Crankshaft balancing is carried out to reduce the load and vibration on the components of the power unit. This operation makes it possible to increase engine performance and extend service life. Basically, balancing is necessary for worn-out engine elements, but there are cases when a new car needs balancing.
Balancing the crankshaft in the garage
You can determine whether the crankshaft needs balancing by the behavior of the gear shift knob: it begins to wobble when idling. The same goes for the engine: if at idle the engine runs jerkily.
The causes of problems may be different:
- poor quality manufacturing of associated parts;
- heterogeneity of the material used for the crankshaft;
- backlashes resulting from violation of the gaps between mating elements;
- poor quality assembly;
- inaccurate centering;
- natural wear and tear.
After replacing the flywheel or its ring gear, the clutch basket, it is necessary to balance the crankshaft. If this procedure is not followed, then even at low speeds the motor will begin to vibrate due to imbalance.
Where to balance the crankshaft - repair options
There are two ways to balance the crankshaft:
- The static method is used for minor imbalances. In this case, the crankshaft is stationary. In this case, the heavy side is lowered down. The light side is balanced using weights that are attached to the edge of the light side. Then, using special knives, the metal is removed from the heavy part until the loaded part is lowered.
Grinding the crankshaft
- The dynamic method is more accurate than the static one. It is used to correct a significant imbalance. In this case, a special machine is needed on which the shaft is installed. The crankshaft begins to spin to the required speed. Using a laser, the point where the heaviest point is located is determined. Excess metal is removed from this place.
Loading …
DIY balancing procedure
Balancing can be done at a car service center, where, naturally, the procedure will be carried out more accurately, or in your own garage. To carry out the procedure at home, you need to make a special device - a machine on which the flywheel will be installed. There is nothing complicated. Even a person with no metalworking experience can make such a machine with his own hands.
Device
First of all, you need to weld the frame, which will serve as the basis of the machine. The dimensions of the frame and fixture depend on the length of the crankshaft. For manufacturing you need a profile pipe and a corner. After making the frame and grouting the seams, you need to drill holes for three studs in the two corners of the frame and in the middle of the opposite pipe. Nuts with an internal thread diameter equal to the diameter of the studs, which are made from iron rods, are welded to the holes.
Homemade balancing machine
Before balancing, the frame must be aligned strictly horizontally using a level. This is easier to do if it stands on three pins than on four. After adjustment, lock nuts should be screwed onto the welded nuts on top. Next, you need to make holes near each corner of the frame for 4 rods with a diameter of 14-16 mm, which will act as racks. The length of the rods should be the same - approximately 250 mm.
Now you need to take 4 corners 2-4 cm wide and about 30 cm long and drill holes in them with a diameter corresponding to the diameter of the racks. A corner is placed on each pair of racks with the ribs up. The corners need to be welded. The result is a device reminiscent of a horizontal bar with parallel bars: racks in the shape of the letter “P” are installed opposite each other. The crankshaft will be installed on these struts. Thus, the crankshaft balancing machine is ready.
Crankshaft alignment
The crankshaft has been assembled, all that remains is to eliminate the runout of the shafts (balance), many people think that you can’t do this without a lathe, but everything ingenious is simple.
Measure each neck with a caliper as shown in the photo below, usually they are the same size, but sometimes they are slightly different in size. This dimension must be taken into account when aligning the crankshaft.
Photo. We measure the crankshaft cheeks.
All that remains is to attach the rod to the crankshaft cheek as shown in the photo below. It will be like this, first place the barbell on one cheek and press it with your finger, the barbell will lie perfectly flat on the cheek, if this cheek is shifted upward, a gap will appear between the barbell and the second cheek. If the cheek is lower, the bar will lie slightly obliquely.
Photo. A motorcycle crankshaft with a rod is shown; the arrow shows the gap between the rod and the cheek.
Your task is to achieve alignment of the crankshaft cheeks without gaps by applying the bar alternately to each cheek. The photo below shows how you can move the crankshaft cheek with a hammer blow. Just be sure to take into account the strength of the crankshaft cheeks, the crankshaft on which I am showing from a cross-country ChZet, it is hardened and is not afraid of impacts. But most of the crankshafts from road motorcycles have soft metal, so you can only hit the place where the bar is not applied.
Photo. This way you can move the crankshaft cheek.
If one cheek of the crankshaft turns out to be larger in diameter than the other, then when centering the crankshaft, take into account the gap between the cheek and the rod; this gap should be visually the same when applying the rod to the larger cheek on both sides.
Photo. The crankshaft of the motorcycle is centered, the rod lies without gaps on the crankshaft cheeks.
If you do everything right, everything will be correct, you will save money on a new crankshaft by replacing only the connecting rod on the old one, for this you only need your hands and a smart head.
The essence of the process of repressing pistons
Before we start talking about the process itself, it is necessary to understand in more detail what the piston design is and what exactly happens during the pressing process. Since the piston itself is used to drive other parts, attention is paid to its upper and lower heads.
The upper piston head is connected directly to the connecting rod, which subsequently transfers the load to the crankshaft, while the lower piston head is attached to the journal of the shaft itself.
Due to high loads, the connecting rod is always made of durable alloy compounds and, nevertheless, they are constantly trying to reduce its weight to reduce the level of vibration in the engine during operation.
In this regard, the re-pressing process occurs as follows:
- the engine shell is disassembled in order to gain access to the pistons;
- the connecting rod bolts and nuts, which act as fasteners to the crankshaft of the lower and upper piston heads, are removed;
- the head of the connecting rod part is heated and the freedom of movement of the pin inside the piston is checked;
- as soon as the calculated gap of 0.01-0.04 mm is reached, the part itself is pressed in;
- The vehicle is collected back.
As you can see, the entire process of repressing the pistons consists only of determining the required distance at which the piston moves without any obstacles. The result of pressing is a clean, smooth stroke of the piston and smooth operation of the car engine.
Is it possible to replace the crankshaft cheek by taking it from another?
I did it in different ways, but it is advisable not to change the crankshaft cheek, since it happens that there is a slight displacement from the center of the hole and the center of the crankshaft, so by assembling the cheeks from different crankshafts it is not possible to remove the axial displacement of the shafts. But it happens that even different cheeks sit like native ones. Crankshafts are drilled on one machine with one setting, if the crankshaft is from a different batch, then it was drilled on another machine, and here there may be a slight displacement of hundredths and tenths of millimeters, this little thing does not affect the engine, but when assembling the crankshaft from different cheeks, there may be a displacement.
