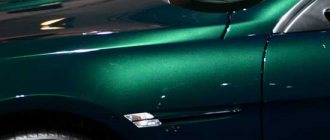
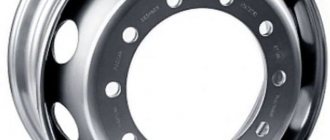
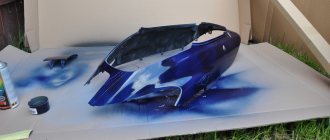
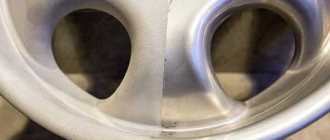
Where liquid rubber is used, car painting becomes a quick and easily reversible process, since the applied film can be easily removed and the original color returned. This product is actively used to treat the body, interior and rims. In fact, liquid rubber is a paint (emulsion) based on rubber, bitumen or vinyl. This material has high hydrophobic properties and forms a barrier against aggressive environmental influences. Liquid rubber is produced in the form of liquid in cans (concentrate) or in aerosol format. When sprayed, the emulsion hardens, forming a rubber film on the surface. Hardening of the material occurs almost immediately. So, as a result of painting a car with liquid rubber, a thin protective layer of matte color is formed, which, if desired, can be treated with a special varnish to obtain a glossy shine.
Description of material
This is a modern coating designed to protect the metal parts of the car from the effects of negative factors, as well as to change the exterior. Liquid rubber is a regular paint made from rubber. It can be applied to different car surfaces. Correct application of the material provides the painted elements with anti-slip and shock-proof qualities.
What is liquid rubber
Important! After painting, the coating becomes more resistant to ultraviolet radiation and sudden temperature changes. Also, liquid rubber can be easily removed if necessary.
Liquid rubber for a car
The texture of rubber paint can be either glossy or matte - everything is at the buyer’s choice. At the same time, the color palette is quite wide. But if a certain shade is not on sale, then it can be obtained by mixing existing colors.
Covering the car with liquid rubber
Today, anyone can cover individual elements or the entire car body with liquid rubber with their own hands. This will protect the body elements from damage, as well as give them a new original look. In this article, one author decided to share how this can be done with minimal effort in a garage environment. The whole process is not much different from regular car painting, it is even simpler.
Materials and tools for work: - masking tape; - scissors; — compressor for painting; - newspapers for covering windows, etc.; — Control Spray set (produces a clear stream); — plasti dip (this is Rubber Dip in black).
Car tuning process:
Step one. Preparing the body for painting
In order not to paint over unnecessary elements of the car, they need to be properly covered with newspapers and masking tape. Perhaps the most important component is the heatsink, so that's where you start. If you paint the radiator with liquid rubber, it will become ineffective and the car will overheat. To close the radiator, you need to remove the front protective grille and then cover it with newspaper.
As for the headlights, here the author decided not to cover them completely; he sticks masking tape only around the edges. Once painted, the plasti dip can be removed very easily from the headlights, resulting in very smooth edges.
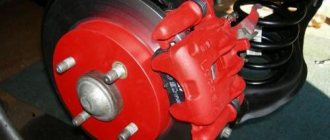
You also need to use masking tape to seal the brakes under the disc and calipers. You also need to remember about the side mirrors; you need to seal their mirror part. As for the glass, they are all sealed using newspapers and masking tape.
The registration number must be removed.
The back of the lights need to be covered with tape only along the edges, that is, exactly the same as in the front. The better the car is prepared for painting, the less work there will be in the end. However, if some error was made somewhere, this is not so scary, because such a coating is very easily removed from the surface. It is also important to remember that the car must be washed very well and there should be no greasy marks on it.
Step two. Car painting
After the preparatory work, you can apply a rubber coating to the car.
The paint regulator must be adjusted so that the paint is applied as efficiently as possible. The speed control must be set to medium or low. It is also important to ensure that the paint is mixed evenly; there are many examples when it lies crookedly and in chunks. To pour plasto dip into the gun, you need to use a funnel.
There is no need to immediately fill the tank to the brim; it is best to fill a little more than half the gun for the first time. It is important to remember that there is a small dead zone in the gun; therefore, before painting a car with a gun, you need to paint some other elements, for example, a garage wall, a gate, and so on. In this case, you need to adjust the spray gun so that the paint applies smoothly and evenly. Only after this can you start painting the car. You need to start painting from the back of the car, with the most difficult part left for the end, just when the master has already gained experience. You need to paint the car from top to bottom, you should not linger in one place and move the gun back and forth for a long time, the layer should be uniform. You need to stand at a distance of 20-30 cm from the car, holding it with your hand, and in this position simply move the gun up and down. It is important to pay attention to how the paint supply tube is located. It must be in the paint constantly, otherwise, if the paint supply is interrupted, the work will not be done well. The gun will always be at the same angle, and this is the angle you need to calculate when filling the gun with paint. In total, about 3-4 layers of paint are applied. After the first coat, the car will be striped, this is quite normal, this phenomenon indicates that the paint is applied evenly, without streaks or bubbles. After about three layers of paint have been applied, the color will become uniform. It happens that after painting there are unpainted places, this is also not a problem, they can be painted after the car is completely painted.
When applying the second layer, the transparency of the paint is covered by approximately 65-70%, that is, the original color of the car will be almost invisible. During the painting process, the main thing is not to rush, otherwise drips may occur.
Step three. Final works
After the paint has dried, you can remove the newspapers and masking tape from the car. It is important to remember to remove the newspaper from the radiator as well as the brakes. You need to remove the tape very carefully and smoothly, otherwise, if you pull, the coating may rupture and an uneven border will form. You need to carefully remove the masking tape from the headlights, after which you can remove the coating itself from them, this is done quite simply. The result is a very smooth and beautiful headlight border.
If it so happens that other unwanted elements of the car were painted over, then this is not a problem, such a coating can be easily removed from any surface.
That's all, actually. In this simple way you can apply a rubber coating to your car. Source
Become the author of the site, publish your own articles, descriptions of homemade products and pay for the text. Read more here.
Why should it be used?
Liquid rubber combines practicality and aesthetics, so it can be considered the optimal solution for painting car rims or other elements. In addition, applying plastidip is quite simple, since no preliminary surface preparation is required. If desired, even a beginner can change the appearance of his car.
Advantages of using liquid rubber
Using liquid rubber has many advantages, including:
- low cost;
- ease and versatility of use;
- Possibility of application to different types of surfaces;
- the thickness of the finished coating is several times greater than a layer of conventional paint;
- rubber paint perfectly masks defects and protects the surface from damage;
- wide selection of colors;
- possibility of painting rims without dismantling the wheels;
- resistance of liquid rubber to external influences;
- easy removal of the coating (no traces remain on the discs).
Advantages of liquid rubber
Note! Proper painting with liquid rubber will eliminate disc imperfections and return them to their original appearance.
Pros and cons of painting wheels with liquid rubber
Painting wheels with plastidip is a very practical and affordable way to transform your car. The main advantage of the material is its resistance to a number of harmful factors. In addition, liquid rubber forgives mistakes - if the application order is broken or you simply don’t like the result, then everything can quickly be returned to its original state. The only disadvantage of painting wheels with liquid rubber is associated with the second application method - cardboard interferes with painting in the corners.
Types of liquid rubber
Liquid rubber is an excellent solution for people who want to change the appearance of their car. But which paint manufacturer should you prefer? Below are the best representatives of their class.
How to choose liquid rubber
Table. Popular types of liquid rubber.
| Title, photo | Description |
| Plasti Dip | The most famous type of liquid rubber produced by the American company Perfomix. The product is very popular almost all over the world. |
| Rubber paint | A high-quality analogue of plastidip from the Chinese manufacturer Pitlane Unofficial. Rubber paint is of high quality and low cost. |
| Runway | Having appeared on the market relatively recently, rubber paint from an American manufacturer has been successfully used by car enthusiasts. The most commonly used colors are black and white. |
| Mibenco | Another type of liquid rubber produced by a German company. It is considered one of the best manufacturers of auto chemicals on the world market. |
| Arizona | One of the few domestic analogues of Plasti Dip. Arizona products are manufactured in the city of Izhevsk. It is characterized by low cost and good quality. |
On a note! Liquid rubber is available in aerosol form and in cans. But the first option is considered more popular.
What is liquid rubber?
The drug is widely used in the American market and has conquered almost the whole world. The uniqueness of liquid rubber lies in the fact that it can be applied to almost any appropriately treated object without much effort. And if necessary, it is also easy to remove the protective film.
Despite the fact that the drug is quite new and does not contain nanotechnology, it became widespread in the automotive sector relatively recently. The coating is usually used as a decorative material for exterior finishing and in some cases as sound insulation.
Car surfaces treated with liquid rubber significantly increase corrosion resistance, and the rate of paint coating burnout is practically absent, so when the car is sold, it will look like a new product with a short service life.
What you need for painting
To paint wheels with rubber paint, you need to prepare the following tools and materials:
- liquid rubber – 2 cans (color of your choice);
- jack;
- wheel supports;
- wheel wrench;
- degreaser;
- dry towel;
- masking tape or playing cards (to protect the tire from paint);
- protective gloves;
- stationery knife.
Tools for painting Plasti Dip wheels
Once everything you need is at hand, you can start painting. The procedure is simple, but may take some time. Therefore, it is better to paint wheels in the garage.
What you need to paint wheels with liquid rubber
Why cover rims with liquid rubber?
Painting wheels with liquid rubber will be the optimal solution for any car enthusiast. After all, the material is one of the new products that is used for tuning cars. Liquid rubber combines beauty and practicality - you can cover the wheels with plastidip of various colors, experimenting with the type of coating (glossy or matte), as well as color saturation. Correctly applied liquid rubber will help restore the appearance of the discs, hide imperfections and give them a second life. If you apply it yourself, the procedure will not be expensive at all and you will not have to contact a service center to completely replace damaged wheel rims.
Instructions for painting alloy wheels
Step 1. Clean and degrease the surface of the discs after dismantling them.
Cleaning the disc surface
Step 2. There is no need to prime the discs before applying plastidip, so pay enough attention to cleaning them.
Wheel rims after degreasing
Step 3. Prepare the paint material. As a rule, for 4 discs you need to purchase 2 cans of paint.
Preparation of paint material
Step 4: Spray the first coat of paint.
Applying the first layer of liquid rubber
Step 5. This is what the rims look like after the first coat of paint.
Discs after applying one coat of paint
Step 6: Be sure to clean the caps and mounting bolts.
Cleaning caps from dirt
Step 7: Apply a second coat of rubber paint. When applying, the can must be kept at a distance of at least 25 cm from the surface.
Applying a second coat of paint
Step 8. The discs should look something like this after the second layer.
Appearance of wheels after applying the second layer
Step 9. Be sure to paint the caps after washing and degreasing them.
Painting wheel caps
Step 10. For the paint to dry completely, you need to wait at least an hour. During this time, remove the grille and prepare it for painting.
Preparing the grille for painting
Step 11: Paint the front grille. Of course, the main purpose is the wheels, so you can paint the grille as you wish.
Painting the grille with liquid rubber
Step 12. After painting, the caps take on a completely different look.
Wheel cap after painting
Step 13. Now they look like brand new. You can’t say that they drove 120,000 km.
Appearance of the caps after the plastidip layer
Step 14: Remove any remaining paint from the tires. To do this, you need to pick up the dried liquid rubber with something.
Removing liquid rubber residue from tires
Step 15: The wheels are dry and ready to install.
The paint is completely dry on the disc
Step 16. Be sure to inspect the surface for any flaws or defects. If necessary, the disc must be repainted.
The surface of the discs must be free of defects
Step 17. Don't forget about the little things. Therefore, tighten the caps - without them, the wheels do not look so stylish.
Installing nipple caps
Step 18: Install the repainted grille after the paint has completely dried.
Installation of painted grille
Step 19. Painting the rims is finished! All that remains is to put them in place and you can enjoy the result.
Wheels painted with liquid rubber
Sequence of plastidip coating
Painting with liquid rubber
First, we buy liquid rubber in cans. You will need 3-4 cans. Next, you should prepare for painting the wheels with liquid rubber.
- It is important to wash them thoroughly and remove dirt, resin and other contaminants.
- Next, degrease the disc.
- After this, seal the tire with masking tape.
- Apply the first thin layer of Plasti dip evenly, avoiding drips. Once the coating is applied, let it dry for 40 minutes until matte.
The second layer is applied in the same way, the third... As a result, the disk should have at least 4 layers of liquid rubber. Preferably 6-8 layers. After the last layer has dried, Plasti dip becomes hard and matte. At the end, just remove the masking tape and enjoy the new look of your car.
Important! The room temperature should be at least +15 degrees. Before applying, it is better to warm up the spray on a radiator - this will improve application.
So... a week has passed, a month, two... Are you tired of the coating? In this case, we remove it and get the original look - the disc is ready for a new color!
Painting Plasti Dip wheels
Step 1: Prepare your work area for painting. If weather permits, the process can be carried out outside.
Preparing the workplace for painting
Step 2. Prepare all necessary materials.
Preparation of tools and materials
Step 3: Jack up your car.
Raising a car with a jack
Step 4: Remove the wheels and place them face up on your workbench.
Removing wheels for painting
Step 5. Thoroughly clean the surface of the rims.
Cleaning rims
Step 6: Protect the tires from paint using playing cards as shown in the picture. You can also cover them with masking tape.
Bus protection with playing cards
Step 7: Shake the spray paint can vigorously.
Shaking the aerosol can
Step 8: Apply the first coat of Plasti-Dip to the discs. The first layer should be relatively light and thin.
Applying the first layer of Plasti-Dip
Step 9. Wait 15-20 minutes for the paint to dry.
After application, the paint must dry
Step 10: Apply a second coat of paint. By now the first coat should be completely dry. Be sure to shake the can again before applying the second coat.
Applying a second layer of plastidip
Step 11: Wait another 15-20 minutes to allow the second coat to dry.
Drying a layer of liquid rubber
Step 12: Apply third and subsequent coats as desired. Only the first two layers of Plasti-Dip are considered mandatory.
Third layer of liquid rubber
Step 13. Proceed to paint the remaining wheels.
Painting the rest of the wheels
Step 14: Remove the playing cards or masking tape from the wheel. Painting is complete.
Removing playing cards
Step 15. Install the wheels on the car. Make sure all mounting nuts are securely tightened.
Installing painted wheels on a car
Step 16: Lower your vehicle and remove the jack.
Removing the car from the jack
Step 17 : Be patient! After painting you need to wait a few hours. Only after this can you go anywhere.
Waiting after painting is mandatory
Step 18. Be sure to show off your new wheels to your friends!
Wheels after painting with Plasti-Dip
Liquid rubber: advantages and self-painting
Nowadays, treating wheels with liquid rubber is becoming increasingly popular. This material has many advantages, and above all these:
It is worth noting that the big disadvantage is the price, but it pays off with high quality.
Necessary materials
To paint wheels, the following tools and materials are required:
- Raw rubber. Unlike regular paint, it is better to use spray cans; the quality will hardly suffer.
- Solvent.
- Gloves and respirator.
In addition, if painting will be done without removing the rubber, you will need masking tape and old newspapers.
Preparatory work
Unlike restoration of discs with acrylic paint, liquid rubber is not so demanding in preparing the base. It is not necessary to remove old paint and sand out scratches. The only thing that is necessary is to wash it very well, degrease it and after drying, you can start applying it.
If painting will be done on a car, measures must be taken to protect the rubber and brake pads.
However, we strongly recommend removing the wheels, this will allow you to paint the most difficult to reach areas.
Painting
Liquid rubber is applied in three stages. The first layer is the basis for all subsequent ones. It must be applied evenly over the entire surface, so that the old paint shows through, i.e. it should be almost transparent. At the next stage, liquid rubber is applied in such a way that the new color becomes more saturated, but transparency is maintained. And so layer by layer.
Additional recommendations
To ensure that the painting of Plasti-Dip wheels is successful, you must follow a few simple recommendations:
- The can must be shaken well. After shaking, the paint will adhere well to the surface without splashing in the form of drops or pieces;
- if in one of the areas the layer of liquid rubber is damaged, then you need to apply the paint locally again in several layers;
- the optimal drying time is 30 minutes and may vary depending on the manufacturer’s recommendations;
- do not start painting wheels with liquid rubber if the outside temperature is below 15°C;
- It is recommended to apply the paint at right angles to the surface;
- Protective gloves should be used when painting as Plasti-Dip is difficult to remove from leather.
Painting wheels with liquid rubber
Painting wheels with plastidip is an excellent opportunity to change the appearance of a car with a minimum of effort and spending a minimum of money. The main advantage of the paint is its ease of use. Plasti-Dip forgives mistakes if the application technology is violated. In addition, if the car owner does not like the result, then the wheels can be returned to their original appearance very quickly.
Consumption of liquid rubber on wheels
Good luck, dear motorists! Did you like the article? Share your experience in the comments below!
Do-it-yourself car painting technology with liquid rubber
Painting wheels with liquid rubber
In practice, painting a car with liquid rubber does not require removing the main layers of varnish and paint, and most importantly, disassembling the car (with the exception of the rims that need to be removed). However, preliminary cleaning of the surface from dirt and grease stains is necessary. To do this, the car is thoroughly washed and dried. All surfaces where the product is planned to be applied are additionally treated with a universal degreaser.
The next stage is the protection of body and interior elements that will not be painted. This is very important, since the technology of painting a car with liquid rubber involves spraying paint, which means it can easily get on adjacent parts. For protection, polyethylene, cardboard and tape (painting tape, if possible) are used.
The spray gun cylinder is filled with a mixture of paint and solvent to two-thirds of its volume, which ensures a more uniform supply. When painting, the spray gun nozzle (or can) should be held at approximately right angles to the surface.
It is more convenient to start painting the body from the rear pillar, moving towards the roof.
The paint is sprayed by moving the hand back and forth, creating a couple of thin layers. In this way, the entire body or selected parts are covered (after the first layer, the paint will look uneven and translucent). Next, the first layer must be dried for about 15 minutes, unless the instructions for the brand of paint used indicate a different drying time. The second layer is applied similarly to the first, but trying to make the coating more uniform. When painting rims with liquid rubber yourself, at this stage it is important to pay attention to the curves, corners and edges. After the entire surface is painted, it is again given time to dry. The remaining layers are applied in the same way.


