How to determine that a valve has burned out in a car engine: signs and symptoms
Valves ensure the implementation of working processes in the cylinder. The intake valves are responsible for supplying a portion of the fuel-air mixture, and the exhaust valves are responsible for releasing combustion products. Burnout of one valve has a detrimental effect on the operation of the entire cylinder.
Signs that the valve is burnt out
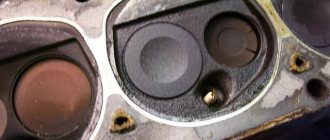
What does a burnt valve look like?
Signs of a burnt-out valve include engine shaking, smoke from the breather (the breather is a valve for venting the crankcase and releasing excess pressure) and, when the engine operates for a long time with a burnt-out valve, increased fuel consumption. Let us explain the popular concept of “motor troit”. This means a malfunction of one cylinder, which manifests itself in a loss of power and throttle response, vibration and shots in the exhaust pipe. But these signs of a burnt out valve are ambiguous.
The engine can also stall due to broken spark plugs or a weak spark.
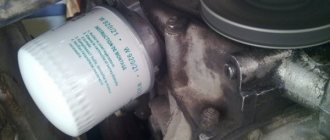
Smoke from the breather can also occur if the piston is damaged. But there is a distinctive feature here - the color of the smoke should be bluish, and the spark plug should be covered with oil, which is associated with a broken piston. In case of burnout, the spark plug remains dry. Note that a burnt valve in a carburetor engine and in an injector gives the same symptoms, because The only difference is the fuel injection system.
How can you tell if a valve is burnt out?
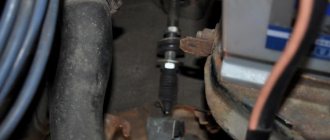
If you have checked the spark plugs, but the engine still stalls, then you should proceed to the procedure for finding a non-functioning cylinder. It's not complicated. After starting the engine at idle, remove the caps from the spark plugs one by one. If the engine changes operating mode when removing the cap, this means that the cylinder is working. If the changes are insignificant, then you should look for the cause in this cylinder.
Removing the wires from the spark plugs
Next, you need to check the compression of the suspect cylinder. We measure the compression level with a compression gauge, and then repeat the measurement by pouring a syringe of oil into the cylinder. If the second value is higher than the first, then there is a problem with the piston. If the values coincide, the valve will burn out.
The valves operate at constant high temperatures (400-600°C) and significant mechanical loads. The inlet valve is in more gentle thermal conditions, because cooled by the incoming fuel-air mixture. Exhaust valves, on the contrary, heat up even more due to the exhaust gases.
Exhaust valves are more likely to burn out.
For proper operation of the valves, a clear fit of the valve to its seat must be ensured and the cooling conditions (opening-closing level) must be observed. The appearance of carbon deposits both on the valve itself and on the seat violates both requirements and leads to damage to the valve. Carbon deposits can form due to under-adjustment, wear, manufacturing defects, problems with the cooling system, elevated combustion temperatures, etc. Factory defects are not that uncommon. The part is complex and operates under constant loads, so even a slight heterogeneity of the metal can lead to destruction of the entire part.
To protect yourself from defects, buy only from trusted manufacturers!
Wear is an insurmountable obstacle for all working parts. Therefore, do not neglect checking the valves after a certain mileage! Poor valve adjustment is the creation of insufficient clearances between the valve and the seat, often referred to as stuck valves.
How will the engine work and what will happen if the valves are clamped?
How to understand that the valve is jammed
If after starting the engine runs normally, but during long operation the thrust drops - this is a symptom of pinched valves. Another sign of jammed valves can be shots into the muffler when releasing gas. Because The combustion chamber is not completely closed, compression decreases and a disruption in the working process occurs. When adjusting, it is better to exceed the permissible gap than to make it smaller.
A burnt valve must be repaired as quickly as possible!
The consequence of clamped valves is overheating, increased fuel consumption and, as a result, burnout. It is undesirable to operate the engine with a burnt-out valve; this leads to burnout of the valve seat. What the car owner will end up having to do is replace the entire head.
Replacing burnt out valves
1. Valve desiccation. To do this, the head is laid out on a flat surface and a rubber mat is placed under the valve. A tube with a diameter of 13 mm is placed on the valve so that the crackers are inside, and blows are applied with a hammer. The valve desiccates, and the crackers remain in the tube. The operation is also easily carried out using a special device that compresses the vein and allows you to pull out the crackers.
- The valve is pulled out, a new one is inserted, and the bushing guide is checked by shaking. If runout is up to 1 mm, the guide is not replaced.
3. If it is necessary to replace the guide, use a special mandrel. The old part is knocked out in the direction of the camshaft using a half-sledge hammer with a heavy blow so that the part does not crumble. Afterwards, a new bushing is driven into the head, having first put a retaining ring on it.
4. The new valve is secured with a retaining ring and the assembly is lubricated with oil.
5. Valve grinding. The seat is initially treated with a special cutter, after which lapping powder is applied to the edge of the valve, inserted into the head, the other end is clamped into the drill chuck, and by pulling it up and down, the valve is provided with a tight fit to the seat. It is advisable to carry out the operation for all valves.
6. Drying of the valve. To do this, press the spring firmly and insert crackers. The cylinder head is attached to the engine cylinder block.
https://www.youtube.com/watch?v=https:46nMpc8QMmk
The described method allows you to replace the burnt valves of all models of the VAZ: 2101, 2102, 2103, 2104, 2105, 2106, 2107, 2108, 2109, 21099, 2110, 2111, 2112, 2113, 2114, Niva, Lada Priora, viburnum, Grant, Grant, Grant. Vesta and most foreign cars.
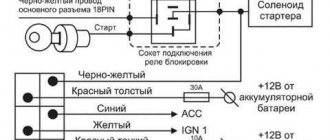
Signs of jammed exhaust valves Nissan X-Trail t30 QR25DE gas/petrol — DRIVE2
I decided to share my solved problem with the valves on my gas X-Trail(e). So it was like this, on a run of 140k kilometers and after washing the injectors, my horse began to eat 11-13 on the highway instead of 9 liters per 100 km, and in the city instead 11-13, 15-17 and even (20 in winter) I decided to supply gas and installed it. And as it turned out later (out of ignorance), the gas workers and I were 100% sure that the qr25 had hydraulics and turned up the gas supply as necessary so that it would feather, and it would feather like an airplane at a traffic light (automatic transmission) and skid on straight wheels in the summer on new tires (Michelin Latitude Cross), I came to them, turn it down, they turned it down a little, and so I rode like that for 50 thousand (190k km). Gradually, over the mileage, I won’t say, it began to twitch while driving while standing, when it was cold, crackling noises were heard from under the hood when starting off and at low speeds, then, closer to finding the problem, it began to openly stall at 2000 rpm when cold, the rpms fluctuated between cold and hot, and stalled while driving. drive when releasing the gas. Well, I started looking for the problem, checked: air leaks, MAF, lambdas, replaced the ignition capacitor, re-read the entire drive and not only, called and visited a bunch of specialists, one grit one thing (the circuit, because of the valves, it can’t) another second (lamda chain has nothing to do with it) ) my third (MAF, ) and so on and so forth (when replacing the gasket at 187k km of the cylinder head, the master said that the exhausts of cylinders 1-2 were pressed 0.1 and 0.15 grit until spring, drive it and then we’ll adjust it) in short, complete misunderstanding. I started it somehow on cold, gas and 2000 rpm it adjusts, turn it off, unscrew the spark plugs 1-2 wet 3-4 dry, then I start leaning towards the valves and they needed to be adjusted 100%. I made an appointment with the same mechanic who did the cylinder head gasket. I changed it, no one else took it upon himself to sharpen the cups, just change them to the right size, but the problem with them is to wait a long time, etc. I’m going for repairs and I think if the problem doesn’t go away, I’ll sell the cattle to outbid and buy a SHNIVA or Patrick. I come to pick up the car after the repair, the master grit go start, I ask him for the code from the box, he kicked out gyr gyr gyr from under the hood, he grits no, I oh really! I go and start it, it’s cold, I put it in D and the plaque is silent, it’s like a watch, the revs don’t float HURRAY HURRAH HURRAY! So he sharpened the entire output from 0.1 to 0.35 runs, (the gaps increase when hot) I’ve been driving for a couple of days, all the twitching on D the revs are gone, they don't float, the stalling has stopped!
The issue price is 5000 rubles.
Adjusting the thermal clearances of Toyota engine valves 4A-FE, 5A-FE, 7A-FE
Toyota 4A-FE engines for Toyota Carina E, Toyota Corolla, Toyota Crown (AE92, AE95, AT171 and AT180)
— Disconnect the high-voltage wires from the spark plugs, holding them only by the rubber tips. Improper handling of wires may result in internal wire breaks.
— Remove the protective cover for the engine electrical wiring and disconnect the electrical wiring from the cylinder head cover.
— Disconnect the positive crankcase ventilation system hoses from the crankcase ventilation valve.
— Unscrew the 3 cap nuts, remove the rubber bushings and the cylinder head cover along with the gasket.
Engines Toyota 4A-FE (AE101, AT190), 5A-FE and 7A-FE for Toyota Carina E, Toyota Corolla, Toyota Crown, Carib, Sprinter
— Disconnect the high-voltage wires from the spark plugs, holding them only by the rubber tips. Improper handling of wires may result in internal wire breaks.
— Disconnect the generator connector, generator wire, emergency oil pressure sensor connector, two electrical wiring clamps.
— After unscrewing the two bolts, remove the protective casing of the engine electrical wiring and disconnect the electrical wiring from the cylinder head cover.
— Disconnect the 2 hoses of the positive crankcase ventilation system from the cylinder head cover.
- Unscrew the 4 cap nuts and remove the sealing washers, cover and cover gasket.
Toyota 4A-FE engines for Toyota Carina E, Toyota Corolla, Toyota Crown (AE92, AE95, AT171 and AT180)
Make sure that the valve lifters of the 1st cylinder are free, and the valve lifters of the 4th cylinder are tightened.
If this condition is not met, then turn the crankshaft clockwise 1 revolution (3600) and again align the groove on the pulley with the corresponding mark.
Engines 4A-FE (AE101 and AT190), 5A-FE and 7A-FE for Toyota Carina E, Toyota Corolla, Toyota Corona, Carib, Sprinter
Make sure that the hole on the camshaft drive pulley aligns with the mark on the bearing cap.
— Using a feeler gauge, measure the gap between the valve tappet and the back of the camshaft cam.
- write down the values of the gap that goes beyond the limits specified in the technical specifications; these values will be used to select the required shim size.
Nominal thermal clearance in valves (on a cold engine).
ICE 4A-FE, 5A-FE and 7A-FE - 0.15-0.25 mm
internal combustion engine 4A-FE (AE101 and AT190) - 0.20-0.30 mm 5A-FE and 7A-FE - 0.25-0.35 mm internal combustion engine 4A-FE (AE92, AE95, AT171 and AT180) - 0.20 -0.30mm
Turn the crankshaft 1 revolution (3600) and again align the groove on the pulley with the corresponding mark and check the valve clearances.
ICE 4A-FE (AE92, AE95, AT171 and AT180)
Adjust the thermal gap in the valves.
Replace the adjusting washer:
— Turn the crankshaft so that the protrusion of the valve cam, in which the clearance is adjusted, is oriented upward and does not touch the pusher.
- Using a suitable tool, press the valve tappet and place the tool between the camshaft and the valve tappet; then remove the device.
— Remove the shim using a small screwdriver and a magnet.
— Determine the size (thickness) of the shim that provides clearance in accordance with the specifications and select the shim.
— Install a new adjusting washer, place the washer on the valve pusher, use the tool to press the pusher and remove the tool
— Check the gap again.
Toyota engines 4A-FE (AE101 and AT190), 5A-FE and 7A-FE for Toyota Corolla, Corona, Toyota Carina E, Toyota Sprinter, Caldina
Adjusting valves on Daewoo Gentra
The Gentre, like the Chevrolet Cobalt, has a new B15D2 engine. The engine is one and a half liter, sixteen valve, 107 horsepower, with a chain drive of camshafts. When the engine is running, the camshafts press the valve tappets with their cams. They, in turn, open the valves. There are no adjusting bolts or adjusting washers in the timing drive design. The manufacturer considered that adjustment would not be needed throughout the entire life of the motor, that is, until a major overhaul. Practice shows that this is not so.
Signs that valves need adjustment
A sign of large valve clearances is a loud metallic knock at the top of the cylinder head, the frequency of which is half the speed of the crankshaft. Due to the clamped valves, popping noises in the exhaust pipe begin. 15–30 seconds after a cold start of the engine, misfires in the cylinders begin, as the valves, heated by the mixture burning in the cylinders, lengthen and cease to sit in their seats. After the engine heats up and elongates due to the heating of the cylinder head, the clamped valves again begin to sit in their seats, and the misfires stop. If valve clearances are incorrect:
- engine power decreases;
- fuel consumption increases.
Consequences of incorrect valve clearances
With large valve clearances, the timing belt operates with shock loads. This increases the lateral loads on the valve guides, leading to their accelerated wear. Too large gaps can even lead to valve desiccation with subsequent engine failure. With large thermal gaps, the filling of the cylinders with the working mixture deteriorates, which leads to a decrease in power and efficiency. Clamped valves reduce compression in the cylinder, and also have poor cooling (especially exhaust valves), since the heat from their plates is dissipated through the seats in which they do not sit. Because of this, pinched valves burn out.
We regulate
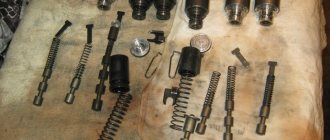
Thermal valve clearances are adjusted at the factory by selecting pushers. The pushers have 64 sizes based on bottom thickness.
This is what they look like:
To get to them, you need to remove the valve cover and both camshafts. We start by removing the air cleaner housing. It interferes with access to the camshaft drive sprockets. To dismantle it, it is enough to release the clamp of the rubber pipe through which purified air enters the intake receiver, remove the connector of the plastic crankcase gas exhaust pipe from the ignition coil cover and disconnect the connector of the intake air temperature sensor. The air cleaner body itself is simply inserted into the rubber cushions with its protrusions. It is enough to pull it up and forward to remove it from the engine compartment.
Now unscrew the bolts securing the ignition coil cover and remove it. Disconnect the connectors from each individual ignition coil. It should be taken into account that the connector latches are blocked by special strips, which must first be pulled out of the connectors. Having unscrewed one M6 bolt at a time securing the coils, we take them out of the spark plug wells and put them aside.
Now it's the turn of the valve covers. Aluminum alloy cover. It is secured to the cylinder head with fourteen M6 bolts. We loosen these bolts, starting from the outer ones to the central ones, in much the same way as the cylinder head of any engine. Then unscrew them completely and remove the valve cover. If its gasket is stuck, you can pry the cover off by the protrusions at its corners. Without a valve cover, access to the camshafts, valves with their pushers and their drive stars is open.
Before adjusting the valves, you need to determine which of them have this gap that does not meet the tolerances. To do this, take a set of flat feeler gauges and measure the gap between the pusher of each valve and the back of the camshaft cam above it. The clearance for the intake valves (top row in the photo above) should be 0.12 mm, and for the exhaust valves (bottom row) 0.32 mm. If the gap differs from these values by more than 0.02 mm in any direction, it requires adjustment. If the engine has an LPG, then the clearances of all valves must be increased by 0.05 mm from the norm.
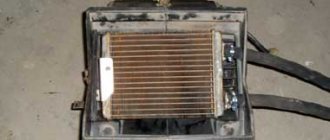
Causes and results of wear of valve stem seals on VAZ 2107/2106.
The purpose of the valve stem seals is to prevent excess engine oil from entering the engine combustion chamber. The cap should fit snugly against the valve and allow only the small amount of oil through that is necessary to lubricate it. The caps are made of special rubber, but over time, the edge of the valve stem cap wears out, deteriorates, the rubber ages, loses elasticity and peels off from the base. As a result, the cap begins to let oil through and it begins to get under the valve.
Leaking oil burns on hot valves , as a result of which carbon deposits build up on the internal walls of the engine, the cross-section of the intake and exhaust channels narrows, and the engine loses power. During active use of the engine, carbon deposits begin to fall off, its particles clog the seat and working chamfer of the valve, as a result, the fit of the valves is disrupted, the engine begins to operate intermittently and stalls. Another outcome is valve burnout, which leads to failure and replacement of VAZ 2107/2106 valves.
Signs of incomplete closing of a car engine valve. Valve bend (deformation).
Introductory article about the signs of incomplete closing of a car engine valve.
Incomplete valve closure is a common problem in racing cars. The impact of this mechanical failure can be reduced if it is detected early during inspection. Failure to correct incompletely closed valves can result in extensive engine damage and require replacement of parts or even the entire engine at considerable cost.
Misfires
The valve does not close completely completely when the engine springs cannot maintain engine speed. These springs are designed to close valves that open and close rapidly during acceleration and at high speeds above 5000 rpm. If the valves fail to close all outputs before the next cycle occurs, it will cause a misfire. Failure to close the valve completely can also cause the hydraulic lifters, which are driven by oil pressure and close the valve, to rise only slightly. When the engine slows down, too much oil remains in the hydraulic lifters, the valve remains open, and this leads to misfire.
Loss of engine power
Along with misfires, a car whose valve is not fully closed loses power because it is unable to maintain the required speed. This occurs because the operating sequence is disrupted due to the valve not being completely closed. Engine compression may recover at low speed, causing the driver to think it was an isolated incident, but the problem will resurface as the engine revs up.
Damaged pistons valves
Reduced efficiency is not the only effect of incomplete valve closure. Due to engine malfunctions, the valve may become bent and if not detected, it may collide with the pistons. As a result, significant damage to parts and engine shutdown may occur. Due to incomplete closure, the valve may also become hot, which can lead to burnout and destruction. When this happens, the driver experiences a loss of power at any speed. Driving a car with such a malfunction is very dangerous; it can completely damage the engine.
Why adjust valve clearances?
Two situations in which adjustment of 4A-FE valves is necessary: “pinching” and increasing clearance.
As the vehicle's mileage increases, the seat wears out, as well as the chamfer along the edges of the widest part of the valve, as a result of which thermal expansion pushes the wide part of the valve ("plate") out of the seat. Thus, the engine power decreases, the removal of thermal masses is disrupted, the “plate” melts and a negative effect occurs on the catalyst.
As the vehicle is used, the pusher plane wears out and the gap increases. Untimely adjustment will lead to a worsening of the situation and noisy operation of the 4A-FE motor. When such a situation occurs, the valve timing is disrupted, which negatively affects the power of the power plant.
Cleaning the throttle body - fashion or necessity?
Among motorists, quite often there is a fashion for certain actions aimed at improving the performance of the car. For example, now everyone has actively started cleaning the throttle valve, service stations are vying with each other to offer their services, and the Internet is full of advice on why, how and why this should be done. Let's see if this is necessary.
1 Throttle valve - what is the reason for poor starting?
Last but not least, the throttle valve should be blamed for poor engine starting and vibrations at idle. Especially if you haven’t looked under the hood for the last 100-150 thousand kilometers. During this time, dust mixed with oil could accumulate on the throttle valve - oil in small quantities comes out of the engine crankcase, and the air filter, clogged with dust, ceases to properly filter the air. As a result, the on-board computer can increase idle speed, which in turn leads to excessive fuel consumption.
We recommend that you read
- Throttle valve VAZ 2112
- Throttle learning
- Throttle Body Cleaner
- Auto scanner for self-diagnosis of any car
The throttle valve can last a very long time without replacement, but it does need cleaning. This element is responsible for supplying air to the intake manifold, from where it enters the combustion chamber mixed with fuel. The driver controls the process of opening and closing the damper by pressing the gas pedal. Adhered dust and oil can cause poor operation of this element - the damper may not close completely. The following “symptoms” indicate the problem:
- the engine starts with problems;
- at idle, floating speed is noticeable;
- at low speeds the car jerks;
- The idle speed “fails” and the car stalls.
You can even determine the degree of contamination visually. If there are no noticeable oil stains on the part, then the problem is different, but if the damper has lost its original metal color due to adhering oil, then it’s time to clean it.
2 Cleaning the throttle valve - cleaned it yourself, teach someone else!
The cleaning process itself is completely simple. We free the throttle body from the corrugation, and free the part from the cable with which it is connected to the gas pedal (in the case of a mechanical drive). To do this, you just need to press the pedal to the floor - the cable will loosen, and you can easily get rid of it. Then carefully disconnect the coolant hoses. Of course, all work must be carried out with the car cooled down, otherwise you will not avoid burns.
Having dealt with the hoses, remove the gasket in front of the throttle valve and the part itself. As a rule, it is secured with two nuts. We start cleaning from the base of the intake manifold - probably a lot of dirt has accumulated there too. You don’t need any special equipment for cleaning; a can of carbocleaner (carburetor cleaning liquid) and a clean cloth are enough.
Apply the spray to the surface you want to clean and leave for a few minutes. Just don’t overdo it – the cleaner is quite aggressive on the plastic and rubber components of the case.
You should not clean the valve with a metal brush - you will remove the protective coating along with the dirt, and also damage the seals along the throttle contour. There is no point in carrying out this operation more often than once every 100-150 thousand kilometers, unless you really like to tinker under the hood. Many people do not understand what cleaning can do for the very reason that the car did not need to clean the throttle valve at the time of service. As many drivers note, after cleaning the throttle valve, the engine speed increased significantly - this is a normal reaction of the car.
3 Additional measures – what else should you pay attention to?
Every motorist should have a universal device for diagnosing his car.
You can read, reset, analyze all sensors and configure the car’s on-board computer yourself using a special scanner.
As a rule, after such a mileage, not only the damper needs to be cleaned, but also the air filter is already clogged with dust. So don't forget to replace it along the way. It would seem that everything is simple, but only if you are the owner of a car without an on-board computer.
The trouble is that as the damper becomes dirty, the computer could take part in correcting the idle speed control (if the throttle is mechanical) or the position of the damper itself (if the part is electric), thereby increasing the idle speed. In this case, you will also have to work with the computer itself. No, we won’t have to crack the code or reflash the system, we’ll just indicate to the onboard “brains” that we’ve already put the part in order, and the speed should be returned to its original values.
This is done quite simply, the main thing is to strictly follow the instructions. First, warm up the engine and then turn off the car. We wait a few seconds and turn on the ignition again. Exactly three seconds later, press the gas pedal all the way five times in a row within five seconds (try to make it in time). Then we wait seven seconds and press the pedal to the floor again, this time we do not release it until the Check Engine light on the panel lights up. Hold the pedal until the light blinks. We release the gas three seconds after it starts to burn continuously.
When you restart the engine, the idle speed will be exactly where it should be with a clean choke. This procedure is not suitable for all cars - if your “iron horse” does not react in any way to the manipulations, and the speed still exceeds the permissible value, contact a service station, where they will reset the parameters.
Do you still think that diagnosing a car is difficult?
If you are reading these lines, it means you are interested in doing something in the car yourself and really saving money, because you already know that:
- Service stations charge a lot of money for simple computer diagnostics
- To find out the error you need to go to specialists
- The services use simple impact wrenches, but you can’t find a good specialist
And of course you are tired of throwing money down the drain, and driving around the service station all the time is out of the question, then you need a simple CAR SCANNER ELM327, which connects to any car and through a regular smartphone you will always find the problem, turn off CHECK and save a lot of money.
We ourselves tested this scanner on different machines and it showed excellent results, now we recommend it to EVERYONE! To prevent you from falling for a Chinese counterfeit, we publish here a link to the official website of Autoscanner.