Operating manuals
Owners can carry out many works on Renault Logan using the owner's manual for their car.
Fortunately, Renault has provided electronic operating manuals for its cars on its official website. Among them, we can note the general operating and maintenance manual for Renault, which is provided in electronic form.
You can also note a good user guide to the Renault audio system.
For models equipped with Media Nav systems, Renault has also provided a user manual.
All the publications provided above were manufactured by Renault itself and have clear recommendations for working with this car.
Replacing a Renault car wheel bearing
Video of replacing the rear brake pads of a Renault Logan with your own hands
The chassis of the Renault Logan requires periodic replacement of the wheel bearing. This is required when it wears out or when the hub is dismantled, since this will inevitably damage the bearing. You can see the structure of the front wheel hub unit in the picture, and it consists of:
- rounded fist;
- wheel bearing;
- speed sensor mounting ring;
- hub.
Wheel bearing
Before work, tighten the handbrake and engage first gear, placing chocks under the wheels. Unscrew the wheel bearing nut. If you are unable to do this due to the wheel spinning, brake the car by pressing and holding the brake pedal (ask an assistant to do this). Next, hang up and remove the wheel. Remove the wheel speed sensor, disc and brake protection. Disconnect the rod end from the steering knuckle and remove the ball pin from the knuckle holes. Disconnect the shock absorber from the steering knuckle and remove the latter from the splined shank of the outer hinge housing. Place the steering knuckle on a vice and press it out with a hammer through the head or mandrel at the end of the hub. The inner ring of the bearing will remain on the hub.
Pry up the protective washer with a screwdriver, freeing the bearing seal, and remove it. Clamp the flange in a vice and insert a chisel between the ends of the inner ring and the hub shoulder. Using a hammer, slide the inner ring along the hub. Insert the puller's grips into the gap that appears and press the ring off the hub.
Using snap ring pliers, pull the bearing race out of the steering knuckle groove. Use a special puller to remove the bearing from the steering knuckle. You can press out the bearing using the impact method. Place your fist on the jaws of the vice. By striking the end of the outer ring through the head or mandrel, press the bearing out of the knuckle. Before installing a new bearing, clean the seat in the knuckle and the groove for the snap ring. Use a file to clean the nick left from the chisel on the hub.
Before pressing the wheel bearing, insert the wheel speed sensor mounting ring into the hole. Orient the ring in the knuckle hole so that the sensor holder fits into the knuckle groove.
After installing the cup puller screw with backing washer, insert the new bearing into the hole. Press in the bearing by applying force through the puller cup. The washer should rest on the steering knuckle.
After installing the bearing, insert the snap ring into the groove. After this, press the hub into the bearing. In this case, the puller cup should rest on the end of the inner ring. Subsequent assembly and installation is carried out in reverse order.
Video:
Video:
Video:
Equipment
Logan is available in several trim levels and, as mentioned above, the basic kit has minimal equipment.
But just add a few tens of thousands of rubles, and you already become the owner of a well-equipped, optional car.
Of greatest interest is the top version, which is equipped with not one, but two airbags, ABS with EBD, power steering and 15-inch wheels.
The restyled version can please you with central locking, the function of adjusting remote control mirrors, and the ability to adjust the belts in height.
Here are presented such insignificant but pleasant little things that create a pleasant impression of the car: an ashtray, wheel caps and moldings that simultaneously serve as protection of body surfaces from mechanical damage and as a decorative element.
Do-it-yourself Logan air conditioner repair
Air conditioner clutch failure
What to do if the Renault Logan stove does not work. A little about the air conditioning system of the Renault Logan car - watch the video
If the reason is a broken air conditioner clutch, it must be replaced with a new one. The service often offers to completely replace the compressor with the clutch - this procedure is not cheap at all, its price starts from 20 thousand rubles. In reality, all you can do is replace a broken coupling component, such as a bearing cage.
The order of work is as follows: freon is completely removed from the air conditioner (this must be done carefully, since freon is very toxic), then the compressor is dismantled (to make the work easier, you can first disassemble the front part of the car, removing the bumper, as well as the headlight on the right side and mudguard). The compressor is secured to the engine with four bolts that need to be unscrewed (before this, two hoses must be removed from the compressor)
It is important to remember that all open elements of the system - hose holes, holes where hoses are installed - must be covered immediately after disassembly with a rag, tape or any other method. The dismantled compressor must not be turned over, otherwise oil will spill out of it.
Then you can replace the failed elements yourself or contact a service that specializes in repairing car air conditioners. The price of this work will be an order of magnitude lower than the cost of replacing the entire compressor.
Violation of tightness
The inability to start the clutch may also be a sign of depressurization of the system. First of all, you should check the integrity of the cooling radiator and pipelines. If a place of depressurization is found, it is necessary to restore the tightness of the elements or replace them.
Bearing wear
A clear sign of damage to the air conditioner bearing is the hum that is heard after starting the device. Typically, element replacement is carried out at service stations, but you can cope with the task on your own.
You will find instructions for carrying out the work in the article “Replacing the Renault Logan air conditioner bearing”.
Insufficient refrigerant
A lack of freon will cause the compressor clutch to disengage. How to restore the optimal amount of refrigerant, read the article “Refilling the Renault Logan air conditioner”.
Before carrying out work in a service center or in your own garage, you definitely need to collect as much information as possible, read several articles and watch a video on the topic of interest. If you decide to repair the Renault Logan air conditioner yourself, you must watch the video.
Repairing Renault Logan air conditioners at a service level is very expensive, so if you have a certain skill and desire, the best option would be to figure out the problem and solve it yourself.
Why do you need to replace antifreeze on a Renault Logan car and when to do it
Replacing the clutch to Reno
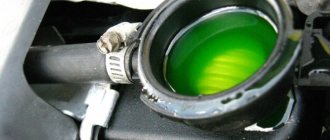
A liquid that has used up its life changes its properties and can cause many negative aspects. It’s easy to determine the degree of its suitability - just open the filler cap of the tank and examine the contents. If the coolant has changed color or acquired a brown tint with sediment, this indicates the need for urgent rotation of the refrigerant.
Based on the recommendations of the manufacturer, replacing the coolant with Renault Logan is carried out in the following cases:
- After every 90,000 km.
- Every 6 years of operation.
The volume of the cooling system of a car with air conditioning is 5.45 liters, and without it – 4.5 liters. New chemical solutions make it possible to increase the interval to 100 - 110 thousand km, but in any case, visual inspection at least 2-3 times a year is necessary.
Why is it important to change the coolant?
Automotive fluids contain not only mixtures of ethylene glycol and monohydric alcohols, but also anti-corrosion additives. Depending on the type of corrosion inhibitors, coolants are divided into:
- G-11 – based on silicate or nitrite additives.
- G-12, G-12+ – based on carboxylic acids.
- G-12++ – includes organics and mineral inhibitors.
Mixing all types is not recommended, although the first two are, in principle, allowed. However, it should be taken into account that the service life of the coolant in this case is reduced. Why all these subtleties? The fact is that over time, the properties of chemical additives are lost, and ethylene glycol paired with water begins its corrosive activity. This threatens:
- Possibility of thermostat jamming due to the presence of corrosion products.
- Destruction of the water pump impeller.
- Depressurization of pump bearings.
- Clogged radiator and internal combustion engine channels.
All of the above factors will certainly lead to overheating of the engine, resulting in excessive fuel consumption and a decrease in power. Regular overheating reduces the operational life of the power unit several times. Such consequences can be avoided by timely replacement of the fully expired antifreeze with Renault Logan.
In addition, it is important to monitor its condition by periodically looking into the expansion tank
What do you need to prepare to perform the operation?
To carry out the work, it is necessary to prepare the following tools and materials:
- Set of open-end and spanner wrenches.
- Set of screwdrivers and pliers.
- Plastic funnel.
- A capacity of at least 6-7 liters.
- Gloves and overalls.
- Coolant 6 liters.
- Worm clamps.
What antifreeze is needed for Renault Logan?
Current Renault engines use type D fluid, which meets the G-12 standard:
- Cool Stream 4030 Premium.
- Glacelot RX (Type D).
These brands are available for sale both in diluted and concentrated form, sold in liter canisters. Before pouring into the internal combustion engine, such a mixture is diluted with distilled water, usually in a 1:1 ratio, and the pour point is -36°C. Thus, Logan will need three liter containers.
- Liqui Moly KFS 2001.
- CoolStream Premium.
- Aral 4003116908396 Silikatfre.
- GlycoShell Longlife.
- SWAG 60 ANTIFREEZE (Green).
- Kuhlerschutz SF.
When to replace
In fact, shock absorbers are the same consumable items as brake pads. However, according to the manufacturer, their service life is quite long, so no data on replacement frequency is provided. There is no need to give numbers here, since the wear of parts is purely individual and depends on the driving style and the quality of the roads. Renault Logan front shock absorbers are usually changed in two cases. The first is breakdown or critical wear. There is no longer a choice here, since driving with a broken suspension is not entirely safe. The second case is car tuning. Despite the fairly high-quality standard models, many prefer to improve the car by installing more expensive and high-quality shock absorbers.
If we talk about breakdown, it is quite difficult to feel it. When there are engine problems, drivers have no problem noticing specific noises, a drop in power or increased consumption, not to mention numerous other symptoms. But it is difficult to identify a problem in the chassis in a timely manner, because many noises are not audible or are simply attributed to a bad road. If you want to quickly detect problems with the suspension and shock absorbers in particular, we recommend paying attention to the following signs:
- strong body swaying when cornering or simply changing lanes;
- the appearance of knocking sounds in the suspension area;
- frequent abnormal operation of ABS or EBS systems;
- uneven tire wear;
- loss of stability when maneuvering;
- reducing vehicle clearance;
- vibration of the brake pedal;
- the appearance of drips on the racks.
If you encounter one of the symptoms described above, have your suspension diagnosed. There are several garage methods, which we will discuss below. If they do not allow you to obtain an unambiguous result, then contact specialized technical centers, where the condition of the shock absorbers will be checked on stands. As soon as the faulty parts are confirmed, you can start looking for new shock absorbers.
Replacing the anti-roll bar
The rubber parts of the Logan anti-roll bar are pads and bushings. They need to be changed when the rubber cracks, bulges and ruptures, as well as when there is excessive wear, causing the connections of the elements to become loose.
Suspend the front suspension of the car by lifting it with jacks or a lift. Before unscrewing the nut securing the stabilizer bar to the front suspension arm, thoroughly clean the dirt from the screw head, since you will have to insert a key here.
Stabilizer circuit
If the key does not go in completely, you may damage the screw or key when unscrewing the nut. The fact is that the threaded connection is usually severely damaged by corrosion.
The front anti-roll bar consists of:
- screw;
- bottom rubber bushing;
- rubber-metal intermediate bushing;
- plastic washer;
- upper bushing made of rubber;
- screw;
- stabilizer bar;
- rod cushion;
- bracket.
Using a spanner, unscrew the nut that holds the stabilizer bar to the front suspension arm. At the same time, hold the screw to prevent it from turning. Remove the lower rubber bushing. In the recess of the end, which faces the nut, there is a metal washer.
Remove the screw with the upper rubber bushing and plastic washer. Pull the end of the rod down by hand and remove rubber bushing #3. In the same way, remove the fastening elements of the stabilizer bar to the lever.
Ball
Install the new parts in reverse order, tightening the nuts of all stabilizer bar screws, but do not overdo it. When installing the intermediate sleeve, you need to orient it upward with the grooves located on the outer part of the sleeve.
To replace the stabilizer bar cushion, take a socket with an extension and unscrew the bolt that holds the cushion bracket and subframe to the body. Using a spanner, unscrew the nut securing the cushion bracket to the subframe. Lower the bracket. Move the pin out of the subframe hole and remove the bracket by pulling its front end out of the subframe groove.
Remove the pad from the bar and install a new stabilizer bar pad in the reverse order. Replace the pillow on the other side in the same way. If you need to remove the bar, disconnect it from the suspension arms on both sides and remove the brackets. Inspect the rod for deep abrasive wear at the pad mounting points.
Excessive wear increases the risk of bar fracture, then reinstall the stabilizer bar in reverse order.
Getting ready for renovation: what you need to know
If you are a regular reader of our portal, you have already remembered that thorough preparation and understanding of the Renault Logan caliper repair process is the key to its successful implementation. One way or another, you should start by preparing the tool. The minimum required set consists of:
- Flat end screwdrivers.
- A socket wrench set to “18”; an open-end wrench set to “13” is also useful.
- Extension cord and pipe. The last tool will be used as a lever.
Most caliper failures are directly related to oil, brake fluid, or waste leaks. In this regard, at the preparatory stage it is important to remove all liquid and dirt from the caliper and adjacent parts. Also check the part itself for wear and general condition. It is very likely that the wear has reached its boiling point, and conventional repairs will not be enough. Depending on the condition in which the caliper is, you need to make a choice: the part is sent for replacement or for spot repairs.
Correct diagnosis of Renault Logan suspension
New boot
Before repairing the chassis of a passenger car, it is necessary to diagnose faulty components and elements. We'll figure out how to do this correctly below:
- Damage to the strut support is indicated by a difference in the distance between the glass and the top support of the strut. There should be approximately the same distance on both glasses - 1-1.5 centimeters. The steering wheel should be level. Have someone turn the steering wheel while placing their hand on the support. Seizing and cracking are a sign of bearing wear.
- Rock the car on each side. If the shock absorbers are in good condition, vibrations will be immediately damped. Also inspect the racks for mechanical damage or oil leaks.
- Try to loosen the tie rod and ball joint using some force. This type of hinge joint involves smooth movement to the sides. There should be no vertical play. Do the same with the stabilizer bar. Any play is a sign of wear on the Renault Logan bushings. It is better to check the rack when the car is standing on a horizontal platform.
- Look at the silent blocks - they should be intact, not torn. Detachment of the bushings can be checked by shaking the lever. Even a slight play indicates the need to repair the Renault Logan suspension.
- Visually assess the condition of the subframe, stabilizer link and lever for mechanical damage.
You can do all this with your own hands in a garage, after which you can repair the Renault Logan suspension correctly, saving money on the services of service centers.
Self-diagnosis methods
Checking shock absorbers in a garage can be done using several techniques. The first is a basic visual inspection. If oil stains are detected, they must be removed and the condition checked after a couple of days. If the oil appears again, the seal is broken and the shock absorbers need to be repaired or replaced. Corrosion spots are another serious problem. If the process has just begun, then thorough cleaning can save the metal. Otherwise, you will have to fork out for new shock absorbers. Unfortunately, such an inspection does not reveal wear or damage to the internal components of the structure.
The second method is rocking the car in the garage. You need to “lean” on one of the wheels of the car and try to rock the car. If the shock absorber is working properly, then the body will return to a state of rest after 1-2 smooth vibrations. If the recoil is too large and sharp, then the rack is not working. The absence of vibrations indicates jamming. Thus, by alternately shaking the car from different sides, you can identify faulty shock absorbers.
The last thing you can do is give it a thorough test drive. It will finally help diagnose shock absorber failure. To check, just perform a few simple exercises: snake, acceleration and braking. You should not accelerate to sky-high speeds of 100-120 kilometers per hour. 60 kilometers is enough. Pay attention to the following characteristic signs:
- car yaws over uneven surfaces;
- body rocking;
- unclear steering response;
- the appearance of a rattling knock when passing uneven surfaces.
If all this is observed, the problem is clearly in the suspension. You can contact a service center for an accurate diagnosis, and if you are 100% sure, change the shock absorbers.
There is also another less popular method. During operation, the shock absorbers become quite hot. After the trip, you can check each of them for heating. If a particular shock absorber is cold, then it did not perform shock absorption and did not heat up. Naturally, this technique does not provide a 100% guarantee, so it can be used more to confirm your conclusions regarding the performance of shock absorbers.
The best option is to use a special diagnostic stand. Please note that the accuracy of the readings is affected by tire pressure, deviations from a straight line on the stand and the serviceability of the handbrake. At some service stations, mechanics use these nuances to trick drivers into making repairs. Driving on broken shock absorbers is dangerous, since silent blocks, levers, and balls suffer, but speaking of the danger of getting into a traffic accident.
Let's start solving these problems
- If the fuel pump in your car does not work, you need to consider some options related to the power supply of this device. Carefully inspect the pump power supply fuse for integrity and replace it if necessary. This block is located on the body panel. Also, the problem of a non-working pump may be the relay of this unit, check it. As a rule, fuel pump malfunctions lie precisely in these problems. There are many videos on the Internet on the topic of DIY repairs.
- If the steering tip in your car is worn out, you need to replace it yourself; to do this, you need to dismantle the wheel and remove the nut of the tip itself. After making several blows with a hammer, disconnect the part from the steering knuckle, then dismantle it and install a new part according to the rules for disassembling and assembling this equipment. Watch the video on repairing and replacing the tip.
- To change the brake pads on the front of your Renault Logan with your own hands, you need to dismantle the wheel and unscrew the 2 bolts securing the caliper to the bracket. Remove the old brake pads and replace them with new parts, then reassemble in reverse order. There are video materials on how to do this.
- If the gears on your Renault Logan are engaged harshly, you need to adjust the traction yourself. With the help of a partner, make this adjustment in the inspection hole, setting the lever to the neutral position, unscrew the bolt, and then fix the rod.
- If the brake hose bursts, it must be replaced. To do this, you need to unscrew this part from both sides of the body panel and caliper, then immediately install a new element and bleed the system by unscrewing the fitting. If you don’t understand everything, watch the video material on the Internet.
- If you hear extraneous noise when the windshield wipers operate, this mechanism needs maintenance and lubrication. Disassemble the plastic panels under the windshield of the body niche, then remove the entire windshield wiper mechanism assembly and lubricate and clean it. Reassemble in reverse order.
- If the handbrake cable breaks, this system stops functioning properly. To change the handbrake cable, you need to disconnect it from the handle in the cabin, and then remove its fastenings on the car body panel. Install the new cable according to the disassembly of the old element.
Malfunctions and their symptoms
Logan suspension
The Renault Logan chassis is quite reliable, but not eternal. Possible malfunctions include:
- Failure of the support bearings and a crackling sound when the steering wheel rotates while standing still.
- Damage or wear to the shock absorber struts. Rocking of the car on uneven surfaces, when braking and when turning.
- Springs sagging or coils breaking. At the same time, ground clearance decreases, directional stability deteriorates and vibrations appear.
- Worn steering tips. The car begins to “yaw” when driving in a straight line, and vibrations occur in the steering wheel at speed.
- Ball wear. When overcoming bumps, the chassis knocks.
- Damage or deformation of the subframe, arm, anti-roll bar. When driving, the car moves to the side.
- Wear of rod mounting parts and wear of stabilizer bushings. When cornering, body roll occurs and directional stability is disrupted.
- Wear of silent blocks. On uneven surfaces, extraneous sounds are heard from the suspension.
- Wheel bearing wear - a hum occurs that increases as speed increases.
- Failure of the constant velocity joint. You will hear a cracking sound when turning the wheels to the sides.
- Wheel imbalance. Vibrations occur at speed.
Do not forget that external signs are indirect indicators of a faulty Renault Logan chassis. Signs of wear on CV joints and wheel bearings make it possible to determine the cause with a high probability, but it is sometimes very difficult to understand where exactly the knocking comes from.
Front suspension Renault Logan
Renault Logan front suspension: Design description
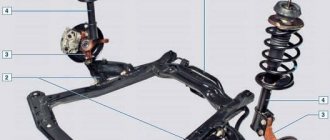
: 2 — suspension arm with silent blocks and ball joint; 3 — steering knuckle with hub and bearing; 4 — shock absorber strut; 5 — anti-roll bar The front suspension is independent, MacPherson type with triangular wishbones and a stabilizer bar mounted on a subframe. The basis of the suspension is a telescopic shock absorber strut, which allows the wheels to move up and down when driving over uneven surfaces and at the same time dampening body vibrations.
The rack is attached from below with two bolts and nuts to the steering knuckle, and from above with a nut through a rubber-metal support to the body. To effectively dampen body vibrations and improve vehicle controllability and stability, a double-pipe gas-filled shock absorber is installed in the strut housing, which has higher characteristics than a conventional hydraulic shock absorber.
The lower spring support cup is welded to the middle part of the strut body, and a bracket for attaching the strut to the steering knuckle is welded to the bottom of the strut. A compression stroke buffer is installed on the shock absorber rod, made integral with the protective cover.
From above, the spring rests against the upper support cup mounted on the shock absorber rod. Repair and replacement of the sound signal (horn) Renault Logan Do-it-yourself repair of the Opel Cadet video A thrust ball bearing is installed between the upper spring cup and the upper support of the strut, allowing the strut body to rotate with the spring, and the shock absorber rod to remain stationary.
Braking and traction forces when the car is moving are perceived by suspension arms connected through ball joints to the steering knuckles and through silent blocks to the subframe. Front suspension elements on a car
: 1 — lever; 3 — bolt securing the lever to the subframe; 4 — anti-roll bar; 5 — bracket for attaching the stabilizer bar to the subframe; 6 — shock absorber strut; 8 — elements for fastening the stabilizer bar to the lever; 9 — coupling bolt of the terminal connection between the steering knuckle and the ball joint pin; 10 — ball joint The subframe is rigidly attached to the body with four bolts, two rear bolts also secure the stabilizer bar brackets to the subframe.
On the front bolt securing the suspension arm to the subframe, a bracket is secured with a nut, the second end of which is attached to the body. The ball joint housing is pressed into the hole in the suspension arm, the support is covered with a rubber boot. The ball joint pin is secured with a clamp connection to a coupling bolt in the steering knuckle eye:
Shock absorber models for Renault Logan
The original front shock absorber for Renault Logan has catalog number 60 01 550 751 or Renault 54 30 223 44R. The cost of the original varies from 2 to 3 thousand rubles. If for some reason they do not satisfy you, take a closer look at the following analogues:
- Monroe G 7203;
- Kayaba 338713;
- TRW JGM 815T (2 pieces included);
Branded products are often counterfeited, so before purchasing, we recommend that you study all the nuances of how to distinguish a fake from the original. There are many useful videos on this topic on the Internet. Additionally, during the replacement you will need related elements. Here are the part numbers you can use:
- 900 307 — boot and bump stop from Sachs, set;
- M25504 - support bearing from SNR;
- 31345 01 - rack support from Lemforder;
- 4017000 — spring LESJOFORS.
Preparation for work on repairing the Reno Logan engine and brief information about the internal combustion engine
Engine Renault K7M 710/800 1.6 8V
Engine characteristics Renault Logan 1.6
Manufacture - Automobile Dacia Years of production - K7M 710 (2004 - 2010), K7M 800 (2010 - our time) Brand\Engine type Renault Logan - K7M Cylinder block material - cast iron Power system - injector Type - in-line Number of cylinders - 4 Valves per cylinder – 2 Piston stroke – 80.5 mm Cylinder diameter – 79.5 mm Compression ratio – 9.5 Engine capacity – 1598 cm3. Power – 86 hp /5500 rpm Torque - 128 Nm / 3000 rpm Fuel - 92 Environmental standards - Euro 3 Fuel consumption - city 10 l. | track 5.8 l. | mixed 7.2 l/100 km Oil consumption - up to 0.5 l/1000 km Renault Logan engine oil: 5W-40 5W-30 Change the oil every 7500 km. Engine life of the Logan 1.6 engine: 1. According to the plant - 400 thousand (unofficially, according to plant tests) 2. In practice - 400+ thousand km
TUNING Potential - unknown Without loss of resource - unknown
Engine installed on: Renault Logan Renault Sandero Lada Largus
Engine malfunctions and repairs Renault Logan/Sandero 1.6 K7M
Engine Renault Logan K7M 710 1.6 l. 86 hp nothing more than a regular K7J 1.4 liter, only with an increased piston stroke (from 70 to 80.5 mm), of course the height of the block has increased slightly, the clutch has a larger diameter, the flywheel has been enlarged and the shape of the gearbox housing has changed. Structurally, Logan's 1.6 liter engine, like its low-volume brother, has the same archaic design from the middle of the last century with rocker arms and a strange oil pump drive system from lower-end Renault engines of the 60s. In spite of everything, with careful attitude to the engine, service and maintenance, changing the oil 2 times more often than according to the instructions, it is very, very reliable, according to internal factory data, the service life of the Logan 1.6 engine is about 400 thousand km, in practice the engine traveled a little more . In 2010, the K7M 710 was replaced with the K7M 800, the engine was strangled, brought up to the Euro-4 environmental standard, the power decreased to 83 hp, and no design changes occurred. The disadvantages of the K7M are the same as those of the K7J 1.4 engine, high fuel consumption, the speed often starts to float at idle, valves need to be adjusted constantly (once every 20-30 thousand km), there were no hydraulic compensators and there are no timing drives It’s belt driven, if the belt breaks in the Logan 1.6, the valve bends, so we change the belt every 60 thousand km. Still the same crankshaft oil seal leaks. The motor is noisy and there are vibrations. On the design of the Renault Logan 1.6 engine and where the engine number is located, information is presented in the article “K7J engine”, which, apart from the volume and accompanying changes, has no other changes. All malfunctions and the reasons for their occurrence are also described there. Speaking about which engine for Renault Logan is better, 1.4 or 1.6 8 valve, take 1.6... the engine is the same, but the small volume is very weak. Also, on the basis of the K7M, the K4M engine was created with a 16-valve cylinder head and other significant innovations, the power of such an engine is significantly higher and if you choose (for example, Logan, Sandero), always take it, you won’t regret it. Engine tuning Renault Logan K7M 1.6
Chip tuning of Renault Logan engine
For the Logan K7M 800 engine, you can remove the catalyst, return it to its original power of 86 hp, install an exhaust and flash the sport firmware, maybe add a couple more horses, but nothing will change significantly, except fuel consumption, now your engine will eat more))
Compressor and turbine for Logan 1.6
The installation of turbocharging and compressor is described HERE using the example of a 1.4 liter engine and all this is applicable 1 in 1 for a 1.6 liter. The power of the Logan 1.6 engine will be on average 5-10 hp. more with a similar approach. Looking ahead... you won't be able to achieve high power.
ENGINE RATING: 3+
The reason for the cap. repairs resulted in increased fuel consumption - 10-11 liters. on the highway and up to 14 hp. around the city, increased oil consumption, strong oil deposits on the spark plug of the 1st cylinder. Compression measurement: 10-8-8-9 (not enough!). Taken from wikimotors.ru
A work neighbor recently decided to sell a Renault Logan with a 1.4 engine, mileage 88 thousand kilometers. The car was in the garage and did not drive. And so, the chaos was in place, the sale announcement was submitted, and buyers flocked in. There were few of them, but the last ones were determined and came from another region. For the show, the neighbor drove Logan outside, opened the hood, and started the engine. “Bought” the inspection of the body began from the stern, moving to the front of the car. The guys were in a hurry, the condition suited them, and when they approached the hood, they told their neighbor that they were taking the car. At these words, a loud metallic knock was heard from the engine... A neighbor came running to me asking me to look at the engine. The examination did not reveal anything reassuring - the knock was either from the connecting rod or from the camshaft in the bed! The buyers looked at each other, smiled and left. The neighbor was upset - a profitable deal fell through. Everyone was perplexed - Logan firmly holds the reputation of a reliable car, taxi drivers reel in hundreds and hundreds of thousands without any engine repairs. And here the mileage is only 88 thousand. The case is very mysterious. According to the law of meanness, as luck would have it, the neighbor received calls from buyers who wanted to inspect the car. The neighbor said that he had gone on a business trip, and he put the car on a lift at the K-POWER Workshop.After the tedious and epically long repair of the Ford S-Max engine, it was even interesting to tinker with the simple Logan. When will you have another opportunity to evaluate and inspect such a popular budget vehicle up close? This car was produced in 2006, without air conditioning, with power steering. Budget Logan in a budget configuration...
First, let's inspect the car from below. Total economy is the main idol of this car. During development, every euro cent was counted, everything unnecessary was mercilessly removed for the sake of economy. The entire exhaust from the manifold to the final pipe is fully welded. Levers with tightly sealed ball joints (savings on production and additional earnings on the sale of spare parts for the manufacturer!). The design of the gear selector under the floor killed me on the spot - this is the first time I’ve seen something so cheap. The rear beam bracket with the mounting hole hanging in the air has already been sucked by all the journalists in articles about Almere. It’s the same here, and what’s also striking is the silent block, which is unnaturally oriented relative to the beam lever. Is this why the rubber of the silent block is already full of cracks?
Logan’s 1.4 engine (8 valve) is an unimaginable cross between some ancient mammoth feces carburetor engine with injection components. The cool air filter housing a la “carburetor pan” hides a throttle valve underneath, over which the author almost fell under his chair from laughter. The damper (mechanically driven by a cable) is screwed to the intake manifold with just one bracket with one screw and looks like a megaphone pipe. It would be naive to believe that the side support here will have a hydraulic cushion, like Ford’s. An ordinary piece of rubber.
There is no particular thickness in the metal of the spar. Everything is very similar to “Chinese cars”, except that the quality is a little better. All bolts are with press washers; you won’t find separate washers or groovers; everything is simplified for the sake of economy. The washers are located only under the cylinder head bolts, where it is difficult to do without them. The timing drive is simple, but what I liked is that the pump is located on the side of the belt opposite the tension roller and at the same time plays the role of a deflection roller. The exhaust manifold is clearly from the carburetor progenitor, the gasket to the cylinder head is only 1 sheet thick... The catalyst is welded into the exhaust tract already under the bottom of the car. The intake manifold is fairly easy to remove. In general, the motor is simple and access to the components is generally good, except for the power steering pump housing - the front bolts of its fastening are unscrewed through holes in the housing of its own pulley. In the process of disassembling the engine, a vulgar saying is spinning in my head - “Monsieur the French are a good judge of perversions.”
After removing all the attachments, it's time to remove the valve cover. Below it - hello to the mid-late 20th century - a camshaft with rocker arms! There are no hydraulics here and the gap is adjusted using locknuts on the rocker arms. But the motor is not as simple as it seems. To set the crankshaft to TDC, you again need a locking bolt, screwed through a hole in the block. The neighbor is in a hurry - he needs maximum savings, because the car needs to be sold at a profit. Any replacement of consumables is subject to an “owner’s ban” - you only need to eliminate the cause of the knocking, everything else cannot be changed. The timing belt is still in good condition, so we’ll do it easier - we’ll put marks on the pulleys and belts, in relation to which we’ll assemble the timing belt after repairing the engine, so as not to waste time on making a retaining bolt. Fortunately, in the engine design, all pulleys are keyed and their position relative to the crankshaft and camshaft will remain unchanged.
During the inspection of the rocker arm elements, I discover wear on the first camshaft journal. She moves out of the support a little and you can see how badly she has been eaten. When the camshaft wobbles by the pulley, the shaft noticeably plays in the bed. I find a bunch of garbage next to the valve.
I invite my neighbor to take a look. Poking around in this pile with a screwdriver reveals quite a lot of depth in this pile. Seeing this, the neighbor’s face changes and says: “This is abrasive from a grindstone, at my work, even copper filings are visible, there are turners sharpening bronze bushings nearby, someone poured abrasive into the engine while the car was standing on the territory with no one.” I didn’t swear at work, what kind of people do we have?!” But this is not important now, the main thing for the owner is to repair the engine for the least amount of money.
It is clear that the abrasive circulated throughout the system and killed the crankshaft. You need to remove the cylinder block and disassemble it. It is possible to remove the block on Logan without a box, but it is very inconvenient. The huge tray rests on the subframe, and the width of the compartment is simply not enough to remove the flywheel and clutch from the box. Plus, lovers of perversions, monsieur the French, screwed two long studs into the block, which pass through the gearbox housing and are then tightened with nuts. Otherwise, the block is screwed to the box with short bolts. I would like to force the engineer who designed this to disassemble his product with his own hands... Perhaps, using Renault technology, here you need to remove the power unit complete with gearbox and dismantle the subframe, but why do extra work and pay extra money for it? The Russians have already defeated the French, and they won this time too - the harmful pin was unscrewed from the block with a pin driver, after which the cylinder block was removed from the gearbox housing and removed from the engine compartment without dismantling the box! It would be useful to mark the position of the flywheel relative to the crankshaft, since there are two gears on the flywheel - one for the starter, the other for the crankshaft position sensor, which the French attached above the hatch in the gearbox housing (and they are not shy about such decisions!). However, the flywheel mounting holes in the crankshaft are asymmetrical and it will not be possible to place the flywheel in the wrong position. And for that, thanks to the French. The clutch is already at its limit, it is small in diameter and the damper springs in the driven disk are tired long ago, and the linings are worn out. But we were also forbidden to change the clutch. Another interesting thing is that the French count their cylinders not from the timing drive, as is customary in Rus' and other enlightened countries, but from the flywheel and clutch. Those. where we have 1 piston, they have a 4th. Well, isn't it a deviation?! In order not to get confused with disassembly and reassembly, it would not be superfluous to mark with a white marker the number of pistons and their human orientation - to the timing drive. The wires from the coil are also connected to the spark plugs - the counting goes in reverse... We removed the pan, and there was a sea of abrasive poured out...
Under the pallet is a bicycle. Well, I mean, the chain is almost like on a bicycle, only the bike is French and the chain turns the oil pump. But, unlike Ford, the French confidently cut off everything “unnecessary” - there is neither a damper nor a tensioner on the chain. Bravo, French! Saving is your god! Why else do you have a tensioner on the timing belt, you should remove that too! The bearings and crankshaft are in poor condition. The connecting rod of the 1st cylinder was knocking, the liner and neck there were already quite ground up. The rest of the journals are also worn out.
The layout of the cylinder block vividly resembles the VAZ classic. The same location of the oil pump, the same block architecture. As I already wrote above, the engine is a clear “hello” from the carburetor era. Of course, there is no smell of oil jets cooling the pistons here. The connecting rods and pistons are also nothing interesting; the fingers are pressed into the connecting rods in a cheap manner. But the block is massive - have the French really found free cast iron or are they casting it somewhere in Africa?
They called a neighbor to figure out what to do next. Repairing the camshaft bed cost almost 7-8 thousand rubles - it was necessary to bore and fit all 5 bearing journals into the cylinder head, and grind the camshaft journals. Grinding the crankshaft cost 2400 rubles . There is a problem with the liners for this engine (it would seem that the engine is very common and there are no liners?!!). There are two repairs of connecting rod bearings: 0.25 and 0.5 mm, the set costs about 800 rubles . But with the indigenous people it’s an ambush. Here they are without locks and I couldn’t find anything in the catalogues. But in one local store in Logan they were pleased - they have 0.25 repair inserts without locks, at a price of 1400 rubles . Well, plus work for the bulkhead, etc. The neighbor became even gloomier, counting his losses on the sale of Logan. Having slowed down the repair process, he rushed to poke around Avito, looking for used units. As a result, he bought the following from salvage cars: 1) A head complete with a camshaft, but with bent intake valves. The price of the head is 5,000 rubles 2) The cylinder block assembled with pistons, crankshaft and flywheel, but without a pan - it shattered into pieces during an accident. The price of the block is 5000 rubles. So, we had to assemble a Frankenstein from the remains of three emergency engines .
But it wasn't that simple. The Logan 1.4 engine has been constantly modernized over the years of its release. On the head with bent valves, an axle with rollers on rocker arms was found. On the old engine, the rockers were simple, with heels, without rollers. The camshafts were also different - the lift of the cams was slightly different and the width of the cams for the rollers was the same. The brackets and gaskets also differed in appearance.
Both heads were disassembled and one was assembled from their spare parts. Bent valves and deformed valve springs were replaced with whole spare parts from a head eaten by abrasive. The brackets and all other parts were also installed from the old head. The camshaft and rocker arm axle with rollers were installed from a new head. The camshaft pulley was installed using the old one, with our marks. The only plus of this head is that the valve bushings are brass and practically do not wear out. It's amazing how the French didn't skimp on bushings!
The cylinder block with a broken pan was washed from dust and dirt, the whole pan from the old engine was washed from abrasive and placed on a new block. I also had to replace the front cover and small timing pulley - they were of a different shape. The pump also differed in appearance and design; it was replaced with an old one from the previous engine, fortunately the cylinder blocks themselves are no different. Otherwise, the diameter and appearance of the pistons are all the same. They did not disassemble the “contract block”; the seller assured the neighbor with an oath that it was in perfect condition. Even the oil filter was still new, it had been changed right before the accident. The second photo shows a bunch of spare parts left over from assembling the Frankenstein.
The assembly process is not interesting in any way and we will skip it in our photo report. The valve clearances were adjusted, a simple process. We filled in new oil, set the timing drive to the old marks and started the engine. The Renault Logan engine started working as if nothing had happened, as if the whole story with the lion’s portion of abrasive poured by some kind of radish through the oil filler neck had never happened. Of course, all the knocks disappeared.
The repair cost my neighbor 20 thousand (10 for “contract” spare parts, 10 for labor) , the engine was disassembled and reassembled in 3 days. The car was sold an hour and a half after the engine was started.
Article written: November 13, 2014 Author of the article, photo-video materials: © Quasar Prohibited without the written permission of the author: reprinting the article in whole or in part, reprinting and use of photo-video materials, as well as their modification and editing for the purpose of further publication on third parties websites.
How to replace the coolant on a Renault Logan car technologies and tips
Ideally, the operation should be performed in the inspection hole, because it may be necessary to dismantle the crankcase protection. On this machine there are no plugs in the cylinder block to drain the coolant, so you will have to remove the pipes in the process. The operation of changing the fluid is carried out on a cold engine.
How to drain correctly?
Before replacing antifreeze on the Renault Logan sedan, you need to relieve excess pressure in the cooling system. To do this, open the cap of the expansion tank, and then work is carried out according to the following points:
- Unscrew the six bolts securing the engine protection and remove it.
- Place a container under the engine to drain the fluid.
- Close the expansion tank cap to reduce the intensity of draining at the initial stage.
- Use a slotted screwdriver to disconnect the hose clamp on the lower radiator pipe.
- Remove the sleeve and drain the coolant into a container.
- To increase the pressure, remove the plug from the expansion tank, and also unscrew the air outlet fitting from the system, which is located on the heater supply hose.
- After draining completely, put the hose on the radiator pipe and secure it with a new worm-wheel clamp.
How to fill?
The procedure for filling the system with new fluid occurs according to the following scheme:
- Fill coolant through the neck of the expansion tank until antifreeze comes out of the air bleeder hole.
- Screw on the cap of the expansion tank and the fitting cap.
- Start the engine and wait for the cooling system fan to turn on, then stop the engine.
- After the engine has cooled, bleed the air using the fitting and check the coolant level, if necessary, bring it to normal.
- Install engine crankcase protection.
Some car enthusiasts are wondering whether flushing the system is necessary when replacing the coolant on a Renault Logan car, or is it a waste of time? It all depends on the life of the car and the coolant itself. However, the procedure will not be superfluous in any case. To do this, just insert the hose from the water supply into the filler neck, turn on running water and wait until it comes out clean.
If the radiator does not work satisfactorily, you should wash it yourself or seek help from specialists. If complex contamination is suspected, clean water is poured into the cooling system with the addition of special cleaning agents and the car is operated for 2-3 days. After this, the dirty water is drained and fresh coolant is added.
Renault Logan repair manual
Home / Repair manuals / Repair manual Renault Logan
This section contains an electronic version of the repair and operation manual for the Renault Logan car. To navigate through sections, use the links in the table of contents. The guide is divided into pages, which you can view to move on to the next one using the “See also...” link at the bottom of the page.
- Section 1. Car structure
General information about the car part 2 part 3 part 4 - Vehicle registration details
- Car keys
- Controls Instrument panel part 2
- Instrument cluster part 2
- Locks
- Adjusting the front seats
- Sun visors
- Safety rules and recommendations Safety rules
- During daily use
- Refueling a car with gasoline
- The engine does not start General techniques for starting the engine
- Diagnostics of the engine condition by the appearance of the spark plugs
- Jerking when starting to move
- Checking the lubrication system
- Checking the cooling system
- Checking electrical equipment
- Knocks in the engine
- Bleeding the brake system
- Wheel replacement part 2
- General provisions Safety regulations
- Wheel check
- Changing the engine oil and oil filter
- Replacing the air filter element
- Design features part 2 part 3 Useful tips
- Replacing the right power unit suspension support
- Replacing the cylinder head cover gasket
- Replacing the camshaft
- Design Features
- Design Features
- Design Features
- Design features part 2 part 3
- Clutch Design Features
- Design Features
- Design Features
- Front suspension Design features
- Design Features
- Design Features
- Replacing the outer tie rod end
- Bleeding the power steering system
- Features of the device part 2 part 3
- Replacing the vacuum booster
- Replacing the brake force regulator in the rear brake hydraulic drive
- Replacing brake hoses
- Replacing the brake pads of the front wheel brake mechanism
- Removing and installing a brake drum
- Adjusting the parking brake drive
- Design Features
- Design Features
- Design Features
- Design Features
- Design Features
- Design Features
- Design Features
- Replacing windshield wiper blades
- Design Features
- Design Features
- Replacing instrument panel switches
- Removing and installing sound system speakers
- Replacing the oil pressure warning light sensor
- Design Features
- Removing and installing the hood
- Removing and installing front door trim
- Replacing trunk lid springs
- Removing and installing the front seat
- Design Features
- Removing and installing an outside mirror
- Removing and installing the instrument panel part 2
- Device Features
- Replacing handrails
- Car wash
- Specifications
- Engine oil
- How to prepare a car for winter, part 2
- Recommendations
- Safety precautions during repair work General requirements
- Basic tool kit
- Unscrewing rusty threaded connections
See also: General information about the car →
