Calculation of circuit operation under load
In order to find out whether the circuit can work normally when connecting an additional load, try drawing it schematically with a pencil on a sheet of paper and marking all the sockets and lighting fixtures available in it. Check your wiring diagram and place it on the main board.
Automatic fuse from ABB.
Next, inspect the markings of the fuse or insert that is responsible for this circuit, and determine the load limit that the circuit is able to withstand. These values are located on the surface of the fuses and are indicated in amperes.
To make the calculation, sum up the power of all devices connected to a given circuit in watts. Be careful and don't miss anything. Next, determine the load you are going to connect and add it to the total watts. Divide the resulting value by 120 volts, and you get the total circuit load in amperes. This value is the load on the network under the condition of simultaneous operation of all devices connected to it.
Modular automatic fuse Hitachi HiBD63H.
Circuit breaker e.mcb.100.3.D63.standard.
Circuit breaker e.mcb.100.3.D63.
If this value does not exceed the maximum load on the circuit, then additional load can be installed. As a general rule, the total circuit amp load should not exceed 80 percent of the maximum allowable (typically 15 to 20 amps in residential applications) for circuits serving lighting fixtures and outlets. To be on the safe side, check with your local building inspector about electrical code requirements.
Photo of circuit breaker iEK BA88-33.
When calculating the load with an additionally connected device, be sure to take into account the location of the new outlet. If it is located in the bedroom, then most likely you will not be connecting a drill or even a milling machine, but electrical appliances such as clocks, lamps, a radio, a vacuum cleaner, etc. For this type of device, a value of 100 watts per outlet is usually taken.
If the circuit to which an additional connection is planned is located in the kitchen or garage, it is obvious that the load on the outlet there will be higher. Try to calculate the expected load on the network by assessing which devices will work simultaneously.
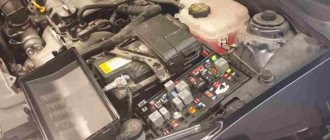
Power supply in the Opel Zafira interior
For a simpler understanding, it is better to use the table:
| № | Direction |
| 1 | Front electric windows |
| 4 | Air conditioning, airflow, climate control (in modern models) |
| 5 | Airbag |
| 11 | Heated rear window |
| 12 | Rear window wiper |
| 13 | Operability of parking sensors (if there is a parking pilot) |
| 14 | Heater and air conditioner protection |
| 15/16 | Front seat control |
| 17 | Tire pressure, rain sensor, mirror adjustment, interior air control |
| 18 | Switch Surge Protection |
| 21 | Heated side mirror protection (rear) |
| 22/23 | Rear electric windows |
| 24 | Special hole for diagnostics |
| 25/26 | Control and protection of electric drives of side mirrors when folding |
| 27 | Anti-theft alarm, motion sensor (in new models) |
| 29 | Panel socket and cigarette lighter |
| 30/35 | Rear power outlet in the cabin |
| 31/32/33 | Protection and control of the Open&Start system |
| 36 | Car coupling device |
| 37 | Performance of the LED interior lighting lamp |
| 39/40 | Heated front seats |
Note! Serial numbers not included in the fuse block table are classified as additional (reserve).
Replacement - fuse
Tables for decoding the Volkswagen Passat B3 fuse box
Replacement of fuses on metal and reinforced concrete supports, as well as on wooden supports with grounding slopes, can be done without removing voltage and without work, only using a bucket truck with an insulating basket. In this case, the basket should not touch the wires or the body of the support.
Replacement of fuses in the dark can only be done on wooden supports without a grounding descent, without being accompanied by two persons, one of whom must have a qualification group below III. Replacing fuses installed on supports is prohibited during a thunderstorm.
Replacement of fuses in the installation itself and in the power supply circuits of the installation must be carried out with the voltage removed. Before replacing fuses on capacitors, they must be discharged.
| Installation of closed conductors in the workshop…. |
Replacing fuses in a joint venture without turning off the input switch can lead to electric shock. Recently, tubular fuses have been replaced by automatic fuses.
Replacing fuses on poles in rainy weather requires first disconnecting the line.
Replacing fuses is the simplest and most common type of repair. The fuse itself is a small piece of calibrated wire that is part of an electrical circuit. When the current exceeds the permissible value, the wire melts, breaking the circuit.
Replacing the lighting circuit fuses must be done with the circuits de-energized and the buttons turned off.
Replacement of lighting circuit fuses must be done with the circuits de-energized.
Replacing fuses and arresters on input racks, cabinets or switchboards during thunderstorms, as well as on lines exposed to high voltage, must be done wearing rubber gloves or using special taps.
Replacing fuses and arresters on the main switchboard during thunderstorms must be done wearing rubber gloves or using special clamps.
Replacement of fuses with a voltage of up to 1000 A on a support may be carried out under voltage by one person with qualifications of at least Group III. The work should be carried out wearing dielectric gloves, using insulating pliers, standing on the claws and attached to the support with a safety belt. Eyes must be protected with safety glasses. Replacing fuses on poles in wet and rainy weather while under voltage is prohibited.
After replacing the fuse, check the operation of the sandboxes, turn on the BV and gradually regain the controller positions, holding the controller handle in the 1st position for several seconds. The driver's assistant should carefully observe the battery voltmeter readings; at the moment the fuse insert blows again, the voltmeter needle deviates towards zero. Having noticed the position of the controller where the fuse insert has blown, move the controller handle to zero, open it and disconnect the wire receiving power at this position. Then, according to the diagram, it is preliminarily determined which device will not turn on because of this and how this will affect the operation of the circuits. Then they replace the fuse again and set the controller positions first, without turning on the BV, and then restoring it. This verifies that the shutdown was performed correctly.
To replace fuses, it is necessary to turn off the current.
To replace the fuse, it is enough to loosen the bolted connection that secures the contact pins to the posts.
Fuse operation
In practice, it often happens that when the washing machine is operating, there is a voltage drop or the power supply is stopped. If there is no fuse, the electrical part of the device may burn out completely.
In the presence of this element, the short circuit created in the circuit does not affect the equipment, that is, if the current strength increases, this ensures that the electrical circuit opens and the conductive core of the wire melts.
Externally, the fuse in a washing machine is identical to a glass tube with a bulb placed inside.
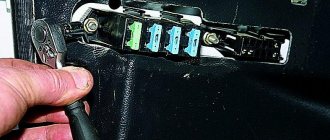
How to replace the cigarette lighter fuse
Power window fuse
Each driver should carefully study how many and what kind of software are present in his car. Of course, you don’t need to carry the same number of spare fuses with you, but having a solid supply of all ratings (2-4 pieces each) is vital. Since they are inexpensive and take up even less space, there will be no problems with storing them. But looking for them among other trash can be a much more difficult task. Remember that such a need may arise at any time, and if everything is not in order with the electrical part of the car, then more than one replacement may be required before the problem is eliminated.
This operation must be performed with the ignition turned off; for insurance purposes, it is better to remove the key altogether. Don't forget to disconnect the negative terminal of the battery. Further actions are extremely simple - open the lid (the clamping mechanism may be different), find our part, and pull it out using tweezers. It is advisable to use branded tweezers; they are usually hidden on the lid of the unit. Do not try to pull out the fuse with tweezers that are too thin. If it is not nearby, then you will probably find pliers - you can also use them carefully. You need to install a cigarette lighter fuse to replace the burned one with the same one. If you don’t have the right one at hand, you’ll have to do without using the device connected to the cigarette lighter until you buy the one you need. Many people solve the problem by installing “bugs” in the form of a wire or a paper clip - we strongly recommend that you abandon this option, since this can have serious consequences for both the rest of the electronics and the car (there are many cases when such amateur activities ended in a fire).
Rarely, there are situations when the PP has melted and does not want to be removed. It is unacceptable to use force in such cases - you risk breaking the entire panel
Try to carefully loosen the body. With enough persistence and perseverance, sooner or later the fuse will be removed
As a last resort, you can try to pry it off with the tip of a screwdriver, knife or other sharp object. If you use brute force, you can damage the seats, which will definitely create a new headache for you.
But such problems are extremely rare, so replacing the PP is a simple operation that even a child can cope with (figuratively speaking, do not consider it a guide to action). It is much more important to find out why the fuse failed and which device is responsible for the emergency. To do this, you may have to take measurements with a tester, and if a source of increased power is found, it is better not to use it. In any case, you can find a suitable replacement by purchasing a similar device, but consuming less power.
How to change a fuse in a car
Beginners faced with replacing car fuses often wonder how to do it? In this seemingly simple action, sometimes you need to know small nuances.
There are two types of fuses in cars - classic “finger” and more modern “flag” ones. Accordingly, we will deal with both separately.
Replacing classic fuses
This type of fuses was widely used in classic AvtoVAZ models and the first Samaras. It is a rod made of plastic or ceramics, with a fusible insert of a certain width made of thin metal placed on it. It is this insert that breaks when a short circuit occurs in the car wiring. Such fuses are installed between two metal legs of the block - each between its own pair.
Classic “finger” fuses are installed between two elastic legs.
To replace the “finger” fuse, you just need to pull it out from the space between the tabs, slightly pressing the movable tab (the second, as a rule, is rigidly fixed in the block). The new fuse is inserted in the same way. In this case, you need to make sure that the ends of the fuse are installed in the holes or recesses on the legs and that it does not dangle in its place.
A well-known disadvantage of classic mounting blocks with “finger” fuses is that the legs lose their elasticity over time and can move away from each other. Therefore, if the new fuse continues to dangle even after correct installation, remove it, press the movable tab towards the top (reducing the gap between them) and insert the fuse back.
Replacing the fuses
Flat fuses have a completely different design. The fuse link is placed in a plastic housing and has two external contacts. With these contacts, the fuse is installed in the corresponding holes in the mounting block and provides a very reliable connection.
Pulling out such a fuse is much more difficult than a finger fuse. For this purpose, special plastic tweezers are used, which, as a rule, are placed in a separate socket of the mounting block. Using these tweezers, take the fuse by the plastic flag housing and pull it out of the socket.
If you don’t have special tweezers at hand and you need to pull out the fuse, you can use a small flat-head screwdriver to pry the fuse by the plastic casing at the very base. In this case, you need to ensure that the metal tip of the screwdriver does not touch any contacts in the block (adjacent fuses, relays, free sockets).
It is most convenient to remove flag fuses from the socket using special tweezers
At worst, the safety pin can be pulled out with your fingers, but it is not always possible to pick it up. In the mounting blocks of many cars, the fuses are installed so closely that strong men’s fingers simply cannot fit between them, and women’s fingers do not have enough strength.
Installing flag fuses is extremely simple - they are inserted into the desired socket in one motion, like a plug into a socket. And at the same time they don’t hang out. If a fuse of this type has free play in the socket, this indicates a malfunction of the socket. Its shape and size are usually disrupted due to strong heating caused by total oxidation of the contacts. In this case, the block will have to be disassembled. Modern mounting blocks are quite complex, so without good knowledge of automotive electrical engineering and skills, it is better to entrust this work to specialists.
When replacing a fuse, be sure to ensure that the new one has the correct current rating. A person who is too weak will burn out without a reason, but a strong person can courageously withstand at a critical moment and then... It is better not to let it come to this.
You can find out what ratings flag fuses come in, and what colors of housing they have, from the table in the article on how to choose fuses for a car.
By
Fuse repair
How to check a fuse with a multimeter
Repair of fuses with replaceable inserts consists of replacing them with new ones designed for the same current. The rated current of the insert is indicated on its surface in those places that are not affected by melting. Additionally, the insertion current of the fuse is indicated next to it on the device body, and at industrial facilities a tag is additionally hung on the fuse body.
If cracks, soot, or metallization from the action of an electric arc appears on the body, it is replaced. Any defect that can impair the arc-extinguishing properties of the fuse will lead to problems when disconnecting the next short circuit: the body will melt, the arc will spread to adjacent contacts. The switchgear will switch off completely and be damaged.
The fuses in household equipment are replaced entirely. In plug-type fuses, the fuse link is replaced. But inserts for the required current are not always at hand. Sometimes it becomes necessary to temporarily repair a fuse, but at the same time ensure trouble-free operation of the protected device.
Electricians have long solved this problem by installing, instead of inserting, a thin copper wire called a “bug.” But when installing it, you need to take into account two main rules, compliance with which will preserve the safety of the repaired fuse.
Technical specifications
| Number of poles | 1 |
| Rated current | 1.6 A |
| Trip characteristic - current curve | WITH |
| Rated operating voltage | 230/400 V |
| Breaking capacity according to EN 60898 | 4.5 kA |
| Width by number of modular distances | 17.8 mm |
| Max incoming cable cross-section | 25 mm |
| Rated DC voltage - DC | 48 V |
| Rated impulse withstand voltage | 4 kV |
| Current limiting class | 3 |
| Frequency | 50 Hz |
| Degree of protection - IP | IP20 |
| Installation type | on DIN rail |
| Climatic performance | UHL4 |
| Release type | Thermal, electromagnetic |
| Scope of application | Industrial and household |
| Total number of poles | 1 |
| Trip time of the release in the short circuit zone tm | 0.1 s |
| Availability of explosion protection | Without explosion protection |
| Mounting rail type | 35×7.5 |
This type of device is the safest, most reliable and affordable.
The fuse link is destroyed instantly under the influence of excessive voltage, providing an effective break in the circuit and protection of the wiring. At normal voltage, the insert heats up, and the heat is dissipated from the outside through the housing parts. The element itself is not deformed.
What happens when the current increases? The temperature of the insert begins to gradually increase as the part offers active resistance. Given the rate of increase in temperature, the element either melts or evaporates.
The main criterion by which a fuse-link is selected for a specific electrical circuit is the time-current parameter. In emergency mode, a quick break in the electrical circuit can prevent the negative consequences of the process.
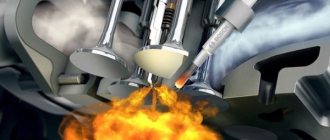
Operating principle of the fuse
When electric current passes, the conductors heat up. The greater the current or the smaller the cross-section of the conductor, the greater the heating. When a certain value, called the melting current, is reached, the conductor melts and collapses, thereby breaking the electrical circuit.
But this is not enough. At the moment of rupture, the short circuit current may not be interrupted, but will continue to pass through the fuse through an electric arc that occurs due to the ionization of the gas inside it. Three methods are used to extinguish it:
- Filling the cavity inside the fuse with a substance that does not support combustion. For this, quartz sand is used. By filling the fuse, it displaces air that can ionize.
- Splitting the arc into pieces due to the insert burning out in several places simultaneously.
- Use of spring-loaded inserts. After they burn out, the spring is released and sharply increases the distance between the contacts, drawing out the arc and causing it to go out.
Types of fuses
Devices are classified according to the criterion of electrical circuit breakage. The following types are distinguished:
- Fusible.
The rupture occurs by melting a special insert. - Electromechanical.
A bimetallic element that, when deformed, disconnects contacts. - Electronic.
An electronic circuit controls the key responsible for breaking the circuit. - Self-healing.
Special materials are used for their production. While current flows through the circuit, their properties change, but resume after the current disappears or decreases. Resistance increases, then decreases again.
Fuses are considered the most popular and in demand.
.
Recommendations for replacement
If you carefully study the instructions, there is nothing particularly complicated in the procedure for replacing the protective element. But it’s worth following certain rules and recommendations.
Before removing a burnt-out device, make sure you have a new element available. It is the selection and purchase of new fuses that is considered the most difficult stage in the entire replacement work. By checking the functionality of all equipment, you will be able to identify the culprit of the incident with your car. Make sure that the problem is in the fuse, and replacing it will restore the car's functionality. Now let's move on to how to remove and properly pull out a blown fuse in a car. Anyone who has pulled out elements before is unlikely to encounter any difficulties. You can pull out the device using a special device in the form of pliers. Remove the device carefully, without jerking or tugging on the sides. Otherwise, you risk breaking the case, and the contacts themselves will remain in the socket. Getting them separately will be much more difficult. Previously, large fuses were used that were easily removed with your fingers. But the increase in their number in the car led to a decrease in the structures themselves. Therefore, it is better not to pick around with your hands and fingers, but to take pliers and use them to remove the problematic fuse. Check the element for functionality. Since a visual inspection does not always give an accurate answer to the question of the condition of the fuse, the best solution is to use a multimeter. Modern fuses are made of transparent plastic or glass. The state of the low-melting thread is usually clearly visible through the body. Once the driver has taken the fuse with pliers and pulled it out, it is worth inspecting it. It is possible that there are other problems with the car, and this element has nothing to do with it. We remove it carefully in any case, even if the device is definitely out of order. Install the new fuse in its rightful place
Here it is important to adhere to the rule that a fuse with the same rating is inserted into the same socket. You already know about the consequences of choosing the wrong protective elements, so you definitely don’t want to risk the integrity of your vehicle. It is considered a big mistake not only to use fuses of a lower rating than required, but also to use a larger one.
Some motorists believe that it is possible to replace a 30-amp device with a 40-amp element, which will supposedly be more stable, durable and reliable. But this is a mistaken opinion, which can result in expensive repairs. If the car manufacturer has provided that this socket goes into a device rated 10 Amps, and this socket is rated 40 Amps, install new fuses that way. For reinstallation, use the same pliers that were used to remove the burnt-out protective element in the safety block.
Upon completion of the work, you need to check all systems that have stopped functioning due to a blown fuse. If everything works, feel free to close the unit and continue to safely operate your car.
It will sound a little strange, but quite often situations arise when motorists install fuses in the wrong sockets where they should be placed. This can be explained by poor lighting, vision or memory.
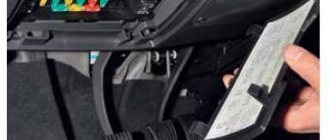
There is nothing surprising here, since the nests in the block are very dense and close to each other. Because of this, you don’t always remember exactly where this or that element was extracted from. If in doubt, refer to the instructions or check the map on the safety block cover. This will save you from unwanted mistakes.
Understanding fuses is quite simple. This is a common procedure that thousands of car owners perform every day. Such small devices can reliably protect automotive equipment and prevent complex and expensive repairs.
Finally, we recommend that you always have a supply of fuses of different ratings on hand. They can burn out at any time, and sometimes, just because of one fuse, it is impossible to continue the trip. By quickly replacing the element, you will solve the problem and be able to resume movement.
How to find a part
Manufacturers can provide for the presence of fuses of different models in machine designs and install them in any location. It is possible that such a search will take a lot of time, so the best option would be to find an electrical diagram of a technical device.
The drawing will indicate the installation location. If this circuit is missing, then it is necessary, based on logical thinking, to determine where the fuse is located.
List of tips on where the part is located:
- The part is located in the plug from the main wire required to connect to the power supply.
- In a wire located in the equipment housing, you should pay special attention to the base of this branch; in most cases, they are installed there.
- Installation is carried out in the power supply of the technical device.
- Locations on or near the board.
- Study the electrical circuit of a washing machine. Thus, during the production of washing units, the manufacturer ensures the safety of this expensive element.
Still, you should initially look for the element inside the outlet or in the wire.
To carry out a thorough inspection, it is necessary to remove the top cover, that is, using a screwdriver, unscrew a pair of screws and push out the cover structure.
Next, you just need to consider whether there is a fuse in the equipment. There are cases in practice when fuses are simply not found, then most likely they are not in the technical device.
Correct fuse
Well, your headlights have gone out. Or the ceiling light has gone out, or the wall socket is no longer charging your cell phone. You've checked the lamp and phone charger, so you're absolutely sure the fuse has blown. But which one? There are a couple dozen of them, in all possible colors. The fuse box cover almost always has an indication printed on the inside which fuse controls which electrical circuit. If not, refer to your user manual.
Removing a suspicious fuse is easy - pull it out. If your car was made in the late 80s or later, it most likely uses flat fuses that can simply be pulled straight out of their sockets. Of course, you won't be able to remove them with your bare fingers. You need to use some tool. Some thoughtful car manufacturers provide fuse clips neatly inserted into the fuse box. They are simply a pair of pliers with two clamps that are great for pulling out fuses. Grab, squeeze and pull.
If your vehicle uses old glass fuses, you may have to remove them from their holders. Warning: Glass fuses may break if pulled with too much force. Instead of pressing on the glass, pry at one end of the fuse. If you have to pry from the side (because the fuse box is in an inaccessible place), pry off the metal cover. And remember that you need to replace the fuse, so be careful not to damage the fuse holder terminals - they must make sufficient, reliable electrical contact. Don't have a fuse clipper? A pair of small pliers will help. You can also try to remove the fuse from the panel by prying it with a thin screwdriver - there is a small edge on the top of the fuse housing that you can catch on. Just be careful where you insert the screwdriver so you don't short anything else. To replace the fuse, simply push it in with your fingers.
Older, European-style fuses use a simple sheet metal insert wrapped around a ceramic fuse body. They are quite durable, but are susceptible to corrosion between the fuse end and the contact; Try twisting the fuse in place (without removing it) to restore contact if you have a problem and the fuse looks good. These types of fuses are not color coded - read the ratings in the fine print.
Published: September 02, 2014
How to find a fuse
A fuse is installed in the washing machine if the equipment is manufactured in foreign countries. In the states of the former USSR, this device was not always installed, since there are no clear regulations for performing this work.
If washing equipment was produced before the beginning of this century, then it was not equipped with this safety device.
When troubleshooting a machine, you can confuse the surge protector with the fuse, so it’s important to know what it looks like.
Let's go on reconnaissance
Not sure which fuse is blown because you don't have a diagram? You can always take them all out one by one and inspect them. It is faster to do this with a voltmeter or diagnostic lamp. The conductors inside the blade fuses are exposed on the top surface. Turn on the ignition and the electrical circuit that needs to be checked. Connect the ground wire of your voltmeter or test lamp to a reliable chassis ground point - bare metal. Touch the fuse wire with the probe. A good fuse should show voltage on both sides. A burnt out one will not show any voltage on one side.
VAZ 2114 fuses burn out - how to prevent
The easiest way to eliminate a breakdown is to take proactive action. High-quality and timely diagnostics help prevent breakdowns and sudden circuit failures.
The manufacturer recommends performing basic procedures in a timely manner.
- Treatment of contact groups with special oils. The products isolate metals from exposure to oxygen and water.
- Periodic control of the seating density of elements. Over time, mounting connections can become loose, leading to loss of contact and the potential for arcing, which can burn out metal parts.
- Strength of fastening of consumers in sockets. The size fuse of the VAZ 2114 may blow out if the light bulb dangles in the lampshade or water gets inside when it rains.
- Serviceability of blocks and main mechanisms. It is necessary to carry out diagnostics of vehicle devices in a timely manner. The VAZ 2114 starter fuse often fails when there is damage to the electric motor or the retractor element touching the body.
The power supply system of a domestic car has its own disadvantages and design features. To prevent unexpected breakdowns, it is recommended to carry out diagnostics of the machine in a timely manner. The VAZ 2114 fuse panel will help troubleshoot the problem.
Answers from experts
Alexander B:
Untwist the stranded wire, and insert it approximately along the diameter of the burnt-out filament onto its (burnt-out fuse) body, braiding it with this wire, or twist several wires if their diameter is small - quickly and works - the bug is called
murmudont:
what amperage? , but 100 rubles is a pity?
reason:
“the positive wire that goes from the battery to the subwoofer”))) that’s really not necessary. You don’t have to do it yourself, it’s better to buy it, it’s not expensive
Nadezhda Klimina:
In fact, changing the fuse is simple; to do this, you need to follow several rules:
a) Find the correct fuse. This is probably the most difficult thing, given the lack of information about its location. In addition, there may be several fuses for a particular system.
b) Take it out. Sometimes this is quite difficult to do without a special tool, such as forceps. There are more and more fuses due to the ever-increasing number of electronic modules in a car, and there is no more space in the car. Therefore, this problem is solved by reducing the size of the fuses. And it becomes impossible to simply remove them with your fingers. But in Ford cars, there are often special pliers in the fuse box covers for removing them.
c) Make sure the fuse is blown. To find out whether the fuse is blown or not, you need to look at it. Most often, fuses are now made of transparent plastic through which a thin wire can be seen. Which melts in a faulty fuse and is visible through the plastic.
d) Place the correct fuse in the correct location. The most important thing is to install the correct fuse, that is, a fuse with the same rating as the one you took out of the box. Fuses are made in different colors - red, yellow, blue, and each one is usually marked with the numbers -3, 5, 15, 20, 25, 30, and so on. This is the face value
An important rule - never place a new safety terminal higher than the one you removed. If you take out the yellow 20 Amp fuse, don't put in a 30 Amp fuse.
This can be costly.
Reinstall the exact same fuse that was removed. You took out the yellow one at 20 amps, put the yellow one at 20 amps. Everything is very simple!
The second important task is to put the fuse back in the same important place you took it out from! This may sound funny, but very often people in the dark or due to poor vision fall into another nest and the results are sometimes very strange, and in rare cases disastrous
The fact is that in modern cars, fuses are in boxes along with electronic modules, and by placing the fuse in a different place, you can force the module to work differently and the car may begin to behave strangely, for example, you cannot turn off the engine when the headlights are on, or when you turn on the ignition for minutes the headlights, power windows, or anything else will not work.
That's all. Quite simple rules that you can follow and that can save you time and money. It is best to have complete fuses from those used in your car, a flashlight to replace the fuse in the dark, pliers if you cannot remove the fuse with your fingers, and probably a magnifying glass if you have poor eyesight and cannot see the fuse number and the denomination on it.
AR:
Buy at a car dealership, at least they used to sell these kind of case fuses that are attached with self-tapping screws to the body or plastic in the right place. And look at the amperage approximately according to your sub, according to the peak power (Power = voltage * current)
CLEOPATRA:
.kakprosto /kak-54125-kak-vytashchit-predohranitel
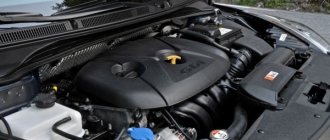
PSU located under the hood
A table with the following symbols is also provided:
| № | Purpose |
| 1/2 | ABS system operation |
| 3/4 | Heater, air conditioning, ventilation and climate control in the cabin |
| 5/6 | Both fans in the cooling system |
| 7 | Windshield washers |
| 8 | Horn/signal operation |
| 9 | Headlight washers |
| 12 | Circulation pump operation |
| 13 | Fog light operation |
| 14/15 | Rear window wipers |
| 16 | ABS and Open&Start systems, as well as the operation of the engine control module |
| 17 | Fuel filter (diesel engines only) |
| 18 | Starter |
| 19 | Transmission electronic components |
| 20 | Air conditioner performance |
| 21/22/30 | Engine electronics |
| 23 | Tilt of high and low beam headlights |
| 24 | Functioning of the fuel pump |
| 27 | Power steering |
| 28/29 | Electronic filling of the gearbox |
| 31/33 | Tilt angle and light adaptation |
| 32 | Car brake system and air conditioning |
| 34 | Steering wheel control unit |
| 36 | Operation of the display, radio, multimedia system, as well as Twin Audio |
Note! In some cases, it is especially important to change fuses that affect the operation of paramount devices or those responsible for several processes at once. This will allow you to protect yourself while moving.