Recommendations
Comments 5
Much needed information! Thank you
No reason))) always happy to help
Thank you, just needed
This message was found in the comments at one time and saved on disk: I post the types of lamps used on RENAULT LOGAN, first of all, for myself, in order to quickly find the type of lamps if I need to replace them. Well, maybe it will be useful to someone.
Front headlights: Low / high beam - lamp H4 12V 60/55W Front dimensions - baseless lamp 12V W5W Turn indicators - single-pin yellow lamp 12V PY21W
Fog lights: Logan Faza 1 / Sandero - fog light bulb H11 12V 55W Logan Faza 2 - fog light bulb Ph2 PSX24W Base H16
Side turn signals: orange turn signal lamp without socket 12V 5W
Rear lights: Brake light / marker - two-pin rear light bulb 12V 21/5W
Rear turn indicators - single-pin lamp 12V 21W
Reversing light - single-pin lamp 12V 21W
Rear fog lamp - single-pin lamp 12V 21W
Additional brake light: single-pin lamp 12V 21W
License plate lighting: baseless lamp 12V W5W
The video tutorial is not very informative, so below I wrote step-by-step instructions for replacing the lamp.
Features of light beam regulation
After replacing the Renault Logan headlight, you will need to adjust its light beam. To ensure the correctness of the indicated process during adjustment, we follow these mandatory rules.
- The light beam emitted by LED sources requires very precise adjustment. In no case should its direction exceed the maximum permissible vertical level in relation to the horizontal plane.
- Installation of headlights with such lamps on Renault Logan should ensure that the fog lighting equipment is located as close as possible to the road surface. This will ensure that the correct light beam boundary is completely reached.
- Sometimes exceptional cases arise that require adjustment work to be carried out in a specialized workshop. If during self-adjustment it is not possible to achieve the required parameters, this entails the need to contact servicemen.
- After the fog light bulb was replaced. If there are no force majeure circumstances, then independent regulatory measures usually take no more than 1-1.5 hours.
- The adjustment process will be convenient if you use a special improvised screen. Its role can be an ordinary flat vertical surface with markings applied on it. The Renault Logan should be located at a distance of about 5 meters from this surface.
- We adjust the fog lights in this way when the upper level of the light spot coincides on our created screen with a drawn horizontal line, which is located (necessarily) 100 mm below the previously marked centers of the headlights (the straight line connecting them). The distance between these centers should be 1200 mm.
This is interesting: How to replace the rear struts of a VAZ 2114: step-by-step instructions
Step-by-step replacement of a Renault Logan parking lamp
To replace the lamp you need to remove the battery, but if you have a thin palm, you can try changing it without removing the battery.
1. Open the hood and stick your hand in the direction of side light base .
2. Take the base with your fingers and turn it 90 degrees clockwise.
3. Remove the base from the headlight, it will be together with the lamp.
The lamp is simply pulled out of the socket towards itself and installed .
5. Take the socket with the already replaced lamp and insert it into the headlight housing.
6. Next, turn the base 90 degrees counterclockwise and the work is completed.
If you have any questions, write in the comments.
Choose diagnostic equipment for car air conditioners
Auto parts for foreign cars, auto repair
It is better to unscrew the battery fastening nut with a long socket wrench or a socket with an extension, since it is very inconvenient to access it with an open-end wrench.
In extreme cases, when there is no socket wrench, you can place an open-end wrench on the end of the nut, and insert another wrench or a screwdriver into it on top to increase the unscrewing force. Having unscrewed the connection, you can safely pull out the bolt along with the plate; it will not go anywhere, since the bolt is partially flared in connection with the plate.
how to remove a light bulb from a Renault Logan
Helpful advice: Next, the battery is removed and you can more freely carry out the work of replacing the Renault Logan lamp in the left headlight. The chip sits quite tightly on the contacts and plus the rubber boot gets in the way a little, preventing you from comfortably grasping the chip, and therefore you have to use some force to remove it.
When removing the chip, it is better not to pull it straight towards you, but to move it left and right, as if loosening it on the contacts. For convenience, you can remove the boot from its seat.
After removing the chip, we move it to the side so that it is not in the way, and proceed to replacing the lamps, which is completely identical to replacing the lamp in the right headlight. We press the upper clamp marked in the photo and pull out the plug. Pull out the block with the wires, and then pull out the seal. Please note that there are straps on the sides of the seal.
If you pull on any of the straps, the seal can be removed very easily and quickly. Next, we remove the lamp itself from the headlight unit, holding it by the metal legs and replace it with a new lamp, installing it in the reverse sequence similar to removal. Replacing headlights or turn signal If you have a need to replace the front turn signal or replace the side light bulb, it is worth saying that replacing them is much easier.
The lamp socket that needs to be replaced simply needs to be turned counterclockwise and the burnt out light source removed. Differences between Renault Logan headlights in the new body Headlight unit for the new Renault Logan under the hood photo of the editorial car Headlight unit on the front photo of the editorial car Left headlight unit photo of the editorial team Note! We take out the lamp.
Installing a new lamp. It is installed in only one position due to three guide antennae. Snap the spring clamp of the lamp.
We put on a rubber boot. Make sure it fits well around the edges and on the lamp. We put on a glove.
How to replace the low beam lamp on Renault Logan 1st and 2nd generation
We take a new lamp and insert it into the socket. The base key will not allow you to make a mistake.
We take the spring, press the base and move it slightly to the right, and then to the left until it engages with the hook. Repair of optics on Logan In Renault Logan, like many classic VAZs, one lamp is responsible for the high and low beam in the headlight, and we will be changing it. If you change the lamp on the left headlight in the direction of travel, then first remove the battery, otherwise getting to the lamp will be problematic.
Required Tools
To make a replacement without outside help, take:
- rubber gloves (must be worn to avoid damaging new lights);
- side lights W5W (4 pcs);
- Phillips screwdriver;
- keys for 8 and 10;
- socket head 13 (to remove the battery mounting bar);
- rags;
- extension.
Some people neglect to use gloves, but the service life directly depends on this. If you touch a new lamp with unwashed hands, it will fail 5-7 times faster.
How to replace low beam on Logan
So, having selected the appropriate lamps, you can proceed to removing the old light bulbs and installing new ones. As for replacing lamps, it is important to know in the case of Renault Logan how to change the low beam bulb. We note right away that replacement on this machine is not difficult, but you need to take into account some features. Next, replacing the Renault Logan low beam lamp will be considered on the left headlight of this car as an example. By the way, on the right side the lamp changes in the same way.
- First, replacement will require removing the battery. To do this, you will need to prepare two keys (a 10 key and an 8 key). These keys are used to remove the terminals from the battery. You also need a 13mm socket, with which you can remove the battery mount.
When removing the battery, you should pay attention to the fact that the “minus” terminal is removed first, and only then the “plus”. Next, you need to unscrew the mount and carefully remove the battery.
- Usually there are no problems with removing the cover if the pressure is applied correctly. After removing the plastic cover, you will then need to remove the rubber seal and also remove the block with the wires connected to the lamp.
What tools and light bulbs will you need?
First, let's find out which lamps are used as side lamps in Renault Logan. They are the same in both generations. In the headlights, the manufacturer installed W5W incandescent devices with a power of 5 W as side lights:
Bulb W5W
In the rear lights, one device (also incandescent) with two spirals - P21/5W - is responsible for the side lights and brake light.
Bulb P21/5W
If you wish, instead of conventional incandescent devices you can install LED ones of the same size.
Diode analogues W5W and P21/5W
And now for the tools and accessories. We don't need anything special:
- Phillips screwdriver (only for Renault Logan I);
- cotton gloves;
- replacement light bulbs.
Sequencing
- Disconnect the negative headlight;
- We remove the front bumper and clear the approach to the body mount;
- We turn out the bolts of the headlight unit;
- Carefully disconnect the cable drive of the light corrector;
- We unscrew the three screws holding the headlight unit and tilt it to the side;
- Press the locking device and remove the cover;
- Carefully separate the wire connection block;
- Below the main lighting lamp we see the size socket. To change it, you can get to it without removing the bumper and headlight housing, but only by carefully inserting your hand between the headlight and the engine;
- On the left headlight we turn the socket clockwise, on the right - counterclockwise and remove it freely;
- Remove the lamp.
- Renault lamps have the article number W5W. We check the number and brand and put it in place.
- We put the headlight unit back together, connect the wiring block, install the light control cable and the bumper and fasten the housing.
Attention! Do not touch the lamp bulb with your hands - work with cotton gloves to avoid rapid failure of the lamp.
If you are a fan of bright lighting solutions, we advise you to choose a new technology lamp made on the basis of LED elements, of which there are at least 15 pieces. They are sold in almost all auto stores, but their cost is high and ranges from 2,700 rubles. If there are no catalog options from 2012, 2013, 2014 and 2020, you can buy analogues from 2010, 2020 and 2017.
The headlights on all generations of Logan cars do not differ in size. On the 2006 and 2007 models, the turn signals had frosted glass, from 2008 to 2012 - ordinary transparent glass, and from 2012 to the present - an orange reflector.
Replacing lamps
To replace the headlight bulbs, perform the following steps.
| NOTE For clarity, replacing lamps is shown on a removed headlight. |
| 1. Open the hood. |
| 2. Disconnect the wire from the negative terminal of the battery... |
| 3. ...and remove the headlight cover. |
| NOTE Replacement of left headlight bulbs is shown. The lamps in the right headlight are located symmetrically; they are replaced in the same way. |
| 4. Remove the spring clip from the hooks on the reflector... | 5. ...open the latch... |
| 6. ...and remove the headlight bulb. |
| WARNING Do not touch the lamp bulb with your fingers, as the halogen lamp becomes very hot and grease stains will cause the bulb to darken. Handle the lamp by the bulb only with clean gloves or a clean cloth. If there are still grease stains on the lamp, remove them with alcohol. |
| 7. Insert the new lamp into the reflector and secure it with the spring holder. |
| 8. Replace the cover. |
| 9. Turn the side light bulb socket clockwise (for the right headlight - counterclockwise) and remove it from the headlight. | 10. Remove the baseless lamp from the socket. |
| 11. Insert a new lamp into the socket and install the socket in place. |
| 12. Turn the turn signal lamp socket counterclockwise (for the right headlight – clockwise)… | 13. ...and remove it from the headlamp. |
| 14. Turn the lamp counterclockwise and remove it from the socket. |
| 15. Install the new lamp into the socket and the socket into the headlight unit. |
To replace the side turn signal lamp, follow these steps:
| 1. Disconnect the wire from the negative terminal of the battery. |
| 2. Remove the side turn signal light (see “Replacing the side turn signal light”). |
| 3. Remove the lamp from the socket. |
| 4. Insert the new bulb into the socket and the socket into the indicator housing. |
| 5. Install the side turn signal light in the reverse order of removal. |
To replace any bulb in the rear light, follow these steps:
| 1. Disconnect the wire from the negative terminal of the battery. |
| 2. Remove the rear light (see “Replacing the rear light”). |
| 3. Press the latches with your fingers... | 4. ...and remove the rear cover of the flashlight complete with lamp sockets. |
| 5. Press down on the bulb that needs replacing, turn it counterclockwise and remove it from the socket. |
| 6. When installing a new lamp, the protrusions on the lamp should fit into the slots on the socket. Then fix the lamp in the socket by turning it clockwise until it stops (90°). |
| 7. Install the parts in the reverse order of removal. |
To replace the lamp in the license plate light, perform the following steps.
| 1. Disconnect the wire from the negative terminal of the battery. |
| 2. Press the latch and remove the license plate light from the hole in the rear bumper. | 3. Press the lock and remove the flashlight lens. |
| 4. Remove the baseless lamp from the socket. |
| 5. Install a new lamp. |
| 6. Install the parts in the reverse order of removal. |
To replace the lamp in the additional brake light, perform the following operations.
| 1. Disconnect the wire from the negative terminal of the battery. |
| 2. Turn the auxiliary brake light bulb socket counterclockwise... | 3. ...and remove it. |
| 4. Press the lamp, turn it counterclockwise and remove it from the socket. |
| 5. Install the parts in the reverse order of removal. |
| NOTE One of the protrusions on the lamp socket is wider than the others. When installing, orient the chuck to align with the wider slot and turn the chuck clockwise until it stops. |
To replace the lamp in the interior lamp, perform the following operations.
| 1. Disconnect the wire from the negative terminal of the battery. |
| 2. Remove, overcoming the force of the clamps, the diffuser of the interior lamp. | 3. Remove the lamp from the socket. |
| 4. Insert a new lamp. |
| 5. Install the lamp diffuser. |
To replace the lamp in the trunk light, perform the following operations.
| 1. Disconnect the wire from the negative terminal of the battery. |
| 2. Press the lock and remove the lamp from the hole in the car body. | 3. Press the latch and remove the lamp diffuser. |
| 4. Press the spring contact and remove the lamp. |
| 5. Insert the new lamp into the lampshade. |
| 6. Install the parts in the reverse order of removal. |
To replace the cigarette lighter socket light bulb, perform the following steps.
| 1. Remove the cigarette lighter socket and remove the light guide (see “Removing and installing the cigarette lighter socket”). |
| 2. Using a screwdriver, disconnect the housing of the cigarette lighter socket illumination lamp from the light guide. | 3. Unclamping the edges of the case, slide... |
| 4. ...and remove the backlight bulb socket. | 5. Remove the lamp from the socket and replace it. |
| 6. Install the parts in the reverse order of removal. |
Replacing the front light bulb on a Renault Logan
Many Renault Logan owners, when the light bulbs fail, go to a service station to replace them. But the problem can be solved on your own. Changing a parking light bulb is as easy as changing any other bulb. Moreover, if you have an alarm connected to these lights, the bulbs may burn out more often than usual.
Since each such light element has its own expiration date, no one is immune from the fact that one of them fails along the way and will have to be urgently replaced. In this article we will talk in detail about how to change the side light bulb on a Renault Logan.
Tools
- Rags.
- Gloves.
- Screwdrivers.
- Lamp.
- Head at "10".
- Extension.
Front headlight
Block headlight (auto edition)
In Logan, block headlights are installed, and therefore in one design there are low beam and high beam lamps and direction indicators. When replacing any of the lamps, it is not necessary to disconnect the battery. The fog lights are located separately from the headlight unit at the bottom of the bumper; more information about replacing the lamp in them is here.
The process of replacing marker lamps in detail
Some owners remove the block lamp completely, but this is a lot of unnecessary steps. My hand can easily fit into the gap, even where the battery is!
- Use the head to remove the headlight unit.
- Then you need to disconnect the negative wire from the headlight.
- Remove the entire front bumper.
- Disconnect the headlight range control cable.
- To move the headlight to the side you need to unscrew three screws.
To replace a side lighting element, no additional equipment is required; the process will not take more than 5 minutes.
- In order to replace the lamp, you need to open the hood and feel on the headlight unit for the side lamp socket, which is located just below the headlight lamp.
- Finding the lamp body by touch is not difficult.
We took out the socket and tried to remove the burnt out lamp.
Installing new rear side lights
- Disconnect the negative terminal.
- Disconnect the rear light wiring.
- Separate and remove the trunk trim.
- Unscrew the headlight mounting screws.
- Take out the rear light and unclip the light bulb mounting panel.
- Pull out the non-working light bulb (to do this you need to turn it).
- Insert new side lights - press and turn until they stop.
- Reinstall the panel and lamp, secure the trunk trim.
The process of how to replace a headlight bulb on a Renault Logan is the same on new and old models - the design has undergone almost no changes. The procedure for the right and left lamps is the same.
Information provided by the online spare parts store www.z-renault.ru
Replacing the tail light bulb
When replacing a lamp at the rear of a car, there are also some features that must be taken into account when carrying out the work.
- Here, before starting work, you will need to disconnect the negative from the battery.
- Unfold the trunk lining.
- Disconnect the wiring harness from the rear markers .
Disconnect the power harness
Two lambs are marked with arrows
Removing the rear parking light unit
This is what the location of the signals on the Logan taillight circuit board looks like.
When carrying out this work, you must be careful, as you will have to come into contact with other elements of the system.
It is not recommended to touch the lamps with your fingers. The work must be done with clean gloves.
Lamp type
In a Renault Logan car, the front optics are equipped with lamps of a certain type.
When replacing, lamps with an H4 base should be installed. This type assumes the presence of two filaments - for low and high lighting. This means that during scheduled maintenance, only one light bulb will need to be changed. The design features of the lamp also conceal its main drawback. Such devices have a much higher cost than simple H1 and H7. There is also a possibility that if the lamp fails, it will not have either low or high beam.
Replacing headlight bulbs Renault Logan, Lada Largus
to change light bulbs correctly
in the headlight on
Renault Logan
Great knowledge about Renault.
Attention! Do not touch the light bulb with gloves to avoid rapid lamp failure.
If you are a fan of bright solutions, we recommend choosing a new type of lamp made on the basis of LED elements, of which there are at least 15 pieces. They are sold in almost all car stores, but their cost is high and is in the range of 2,700 rubles. If there are no catalog options from 2012, 2013, 2014 and 2015, you can buy analogues from 2010, 2020 and 2020.
The headlights on all generations of Logan cars do not differ in size. On 2006 and 2007 models, frosted glass appeared on the turn signals, from 2008 to 2012. ordinary transparent glass, and from 2012 to the present. orange reflector.
What kind of lamps does Renault Logan use in its headlights?
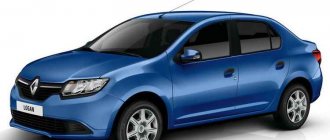
Renault Logan is an economical sedan developed by a French company in 1998. In Russia, sales of this model began in 2004. Logan is in great demand not only in our country, but also in a number of other countries, such as Romania, India, Morocco, Iran and Colombia. Depending on the market, Logan can be sold under the Dacia, Renault and Nissan brands. The first body of this model was a sedan.
But in 2006, a station wagon and a cargo van were shown at the French Motor Show. Logan in a hatchback body was already called Renault Sandero. The main goal of the designers was the affordable price of this car and competitiveness with such models as Fiat Albea, Hyundai Accent, etc. The first restyling was made in 2008, the changes were minimal, both inside and out. The new generation Logan was released in 2012. The car received a new appearance, it became a little longer and narrower.

