Do-it-yourself replacement of silent blocks on a VAZ 2110 on the front beam
Installation of “daisies” in the front suspension beam of a VAZ
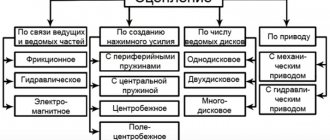
| On the VAZ 2110 (and some other front-wheel drive cars), rubber silent blocks are used in the cross member of the front suspension. To change the characteristics of the suspension and handling, they can be replaced with rubber-metal hinges (popularly “daisies”). Let's look at this improvement in detail. |
Replacing silent blocks of the front suspension cross member
- We hang up the front wheels.
- Remove the engine protection.
- Remove the front suspension braces.
- On a car with a VAZ-2112 engine, disconnect the front engine mount.
Removing the front suspension arm
Then:
- We unscrew the bolt securing the support to the cross member of the front suspension (key “15”).
- Loosen the nut of the bolt securing the support to the generator bracket and move it down (with two 15mm wrenches).
- We unscrew the two bolts securing the cross member to the body (head “13”).
- We unscrew the four bolts securing the cross member to the side members (head “19”)
- Remove the front suspension beam.
- Using a bolt and suitable sections of pipes with washers, we press the silent block towards the front of the car. If it is difficult to press out the silent block, cut off the collar from the side with a smaller diameter.
- We clean the nest from dirt. We wet it and the new silent block with soapy water.
- Pressing is done using a bolt with washers and pipe sections. In this case, the smaller shoulder of the silent block should completely come out of the hole in the cross member.
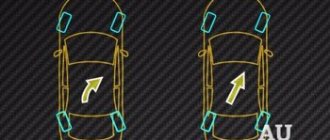
Daisies in the front suspension beam of a VAZ
- ─ Control becomes more precise. The car will respond faster and more clearly to steering wheel turns.
- ─ Reduce chatter during acceleration and braking. When braking, the wheels will no longer touch the wheel arch liners.
─ Faster wear of the daisies.
xn--2111-43da1a8c.xn--p1ai
Do-it-yourself repair of the VAZ 2110 front suspension. Everyone faces this
The old silent tape is removed from the car and pressed out using a vice; The new one is moistened in water with dissolved soap and placed in its place.
It is inserted into the socket by pressing; In order for the silent block to sit well in place, careful blows are applied to the drift; Please note: all threaded connections are tightened after the car is placed on the wheels.
- The required wheel is hung out and the ramp is removed;
- The mechanism is cleaned of mud deposits;
- The fastening nut is screwed onto the upper ball pin;
- The finger is pressed out of the corresponding steering knuckle. When it comes out, the support mount is removed, and it is pulled out together with the protective casing from the upper arm;
- A new ball is installed, and assembly is carried out in the reverse order.
- The fastener on the element rod is unscrewed;
- All existing washers plus the rubber upper cushion are dismantled;
- The bracket from below, which combines the shock absorber and lower arm, is unscrewed;
- The broken element is pulled out through the existing technological hole, the mounting bracket is removed from it, and a complete shock absorber is installed;
- We assemble the auto-constructor in the reverse order. And remember: like all paired parts, shock absorbers change along the axis on both sides, even if only one is covered. Otherwise, your ride will be very uncomfortable, and car control will deteriorate greatly.
AutoFlit.ru
Replacing the rear beam of a VAZ 2110 with a beam from Priora
- Set of wrenches with all heads and sockets
- Special wrench for unscrewing brake pipes
- VD-40
- A piece of pipe for keys
After what mileage do they change ball joints on a VAZ 2107?
Lada 2101 79 Oliva Chiaro Logbook Replacing the front suspension springs, part 2
It depends on the balls, there are some that need to be changed after 100 km Good
They knock change!!!! To the touch Irmina
I still have the factory ones... mileage 42 tkmNikota
how they knock! in appearance, if the anthers are trash and the ball joint doesn’t look like itself! Arkady
The instructions contain a description of where, how much, and what to measure. The book costs only 100 rubles and is sold in any auto store. Northern
By the way, they need an eye and an eye! If he vomits at speed, then... God forbid! Check often for play; if it appears a little, don’t hesitate to change it! They are not that expensive, but changing them yourself is not a problem, the main thing is to get high-quality ones! Vikusik
In general, in books they write that after 15-20 thousand mileage. In practice, the data are very contradictory. I saw that even 5000 didn’t take care of it, but I saw that even after 40,000 you could still drive them, I just did the whole chassis at the same time and changed the balls.
The main thing is to drill a hole in the glass and cut a thread for a grease nipple - almost forever. Alexey
Regularly inspect the condition of the rubber boots on the ball joints. If the boot is torn, the ball joint will not last half its intended life. Sand that gets inside can drill the neck and tear the ball out of it (on a bump or on a turn), like a cork from a bottle. At least once a year in the pit, check the play of the ball joint by sharply rocking the suspension. To assess the relative degree of wear (by eye, without measuring instruments), it is advisable to try in advance how the new support behaves. Lilichka
depending on who drives Georgiy
how to connect a tachometer to a VAZ 2101? If possible, a detailed and detailed answer
people who have links to where the multimedia manual is for operation and repair of the VAZ 2101
Tell me how to change the front crankshaft oil seal. VAZ 2101.
VAZ 2101 Is it possible to pick up some very wide tires for the rear to grab the plow and burn out the dacha? What to think of?
Engine VAZ-21011. When does the timing chain change?
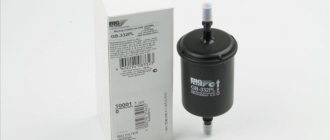
First way
Removing and installing the fuel filter VAZ 2110-2111-2112
The method is not particularly difficult if you follow the instructions correctly. To begin with, we note that the silent block is located at the bottom of the car. As a rule, you will need a jack or inspection hole.
- Raise the car with a jack or drive it into the inspection hole. Option 2 is more convenient, since this way the view of the bottom will be better. Well, it’s much more convenient to work standing up than lying under the car.
- It is not necessary to completely remove the rear support. According to the instructions, the cabin filter of the VAZ 2110 is itself an air filter for the panel of the VAZ 2110 and. Replacing the front wheel drive oil seal on a VAZ 2109, 2110. When dismantling it, you will need to additionally remove the brake hoses, which takes a lot of time.
- It is better to disconnect the warlock so as not to destroy it during the repair process. But shoot carefully.
- Now remove the nut with a 19 mm wrench. The effort will have to be severe, so some car enthusiasts call their comrades for help. If there are no assistants, first treat the thread with the all-powerful WD40 or plain water. This will allow the fastener to oxidize. Then clean it with a wire brush, which will make it easier to remove the element.
- Using a crowbar, lower the support down a little, but you shouldn’t remove it completely.
- There is an elastic band on the support that should be cut off, otherwise it will interfere with the work process. VAZ 2110 front drive oil seal, replacement of the VAZ 2110 drive oil seal, but also on. Replacing rear brake pads on a VAZ 2107. Just keep in mind that if the rubber is old, feel free to remove it. It is better to dismantle a not bad product by drilling a small hole.
- Now the silent block is being removed.
- The brand new part is generously lubricated and pressed into its rightful place. Just do not use grease for lubrication, as this substance corrodes the part. The best lubrication option is ordinary soap or any available detergent.
- Return the warlock to its place and tighten the support.
How to check a ball joint Several ways - useful information
- Drive the car onto an inspection hole or overpass. A flat surface is possible, but access to the bottom of the car is desirable;
- Squeeze the handbrake, turn on neutral speed, jam the rear wheels with special shoes;
- Jack up the left and right front wheels alternately, holding one hand at the top of the tire and the other at the bottom. With some effort, try to shake the wheel up and down. If you hear a slight knock and play, then it is necessary to urgently replace the ball joint. Otherwise, driving onto the highway is extremely dangerous. If there is no play, then you can proceed further.
- Natural wear and tear of vehicle chassis components;
- Exceeding the maximum permissible loads;
- Exposure to the negative effects of water, cold, dust, dirt due to damage to the protective boot on the ball joint;
- The actual absence of lubrication inside the product, which leads to a wedge.
- A characteristic and distinct knocking sound when driving over uneven surfaces and potholes;
- When turning the steering wheel, a grinding noise is heard and the force with which the turn is performed is increased;
- The car doesn't handle the road well. It feels like it's fluttering rather than moving;
- Uneven and rapid wear of car tires.
- Drive the car into the inspection pit of the garage;
- Putting on the handbrake, securing the rear wheels with shoes, you can turn on the first speed for reliability. Jack up the wheel;
- Some take off the wheels, some don't, depending on who you like. In principle they do not interfere;
- Armed with two keys on “17”, we unscrew the fastening of the ball joint to the spar. Just two bolts;
- For convenience, it is better to turn the steering wheel left or right. Using keys “14” we unscrew the support mount directly on the hub itself. Using a hammer and a wooden insert, carefully knock out the support itself from the saddle without damaging the brake hoses;
- Before installing a new one, you should walk a little with WD-40 liquid to remove rust. After wiping the socket with a dry cloth, lubricate it a little with Litol-24M graphite lubricant;
- Install the support and tighten the bolt. We do the same with the fastening;
- Then we move on to the second wheel or test the car on the track.
AutoFlit.ru
Removing the lever and extension of the front suspension VAZ 2110 2111 2112
| We remove the lever from the car to replace the silent blocks of the lever and the extension or the lever itself. We remove the extension to replace its silent blocks or when completely disassembling the front suspension. We carry out the work on an inspection ditch or a lift. Remove the engine mudguard (see section Removing the engine mudguard for VAZ 2110 2111 2112). We remove the ball joint or disconnect it from the lever (see section Removing the ball joint for the front suspension of VAZ 2110 2111 2112). Holding the extension with a 24mm spanner, use a spanner of the same size to unscrew the extension nut. |
| Removal and installation of the fuel rail and fuel regulator VAZ 2110, VAZ 2111, VAZ 2112, Lada DesyatkaRemoval and installation of the fuel rail and fuel regulator VAZ 2110, VAZ 2111, VAZ Lada, 2112 Ten Holding the extension with a 24mm spanner, use a spanner of the same size to unscrew the extension nut. |
| Use a soft metal drift to knock out and remove the bolt. |
| Using two 19mm wrenches, unscrew the nut of the bolt securing the lever to the body. |
| We remove (or knock out) the bolt and remove the lever from the bracket. |
| Remove the washer and lever from the stretcher. |
| On the stretcher behind the large washer there are washers for adjusting the pitch angle of the turning axis (in our case there are three of them). |
| To remove the brace from the cross member of the front suspension, use two 24mm wrenches to unscrew the nut... |
| ...remove the washer and take out the extension from the silent block. Washers for adjusting the caster angle of the steering axis can also be installed at the front end of the brace |
| To replace the silent block of the lever, press it out in a vice with suitable pieces of pipe. We wet the new silent block with soapy water and press it into the lever. |
| We knock down the silent block of the extension with a chisel. |
| Having removed one, we similarly dismantle the second. |
| We pre-press the new silent block in a vice... |
| ...and finally press it, striking a punch with a diameter of 8 mm through three windows in the rubber layer. We carry out the assembly in the reverse order, and tighten the threaded connections of all rubber-to-metal hinges in the “vehicle on wheels” position. |
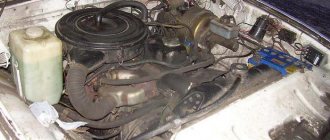
Front suspension. Design Features
The front suspension of the VAZ 2110 is independent, telescopic.
It is based on hydraulic shock absorber struts and coil springs, as well as lower wishbones with braces and a stabilizer bar. 1 – compression valve body; 2 – compression valve discs; 3 – throttle disk of the compression valve; 4 – compression valve plate; 5 – compression valve spring; 6 – compression valve cage; 7 – recoil valve nut; 8 – recoil valve spring; 9 – recoil valve plate; 10 – recoil valve disc; 11 – throttle disk of the recoil valve; 12 – piston;
13 – bypass valve plate; 14 – bypass valve spring; 15 – plunger; 16 – plunger spring; 17 – rod guide bushing with a fluoroplastic layer; 18 – guide bushing cage; 19 – sealing ring of the rack housing; 20 – rod seal; 21 – oil seal cage; 22 – gasket of the rod protective ring;
1 – telescopic stand; 2 – nut; 3 – eccentric bolt; 4 – nut; 5 – steering knuckle; 6 – front wheel drive shaft; 7 – protective cover of the hinge; 8 – external shaft joint; 9 – lower lever; 10 – ball joint; 11 – decorative disk (cap) of the wheel; 12 – hub; 13 – brake disc; 14 – protective casing;
1 – steering knuckle; 2 – outer mud ring; 3 – hub bearing; 4 – wheel hub; 5 – thrust washer; 6 – nut; 7 – retaining rings; 8 – internal dirt ring
Figure 1 shows part of the front suspension. It is based on a telescopic hydraulic shock absorber strut 1, the lower part of which is connected to the steering knuckle 5 with two bolts. The upper bolt 3, passing through the oval hole of the strut bracket, has an eccentric collar and a washer. Turning the top bolt changes the camber of the front wheel.
The following elements are installed on the telescopic rack: - a coil spring 17, - a polyurethane foam buffer 19 for the compression stroke, - an upper support 22 of the rack assembly, - a bearing 21.
The upper support is secured with three self-locking nuts to the body mudguard strut. Due to its elasticity, the support ensures the rack swings during suspension movements and dampens high-frequency vibrations. A bearing built into it allows the rack to turn along with the steered wheels. Parts of a telescopic hydraulic shock absorber, shown in Fig. 1, are mounted in the strut housing. Telescopic stand.
A hydraulic recoil stroke buffer is installed in the upper part of the cylinder, consisting of a plunger 15 and a spring 16. It limits the movement of the rod during the recoil stroke. The lower part of the steering knuckle 5 (see figure “Front suspension assembly”) is connected by a ball joint 10 to the lower suspension arm 9. Braking and traction forces are perceived by longitudinal braces, which are connected through rubber-metal hinges to the lower arms and to the front supports of the front suspension cross member.
When replacement is required
It will not be difficult for a more or less experienced driver to understand that the silent blocks are out of order and they need to be replaced. First of all, you will feel a certain discomfort while driving, you will hear the impact of iron in the suspension. But that's not all.
If you do not replace the front silent blocks on a VAZ 2110 in time, the fasteners and connecting elements will be destroyed, play will appear, and the wheel alignment angles will change. This does not entail anything good.
Determining the need to replace silent blocks is not difficult if you pay attention to the characteristic signs of their wear:
- While driving, strong or minor rubber squeaks are observed. It all depends on the degree of wear. Loud noise is a very bad sign;
- A noise similar to a knock is heard in the wheel area. This indicates that the silent blocks are poorly fixed and they are gradually destroyed;
- Cracks form on the surface of the elements, after which the process of disintegration of the silent block begins. In such a situation, it will be impossible not to hear a knock.
How to check the suspension
Now that you know the meaning and design of the suspension, you can inspect the car and check the condition of the part regularly. In particular, it is worth paying attention to how the protective covers installed on ball joints work. You need to see if there are any deformations or dents on them due to shaking and strong impacts when driving over bumps.
Check the condition of the rubber elements and ball joints on each wheel. Remember: if you notice and fix the problem in time, you can save on major car repairs.
Selecting New Items
Polyurethane
To replace and ensure reliable operation of the car, you need to purchase good silent blocks. Choosing them is not difficult if you know some nuances:
- For the VAZ 2110 model, elements with catalog number 2110 2914054 are suitable. They have the required outer diameter corresponding to this specific VAZ model;
- Do not try to purchase a silent block from a “nine” and install it on your “ten”. Nothing will come of such events, no matter what anyone says;
- Make sure of the quality of the products. Low-grade silent blocks have flooded the market, but their service life leaves much to be desired. Good parts are made from high quality materials that can withstand extreme loads and temperatures.
Replacement
You can repair the rear struts with your own hands without any problems, so feel free to get to work. But only if you have some experience in such matters.
Unfortunately, the rear pillar wears out quickly, especially if you regularly drive the car on country roads with a loaded trunk and interior.
Before starting the repair, it is important to note that the springs should also be replaced at the same time. The work is carried out simultaneously, so let’s consider the whole process as a whole
The procedure is as follows.
- Remove the trim from the trunk. This will allow you to access the rear pillars of your ten.
- Remove the trim carefully near the wheel arch to gain access to the upper shock absorber mounting assembly.
- The upper assembly is held on by a nut, which you can unscrew with a spanner. At the same time, hold the rod in the same position, so arm yourself with an open-end wrench of 6 in advance.
- Having released the top knot, move to the bottom one. Raise the rear of the car on a jack, remove the rear wheels, from where you can see the rack. Be sure to secure the vehicle in place with a parking brake and additional chocks under the front wheels.
- The lower unit is secured with a 19 nut. Unscrew it and remove the bolt of the lower unit.
- Remove the entire rack structure completely. In addition to the shock absorber, you will remove the spring. Remove the old rubber gasket between the machine body and the spring, replace it with a new one.
- Remove the spacer from the upper shock absorber rod. It may be suitable for a new shock absorber, since it practically does not wear out and lasts a long time. If there is no bushing, the rear strut will break the seat.
- Apply silicone grease to the entire rod, which will significantly extend the service life of the structure.
- Replace the old elements with new ones, and begin the reassembly procedure.
- Be sure to secure the upper assembly gasket to the body using adhesive tape.
- Place the rear strut assembly in its seat. The spring must be in a stretched state.
- Attach the bolt to the lower strut assembly, but do not need to tighten it.
- Install a support between the car body and the rear beam. Gradually begin to lower the car, directing the rack rod into the mounting hole on the fender liner.
- Make sure that the tip of the rod appears in the trunk. After this, the nut is fixed and tightened.
- All that remains is to remove the jack, remove the additional support, tighten the nut of the lower unit and check the quality of the repairs.
Now you know how to remove the rear pillar of a VAZ 2110 car. The task is really not as difficult as it might seem
The main thing here is caution and accuracy in your actions, plus the use of high-quality spare parts so that subsequent replacement will not be required soon
VAZ 2110 Removal and installation of the front suspension beam
Removing and installing the front suspension beam
| After installation, the front suspension beam must undergo a geometric check. |
1 Remove the bottom cover of the engine compartment, refer to Section Removing and installing the bottom cover of the engine compartment. 2 Lift the engine and unscrew the engine mounts from the beam on the left and right, refer to Section Removing and installing the oil pan. 3 Mark with paint the position of the corresponding front wheel relative to the hub. This will allow the balanced wheel to be returned to its original position during assembly. Loosen the wheel bolts with the vehicle on the ground. Raise the front of the car, place it on stands and remove the front wheel.
4 Unscrew the bolts securing the lower amplifier -1- (arrows in the illustration).
5 If there is a ground clearance sensor, disconnect it from the beam (arrow in the illustration).
6 Disconnect the transverse arm -1- from the engine beam on the left and right (arrows in the illustration).
7 Unscrew the nuts (arrow in the illustration) on the left and right. Disconnect the ball joint of the transverse arm -1- using a plastic knuckle.
8 Unscrew the fastening bolts and remove the steering mechanism -1- from the suspension beam -2- (arrows in the illustration).
9 Center a garage lift with a wooden spacer underneath the beam. Support the beam.
The illustration shows an engine lift with spacer BMW-312220
10 Remove the bolts securing the suspension beam to the engine beam. 11 Carefully lower the beam using a garage lift
Replacing rear struts on a VAZ 2112 with your own hands video
What tool do you need to prepare?
In order to replace the rear struts for a VAZ-2112 car correctly, and to simplify the work process, you should prepare the following tools:
- spatula for installation work;
- special tools called ratchet and wrench;
- keys for 19, 17, as well as open-end and ring types of keys;
- machine lubricant;
- key for fixing the rack rod.
What reasons will indicate that the rear struts need to be replaced?
Replacement of rear shock absorbers should be carried out in the following cases:
- If traces of oil are visible in the area of the racks.
- If damage is visible on the outside of the shock absorbers.
- Corrosion begins on the piston rod.
If the car struts are faulty, the brake system and chassis of the car may soon fail. The wheels of the car will begin to wear out very quickly, and driving a vehicle will become quite difficult, since the coordination of the car’s movement will be completely disrupted.
How to replace rear struts step by step
As mentioned earlier, replacing rear struts is not a very complicated process when it comes to repairing a VAZ-2112; the main thing is to carry out all operations step by step, taking into account the recommendations of professionals:
Before installing the machine on an overpass or pit for repair and inspection, you should slightly unscrew the locking element that secures the rear rack. To remove it, you can be inside the car or reach the mount from the trunk. When unscrewing is carried out, the rod related to the stand must be stationary. You can fix it in this state using a 6 key or a special installation device. Using a special mechanism (jack), the car is raised to the desired level and the wheel is removed. Using a 19mm wrench, unscrew the fasteners securing the rear shock absorbers. In this case, you should unscrew the nut and hold the bolt firmly so that it cannot turn. The unscrewed fasteners are removed from the inside. To easily remove fasteners, it is advisable to use a hammer or punch
The bolt must be removed very carefully, as the threads can easily be damaged. Once the fasteners are removed, it is necessary to pry off the lower part of the rear pillars to eliminate the snagging of the parts
Next, unscrew the upper fasteners of the rear pillars using a special tool or two keys (open-end and 6). After this, you can easily get the completely assembled rear suspension of the VAZ-2112, replacing all elements will be quick and easy.
Since the rear suspension module no longer fixes anything, the spring can be removed quite easily. To remove the rear strut boot, you just need to pull this element up, and remove the special bumper or buffer from the rod with one movement of your hand. All removable parts of the VAZ-2112 are carefully checked; if damage is found, they are replaced with a new element.
Additional recommendations
Before you begin assembling all the components of the VAZ-2112, you should perform several additional manipulations:
- treat all insert elements with kerosene;
- Before direct installation, carefully inspect each element, even a new one, to ensure its integrity and quality;
- The final fixation of the mounting bolts should be carried out after the jack has been removed;
- After assembling all components, it is recommended to carry out a special wheel alignment check.
If for some reason a car enthusiast has difficulty replacing the rear struts in a VAZ-2112, then you can get additional information from the video tutorial at any time. On the site, recommendations are given by professionals in their field; all work is presented step by step with photos.
Replacing the front beam bushings of a VAZ 2110
Dear visitors of the “Avtolyubitel” website! We will be very grateful for your comments on the video clip “Replacing the front beam bushings of a VAZ 2110”; registration is not required for this. We also ask you to let us know if you have any problems playing the video.
Today I replaced it on my seven with my own hands, I suffered with the cushions when I screwed them to the new beam and the bolts that go from the side through the spar, but everything is fine, thanks again for the tip about the spring and the lower arm.
Novosibirsk region.
Thank you very much helped
Hello Yuri VAZ 2105 99, a beam was torn out from our beautiful roads... The mount is different from yours. One bolt on the bottom and one on the side. There are no through bolts through the side members. I'm thinking about how to do it...
What about wheel alignment?
I really didn't want to take the front apart. The beam burst from falling into the hole. Everything worked out, only one side bolt of nerves was frayed and barely hit. Thank you, I saved money and time on disassembly.
Hello Yuri, as I understand it, when reinforced with tubes, they are scalded on top, and are the bolts sealed by welding or not? If a little metal is torn from below, do you need to install and weld a strip with holes for the bolts? With uv.
Yuri, what if the cracks are where the pipe mounting bracket and clutch hoses are? In other words, is it cracked on the left side, is it normal to just weld the insert in?
Thank you I watched both videos, everything seems clear, the hands grow from the right place, I can repair it myself. There is only a question: can the old beam be repaired or not? Just yesterday the craftsmen were looking at the pit and saw a break in the beam from the front. It’s just that not everything is visible, the protection was not removed... And another question: is it possible to brew the old one the way you showed or is there only one way out: only a new one?
Good day. Excellent video Yuri, thank you. Everything is very clearly and informatively told and shown.
Here are the VAZ drivers: Was it really impossible to install these bushings at the factory? They are on BMW, however. Then I come to the conclusion that VAZ designers are coping well with the task assigned to them - the calculations of their employers are justified...
Question, what do you need to pay special attention to so that you get a camber and the car doesn’t go sideways?
Yuri Hello, I would like to ask your advice on this topic. The beam has burst, I want to try to change it myself, the question is, I talked to a very smart guy, he said that the beam cannot be welded, since welding weakens the metal from heating, what do you say? It is very interesting to know your opinion. Thank you in advance.
well done guys went to change
. Yuri's advice is great + I added 5 from the top of the plate but the lesson is excellent
Signs by which you can distinguish ball joints VAZ 2101-07
Let's start with a visual inspection. There may be several differences, they are all indirect, because different manufacturers do not always adhere to the same standard. Let's look at several signs, the totality of which can clearly determine the top and bottom of the ball joint. There are small guarantees that all of the listed differences will be on your copies, but knowing all the possible ones, you can accurately answer the question on today’s topic.
To clearly recognize the differences, you need to remove the protective boot. Now let's visually inspect.
- The lower part of the body near the upper supports is made in the form of a sphere, as if a ball was pressed into it. The lower ones have a flat bottom. This is done so that more lubricant can fit under the liner.
An obvious difference between the lower ball is the presence in the bottom of the body of a hole with a screwed-in plug bolt (look at the photo above).
This is for the oiler to add lubricant and check for wear. Some manufacturers also have space for an oil nipple on the upper hinges. Therefore, this is not a 100% sign of difference
Visually, the lower one looks more massive and has more weight than the upper support. This is an indirect sign. There were almost identical specimens. Having removed the boot, you can find a hundred percent difference - the housing cover, where the finger moves, has a certain shape.
So on the lower support it is oblong, elongated. This is due to the fact that the lower ball pin moves in one direction, given by the shape of the support body. The upper one can “move” in all directions, so the hole for the finger has a round shape.
The force with which the joint can be moved
Since the forces for which the supports are designed are different, when installing, try to move the ball pins. You can move the upper one with your hand, with a certain effort, it will begin to move. In most cases, nothing will work from the bottom. The finger will not move with your hand. For these purposes, you will have to use a lever to break it and move it apart. Because it is the lower hinge that takes on the largest load, so its design is made to “digest” shocks when driving over uneven roads. This is not a 100% sign. Some fingers will be the same. You can move the upper and lower supports freely by hand - this is an indicator of the low quality of manufacturing of the hinges.
In some cases, markings are indicated on the back of the support body: “B” - upper, “H” - lower, or on the ball pin.
Important! Such signs of differences in supports are not suitable for all cars. They are relevant only for VAZ classics
For example, the Niva boasts identical supports installed on the upper and lower suspension arms.
This is due to the design features of the chassis. In the Zhiguli VAZ 2101-07, the lower ball is installed in the lever with the finger up. Therefore, the wheel, moving over uneven roads, tries to “rip out” the pin from the joint body, so it must be reinforced to withstand the impacts of the wheel. It is the classic VAZ models that can most often be found with the wheel turned outward.
On Niva they got rid of such a miscalculation in the suspension. The supports are mounted pin down on the upper and lower arms. Therefore, the cone where the ball pin is pressed does not hit the pin, tearing it out of the cracker, but rather the lever. The lower joint does not experience such stress, so there is no need to install a reinforced ball joint down. On Nivas, the suspensions have identical upper supports in a circle; there is no need to learn to distinguish them.
Now you know what is the difference between the upper and lower ball joints of the VAZ 2106, VAZ 2107 and other domestic classics and what will happen if they are mixed up in the suspension arms. Why these signs of differences are only suitable for Zhigulis of the classic family - we learned from this article; Niva owners should not worry.
Replacing silent blocks of lower arms on a VAZ 2110
If you notice that:
- A knocking sound is heard when driving over uneven surfaces;
- Creaking of rubber when driving over uneven surfaces;
- There are cracks or wear on the silent blocks;
- Backlash in connections when checking the chassis;
- Uneven tire wear disrupts wheel alignment;
- these are all possible signs of a faulty silent block, which means they must be replaced.
To replace the silent blocks of the lower control arms on a VAZ 2110, the following algorithm of actions is presented:
1. Drive the car into a pit or lift it on a lift, remove the nuts on the wheel(s) on the side of the work to be done.
2. Next, if any, remove the engine protection, treat the bolts and nuts of the connections that need to be removed with penetrating liquid.
3. Unscrew the nuts fixing the bolts of the front arms, as well as the nut fixing the stabilizer link bolt, then knock out the bolt.
4. Unscrew the bolts and nuts, thereby freeing the lever in which the silent blocks are to be replaced. Everything is quite simple here. If the bolt or nut cannot be unscrewed, treat it with WD-40 or heat the stuck (soured) nut.
5. After this, we press out the old silent blocks using a special puller (see Tools below) or using a vice. You can also press out old silent blocks by burning them out: to do this, set the silent block on fire and wait until it softens or burns out completely.
6. Pressing out, regardless of the option you choose (puller or vice), is carried out using the same method: emphasis is placed on one side and pressure is placed on the silent block, and on the other, a cavity is created into which the silent block is squeezed out.
7. To press in the silent block, you must first clean the seat from the remnants of the old worn-out silent block, after which you need to lubricate the hole, as well as the silent block itself, with a soap solution or, for example, some detergent.
8. Pressing in the silent block is carried out in the following way: we put a washer on the pin (long bolt), then a new silent block, then we put on a lever into which the new silent block should be pressed (pressed), then we put on a piece of pipe into which the outer part of the silent block will go, and it goes again the washer so that it does not fall into the pipe. The final element of this design is a nut, which will create pressure by twisting along the thread of the bolt.
9. Here you need to be careful and not rush, but watch how the pressing takes place, since the silent block should go smoothly and stop only after its fixing collars move slightly out of the seat. With the help of these collars the silent block is held in the socket; if you do not tighten or overtighten it, the service life of the product will be significantly reduced. In addition, problems may arise during assembly.
10. After pressing in the new silent blocks, the entire assembly occurs in the reverse order. Depending on how and what you disassembled, you may need to adjust the wheel alignment (see “Self-adjustment of wheel alignment. Methods for adjusting wheel alignment at home”).
Tools:
- A set of keys;
- Hammer;
- Screwdrivers;
- Pliers;
- Lift or inspection hole;
- Liquid WD-40;
- Soap solution;
- Device for pressing out/pressing in silent blocks. Or a vice, tubes with washers of the appropriate diameter for pressing silent blocks. In the absence of either one or the other, you can make your own effective device. It consists of several washers, a piece of pipe and a long 12 bolt:
How to replace the lower suspension arm of a VAZ 2108 at home
Replacement of the lower wishbone of the suspension is carried out in case of excessive wear or as a result of serious damage to this part. As a rule, failure occurs after prolonged use of the vehicle on rough roads. The breakdown is quite unpleasant, but it is very difficult to call it complex. The solution to the issue is quite trivial; no “super skills” or super abilities are required to perform this type of repair. Moreover, now you will learn how to replace the lower suspension arm in the smallest detail. Go!
To work we need:
- Have a set of keys, namely: “24”, “19”, “17”, two of each;
- A universal puller that will be used to press out the ball joint;
- Jack;
- Screwdriver;
- Penetrating fluid WD-40;
- Lift or inspection hole.
Do-it-yourself replacement of the lower suspension arm on a VAZ 2108
- Those who have a lift lift the car, others drive into the pit and tighten the handbrake.
- After this, it is necessary to prepare the connections for unwinding; for this we have a “wedashka”, that is, WD-40 liquid. We wait 10 minutes until the liquid does its “rusty” job.
- Now you can start unscrewing the bolts. First, you need to remove the wheel bolts while the car is on the ground on four wheels. For those using a lift, you can strip the bolts before the car is lifted.
- Next, we jack up the side that needs to be repaired.
- We hang the wheel on the side from which the lower suspension arm will be replaced.
- Place a safety block under the body and remove the jack. Working “on a jack” is life-threatening!
- Next, remove the wheel that was previously hung.
- If necessary, we again “flavor” with WD-40 all the connections that need to be loosened, namely: the longitudinal link, the anti-roll bar, and the ball joint.
- Unscrew the nut that secures the longitudinal link to the wishbone.
10. Then remove the washer, take two keys and unscrew the nut securing the stabilizer link to the transverse arm.
11. Using a screwdriver, pry up the strut hinge, then remove the stabilizer bar mounting bolt.
12. Next, unscrew the nut securing the ball to the wishbone of the suspension.
13. Take a puller, install it on the lever and the ball joint pin and press the ball joint out of the lever.
14. Unscrew the bolt securing the transverse arm to the bracket; to do this, you must hold it on both sides.
Remove the lower wishbone and replace it. Assembly is performed in reverse order. Upon completion of the work, lower the machine onto the wheels and tighten the previously unscrewed connections.
Replacement of the VAZ 2108 suspension arm was completed successfully! As you can see, nothing complicated, the main thing is to follow the sequence and safety rules.
Thank you for your attention and for visiting vaz-remont.ru
What are silent blocks
Silent block is a part that dampens vibrations that occur between the suspension elements during movement. Thus, it dampens noise and vibrations that can lead to rapid wear of parts. The hinge is very important because it is responsible for the correct operation of the entire system. It consists of inner and outer metal bushings, with a rubber or polyurethane gasket placed between them.
Note that polyurethane silent blocks are considered more durable and last up to 2-3 times longer than rubber ones. Cars equipped with polyurethane hinges listen better to the driver.
It is important to monitor the serviceability of silent blocks, because their breakdown leads to difficulties in controlling the car, slowing down the response to the steering - the car will not immediately respond to the driver’s actions. In extreme cases, the car will wobble from side to side at speed.
Broken silent blocks can damage the joint seats, in which case you will have to replace the entire lever, which will not be repairable.
Therefore, it is necessary to regularly diagnose the hinges. The manufacturer claims excellent performance for 100 thousand km, but, given the quality of domestic roads, it is recommended to inspect silent blocks every 50-70 thousand km.
DIY diagnostics of the rear axle of VAZ 2101-2107
If you hear a hum in the rear of the VAZ, then check the gearbox. To check, increase the speed of the car until extraneous noise appears, and then increase the speed and reset it.
When you hear the noise occur at the same speed when accelerating and decelerating, do it again, but when you reach the highest speed, shift into neutral. But if you have reduced the speed and there is no noise, then the problem may be related to the gearbox. If you hear the noise again, it means that the bearings are most likely worn out, because with neutral gear there is no load on the gearbox.
It is also advisable to listen to how the rear axle works from under the car, hanging the rear wheels, then you will be sure that the malfunction is related to the gearbox, and not to the suspension or components. But this is not always effective, since sometimes other faulty parts can make noise and mix with other extraneous noise.
Upper rear shock absorber support for VAZ 2110-2190, assembled, ComfortPRO series, set of 2 pcs.
Dear customers, in order to avoid errors when sending a complete set of upper rear shock absorber mounts 2110, please indicate the model and year of manufacture of your car in the “Comment” line.
In the “standard version”, the shock absorbers in the rear suspension of VAZ 2108, VAZ 2109-099, VAZ 2110-2111, VAZ 2112, VAZ 1117-1119, VAZ 2170, VAZ 2190 are mounted using two rubber pads. The basic requirements for the upper shock absorber mount are the same as for the upper strut mount, except for the need to turn the wheels.
Such a mount does not provide the required properties in terms of noise, vibration insulation and energy consumption (since at full load the rear axle accounts for more than half the weight of the car).
Suspensions of foreign cars use specialized upper shock absorber supports to solve these purposes. In this regard, the developed upper shock absorber support for the rear suspension has no domestic analogues (protected by patent No. 43221).
The VAZ 2110 – 2190 upper rear shock absorber support assembly, “ComfortPRO” series, performs a similar function as the upper support of the front suspension strut, but is structurally simpler, since it does not have a bearing and mounting bolts to the body.
The upper support A110.2912.822 of the ASOMI rear suspension shock absorber is intended for use in the rear suspension of cars of the VAZ 2108, VAZ 2109-099, VAZ 2110-2111, VAZ 2112, VAZ 1117-1119, VAZ 2170, VAZ 2190 and their modifications.
Rear supports A110.2912.822 ASOMI serves to transmit the damping forces of the shock absorber and the elastic forces of the spring and compression buffer to the body, and is also a load-bearing element of the suspension.
The upper shock absorber support consists of a funnel-shaped outer casing (1), an inner casing (2) consisting of a bushing and a shaped washer, and a rubber element (3) surrounding the surfaces of both casings.
1 — outer housing of the support; 2 — inner body of the support; 3 — rubber element; 4—supporting surface of the spring; 5 — seating surface of the body bracket; 6 and 7 - protruding teeth.
On the outside, the support has a seating surface for the support coil of the suspension spring (4). On the inside (5) the support has a cylindrical surface for installation in the body bracket. The inner housing of the support is located in the lower funnel-shaped part of the outer housing and forms the lower end of the support. The housing bushing has a mounting hole for the rear suspension shock absorber rod. The shaped washer welded to it with its outer part follows the contour of the outer casing.
The space between the housings is filled with a rubber element. In the upper horizontal part (in the area of the supporting surface of the body) and the lower part of the inner surface of the support there are teeth - protrusions (6), which, when deformed, create a progressive characteristic. In this case, the teeth (6) are constantly involved in the work, and the amount of their deformation depends on the load on the spring. Additional fastening elements - a rebound limiter, consisting of a washer and a cushion, is designed to limit the forces that arise during the reverse movement of the wheel, and fixes on the body a pre-assembled unit consisting of an upper support, a shock absorber, a spring, a protective casing and a compression stroke buffer.
The rear supports A110.2912.822 ASOMI do not have wear parts, so their service life is equal to the service life of the vehicle. The ASOMI rear support does not require maintenance or inspection, while the removal and installation of the shock absorber is greatly simplified.
The upper supports A110.2912.822 of the shock absorbers of the rear suspension TM ASOMI have the following advantages:
— allow you to get a high smooth ride of the car and have the ability to absorb high dynamic loads;
— increase the stability and controllability of the car;
— reduce the overall internal noise by 1-4 dB;
- increased service life.
Other article numbers of the product and its analogues in catalogues: A110.2912.
VAZ 2108, VAZ 2109-099, VAZ 2110-2111, VAZ 2112, VAZ 1117-1119, VAZ 2170, VAZ 2190.
Any breakdown is not the end of the world, but a completely solvable problem!
How to independently install or replace the upper support of the rear shock absorber on a front-wheel drive VAZ car.
With the AvtoAzbuka online store, repair costs will be minimal.
Just COMPARE and BE SURE!!!
Don't forget to share the information you find with your friends and acquaintances, because they may also need it - just click one of the social networking buttons located above.
The following two tabs change content below.
- Bio
- Latest Posts
admin1
I am a professional in the field of Auto Electrics and Auto Diagnostics. Work experience more than 10 years. I will identify and eliminate faults of any complexity. (Even with cars that Dealers and services cannot handle, as it were, of the highest class). We carry out all types of work on the installation of additional electrical equipment (xenon, multimedia system, special signals, etc.)