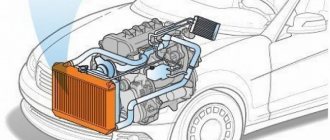
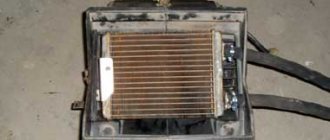
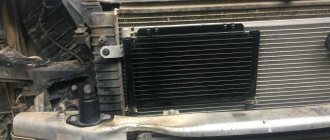
An automobile cooling radiator is designed to lower the temperature of the coolant (antifreeze or antifreeze) circulating inside the engine. Its design usually consists of two tanks and honeycombs located between them, which are a system of thin tubes equipped with thin lamellas. Reducing the refrigerant temperature is achieved through natural or forced air blowing of the cells.
Despite its simple design, the radiator sometimes fails. Its main malfunction is a violation of tightness. In other words, it begins to leak. A coolant leak while the power unit is running threatens the latter with critical breakdowns due to overheating.
Replacing a radiator is not so much a troublesome task as it is an expensive one. And the bill here runs into thousands and even tens of thousands of rubles. In this article we will talk about whether it is possible to solder a cooling radiator with your own hands and what tools you will need for this.
Why does a leak appear?
A leak in the device under consideration can occur only for two reasons: due to mechanical damage and due to corrosion processes occurring inside the tubes. In the first case, it may be the impact of a foreign object on the honeycombs or tanks. This usually happens as a result of traffic accidents, hitting a high curb, hitting a stone, etc. Everything is clear here. A visual inspection will allow you to accurately determine the location of the damage, as well as assess the possibility of repair. Corrosion is a little more complicated. In order not to make a mistake and solder the cooling radiator where needed, you will need to carry out a few simple steps to detect the problem area or even areas. The fact is that corrosion damage can occur in several places at the same time.
Cleaning honeycombs from the inside. How to clean the inside of a radiator?
Very often, when car enthusiasts neglect the basic rules for operating engine cooling systems, radiators become clogged from the inside. There are two main reasons for this. The first and main thing is the use of water instead of the prescribed coolants: antifreeze, antifreeze. The fact is that the latter contain numerous anti-corrosion additives (inhibitors) that prevent the formation of rust and corrosion of the system from the inside. If the system is filled with clean water, then an intense corrosion process occurs inside, the products of which are carried throughout the system and clog the bottlenecks of the cooling system - the radiator honeycombs. The second reason for clogging of radiator honeycombs from the inside is the abuse of various kinds of additives against minor leaks: mustard, special chemicals, etc. Minor leaks usually disappear, but the radiator honeycombs from the inside become covered with plaque or become clogged altogether, significantly reducing the thermal conductivity of the tubes and cooling systems in general. Sometimes flushing helps in such cases, but not always.
The only effective way to internally clean radiators is to flare (unsolder) the tanks and mechanically clean the radiator cells with special cleaning rods. It should be noted that this is a jewelry procedure, since there is always a possibility of damage to the honeycomb. But its implementation helps to effectively not only clean the radiator, but also significantly increase its thermal conductivity. This effect is explained by the fact that during cleaning the internal surfaces of the honeycombs not only get rid of plaque, but also receive some scratches, which slightly increase the turbulence of the coolant and increase the area of the internal tubes.
Looking for a leak
A clear sign that the radiator is leaking is the presence of traces of coolant on the ground under the car, on the engine guard, or on the engine itself. Finding the location of the leak without dismantling the device is almost impossible. But before you remove it, you should make sure that the problem is in it, and not in the pipes or, for example, in the leaky plug of the upper tank. When this is done, you can safely drain the coolant and remove the radiator for diagnostics.
If a visual inspection of the device does not yield any results, check it by immersing it in water. To do this, take a container of a suitable size and fill it with water. Close all pipes with plugs and immerse the radiator in water. Now all that remains is to create air pressure in the device. This can be achieved by simply blowing into the filler neck of the upper tank or by coming up with another option with a compressor (pump). The escaping air bubbles will show you exactly where the damage is.
Copper or aluminum
In order to properly solder a cooling radiator, it is necessary to determine exactly what material it is made of. Most often, cooling devices are made from copper and aluminum. It is not difficult to determine the type of material. Copper honeycombs have a characteristic reddish-brown color, aluminum ones – gray.
If you have determined that you have a copper radiator, you can consider yourself lucky. This metal is easy to solder at home. If you get an aluminum device, then you will have to tinker with it, because this material is difficult to solder.
Features of working with aluminum
The choice of aluminum for the manufacture of various radiators is not accidental: this metal has an optimal combination of low weight, strength and excellent thermal conductivity. Thanks to this, plate structures with a large total area can be made from aluminum, and they will provide excellent heat transfer.
But the material also has a drawback, which is the difficulty of repairing any radiators if damaged:
A film of oxides appears on any aluminum products
- Aluminum is a chemically active material. Because of this, the metal surface oxidizes very quickly, becoming covered with a layer of oxide film.
- The oxide film becomes an obstacle to soldering two aluminum products. For maximum strength, it is necessary to achieve direct metal-to-metal contact, but when heated, a thin layer of oxides inevitably forms between them.
The oxide layer protects against corrosion - this is true for both copper and aluminum
On the other hand, if it were not for the film, then the corrosion of aluminum in air would be extremely active. The same is typical, for example, for a copper radiator: the surface layer of oxides plays the role of insulation, impermeable to oxygen.
- To effectively solder an aluminum radiator, you need to get rid of oxides on its surface. For this purpose, special compounds are used - fluxes. The use of fluxes based on cadmium, bismuth or zinc allows you to clean the surface of the material, reduce the stress on the surfaces during connection and improve the adhesion of the metal to the solder.
Oxides are removed using special fluxes
The price of high-quality fluxes for soldering this metal can be quite high (for example, Castolin Alutin 51L - about 300 rubles for 25 g). That is why, when repairing radiators at home, they use homemade compounds - the so-called fluxes.
Even such a small hole will not be easy to repair.
In any case, when soldering, the main task is to isolate the treated area from contact with oxygen. This is achieved in a variety of ways.
An alternative technique - sealing the defect by cold welding - can only be considered as a temporary measure. Still, such compositions cannot withstand operational loads, and sooner or later their strength decreases.
Repairing a copper radiator
To solder an engine cooling radiator made of copper, you will need the following tools and tools:
- powerful soldering iron or gas torch;
- solder;
- soldering flux;
- pliers;
- sandpaper.
First, you need to dry the radiator, especially if you checked it by immersing it in water. Next, the damaged area should be thoroughly cleaned with sandpaper. If there are slats on it, they need to be removed locally. After this, the soldering area is treated with flux and dried again.
You can solder the cooling radiator using either a gas torch or a soldering iron. In the first case, solder is applied in place and heated with a torch until it melts and fills the crack. When using a soldering iron as a heating tool, make sure that it has sufficient power.
If the solder does not adhere to the surface or lags behind, it is necessary to repeat the stripping and fluxing process. You can check the repaired radiator using the method described above.
How to solder plastic?
On modern cars, to reduce overall weight and reduce production costs, many parts are made of plastic. Radiators did not escape this fate either. First of all, it is necessary to accurately determine the type of plastic . This is done according to the markings on the part. As a rule, polyamide (PA marking) or polypropylene (PP marking) is used for manufacturing. It is with this marking that you need to purchase welding rods for plastic. They can be replaced with strips cut from an unnecessary plastic part with similar markings.
The following materials and equipment will be required:
- industrial hair dryer for heating the workpiece;
- electric soldering iron with adjustable tip temperature;
- solder selected in accordance with the radiator material;
- acetone;
- rags.
You must act in the following order:
- degrease the damaged area with a rag soaked in acetone;
- warm up the repair area with a hairdryer;
- set the soldering iron temperature to 250 o C;
- move the soldering iron tip along the seam line several times so that a recess is formed in the shape of the welding rod;
- insert the rod into the recess and, smoothing it with a soldering iron, level it flush with the radiator body.
During soldering, you need to ensure that the plastic softens, but does not melt or burn. After the repair and before installing it back on the vehicle, you should check the tightness of the repaired area in a container of water.
An automobile cooling radiator is designed to lower the temperature of the coolant (antifreeze or antifreeze) circulating inside the engine. Its design usually consists of two tanks and honeycombs located between them, which are a system of thin tubes equipped with thin lamellas. Reducing the refrigerant temperature is achieved through natural or forced air blowing of the cells.
Despite its simple design, the radiator sometimes fails. Its main malfunction is a violation of tightness. In other words, it begins to leak. A coolant leak while the power unit is running threatens the latter with critical breakdowns due to overheating.
Replacing a radiator is not so much a troublesome task as it is an expensive one. And the bill here runs into thousands and even tens of thousands of rubles. In this article we will talk about whether it is possible to solder a cooling radiator with your own hands and what tools you will need for this.
What is the difficulty of soldering aluminum?
Aluminum is a very specific metal. Its peculiarity lies in its high chemical activity, manifested in the formation of a so-called oxide film on the surface. It appears instantly when pure metal comes into contact with air, reacting with oxygen. And it is precisely because of this that it is impossible to solder an aluminum cooling radiator in the usual way. This will require additional substances that contribute to:
- removing oxide film from the surface;
- reducing surface tension;
- protection from adverse factors affecting the soldering process;
- improved solder flow.
Materials and tools for soldering aluminum radiators
In order to solder a cooling radiator, the honeycombs of which are made of aluminum, you will need:
- powerful soldering iron;
- solder (tin-lead or tin-bismuth alloy);
- iron filings;
- rosin;
- fireproof container (crucible).
It is desirable that the soldering iron has a power of more than 100 W. Otherwise, it simply will not be able to warm up the aluminum. As for solder, a tin-lead alloy is suitable for sealing small cracks (holes). If the damage is significant, then it is advisable to use solder consisting of 5 parts bismuth and 95 parts tin. Such an alloy can be easily purchased in stores that sell radio components. Usually, it has the form of wire and is marked as POSV-33 or POSV-50.
Making metal tanks instead of plastic ones.
Sometimes it is not possible to weld or glue a plastic tank. In particular, this situation arises when a crack occurs at the junction of the tank with the pipe plate (at the sealing rubber), or when the plastic cannot be welded at all due to old age. In this case, it is best to make a new tank from aluminum or brass (depending on the material of the radiator itself). If the radiator is aluminum, then, of course, the tank should also be aluminum. If the body of the radiator is copper-brass, then the tank is also made of copper or brass. In the first case, exclusively argon-arc welding is used for the manufacture and fastening of the tank; in the second, you can use both welding and soldering. If soldering is used, then fastening of highly loaded elements (outlets for pipes, etc.) must be done exclusively with high-temperature copper-phosphorus, silver or brass (copper-zinc) hard solders. In other cases, the use of soft tin-lead solders such as POS-18, POS-30 is allowed. It should be noted that the manufacture of metal tanks is a rather labor-intensive process, but if it is carried out well, only it can give a 100% guarantee that your tank will not leak over the next few years.
Preparing gumboil
Soldering a cooling radiator with your own hands is only possible if you have high-quality flux. You will have to prepare it yourself. And it’s better to do this just before you start soldering. So, pour 2 parts of ordinary rosin and 1 part of iron filings into a fireproof container. Sawdust can be made using a file with fine notches, processing any iron workpiece that comes to hand. Heat the resulting mixture over a fire, stir and let cool. That's basically it. Flux for aluminum is ready.
Flux for the most durable seam
To obtain the most durable protective seam at the site of damage to the radiator, a special flux called flux is used. It can also be obtained at home. To prepare flux, you will need the following substances in the following proportions:
- potassium chloride – 56%;
- lithium chloride – 23%;
- cryolite – 10%;
- coarse table salt – 7%;
- sodium sulfate – 4%.
The ingredients are finely chopped and mixed. This melt must be stored in a hermetically sealed glass container in a dark place.
How to isolate transistors from a heatsink
Hello, friends! Many radio amateurs have encountered the problem of isolating a group of transistors on one radiator. Usually, special heat-conducting pads cut from cushioning mica are used to insulate transistors on the heat sink. The mounting screws are insulated with a special plastic sleeve. Computer power supplies use silicone gaskets lubricated with white heat-conducting paste to insulate transistors. But, unfortunately, it is very difficult to buy these gaskets and bushings in stores; not all sellers want to sell such trifles. But not every radio amateur has computer power supplies at hand. Therefore, I will tell you a big secret and tell you how to isolate transistors from the radiator.
Drill holes in the radiator to mount the transistors. To ensure that the transistor fits tightly to the radiator, be sure to remove the chamfer with a larger diameter drill and cut an M3 thread. Also pay attention to the surface of the radiator; sand any roughness with fine-grained sandpaper.
If you don’t have plastic bushings for insulating transistors and can’t buy them, then you’ll have to make them yourself from a piece of PCB. Cut the plate to the desired size, drill holes with a diameter of 3 mm.
How to insulate screws from radiator? Place a ring of heat-shrink tubing on each screw and heat it with a lighter. The ring will take the shape of a screw and will serve as a good insulator.
Where can you get mica from at home? Mica is a heat-resistant dielectric that is widely used in modern household appliances. The microwave oven contains a plate made of sheet mica; it is quite suitable for insulating transistors on the radiator. An old burnt soldering iron also contains mica rolled into a tube; it insulates the nichrome winding.
And also in thermopots and mica capacitors. What to do if your house does not have old household appliances and mica capacitors? Then you can use a baking sleeve as a dielectric; it is very heat-resistant and does not conduct current.
Cut a small piece from the sleeve and fold it in two for security.
Attach the cut piece of the sleeve to the radiator where the group of transistors will be installed.
Press the transistors onto the heatsink and use an awl to make holes for the mounting screws. For greater thermal conductivity, it is advisable to lubricate the heat sink and transistors with thermal paste.
Insert insulated screws into holes and tighten.
Screw the heatsink to the board.
Check with a multimeter that there is no short circuit between the collector and the heat sink.
This completes the installation of transistors on the radiator. It remains to carry out thermal tests at maximum load on the transistors. As practice has shown, this method of isolating transistors is not very simple, but it is reliable.
I wish everyone good luck! See you in new articles!
We repair an aluminum radiator with our own hands
The radiator, as in the previous case, is washed and dried. We thoroughly clean the soldering area with emery cloth and then degrease it. After this, we apply pre-prepared flux to it using a soldering iron. Rub it thoroughly over the surface. Next, we apply solder layer by layer, stretching it over the surface to be repaired. The role of the iron filings is to destroy the oxide film at the very last moment before soldering, thereby allowing the aluminum and solder to bond.
How to solder plastic on a cooling radiator
Most modern car radiators have tanks made of heat-resistant plastic. This material does not react with coolant and does not corrode, but it does not have the elasticity to withstand mechanical damage. That is why some car owners, faced with the problem of a broken tank, are wondering whether it is possible to solder a cooling radiator whose plastic has been damaged. Can! But it is better to entrust this matter to professionals. Heat-resistant plastic is very difficult to solder due to its rigidity. Yes, and choosing the right material for this is quite difficult.
Today you can find hundreds of offers from organizations and individuals who are ready to solder a cooling radiator with high quality. The price for such services ranges from 100 rubles per sq. cm. You will have to pay separately for removal, diagnostics and installation of the device.
If the issue of repairing the tank has become very acute, or you don’t really want to pay, you can try to do it yourself. To do this, the damaged area must be cleaned and formed in such a way that the material that will be applied as a restorer can easily penetrate into the gap. Next, the treated area is degreased.
As for the gluing material, it can be soft plastic or two-component epoxy adhesive. In the first case, the plastic is melted using a soldering iron and applied to the damaged area with a small spatula. The glue is applied in the same way. When performing work on soldering tanks, it is advisable to use a reinforcing mesh with small cells. It is placed between layers of adhesive material. Of course, such soldering cannot guarantee years of trouble-free operation of the radiator, but it is quite suitable as a temporary measure.
Soldering
The most reliable way to repair a car radiator with your own hands and eliminate leaks without specialized equipment is soldering. Depending on the radiator material, various technologies are used.
Repair of brass radiators
The simplest method based on the materials used and technologies used. Used to eliminate small cracks and breakdowns in pipes and expansion tanks of the cooling system, air conditioner and heater. Since the temperature of the coolant or coolant has virtually no effect on the material.
Soldering brass will require:
- Electric soldering iron, power from 50 W.
- Zinc chloride (soldering acid) or borax, flux.
- Solder.
- Wire brush, sandpaper.
The working surface is pre-cleaned of dust and dirt. The brush removes corrosion elements and oxides. Sanding is carried out until a metallic sheen appears; this is done to increase the level of adhesion of metal and solder. The soldering iron tip must be cleaned of solder residues and old scale. Flux is applied to the surface of the brass. Using a heated soldering iron, distribute the solder over the entire damaged surface.
IMPORTANT! Soldering is possible only if the defective areas are located some distance from the factory seams. Brass has high thermal conductivity; with prolonged contact with a soldering iron, they can “float”.
Repair of aluminum radiators
The most technologically complex process. The nuances lie in the peculiarities of flux preparation for surface treatment. Powdered sawdust of bismuth, zinc, cadmium or special combined mixtures are suitable as additional metal additives to regular rosin.
Metal-rosin flux is prepared in a crucible - a fireproof container. It is heated on a stove or with a gas soldering iron, the rosin is melted and, constantly stirring, metal dust is added. The ratio of rosin and sawdust is 2:1.
At the preparatory stage, the repair of aluminum car radiators is similar to the preliminary preparation of a brass surface. The prepared flux is applied to the entire surface in a thick layer.
IMPORTANT! During the soldering process, air must not be allowed to penetrate to the surface being treated. Aluminum oxidizes very quickly, and the oxide film, despite its micron size, significantly reduces the adhesion coefficient of the base and solder.
Soldering under a layer of flux is carried out in a circular motion, the solder is “rubbed” into the surface, and metal filings act as an abrasive material.
Do-it-yourself radiator repair using homemade fluxes
To create a flux, components are required in the following proportions:
- Sodium sulfate - 4%.
- Table salt (sodium chloride) – 7%.
- Cryolite – 10%.
- Lithium chloride – 23%.
- Potassium chloride – 56%.
All components are individually ground to a powder consistency and mixed. The composition must be stored in an airtight jar, away from sources of heat and sunlight. The melt is melted in a crucible and applied to a pre-treated surface. Soldering is carried out with POSV33 or POSV50 (tin-lead-bismuth) solder under a layer of flux.
IMPORTANT! You can create POSV solder yourself by adding bismuth powder, 5% of the total weight, to the melt of a conventional tin-lead composition.
The main reasons for the loss of radiator tightness, signs, repair features
Loss of tightness of the radiator of the cooling system may be due to the following reasons:
- Natural wear and tear. The approximate lifespan of a radiator is about 10-12 years. As the device wears out, its internal working surface becomes covered with a layer of scale and deposits formed as a result of chemical and thermodynamic processes. The walls of the radiator plates and tubes become thinner. Since the liquid in the device is under pressure, microcracks are possible, as a result of which the liquid begins to leave the system.
Considering that the sizes of microcracks are small, a strong leak is not observed in this case. Wet traces of leakage may disappear after cooling the engine and antifreeze. It is advisable to immediately detect the consequences and place of fluid leakage. The sooner repairs are made in this situation, the less damage will have to be repaired. Can be successfully repaired by cold welding .
- Filling the cooling system with water. Freezing in the cold season. If there is a slight leak of antifreeze, many drivers add limited amounts of water to the system. During the warm season of vehicle operation, the number of such top-ups can be large. As a result, the concentration and characteristics of antifreeze change. In winter, even at slightly below zero temperatures, it can freeze. In this case, volume expansion occurs. The radiator may “break”.
The resulting crack is usually large in size. It can occur at the junction of plastic and metal radiator elements. In most cases, such damage is difficult to repair.
- Filling the cooling system with low-quality antifreeze. Overpressure. In most modern engines, the coolant is under pressure. At the same time, the boiling point of antifreeze increases to more than 100 degrees Celsius. This allows you to increase the efficiency of the engine. If low-quality antifreeze is poured into the system, it may boil at a lower temperature. This may damage the radiator. It may be small. In such cases, it is better to use the soldering repair method, as it provides better performance in terms of resistance to increased pressure. Soldering is easy to do at home .
- Mechanical damage . This malfunction may be due to:
- foreign objects entering the radiator area;
- road accident;
- destruction of fan blades;
- poor quality repairs.
Depending on the location and size of the damage, cold welding and soldering methods can be used for repairs.
Engine cooling radiator design - studying the device diagram
In the manufacturing process of radiators, copper and aluminum are used. Depending on the purpose of the core, they are tubular, lamellar, or honeycomb-shaped. Between them are transverse strips of brass, which give the structure more rigidity and serve to increase the surface area that promotes cooling. To create fluid circulation, a pump is installed on the engine. All components of the cooling system are connected to each other by rubberized pipes.
Antifreeze or antifreeze is used as a cooling liquid in cars, which is poured into the expansion tank. One of its tasks is to compensate for changes in the volume and pressure level of the coolant when it is heated or cooled. For forced cooling of liquid, fans are installed on cars. Their purpose is to create and increase the volume of air that passes through the radiator.
There are two types of fans used on cars:
- Driven by the engine crankshaft.
- Electrical. They turn on when the liquid temperature reaches a critical point.
Soldering a radiator at home
Soldering cooling system radiators is a classic repair method. It was used at the beginning of the last century. At that time, radiators were made of copper or its alloys (usually brass). Soldering technology was mature at that time. A copper kettle could be repaired in any city. The soldering process is performed at the melting temperature of the solder used. To perform soldering, the following materials and tools are required:
- a powerful soldering iron of 220 Volts (it is better to use a hammer type with a power of 250 or 200 Watts, if not available, at least 100 Watts);
- medium grit sandpaper;
- active flux;
- tin-lead solder POS-60 or POS-40;
- solvent for surface cleaning.
The pre-repaired surface of the radiator is cleaned of foreign contaminants. Next, if necessary, to provide access to the soldering area, carefully remove the cooling fins. Then a final cleaning is carried out using sandpaper.
The soldering iron (if it is new) is pre-tinned. To do this, active flux is applied to its tip, heated to operating temperature, and then solder is melted onto the soldering iron tip. If there is no active flux, you can use an aspirin tablet. At the same time, it is advisable not to inhale the “thermonuclear” fumes from the tablet.
Next, active flux is applied to the cleaned area. After this, a large drop of solder is applied to the soldering iron tip and the soldering process is carried out. It requires a little experience. It may take time to get good soldering done.
Engine cooling radiator - operating principle
The principle of cooling the liquid is quite simple: passing through the cylinder block, the antifreeze absorbs most of the heat, after which it enters the radiator of the engine cooling system. The direction of movement is from the upper tank through the honeycombs to the lower part. The core of the radiator is the main participant in cooling; when moving, air is blown across the liquid through it, as a result of which the temperature of the antifreeze drops slightly.
For stable and economical operation of the engine, a constant coolant temperature (range of approximately 80 to 90 ° C) is required. In order to stabilize it, a thermostat is installed in one of the pipes. When the temperature is below 80 °C, the thermostat is closed and the liquid moves in a small circle, but as soon as it reaches the control mark, the thermostat opens, as a result of which the flow is directed to the upper compartment of the radiator, a special tank.
Trucks are also equipped with an engine oil cooling radiator, thanks to which hot lubricant does not liquefy and does not burn to hot engine parts. Its design is practically no different (except for the horizontal arrangement of honeycombs and smaller sizes).
