4.7 / 5 ( 7 votes)
Good air filtration in the cabin is a guarantee of comfort and health safety for motorists. Breathing polluted, harmful air every day can have a detrimental effect on a person’s respiratory system. Today we will talk about the solution to the problem of Lada owners, which is offered by the manufacturer.
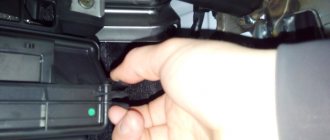
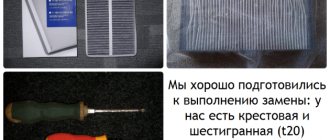
We will dwell on this in more detail and find out what the VAZ 2114 cabin filter is and how to replace it. But first I would like to advise that before disassembling a car, you need to purchase the part itself or a spare part for the car. It is known that the primary task facing the device is to filter the flow going inside. Imagine, a huge amount of air manages to come through this device every day it is used.
How to replace the VAZ 2114 timing belt: subtleties and nuances, timing marks
The VAZ 2114 timing belt is installed on an 8-valve and 16-valve engine. The belt performs the function of transmitting torque from the crankshaft to the camshaft of the internal combustion engine, reducing the speed of the latter (necessary for the supply of fuel and the correct mode of gas removal as a result of the cyclic movement of valves and pistons).
To avoid such a problem, it is necessary to monitor the condition and periodically replace the VAZ timing belt according to regulations, namely every 50-60 thousand kilometers. Next, we will look at how to replace the timing belt on a VAZ 2114.
Read in this article
Timing belt VAZ 2114 8 valves: functions, location and signs of malfunctions
So, the belt is under a protective cover on the crankshaft pulley side. The belt itself is a ring structure, made of reinforced rubber, and has an internal tooth structure so that the teeth on the crankshaft pulley and timing gear can engage with the belt.
Engaging with the crankshaft and camshaft with its toothed side, the belt ensures synchronous rotation of the shafts, and with its smooth side it drives the water pump shaft of the internal combustion engine cooling system. The required timing belt tension is maintained by a tension roller.
If the timing belt is torn or has become dislodged/flipped off or jumped, the vehicle’s internal combustion engine stalls or operates extremely unstably. Possible signs of timing belt failure:
- the engine stalls;
- the car does not start;
- “phase sensor error” lights up - failure of the timing belt (displacement or slippage of the belt).
For example, the timing belt on a VAZ 2114 “chews”. There may be several reasons why the timing belt is chewing. This is either mechanical damage to the teeth of the crankshaft or pulley, sagging of the belt, displacement of the axes of the pump roller and tension roller, etc.
Another such reason may be the belt slipping or moving to the side relative to its working position. This can lead to damage to the timing belt structure (contact with metal parts, abrasion on the edge of the tension roller) and, accordingly, disruption of the car engine.
The main reasons for belt displacement can be:
- manufacturing defect of the product (different rigidity across the width);
- failure of the water pump bearings (play, lack of lubrication, poor cleaning of the seat);
- deformation of the tension roller mounting pin (improper tightening or errors when replacing elements).
Basic timing belt faults
The main malfunctions of the timing belt are:
- deformation;
- cracking and delamination;
- cutting teeth;
- gap
Deformation occurs due to displacement of the axis of the tension roller or toothed pump roller. With further use of the belt, it will certainly lead to its delamination or breakage.
Cracks and delamination can also be the result of long-term use, high belt tension, or problems associated with malfunctioning water pump. These same factors, as well as mechanical damage to the teeth of the crankshaft pulley or timing gear, often cause belt teeth to cut off.
A belt rupture is the result of the influence of the listed problems, as well as the car owner’s irresponsible attitude towards his car, often leading to a major engine overhaul.
How to change the timing belt yourself
Replacing the VAZ 2114 timing belt is carried out according to the regulations established by the manufacturer, or in the event of certain problems associated with its performance (misalignment, delamination, etc.).
In this case, replacing the belt, if you have certain knowledge, skills and appropriate tools, can be done independently. Before replacing the belt, you must read the vehicle's operating instructions.
List of required tools:
- ratchet or wrench together with a 12-sided socket for 13;
- spanner or open-end wrench 10;
- 19mm socket wrench with long extension;
- open-end wrench 17;
- key to 8;
- key for fixing the tension roller.
Algorithm for replacing the timing belt:
- align the internal combustion engine flywheel and timing gear according to the marks;
- Place the car on a flat surface and use a jack to lift the front right wheel until it rotates freely;
- Having opened the hood of the car, use a 10mm spanner or open-end wrench to unscrew the three bolts securing the protective cover;
- Using a 13 key, loosen the belt tensioner and remove it;
- Having found a special mark on the camshaft gear, make sure that the marks on the fastening of the protective belt cover and on the camshaft gear match;
- remove the special plug on the crankcase, find the flywheel crown and mark under the plug, and then make sure that the mark on the flywheel matches the mark on the flywheel housing;
If, when installing the timing belt, the marks are lost, they must be installed back. Otherwise, problems are possible, both with the belt and with the engine and its operation.
Do-it-yourself replacement of a VAZ 2110 engine mount
So, having decided that replacing the engine mounts is inevitable (either one or several, for example, replacing the rear engine mount), you need to prepare the car and tools for repair work (drive the car into a pit or onto a lift, have a set of keys, jacks, etc.).
In the case of an 8 valve engine:
- First, use a 13mm wrench to unscrew the alternator belt tensioner bolt and remove the belt;
- A jack is placed under the engine, a wooden beam or a thick board is placed on the top of the jack;
- Next, the engine is raised with a jack so as to relieve the support;
- Then, using a 15mm wrench, unscrew the central nut securing the right airbag;
- Then, using a 13mm wrench, unscrew the bolts securing the pillow to the bracket
- Next, from below in the area of the right arch, using a 17 key, you need to unscrew 3 bolts (the bracket is attached to the spar);
- Now the bracket can be removed and the engine mount can be replaced by tightening all the bolts back after installation.
- Upon completion, the jack at the bottom moves under the box, which raises the gearbox;
- Now, using a 15 wrench, unscrew the central nut securing the pillow on the left;
- Afterwards, you can unscrew the 2 bolts securing the support with a 13 key, and the support itself is removed;
- Next, a new support is installed and reassembled;
- Having completed the stage, you need to go down under the car, then unscrew a couple of 17 nuts (attach the pillow to the body);
- After this, unscrew two more nuts securing the element to the gearbox and remove the rear support;
- All that remains is to use a 19mm wrench to unscrew the nut that secures the cushion to the bracket, then remove the old cushion and install the new element;
- Reassembly completes the process; at this point, the replacement of the VAZ 2110 engine mounts can be considered completed;
Let us also add that for VAZ engines with 16 valves, both the process of removing and replacing the side airbags itself is no different from the process discussed above. When it comes to replacing the front lower airbag, you need to work from below.
Currently reading
Installation and repair of the muffler resonator
How often to change the timing belt on a car: what you need...
First, use a 15mm wrench to unscrew the bolt that secures the front lower support rod to the cross member of the car's front suspension. Afterwards, the nut of the bolt that attaches the support to the engine bracket is unscrewed, and the bolt itself is removed.
To unscrew the bolt, you will need two 15mm wrenches. Now the support can be removed and only the pad or the weight of the entire element can be changed. Now we can proceed to reverse assembly.
The overall process of replacing the pillows is completed by unscrewing the fastening bolt of the upper front support to the body with a 17mm wrench. The bolt nut can be held by hand.
Then the bolt and nut are removed, after which, using a 15mm wrench, the bolt securing the front upper support to the power unit bracket is unscrewed (the bolt and nut are also removed). Next, the support is removed, the cushion or the entire assembly is changed, and reassembly is performed.
- As you can see, the VAZ 2110 16-valve engine mount changes almost exactly the same as on an 8-valve internal combustion engine. The only difference is that there are more supports themselves, and the rear support is changed from below (in the bottom area). At the same time, with the right approach, there are still no special difficulties; it is quite possible to change the cushions on this type of internal combustion engine with your own hands in the conditions of an ordinary garage.
Having installed new VAZ engine mounts (engine mounts for 2110, 2112 and other similar models), you should start the engine to check. If the pillows or supports are of high quality, and the replacement itself is carried out correctly, normally there will be practically no vibrations.
Setting timing marks
One of the important parts in the list of tasks for replacing a belt is setting the timing marks. To correctly set the VAZ 2114 timing marks, you need skills, knowledge and tools, such as: a jack, a 19mm wrench, a thin flat-head screwdriver.
For VAZ 2114, timing marks are set according to the following algorithm:
- jacking up the right side of the car, unscrew the timing belt protective cover;
- dismantle the timing belt casing of the VAZ 2114 (unscrew the mounting bolts, remove the timing belt casing, then unscrew the mounting bolts of the lower fastening of the timing belt casing and dismantle it);
Inspection, basic functions
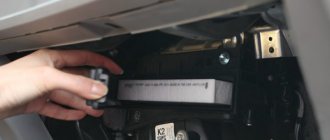
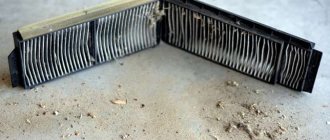
The device has a simple structure - it is a regular plastic frame, it contains a special filter material. There are many third-party devices that people themselves come up with to improve interior cleaning (homemade cleaning devices made of fabric), I believe that if used correctly and if the VAZ 2114 cabin filter is periodically replaced, then I think that this is unnecessary.
What's the result?
As you can see, the timing belt is an important part of the car, on which the entire operation of the internal combustion engine depends. Like all elements, the timing belt has its own resource, which, as a rule, is limited to 60 thousand kilometers of the vehicle.
If signs of wear are noticeable ahead of schedule, the belt still needs to be replaced. At the same time, the rollers must also be replaced, since jamming can cause a break.
When to change the timing belt. Replacing the timing belt, marking it and how to do it correctly. Tips and tricks.
Comparison of chain and belt type gas distribution mechanism drives. Advantages and disadvantages of timing chain, pros and cons of timing belt. Recommendations.
Checking the Priora 16 valve timing belt and replacing the Priora timing belt. How to tighten the timing belt on a Priora, belt selection and replacement. Tips and tricks.
Features and nuances of correct selection of timing belt. When a belt needs to be replaced, the best belt manufacturers know how to avoid buying a fake. Recommendations.
The purpose of the timing belt in the timing belt drive device. Features of operation, how often the drive belt needs to be changed.
Purpose of timing drive. Advantages and disadvantages of a belt or chain in the design of the engine timing gear drive.
Replacing the timing belt VAZ 2114 8 valves
Quite often, when faced with the problem of timing belt wear, drivers turn to service centers for help. But this problem can be solved with your own hands, without spending money or time. Here we will talk about how to replace the timing belt on an eight-valve VAZ 2114 yourself.
The belt rotates the camshaft and synchronizes the operation of the crankshaft and camshaft. Some other components of the mechanism also pass through this transmission. The belt is a closed hoop, on the inside of which there are teeth, with which it engages with the gears. Thanks to this, slippage is eliminated.
Belt life
The manufacturer promises us that we should start taking an interest in the condition of the belt drive after 50,000 km. Perhaps this is actually the case, but you still need to carry out diagnostic procedures on the belt from time to time, as it can slip. It may also receive the following defects:
- formation of cracks;
- the appearance of swelling on the surface;
- corrosion of the structure due to oil getting on the surface;
- fraying of the ends.
All these defects indicate that this consumable has already served its purpose, and it’s time to replace it with a new one. A broken belt can cause serious problems. Judge for yourself: a break will lead to a collision between the valves and the pistons. Both of them become deformed because of this, which means that serious repairs to the vehicle’s propulsion system will have to be made. Then you will need to fork out money and shell out a tidy sum not only to purchase consumables, but also to pay the labor of the craftsmen who will repair the car.
Here are the reasons for premature wear of the belt drive:
- aggressive or inept driving;
- specific weather conditions;
- obviously low-quality consumables were purchased;
- the belt was not installed correctly.
If you want to do everything yourself, if you don’t want to overpay, then you should definitely make such repairs yourself. Moreover, there is nothing very complicated in this. You just need to strictly follow the instructions and show diligence and patience.
Replacing jet rods on a VAZ 2107
It is necessary to prepare a kit with tools and consumables in advance. Their main list is as follows:
- Hammer;
- Set with open-end wrenches. The reinforced double type parts are sometimes difficult to remove without additional tools;
- Blades for installation;
- WD-40 – this composition removes rust;
- A set with new reaction rods, including a transverse one.
When everything is ready, they begin the work itself.
Removing jet rods
Removing old parts is the first step where work begins.
The process involves the following sequence:
- A wire brush is used to remove rust and dirt from threaded connections. Then WD-40 is used for processing. You will need to wait some time before the work can continue. The instructions are also relevant for the classic model.
- Completely unscrew the nut, due to which the washer is held on the free side. This process is difficult, it is better to take a long wrench and, if necessary, re-treat the surface with WD-40.
- Dismantling the bolt and nut, moving to the other side. The rear parts are dismantled in almost the same way.
- Unscrewing the nut from the lower shock absorber mounting. The bolt with the spacer sleeve is also removed.
- Shift towards the shock absorber itself. Otherwise you won't be able to access the second bolt.
- Clean the bolt threads with a wire brush, then apply WD-40 again.
- Unscrew the nut and pull out the bolt. The elastic band also changes if necessary.
The bolt is simply cut off if the nut cannot be unscrewed. Removing the reaction rods involves using a spatula for installation. Remains of the fastening must be removed if the bolt had to be cut off.
Reverse welding of cracks will not help when they appear on the surface. The seam then still cannot withstand the load. Such parts can only be replaced in full.
Repair and installation of jet rods
Reuse is permissible only if the metal part remains intact. Rubber silent blocks must be replaced in any case. The old parts are removed from the lugs and then new ones are installed. Treating the surface with dishwashing detergent simplifies this process.
New rods are installed in the following order:
- The traction eye is mounted in the front bracket;
- The securing bolt is lubricated with nigrol, lithol. Everything is inserted into the bracket and tightened with a nut;
- The tie rod eye is inserted into the rear tie rod bracket;
- Insert the bolt with lubricant, then secure with a nut.
A situation is acceptable when the holes at the traction eye and the bracket do not coincide with each other. Then take a mounting blade and, if possible, correct the current position.
The lower part of the shock absorber at the rear is secured when the bulk of the work is completed.
Video of changing jet engines on a VAZ 2107
Replacement process
To carry out a repair of this complexity we will need:
- a set of screwdrivers with different tips;
- standard set of keys;
- jack;
- new consumables;
- set of rollers.
- So, first we place the car on a flat platform and put it on the handbrake.
- 3rd or 4th gear must be installed.
- Now you need to turn off the power to the car. To do this, disconnect the left terminal of the battery.
- The camshaft drive is protected by a special casing. To gain access to it, the cover will have to be removed. To do this, unscrew several bolts securing it.
- Now remove the crankshaft pulley. We remove it along with the strap, which will have to be loosened for this.
- We put the car in neutral.
- Now a very important stage, it concerns the alignment of marks. We begin to turn the crankshaft to the right. At the same time, we observe the flywheel and the location of the marks. We rotate the shaft until the mark on it corresponds to the average value of the scale.
- The mark on the pulley should be placed opposite the mark located on the housing. Slightly loosen the nut securing the tension roller. In general, you need to pay special attention to the video. Most likely, it will also have to be replaced. Even if it seems to you that it is still in good condition, backlashes may still form on it soon. Then it will definitely have to be changed, but because of this the entire mechanism will have to be disassembled again.
9. Now we begin to prepare the belt for removal. To do this, loosen the belt using a tension roller.
10. We remove the worn-out consumable and begin to pull the new product onto the crankshaft gear. 11. Now we pull it onto the camshaft gear. We do this carefully to avoid sagging of the belt drive. We put the belt on the tension roller.
12. Turn the crankshaft 2 turns to the right and set the marks. If they do not match exactly, the belt drive installation procedure will have to be repeated. 13. Return the generator pulley to its place and tighten the bolt securing it. 14. Turn the belt to the left to adjust its tension. The tension should be optimal - the belt should not be overtightened, but sagging should also be eliminated. 15. Put on the generator strap. 16. After this, all that remains is to return the remaining parts to their place and check the operation of the mechanism. To do this, start the engine and listen to how it works. If you don't hear any extraneous noise, we did an excellent job. Well, if you still hear a whistle or grinding sound, then the installation will have to be repeated.
Note: when installing the belt, pay attention to the fact that it must be installed in accordance with the arrows marked on it - the arrows must indicate the direction of movement. It may well turn out that your belt will have no arrows. Then look at the inscriptions - after installation they should not be upside down, they should be easy to read.
Replacing the clutch VAZ 2110 2114
First of all, we drove into the pit and removed the engine protection. There shouldn't be any problems here. All the bolts came off with a bang. The oil can be drained to reduce the weight of the box. We will not pull the drive out of it, so there is no need to drain it.
Loosen the front wheels. Unlock both hub nuts and unscrew. It's better not to put the old ones back. Buy new ones. They cost about 70 rubles.
Raise the car and place blocks or sawhorses underneath it. Remove both front wheels.
DO NOT work on a jack without reliable insurance.
Remove the clutch cable from the fork and unscrew it from the bracket located on the box. You will need two 17 keys. For convenience, it is better to remove the battery.
Disconnect the speed sensor connector.
Remove the air filter housing, having first disconnected the chip from the mass air flow sensor.
Unscrew the bolt securing the ignition module to the gearbox and another bolt nearby. It is one of those that connect the gearbox to the engine.
Unscrew the nut on the starter that holds the positive wire. Disconnect the terminal from the traction relay.
Unscrew the upper and lower starter mounting bolts, then remove it.
For prevention, you can treat Bendix with a small amount of lithol and similar lubricant.
There is another bolt at the top that holds the gearbox. It is located in the thermostat area. It is covered by fuel pipes.
This completes the work at the top.
We go down into the pit.
Many people write that the “saber” needs to be removed, but we took a different route. We unscrewed the ball from the hub and the bolt that connects the lever and the stabilizer. Then simply bent the lever down. This method is suitable if the hole allows it and you are not going to completely remove the gearbox.
Move the left hub and remove the drive.
Unscrew the flywheel protective shield. There are three bolts. I don’t know why, but they were different for me. Two were unscrewed with a 10 head and the third with an eight. I still don’t understand.))) Maybe someone can tell me why this is so?
Then disconnect the shift linkage by loosening one bolt. It is recommended to pre-mark the position of the rod to make it easier to adjust the speeds later. I used this advice, but during subsequent setup, for some reason it did not work. This is such additional information)))
Now loosen one gearbox mounting bolt, which is located under the starter (it has already been removed), but not completely.
And another bolt is located in the area of the right drive. We didn't notice it during disassembly and spent a long time trying to figure out why the box wouldn't come out. Take this bolt off too, but don’t unscrew it completely. This required a good extension cord and a reliable head.
Now you need to take a jack and install it under the engine. When we start unscrewing the pillows, the motor will remain on only one and may fall, breaking the heating hoses. Place a small piece of wood between the jack and the engine to prevent damage to the crankcase. It should be installed closer to the checkpoint. It’s also better to put a block under the box, just in case.
When the engine is securely fixed, remove the cushions.
First, let's remove the rear support. You can simply unscrew it from the body. It is held on by two studs, but this method is suitable if you are sure that the nuts will unscrew easily and will not break. We didn’t experiment; we did this: There is a bolt on the pillow itself, it points towards the interior. It needs to be loosened and unscrewed a little. Then disconnect the cushion bracket from the gearbox and move it as far as possible to the side. Maybe this is the wrong way, but the studs remained intact, and we are happy)))
Now unscrew the left pillow of the box. There are two nuts, one at the top and the other at the bottom. The fastening looks like a threaded pin on both sides. Unfortunately I didn't take a photo.
Next, you need one to hold the box from below, and the second to unscrew it completely and remove the bolts. One near the starter, and the second near the right drive.
Now the two of you need to move the box away from the engine and lower it onto the bent lever. Do this carefully, without damaging the pipes and wiring. The box is heavy, about 30 kg if I'm not mistaken. We had enough))).
When you move the gearbox, make sure that its guides do not fall out. They are located in the lower holes of the gearbox mounting. They look like tubes.
The box will move back about 10 - 15 cm. This is enough to replace the clutch basket and disc, as well as the bearing and fork.
When we moved the box away, we saw that three petals of the basket had fallen inside. It immediately became clear that it was due for replacement.
Let's start removing the basket. It is bolted to the flywheel with six 8mm bolts. For us, they were unscrewed with great effort. I had to use leverage. Before unscrewing, secure the flywheel from turning. To do this you will need a screwdriver or something similar.
Having unscrewed the basket and taken out the disk, we decided to change both.
Replacing the timing belt of VAZ 2113, 2114 and 2115 with your own hands
Replacing the timing belt with your own hands on VAZ 2113, 2114, 2115 cars, in the cylinder head of which 8 valves are installed, is relevant today for many owners of cars of these brands. This operation cannot be called complicated, since repairs can be easily carried out in a garage or on any flat area without the use of special equipment.
Before starting work, you should prepare the necessary spare parts:
- Timing belt, article number 21080-1006040-82.
- Tensioner roller, article number 830900AE2 (2108-1006120).
- Pump in the engine cooling system, article number 2108-1307010.
Experts recommend replacing the timing belt, tensioner and pump in the cooling system at the same time, since problems with this unit most often lead to malfunctions in the valve mechanism. You will need tools and accessories:
- car jack;
- car body stand;
- wheel chocks;
- set of wrenches;
- container for draining coolant;
- rags.
Replacing the pump on a VAZ 2110
Car owners of the front-wheel drive 2110-12 family must monitor the condition of the pump that circulates the coolant. More often it is called a pump. This unit is in the category of critical engine systems. A failed pump can negatively affect the performance of the motor and lead to serious consequences. Despite the complexity and importance of this unit, replacing a VAZ 2110 8 valve pump is not a difficult task. If you have a garage and plumbing tools, most car owners will be able to make repairs themselves.
The entire operation to replace the water pump on a VAZ 2110 car will take no more than 2 hours. Along with the main task, the timing drive will be subject to revision, which is very important for the further operation of the car.
Signs of a pump malfunction
Thanks to the rotation of the pump driven by the timing belt, the impeller circulates a special fluid (antifreeze, antifreeze) through the small and large circuits of the cooling system. A damaged pump can cause the engine to overheat or cause the timing belt to break. To avoid an emergency on the road, you should do preventive repairs on time. On a VAZ 2110 with an 8-valve engine, the omen of replacing the pump can be recognized by the symptoms described below.
Noise from the timing belt cover
Timing belt protection cover
When the engine is running, a shuffling rotating sound is produced from the timing belt protective cover. This is an indication that the pump bearings are sufficiently worn. According to the maintenance regulations, the pump should be changed every second timing belt replacement. The recommendation should not be neglected, since the rolling shaft bearings operate under load and wear out relatively quickly. Sometimes antifreeze or antifreeze gets into the bearing race due to a leaky seal. As a result, the lubricant is washed out and wear of rubbing parts accelerates.
Coolant leak from under the pump
Hermetic seals: the oil seal and rubber cuffs, as well as the bearings, have a limited service life. Typically, seals leak after bearings wear out, as there is play in the shaft. In addition to this, the constant cycle of heating and cooling of the engine gradually destroys the material of rubber products. As a result, small puddles of coolant appear under the engine compartment of the VAZ 2110 on the pump side.
Misalignment of drive shaft pulleys
VAZ 2110 pulley
A defective pump can result in noisy engine operation and frequent timing belt breaks. According to the performance characteristics, skewed rotation of the pulleys does not provide the vehicle with a long service life. The belt cannot withstand additional loads and breaks after a mileage of up to 1000 km. As a result, you will have to replace the defective pump, otherwise on such a VAZ 2110, an unscheduled replacement of the timing belt will become a regular procedure.
Motor overheating
The pump impeller may be partially destroyed. The lack of blades leads to a decrease in coolant circulation. As a result, the engine does not receive proper cooling from the small circuit and the temperature rises, even to the point of boiling. Overheating, in turn, has a detrimental effect on the engine.
Among the most common consequences, the most difficult to eliminate should be listed:
- can “drive” the cylinder head;
- the cylinder head gasket burns out;
- piston rings are destroyed;
- the motor risks jamming;
- The crankshaft bearings fail.
For reference! Frequent use of a special sealant to eliminate coolant leaks reduces the service life of the water pump. The foreign mixture tends to stick to the impeller, forming a solid clot and clogging the channels of the cooling jacket.
Which pump to choose
There is no need to save money on purchasing the main coolant unit.
Today the market is saturated with various types of pumps, with any pricing policy. For VAZ 2110 car owners who decide to replace the pump with their own hands for the first time, auto repair shop experts recommend paying attention to branded manufacturers such as: KolbenShmidt, SKF, GRAF, HEPU, Valeo, Quinton Hazell. It is not recommended to install: FEBI, Dolz, RUVILLE, Airtex, Pex. On a VAZ 2110, in addition to replacing the pump, it is advisable to update the timing belt and tension roller. It is better to purchase them as a set from manufacturers: Contitech, Gates, Lemforder, SKF.
For reference! If imported auto parts are not available in the VAZ store, then you can leave a request in the “Spare parts for foreign cars” order desk. This method is practiced by experienced car owners, since the parts purchased are of higher quality. According to reviews from such buyers, the personal budget does not feel much difference.
Replacing the pump
After preparatory steps, such as: searching for a garage box (if you don’t have one for personal use), preparing keys (open-end sockets), purchasing spare parts and coolant, you can get to work.
To explain as briefly and clearly as possible how to change the pump on a VAZ 2110, we will describe the process in the form of step-by-step instructions:
- It is advisable to install the machine above the inspection hole. As an option, an overpass is suitable;
- It is recommended to carry out plumbing work on a de-energized car, so you should unscrew the negative terminal from the battery;
- remove the expansion tank cap, this will prevent the formation of a vacuum in the cooling system;
- A 5-liter container (at least) should be installed under the engine to drain the coolant, since it is recommended to change the pump when the antifreeze or antifreeze on the VAZ 2110 is almost completely drained. Otherwise, when the pump is removed from its seat, the contents of the system will spill out randomly;
- On the back of the block there is a coolant jacket plug, which should be unscrewed with a 13 mm wrench and the liquid should be drained into a container placed under the engine. Screw the plug back;
- Next, you should unscrew the timing drive casing (with a 10 mm wrench), secured with three bolts;
- disconnect the casing and set it aside;
- it is necessary to set the gas distribution mechanism to the top dead center according to the marks. Having moved the gearshift lever into neutral, rotate the camshaft gear by the mounting bolt (19 mm wrench) until the marks on the inner timing drive casing align;
- you have to check the mark on the flywheel: remove the rubber plug in the upper part of the crankcase on the right side of the engine and shine a flashlight into the opening;
- the correct position should be fixed by inserting a metal rod or a powerful screwdriver into the camshaft gear;
- loosen the roller nut (17mm wrench) and use a tension wrench to turn the roller mechanism counterclockwise, reducing the belt tension;
- Next, remove the belt and roller;
- unscrew the bolts of the internal timing drive casing (2 pieces) and the pump bolts (3 pieces). It is more convenient to work with a 10 mm socket wrench (head);
- remove the casing and put it aside;
- use a slotted screwdriver to pry up the edge of the pump and pull it out of its seat;
- The installation site must be cleaned before installing a new pump;
- a new pump gasket can be lubricated on both sides with a thin layer of high-temperature automotive sealant;
- insert the new pump into the seat and tighten the mounting bolts;
- Next, you need to return the dismantled parts to their place, observing the reverse order. After installing a new kit: pump, belt and timing pulley, you can count on a certain service life of the parts declared by the manufacturer.
Important! Do not tighten the timing belt too much. It’s easy to check the correct tension: the installed belt can be turned 90° with your fingers (with the teeth facing out), but no more.
- After final assembly, it is necessary to fill the system with coolant to the specified level. We start the engine and warm it up to operating temperature. All hoses should be hot, and when they are compressed, the hand will feel internal circulation. This is an indicator of the correct operation of the cooling system.
Conclusion
Summarizing the points of the step-by-step instructions, it can be noted that replacing the pump on a VAZ 2110 8 valves with your own hands is not a difficult task. In the first days after repair, it is advisable to pay more attention to the engine temperature and the tightness of the connections. If everything is within normal limits, then the replacement of the pump and timing drive was successful.
vaz-2110.ru
Preparatory work
To replace the VAZ 2114 timing belt with your own hands, you will need a lift, an inspection hole in the garage. When there is neither one nor the other, any flat area will do.
The car is placed at the work site, the handbrake cable is tightened, and the gear shift lever is placed in the neutral position. Wheel chocks must be installed under the rear wheels. Using a wheel wrench, tear off the wheel bolts on the wheel in the front of the car on the right side, lift the vehicle with a car manual lift, place a reliable stop under the body and dismantle the wheel. Now you can begin the operation of replacing the timing belt on a VAZ 2114 8 valve.
About the procedure for doing the replacement yourself
Open the engine compartment hood and disconnect the terminals on the battery. Further work is carried out in this order:
- Using a “10” key, unscrew the screws securing the plastic cover of the front part of the timing mechanism and remove it from the engine.
To loosen the tension of the generator set drive, take the key to “13”, loosen the tension, and dismantle the generator belt.
Now you need to set the control marks in the drive. To do this, the assistant uses improvised means to rotate the crankshaft pulley, and the driver controls the location of the installation marks. One of them is on the camshaft pulley and the cover behind the pulley, the second is on the cylinder block and the crankshaft pulley.
To ensure that the marks are installed correctly, remove the rubber plug on the clutch housing. In the window that appears, a mark on the engine flywheel should be visible, which coincides with the mark on the clutch housing.
- The time has come to remove the engine crankshaft pulley. It is necessary to stop it from turning. To do this, engage first gear and press the brake pedal. After this, use a socket wrench to “17” to unscrew the pulley mounting bolt and remove it from the engine.
- To remove a worn belt, you need to loosen its tension. This is done by unscrewing the tensioner roller fastening bolt, then turning the roller to the left and dismantling the belt.
- When it is planned to replace the tension roller and cooling system pumps, they are removed from the engine. Before this, the engine cooling system fluid is drained.
Belt replacement
Required tools:
- socket wrench 10 or similar size ratchet head;
- open-end wrench 13;
- open-end wrench 17;
- slotted screwdriver (large);
- special tension wrench for the tensioner pulley;
- jack, wheel wrench;
- a little machine oil.
First you need to set the timing gear and engine flywheel in accordance with the existing marks.
1. Place the car on a level surface and engage any gear.
2.Use a jack to lift the front right wheel so that it can rotate.
3.Open the hood, use a 10mm wrench to unscrew the 3 bolts securing the timing belt protective cover.
4.Using a 13 key, loosen the generator belt tensioner and remove it.
5. On the camshaft gear we find a mark in the form of a rectangular protrusion on the edge. It should align with the protrusion on the belt cover mount.
6.If it doesn’t match, put the car in gear and turn the right wheel until the marks match.
7.After this, we find a rubber plug on top of the clutch housing. It is located to the right of the cylinder block. Pry it off with a screwdriver and take it out. Below it is the flywheel crown, which also has a mark that should coincide with the triangular protrusion on the left.
8.If there is no such coincidence, use a 17 wrench to loosen the fastening of the tension roller, and using a tension wrench, turn the roller counterclockwise, loosening the belt.
9. Having removed the upper part of the timing belt from the timing gear, use a 17 mm spanner to turn the crankshaft until the flywheel marks coincide.
10.Fix the flywheel in this position by inserting a screwdriver between its teeth. It’s great if you have an assistant who will additionally hold it.
11. Dismantle the front right wheel, remove the arch protection.
12.Using a 17 wrench, unscrew the nut securing the generator pulley, making sure that the flywheel does not rotate.
13.Remove the generator pulley and take it out.
14.Now the timing belt can be removed from the crankshaft pulley.
15.Using a 17 wrench, completely unscrew the tension roller fastening and remove it; you can simply loosen it and the belt will come out.
16. Without disturbing the position of the marks, put a new belt on the crankshaft pulley, install the generator drive pulley in place, having first put the belt on it.
17. We put the belt on the timing gear.
18.Install a new tensioner roller, lubricating it on both sides with machine oil (if removed).
19. We tighten the belt by rotating the tension roller with a special wrench (if you don’t have one on hand, you can insert two pins or screws into the grooves and secure them with a screwdriver) counterclockwise. The tension at which one plane of the belt can be rotated 90 degrees horizontally using your fingers is considered normal. In this position, tighten the tension roller mounting bolt.
20. We carry out further installation in the reverse order; if your marks are lost, then you definitely need to set them again.
Installing a new belt
Installation of the timing belt VAZ 2113, 2114, 2115 8 valves is carried out in the reverse order of removing the worn part. Before starting work, carefully check the position of the timing marks in the timing mechanism drive again. Failure to perform this check may damage valve train components in the cylinder head. There are known cases where, in addition to valves, pistons and, in some cases, connecting rods were damaged. Install the adjusting washer first, then the tensioner roller, screw the nut onto the bolt securing it, but do not tighten it. When the engine cooling system pump is changed, a new spare part is installed. Next, the order of work will be as follows:
Installation begins with the crankshaft pulley of the power unit.
Next, they cover the pump pulley, circle the roller in the tensioner, and cover the belt on the camshaft pulley.
At this point, the repair work done by yourself can be considered complete. The belt in the drive can be replaced by contacting a specialized center, but the price for such work will start from 1000 rubles. You can save on repairs by replacing the belt yourself, following the instructions provided and the advice of specialists.
Also watch the video of replacing the timing belt on a VAZ 2113, 2114, 2115:
Instructions for diagnosing and replacing the pump on a VAZ 2110 without contacting a service station
DIY diagnostics and replacement of the pump on a BAZ 2110
The water pump allows coolant to circulate freely throughout the cooling system, which allows it to cool heating parts. A faulty pump can result in engine overheating and breakdown. That is why it is important to monitor its condition and performance. Indicators of a non-working water pump:
- leaks near the oil seal;
- humming noise when working;
- poor coolant circulation;
- increase in engine temperature;
- decrease in coolant level.
How to make sure the pump is faulty
The following tests must be performed:
- Warm up the engine to operating temperature, compress the upper radiator hose. If fluid circulates normally in the system, the water pump is working properly.
- The pump should not buzz. If such a sound is heard, it can be assumed that the bearing is failing. In this case, it is better not to delay replacing the pump .
Replacing a VAZ 2110 pump with your own hands without removing the generator drive
- Dismantle the adsorber to make the work more convenient. There is no need to disconnect wires and hoses.
DIY diagnostics and replacement of the pump on a BAZ 2110
- Remove the plastic cover from the engine, then remove the timing belt cover.
- Raise the right side of the car with a jack so that the right front wheel can be suspended. This will allow you to set everything by tags. You can make one mark with paint. This will make further work easier.
DIY diagnostics and replacement of the pump on a BAZ 2110
Also check out
- Remove the wheel to gain access to the bottom bolt that secures the plastic casing.
- In the case we are considering, the timing belt is in good condition and does not need to be replaced. Therefore, the pump was replaced without removing the generator drive belt.
- It was necessary to dismantle the plastic casing and also remove the pulleys with the camshaft rollers. This can be done if the tension rollers are loosened and the timing belt is removed from them.
DIY diagnostics and replacement of the pump on a BAZ 2110
- Lock the camshaft gears using something flat. Unscrew them carefully so as not to damage their soft teeth.
- After dismantling the pulleys, you can remove the plastic casing. One fastening bolt will have to be unscrewed from below through the space near the wheel. After this, access to the pump is free.
DIY diagnostics and replacement of the pump on a BAZ 2110
- The VAZ 2110 water pump is attached using three hexagon mounting bolts. Unscrew them. After this, lightly knock on the pump body and try to pull it out.
DIY diagnostics and replacement of the pump on a BAZ 2110
- Place a container to drain the coolant.
- The new VAZ 2110 pump must be well lubricated. In addition, it is better to apply a thin layer of sealant to the paper gasket and let it dry.
After this, all the parts are assembled in reverse order:
- Reinstall the water pump.
- Place the plastic casing.
- Secure the camshaft pulleys in place.
- Using the previously made marks on the camshaft, put on the timing belt.
- Use the wheel to turn the engine, adjust the correct tension and position of the belt. Upon completion of installation, add coolant.
- Check the work.
Replacing a VAZ 2110 pump on video:
We recommend reading
prostovaz.ru
Replacing the timing belt on VAZ 2113, VAZ 2114, VAZ 2115
The timing belt synchronizes engine operation. Without it, the car simply won’t start, and if it was working and the belt breaks or falls off, the engine will instantly stall. And if the engine bends the valves, it will not only stall, but also bend the valves. True, this does not apply to 8-valve cars of the Samara-2 family. The belt must be changed on time, its condition monitored and maintenance carried out. Belt rupture, flying off and other troubles depend on the quality of the belt and the pump. We recommend that you always carry a new belt with you in the trunk, because replacement is a simple and short process. This prospect is much more pleasant than a breakdown far from home, garage or service station. Here only a tug or tow truck will save you.
Note! You will need the following tools: spanners, a 10mm socket wrench, a mounting spade (sold at a reasonable price at a car dealer, but a thick, strong screwdriver will do instead), a special wrench for turning the tension roller (two thin drills and a screwdriver will do instead) , knob with cap heads.
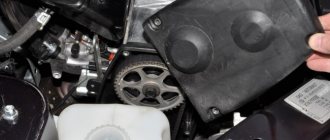
Timing belt location
The belt is hidden under a cover from dirt and other debris. This cover is made of plastic and can be easily removed by unscrewing the fastening bolts. Having removed the cover, the entire timing mechanism will appear before your eyes (except for the pistons, their connecting rods, valves, etc., they are located in the cylinder block). Below we have posted a photo where the belt is clearly visible (indicated by a red arrow), and we indicated the camshaft pulley with a blue arrow, the pump with a green arrow, and the tension roller (which regulates the tension of the belt) with a yellow arrow. Remember the details listed.
When is it necessary to change the belt?
It is advisable to look at it every 15-20 thousand kilometers. Visual signs of wear are obvious: you will find traces of oil, signs of wear on the toothed surface of the belt (puts on the pulleys and holds the belt), various kinds of cracks, folds, peeling of rubber and other defects. The manufacturer recommends replacing it every 60,000 thousand km, but we do not recommend such long intervals.
Checking the condition of the jet rods on the VAZ 2107
100 thousand kilometers - new parts from the car are enough for this period, according to existing instructions. But the actual service life rarely exceeds 80 thousand kilometers, given real conditions.
The same instructions say that it is recommended to organize checks every 20 thousand kilometers. And here the experts recommend reducing the period by 5-10 thousand km to make it easier to avoid unpleasant surprises. You can’t do without an inspection hole and a mounting blade; this is the only way the jet thrust can be opened for viewing and other actions.
Test sequence
The steps are not that complicated:
- Installation of transport on a viewing hole or on an overpass;
- Mounting blades are inserted behind the traction eyes;
- The spatula rests against the jet thrust bracket. An attempt is made to shift the part, together with the silent block. If the action is successful, it means the part is worn out and needs to be replaced;
- Repeating a similar procedure with each silent block. If it moves sideways by a few mm, the need for replacement is obvious.
The rods themselves, along with the eyes, are also checked for wear. If any defects are detected, in this case the bushings and other parts are replaced.
Video checking jet rods on a VAZ 2107
Replacing the timing belt on a VAZ 2113-VAZ 2115
Removal
1) First, remove the plastic cover that covers the belt from dirt, various types of water and lubricants. The cover is removed as follows: take a wrench or socket wrench and unscrew the three bolts securing the cover (in the bottom photo the bolts are already unscrewed). Two bolts are present on the side and hold the cover in place, and one is located in the central part. By unscrewing them, you can remove the cover from the car engine.
2) Now turn off the power to the car by disconnecting the negative terminal from the battery. Then remove the alternator belt - read the article for details: “Replacing the alternator belt on a VAZ.” Set the piston of the fourth and first cylinders to TDC (top dead center). Simply put, place both pistons completely straight and without angles up. The publication will be useful to you: “Installing the piston of the fourth cylinder at TDC on a car.”
3) Then take a “13” wrench in your hands and use it to slightly loosen the nut securing the tension roller. Loosen until the roller begins to rotate. Then turn the roller by hand so that the belt loosens. Grasp the belt and carefully remove it from the rollers and pulleys. You need to start from the top, with the camshaft pulley. It will not be possible to remove all the pulleys, so only release the belt at the top.
4) Next, remove the front right wheel (removal instructions are available here: “Correct replacement of wheels on modern cars”). Now take a socket wrench or any other wrench that can unscrew the bolt securing the generator drive pulley (the pulley is indicated by the red arrow).
Note! The bolt is unscrewed with the help of a second person (assistant) and a mounting spatula (or a thick screwdriver with a straight blade). From the left side (in the direction of travel of the car) of the clutch housing, remove the plug marked in red. Then a spatula or screwdriver is inserted between the teeth of the flywheel (the teeth are indicated in blue) - the flywheel is kept from turning. You will have to use force, the main thing is not to overdo it. After unscrewing the bolt, remove the pulley and set it aside!
5) Now you will have excellent access to the crankshaft pulley and belt. At the last moment, the belt is removed from the lower pulley. It has now been completely removed.
Note! Although this does not apply to 8-valve cars of the Samara family, for general information we will explain: do not have the habit of turning the camshaft and crankshaft pulleys when the belt is not installed. Otherwise, you will mess up the valve timing (they are easy to adjust; you just need to align the flywheel and pulley to the marks). Turning the pulley, for example, on a 16-valve Priora, will cause the valve to meet the piston group and they may be slightly bent.
Installation
1. Carry out in the reverse order of removal, observing some nuances:
- firstly, we recommend that you clean the pulleys and tension roller from dirt and various types of grease that get on them over time;
- After cleaning, degrease the pulleys and tension roller using white spirit;
- start installation.
Install the belt first on the pulley from the bottom, moving to the top. As you put it on, it will sag, so pull it with your hands and make sure that it stands up straight and the pulleys are not distorted. After installation, make sure the marks match, then proceed to install the tension roller. Install the belt onto the tension roller (see photo 1), then climb down and reinstall the generator drive pulley. Be sure to ensure that the hole on the pulley, indicated by letter A, lines up with the mounting sleeve, indicated by letter B in the second photo. If you have a torque wrench (a very convenient thing that allows you to tighten bolts and nuts to a certain torque without overtightening them), tighten the bolt securing the generator drive pulley. The tightening torque is 99–110 N m (9.9–11.0 kgf m).
Next, proceed to adjusting the timing belt on the car: insert two drills or self-tapping screws into the two holes present on the tension roller (the holes are indicated by arrows in photo 1). In a good way, the adjustment is made with a special key. however, not everyone has one, so we are looking at an alternative method of tensioning. Insert two screws and insert a screwdriver between them (photo 3), then turn the roller counterclockwise. With the belt fully tensioned, tighten the nut securing the roller fully and fully (photo 3). Make sure that the steps have been carried out correctly: by hand, turn the belt exactly in the middle part between the pulleys with a force of 1.5-2 kg. If it turns approximately 90° (photo 4), then the belt is adjusted correctly. Otherwise, repeat the adjustment.
Note! An overtightened belt will lead to failure of the roller, belt and pump. A weak, under-tightened belt, while driving at high speeds, will jump off the pulley teeth and the adjustment of the gas distribution phases will be disrupted - the engine will not work properly.
2. Having installed the parts in place, be sure to check the alignment of the marks and check the belt tension.
Additional video
Below is a video on the topic of today's article, we recommend you watch it.
Note! The video below describes in some detail the procedure for replacing the belt, we also recommend watching:
Variety of models
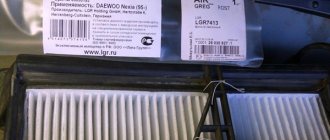
The functionality of this device will largely depend on the model of the VAZ 2114 cabin filter. The simplest filter elements can only protect against dirt and dust. There are more expensive products that have a layer of carbon purification that removes harmful gases.
For this model there are both Russian-made models and foreign analogues. The cost in car dealerships reaches three hundred rubles, which is very reasonable compared to similar cleaners on foreign cars. As a car owner, I recommend using VF-014.
Timing belt VAZ 2114
The timing drive of the popular five-door hatchback in the Russian Federation from the Volga Automobile Plant - VAZ-2114, is carried out using a flexible belt, both on 8 and 16 valve units, only in the latter the timing belt is slightly longer and the mechanism uses two roller (tension and bypass).
Replacing the timing belt drive for the VAZ 2114 is provided by the manufacturer every 60-70 thousand kilometers. However, taking into account numerous reviews from experienced motorists, as well as the quality of spare parts, it is recommended to replace the timing belt after half the mileage.
A visual inspection of the belt drive for mechanical damage should be carried out much more often than scheduled maintenance, at least once a month. If the slightest sign is detected that the belt is already worn out, is being eaten, or has any damage, it must be replaced immediately.
If you don’t do this, then at the most unexpected moment you can get a lot of troubles and, at best, this will be a breakdown of the tension roller, failure of the water pump, or blocking of the generator shaft.
In the case of VAZ 2114 cars with 8-valve internal combustion engines with volumes of 1.5 and 1.6 liters, there is good news - a broken belt drive on these units does not threaten bending of the valves and damage to the cylinder head, which cannot be said about 16-valve units, where major repairs after a break The timing belt should be worn in 90% of cases.
Preparatory work
You can change the timing belt on model 2114 yourself. Before starting repair work, you need to do the following:
- so that during repair work the car does not roll back (when lifting the front end with a jack), it is necessary to place stops under the rear wheels;
- then you can begin to loosen the bolts on the right front wheel hub;
- Remove the wheel completely.
That's all, now the car is ready to replace the worn timing belt. This should be done on a VAZ-2114 (8 valves, injector) in the same way as on 16-valve power units. The only difference is that on recent installations the belt is longer, so it is installed one more notch.
Removing the belt
To dismantle a worn-out timing belt, reliable fixation of the crankshaft is required to prevent it from accidentally turning. To do this, you need to unscrew the crankshaft pulley bolt.
- This can be done without removing the wheels, having previously set the handbrake to the working position.
- Next, already under the car, you can begin to tear off the bolt with a head on “19”.
- After removing the wheel, with the participation of an assistant who will squeeze the brake, you can begin to lock the crankshaft.
- After unscrewing the bolt on the crankshaft, you need to remove the generator drive pulley.
- Then, using the key set to “17”, you can begin to unscrew the nut from the roller and completely remove the timing belt itself.
In general, experienced car enthusiasts change the timing belt on brand 2114 literally in a matter of minutes, but beginners in this matter should not rush, and it is better to check everything at least twice.
How to change spark plugs?
Now let's get down to the most important thing - replacing the spark plugs. This procedure is quite simple and will not take much time. First of all, remove the armor wires from the spark plugs. Just pull them by the cap at the end, and under no circumstances pull them by the wire itself. Place the removed wire near its cylinder so as not to get confused, although on newer cars the armor wires are made of different lengths. Next, remove the dirt that has accumulated near the spark plug so that it does not get into the cylinder.
It is necessary to unscrew the spark plugs on a cold, not running engine, so as not to spoil the threads. Do not overtighten new spark plugs. This may damage the cylinder head. After the spark plug becomes difficult to screw in, tighten it another 1/4 turn, this will be enough. Then we put on the appropriate armor wire.
Installing a new timing belt
To install a new timing belt, you must follow the steps below.
- First, we install the camshaft pulleys according to the marks, after which we securely fix them from accidental rotation.
- To align the crankshaft to the mark, you need to open the inspection window in the clutch housing. Only if all marks match is the correct installation of the new belt drive guaranteed.
- After aligning the timing components according to the marks, we install new rollers (tension and bypass).
- The belt itself is threaded through the pump and is first located on the crankshaft pulley.
- Installing the belt on the camshaft pulleys occurs last.
- The position of the tensioner, pre-lubricated on both sides with machine oil, is adjusted using a special key and counterclockwise*.
- Further installation is carried out in reverse disassembly sequence. If the marks are accidentally lost, they must be set again.
- At the end of the work, you should start the engine and listen for any extraneous noise. If there is any rustling or humming coming from the timing belt, this most likely means that the belt is too tight and needs to be loosened a little.
*For proper tension of the timing belt drive, it is necessary that the part of the belt between the shaft pulleys rotates 90° without applying any serious force. If this is done with little to no force, then greater belt tension is required. If the belt cannot be turned at all, then the tension should be loosened.
Prices for timing belts, their articles, originals and analogues, replacement cost
Today, a timing belt for any VAZ-2114 engine can be purchased without any problems at any auto store. Price tags for these parts vary depending on the manufacturer and on average range from 500 to 1000 rubles. However, when replacing a belt drive, it is better to immediately change the rollers, the price tags for which start at 400 rubles apiece.
The approximate cost of replacing a timing belt complete with rollers is from 1000 rubles at service stations. However, this repair can be done with your own hands. Of course, first you need to buy a new timing belt and pulley, and it is better to do this in a kit, the price of which also varies in the range of 1000 rubles.
Considering possible malfunctions caused by a broken timing belt, as well as the complexity of subsequent repairs, you should purchase products from even well-known companies with extreme caution so as not to fall for a fake.
The original spare parts used for the 2114 are unified with many other VAZ cars, mainly with the “ninth” and partly with the “tenth” models. A branded timing belt for the VAZ-2114 complete with a roller will cost an average of 1,300 rubles.
- The cost of analogues is also not high. For example, a timing belt kit with a pulley from Gates (article - K015521XS) for a VAZ 2114 (1.5-1.6 l., 8 valves) costs 1,200 rubles.
- The timing belt kit from Contitech - CT527K1, will cost more, from 2000 rubles, however, like products from the brands BOSCH (art. 1987949095), DAYCO (art. 94738) and GOODYEAR (art. G1474).