What is the adjustment of a bicycle handlebar?
There are several ways to adjust a bicycle handlebar:
- by the height of the steering wheel - this value determines the slope of the cyclist’s torso and his arms while riding;
- by the angle of the steering wheel - the angle at which the bicycle steering wheel is set/adjusted determines which muscle groups will work during the ride, and how quickly fatigue will come to the cyclist.
How to correctly adjust the bicycle handlebars in the indicated directions? Everything is strictly individual - a lot depends on the style of riding a two-wheeled vehicle:
- if a cyclist is simply enjoying a leisurely walk, covering distances without time pressure, then the steering wheel of the vehicle rises, its angle of inclination becomes small;
- if a cyclist is involved in sports, he has to overcome various distances for a while and demonstrate his speed capabilities, then the steering wheel will lower and its angle of inclination will increase.
How to determine the location of the steering wheel? The “starting” point is the bicycle saddle - if the handlebar is located above it in level, it means that the latter is adjusted upward, and if the handlebar is located below the level of the saddle, then the adjustment was low.
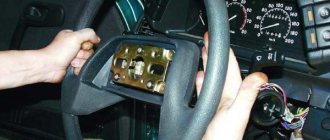
Correct driver position behind the wheel of a car
Correct driving position is one of the most important conditions, since the handling of the car directly depends on it. The ability to quickly carry out the required maneuver, without first changing the position of the body and arms, should be taken into account.
We recommend reading: Check the car with bailiffs
With access to the steering wheel configured, this saves precious milliseconds. Automotive experts and driving school instructors advise dividing the steering wheel into a conventional dial and give advice based on the following values: It is very important to learn not to let go of the steering wheel, especially when making sudden maneuvers (unless we are talking about a car with an autonomous control interface).
How to change the height of the steering wheel
As a rule, adjusting the height of a bicycle's handlebars is carried out using special settings on the steering column - they are present in almost all models of two-wheeled vehicles. But first you need to understand what type of steering column is installed on your particular bike:
Threaded column
This type of steering column mount can be found in professional bicycle models, as it greatly facilitates the entire structure of the vehicle. Surprisingly, all old (Soviet) model bicycles were equipped with a threaded steering column.
The design is very simple - the steering tube is located inside the column, tightened with nuts, thereby connecting to the steering mechanism. It is this simplicity that allows you to change the height of your bike’s handlebars in literally a matter of minutes:
- Loosen the fastening nut (it is located at the very bottom of the pipe, directly above the frame).
- If necessary, you need to loosen the lock nut on the steering tube.
- We raise the pipe to the required height (in some cases it may be necessary to install an additional pipe - a kind of steering wheel extension).
- First tighten the fastening nut, then the locking nut.
Threadless column
In general, this type of headset is standard for mountain bikes. This mechanism is somewhat heavier and more complex than the previous type of bicycle steering column, so the process of increasing the height of the handlebars will be somewhat more difficult. The handlebars are attached to the tube on mountain bikes using an additional element - a stem, which is used when changing the height of the handlebars.
You can change the height of the steering wheel with a threadless column as follows:
- Unscrew the armature bolt with a hexagon (a kind of cap at the top of the pipe).
- Remove the tension bolts that secure the stem to the head tube.
- Remove the steering wheel along with the stem - this must be done slowly and extremely carefully.
- Add staging rings to the pipe, or remove unnecessary ones - it all depends on whether changes in the height of the steering wheel are needed to decrease or increase.
- Place the stem in its original place.
- Tighten the tension bolt first, then the armature bolt.
Please note: you need to carefully tighten the bolts when changing the height of the handlebars on a threadless column - on such bicycles, if they are tightened too much, the parts become unusable. After completing the procedure for adjusting the height of the handlebars on a mountain bike, you must definitely adjust the level of the handlebars in relation to the front wheel of the vehicle - it is very easy to move the structure. If it is necessary to slightly correct the position of the steering wheel, then the armature bolt and the mounting bolt are slightly unscrewed, the steering wheel is straightened to the desired position, and then the bolts are tightened again.
A set of necessary tools
To change the handlebar position on your bike you will need the following tools:
- Hexagons are of different sizes, so the best option would be to have a whole set;
- Tension limiter. It will allow you to keep the threads in their original state when working with lightweight components such as carbon;
- Torxes T20 and T25 (special type of keys). They may be needed for certain stem models.
The stem is quite easily dismantled if you first unscrew the bolt that secures the cover, as well as a couple of bolts that hold the structure itself in the assembled state. The mounting sequence is as follows: first comes the offset, then special spacer rings are placed.
If it is only necessary to lower the steering part, the rings are dismantled and the stem is returned to its original place, and the rings are placed on top of it, after which everything is secured with a lid.
Attention! It is not advisable to tighten the bolt that is installed at the end, fixing the cover. Its participation in the design is reduced to removing possible slack, as well as play at the steering column.
After fixing the steering part with a bolt, you need to align the steering wheel itself and finally secure the system with bolts. Tighten the mounting bolts carefully, without applying excessive force, but at the same time conscientiously.
Sometimes there is a need for the reverse process - the steering wheel must be lowered. To do this you will need to turn the stem over so it is facing down. Remember that lowering the steering wheel is much easier than raising it. This procedure can be simplified by purchasing a special stem that can be adjusted.
The stems are available in different versions, varying in length. The rule is simple: if you want to raise the handlebars to a significant height, opt for a longer stem model.
Additional steering wheel adjustments
As a rule, additional steering wheel settings are present only on bicycles with a threadless column - we are talking about mountain models.
The first thing you can adjust is the steering angle. This is done using a hexagon - it simply loosens the bolts on the stem, which makes it possible to scroll the steering tube to the required position. This adjustment is necessary for a mountain bike with high, complex handlebars - the position of the cyclist's hands will need to be changed quite often.
Separately, it is worth mentioning the stem - this is a key element of handlebars with a threadless column. There are several types of takeout:
- vertical stem – it is used to increase the height of a mountain bike’s handlebars;
- horizontal stem – allows you to compensate for the length of the frame when adjusting the steering wheel;
- corner stems – they help to place various body kits and gadgets on the vehicle.
( 60 votes, average: 4.70 out of 5)
Cleaning a bicycle chain
Adjusting the brakes on a bicycle
Related Posts
Inclination angle setting method
For comfortable cycling, sometimes you only need to slightly adjust the tilt of the steering wheel.
This is easiest to do if you have an adjustable stem installed. When acting on the adjustable stem, which is connected to the frame with one bolt, it should be loosened slightly by changing the angle of inclination and tightened again. However, if such an element is installed on a bicycle, it is only on an amateur recreational bike.
Another way to adjust the angle of the handlebar is to loosen the four (two) screws located in the middle of the handlebar. By loosening these bolts, you can turn the steering wheel around its axis. After the adjustment, you should check whether it has become more comfortable to ride the bike. However, you must first tighten the bolts back. Otherwise, the steering bar will not hold well and at any moment under the weight of the cyclist may tilt forward, which is fraught with injury and other unpleasant consequences.
If the angle adjustment is successful and the bike is ready for a comfortable ride, you need to tighten the bolts as tightly as possible. They must securely fix the handlebars so that they do not wobble or dangle while cycling.
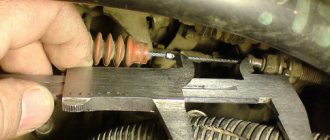
Features of dismantling and replacing the steering stem
The steering wheel should be replaced if various types of defects appear on the part. If the stem is welded to the rod, then they change together. When fastening with bolts, it is enough to unscrew them, which requires a small set of keys.
The dismantling instructions are as follows:
- The pin is removed from the fork tube. Fastening is carried out using a fastening element in the central part.
- You can adjust the position of the holder using a special bolt, which is loosened.
It is often necessary to adjust several times to find the most suitable position. Many cyclists change the position of the handlebars based on their own preferences.
The stem of a bicycle is a fairly important parameter that must be taken into account. Incorrect adjustment makes the bike less comfortable to ride. When choosing a suitable model, you should pay attention to the type of material used in the manufacture of the structure and some other points.
Stem material and manufacturing technology
The main part of the structure is represented by a bracket.
It can be manufactured using the following materials:
- Carbon steel. It is cheap and durable, but is susceptible to corrosion.
- Modern bicycles are made using aluminum. The material does not respond to exposure to high humidity.
Various technologies can be used in the manufacture of the bracket.
The most widespread are the following:
- Forging. This technology allows us to obtain lightweight and durable products that have a long service life. However, the production technology itself determines the high cost of the product.
- Welding. Such a product has more weight compared to forged ones. Welds can wear out quickly. The weld is easy to obtain, which significantly reduces the cost of the product and determines its distribution.
- Milled ones are considered a universal option , since they are more reliable than welded ones, but heavier than forged ones. Produced by milling cast blanks from various alloys.
- Mixed. In such a case, the fork clamp is located in the body of the bracket, steering element by welding. This part is characterized by a relatively low price, as well as good quality and reliability.
This point is rarely taken into account, but is considered one of the most important.
Bicycle Threaded Steering Column
Elements of the presented type are considered classic parts that are found in budget bicycle models. Such systems are quite unpretentious in maintenance. The upper bowl of the threaded system has standardized chamfers. The steering tube is secured here with a control nut.
The advantages of a threaded column include low weight and low cost. Among the disadvantages, it is worth highlighting the relative unreliability, as well as the complexity of adjustment.
Saddle position
It is worth paying attention to adjusting the saddle. If the nose of the saddle is raised too high, a person will fall backward, and if it is lowered, he will slide. The optimal position must be selected based on the person’s physique.
The best option is the horizontal position of the saddle. The horizontal tilt of the saddle is adjusted using the nuts that secure it to the frame. By loosening the fixation, the most comfortable position is selected. Then, in this form, the saddle is secured using the previously loosened fasteners.
With the slightest skills, solving the problem of customizing a bicycle to your own parameters is not difficult.
How to adjust a touring bike and cruiser.
Selecting a bike by frame height.
- This generally doesn't matter, as touring bikes typically feature steeply raked top tubes with five to 5 inches of clearance.
- Some bicycles in this category are specially designed so that the cyclist can place his feet on the ground while remaining in the saddle.
Adjustable saddle and handlebar heights.
- Position the saddle so that you can enjoy a comfortable, nearly upright position. In this case, your arms should be slightly bent at the elbows.
- Likewise, as with other types of bicycles, the saddle should be positioned at such a height that your legs are never fully straightened while pedaling. While the pedals are at the bottom of the stroke, there should be a slight bend in the knee joint.
- Most touring bikes and cruisers come with adjustable stems that allow you to raise or lower the handlebars. See the recommendations for adjusting the stem that were given above in the instructions for adjusting road and mountain bikes.