Why replace the Mazda 3 cabin filter?
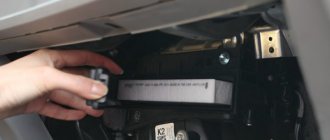
Cabin filter Mazda 3 , as on any other car, is designed to filter the air entering the cabin. The very first cars were not equipped with a cabin filter. However, progress has stepped forward and today it is no longer possible to imagine a modern car without a cabin filter. There are, of course, several reasons. Firstly, this is basic comfort. The cabin filter cleans the air entering the cabin from dust and other dirt. Secondly, the cabin filter cleans the air of unpleasant odors. In addition, the efficiency of the heating, air conditioning or climate control system depends on the cabin filter.
How can you determine when it’s time to change the Mazda 3 cabin filter?
In fact, the interval for replacing the cabin filter on a Mazda 3 is approximately 30,000 km or 2 years, whichever comes first. However, these are very arbitrary figures, since filter contamination depends on many factors, for example, the area in which the car is primarily used. For example, if you most often drive on field or dirt roads, then the cabin filter will fail much faster than when using the car on asphalt roads. Therefore, I recommend changing the cabin filter a little earlier than the scheduled time, i.e. every 20,000 km or once a year. It is best to replace the Mazda 3 cabin filter before the summer season, when the roads have dried out and the first dust begins to appear.
The main signs of a “clogged” cabin filter are the following:
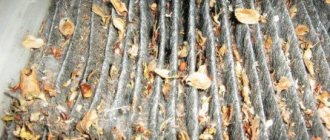
1. In damp weather, the windows in the cabin fog up heavily 2. You can smell dampness and other unpleasant odors in the cabin 3. Climate control, stove or air conditioning have begun to work much worse These are the three most basic signs, when they occur, you should first pay attention to the cabin filter.
How to change the cabin filter on a Mazda 3
Note that replacing the cabin filter on a Mazda 3 years old is much easier. The element is in the same place, but replacing it does not require removing the glove compartment or fuse box. So let's get started! First of all, it must be opened. After that, remove all its contents.
You will definitely be surprised how much stuff can fit there. The cladding is attached on the right side. It must be disconnected starting from the central part.
The clips will be released and the panel will begin to come out. After this, slide the L-clamp to the far right position. Set the panel aside carefully as it is very easy to scratch.
Some cars use screws instead of bolts that can be removed with a screwdriver, but mine has bolts. I used a 10mm socket.
Oddly enough, only two bolts hold the glove box in place. After the glove compartment is disconnected, it must also be put aside.
You should get the same result as in the picture above. Another surprise. Surprisingly, only one rivet holds the panel in place. Looks like there should be more fasteners... At this stage, I thought about what the developers were thinking when they recommend removing the fuse box every 30 thousand. After all, it is with this frequency that the cabin filter on a Mazda 3 car should be replaced. In Russian conditions, this can be done much more often.
Removing the fuse box is fairly easy. You just need to understand how to disconnect the connectors. They resemble those used in computer processors. You just need to turn the plastic lever, which will release the connector.
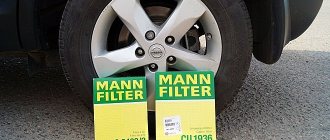
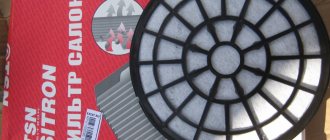
Original Mazda 3 cabin filter and analogues
There are many debates on the Internet about which spare parts to use - original or analogues. I don’t want to impose my opinion on anyone, so I’ll just say one thing: there are good analogues, and there are analogues with not very good quality. Of course, if your budget allows, it is better to use an original spare part. But if you don’t want to overpay for a brand, then you can get by with duplicates. Fortunately, the cabin filter is not such a serious detail on which the starting of the engine or the operation of the braking system depends.
How to choose the right cabin filter for Mazda3?
There are two ways. One for experts, the second for blondes. The first method is to independently select through specialized catalogs, for example through japancats.ru/mazda/. The essence of this method is that you enter your VIN number in the appropriate field and then select the cabin filter in the appropriate section. Next, you receive a catalog number, with which you can easily find the filter in any online spare parts store. The “for blondes” method is much simpler. Just call any spare parts store, ask a consultant to select a filter for your car and dictate to him the VIN number or the basic parameters of the car. And the seller carries out the procedures described in the method for experts for you. And after that it offers filters that are in stock or that can be brought to order.
How to change the cabin filter in a Mazda 3?
Unfortunately, it was not possible to take a corresponding photo, but they are not difficult to find on the Internet. The work is not finished yet, because to replace the Mazda 3 cabin filter, you need to do something else. This element must be removed from its installation location.
To do this you need to unscrew a couple of bolts.
VIDEO: Mazda 3 2012 replacing cabin filter
If your car's engine has been running relatively recently, those silver tubes will be very hot! They lead to the heater core, which is located in a very accessible location. Be careful as you can get serious skin burns! You're almost there! The Mazda 3 cabin filter is within easy reach. We recommend using a magnetic screwdriver to avoid losing small screws. And here is the filter. We cannot write that replacing the cabin filter on a Mazda 3 is easy and simple.
Although no special skills are needed, it is very difficult to do without detailed photo instructions or even a video. Note that the cabin filter consists of two parts.
How to change the cabin filter on later models
They are installed on top of each other. In the photo above you can see the new cabin filters for the Mazda 3.
This is the correct location. A filter with a small part on the side is installed below, at the passenger’s feet. A filter with a panel that is divided in half should be located on top. There are arrows that show how the air should flow through. The final difficulty is that the air filter housing does not contain anything to hold the upper filter. Therefore, you will have to hold it with one hand and install the lower part with the other. I can't do this on the first try.
Many owners of Mazda 3 cars do not even realize that Japanese specialists could come up with such a complex method of replacing the cabin filter.
Good luck to you in completing this task.
What is required to replace the Mazda 3 cabin filter?
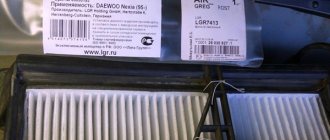
1. New cabin filter. On the Mazda 3, the cabin filter consists of two halves. Original number (for our model): BP4K-61-J6X-9A
2. A set of tools, which should include at least screwdrivers, spanners or screwdrivers 3. A clean cloth (rag) 4. Work gloves 5. A little patience and about 30 minutes of time
How to replace
If there is a need to replace the cabin filter, we recommend that you first decide on the filter element. There are two types on sale: carbon and anti-dust. The first has a higher degree of purification, but also gets dirty much faster. The second will last longer and is better suited for motorists who operate vehicles in a more or less clean environment.
This is interesting: Updated version of traffic rules
Despite the fact that in the 3rd Mazda it is somewhat more difficult to replace the filter than in other models of the Japanese manufacturer, you will need no more than 30 minutes. The car must be turned off, work can be carried out both on the street and in the garage.
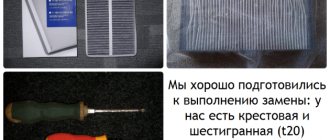
Necessary tool
To replace, you will need a common tool that is found in every home. Prepare in advance:
- set of spanners;
- thin screwdriver;
- a thick flat screwdriver;
- a few rags.
Tools must be clean and free of oil or other substances. The work will be carried out in a salon, so dirty materials will cause an unpleasant odor and may ruin the interior.
Choosing a new cabin filter
As mentioned earlier, you can choose a carbon or anti-dust filter element for replacement. There are quite a lot of consumables for Mazda, both new original ones and similar ones from other manufacturers. Despite the fact that the latter have a lower price, their quality does not always meet factory requirements and they wear out much faster.
Choose original cabin filters for Mazda 3
Most experts recommend choosing original filters marked (BP4K-61-J6X-9A). When purchasing, make sure that the packaging is intact, without any signs of tampering. To replace, you will need two filter elements; it is better to purchase them in one place.
Advice: The quality of consumables determines the cleanliness of the air in the car and the health of the driver and passengers, so you should not save on your purchase.
Step-by-step instructions for replacing the cabin filter
After preparing all the necessary tools and materials, you can start working:
- Disconnect the battery by disconnecting the negative terminal.
Disconnecting the negative terminal of the battery
- We get to the fuse block. To do this, you need to remove the glove compartment lid.
- Remove the decorative element on the front panel. This can be done using a thin flathead screwdriver. You don’t need to make any special efforts here, just move the strip a little to the left. Removing the decorative element to access the bolts
- Having gained access to the bolts that secure the glove compartment lid, unscrew them. We pull out the duffel bag, shaking it to the sides.
- Next, unscrew the screw under the glove compartment that secures the plug.
- Remove the side panel on the passenger side of the front seat. Using a thin screwdriver, remove several plugs that secure the decorative panel to the door.
To remove the side panel, press the clip with a flat screwdriver
- Remove the small panel in front under the glove compartment. It is held in place by two clips, which must be pressed in the same way as the side ones.
- After gaining full access to the fuse panel, remove it by unscrewing two bolts. After removing the block, the bolts remain inside it.
- To get to the cabin filter itself, you will also need to remove the box with plugs, which remained after dismantling the fuse box. It is also secured with two bolts.
Remove the back cover to gain access to the cabin filter - Removing the filter begins by unscrewing the two bolts that secure the device body. After this, carefully pull the electrical control plug out of the housing.
- To replace the filter elements, remove the side cover of the compartment and pull out the old consumables. Open the side cover of the compartment to remove old filter elements
- Before installing new ones, we recommend wiping the compartment with a rag to remove dirt and dust that has accumulated there over several months.
- We install new filter elements.
- We reassemble in reverse order.
- We connect the battery.
This is interesting: AVTOVAZ brought losses to RENAULT
As a visual example, you can watch the entire process of replacing the cabin filter on video. Let’s make a reservation that there are no significant differences in installing the filter on Mazda of 3 different model years, be it 2008 or 2011.
Instructions for replacing the cabin filter Mazda 3 with photographs
This report on replacing the Mazda 3 cabin filter was made using the example of a 2010 model year car, but the instructions are also suitable for Mazda3 2008, 2010, 2011, 2012 model years. etc. However, on the latest Mazda 3 body, replacing the cabin filter is performed slightly differently. But more on that in another article. 1. Since we will be dealing with the fuse box, it is better to disconnect the negative terminal of the battery. To do this, open the hood and use a 10″ wrench to loosen the terminal with the “-” sign and move it further to the side. Now all work can be done without fear of “shorting” something.
2. Using a thin screwdriver, carefully pull out the decorative strip located above the glove compartment.
3. Under the decorative strip there are two screws on which the glove compartment itself is attached. Unscrew both screws using a Phillips screwdriver.
4. Rocking the glove compartment drawer from side to side, we pull it towards us, but not too sharply, since it is necessary not to break the box illumination wire.
5. Behind the glove compartment body there is a courtesy lamp. It is necessary to disconnect the chip from it, which is held in place with one screw. We unscrew it and put the chip aside.
6. Remove the two plastic clips that secure the decorative plastic protection under the glove compartment. Let's put it aside.
7. Remove the plastic element of the panel, which is located to the left of the passenger. It's simple. You just need to pry the clip with a screwdriver and release the hole from it. After which part of the panel can be easily dismantled.
8. Unscrew the two screws securing the fuse box. The screws have convenient plastic wings that can be easily unscrewed by hand. After this, we disconnect the chips from the fuse block, unscrew the two fastening nuts and move the block to the side. There is no need to remove the fuses and relays themselves from the block.
9. Now unscrew a couple of screws securing the cabin filter housing and move it to the side. 10. Dismantle the old cabin filters. First we pull out one, and then the second. The installation site of the Mazda 3 cabin filter should be cleaned of accumulated dirt using a clean rag.
11. We install new cabin filters in place. If possible, you can additionally glue it around the perimeter with thin foam rubber. This will improve the fit of the filter and prevent air flow from passing past the filter element.
12. Now all that remains is to assemble everything in reverse order. That's all! At this point, the procedure for replacing the Mazda 3 cabin filter can be considered complete. After replacing the Mazda 3 cabin filter, you will immediately feel changes for the better, both in terms of air filtration and in terms of the efficiency of the stove or air conditioner.
Auto world
From time to time, Mazda 3 2012 owners face the question of replacing the cabin filter. For a solution, you can turn to professionals. But why not try replacing it yourself? In order to correctly replace the cabin filter in a Mazda 3 2012 car, you will need to have on hand:
- new cartridges;
- Phillips screwdriver;
- flat screwdriver or knife;
- spanner or open-end wrench 12;
- damp rags;
- vacuum cleaner.
The cabin filter is located under the dashboard console on the passenger side. Such work is carried out in not very comfortable conditions.
- We remove the decorative plastic panels of the interior trim: use a flat screwdriver or knife to pry up the cap of the plug and remove it. We remove the panel. The panel under the glove compartment is secured with 2 clips. Press them with your fingers and pull the panel towards you.
- Then we disconnect the board by unscrewing two screws that do not fall out, but remain in the board. Then unscrew the metal bracket with a key. We release the left side completely, and the right side only needs to be loosened. It, together with the board, will hang on the wires and free up access to the hatch behind which the filter is located.
- Move the wires covering the hatch to the right. We remove two connectors. One is on the sensor - it is black, the other is on the white plastic cover. With one hand we hold the latch with a screwdriver, and with the other we smoothly disconnect the connector itself.
- The next step: you need to remove the sensor, it is black. Use a Phillips screwdriver to unscrew 2 screws.
- Remove the hatch; it is secured with 3 screws. 2 below, 1 above. Use a Phillips screwdriver to unscrew them. Under the cover, covered with foam rubber, we will see a filter. We wipe the foam rubber with a rag.
- Remove the filter by pulling it towards you. There is a second part above it. We'll get her too.
Before installing new cartridges, the tunnel with guides must be cleaned of accumulated dirt with a vacuum cleaner, then wiped with a rag. You can start installation.
- We take the upper part, with a shortened beveled edge. We insert it into the tunnel and push it up along the vertical guides located along the radiator.
- The second part, with the perforated patch glued on, is pushed into place along the horizontal guides. The filters should stand up straight, without distortions, without dangling.
- We install a white hatch with a pre-screwed black sensor. We connect the connectors to them. They have different connections and it is impossible to confuse them.
- We place the metal bracket on the studs (fasten it, leaving a small gap).
- We screw the board on both sides.
- We secure the bracket with nuts.
- We insert the side part of the plastic panel into the eyelet and secure it with a plug.
- We put the top panel on the bracket at the far end and secure it with clips.
Assembly is complete.
We recommend reading:
- How to choose a car seat
- Should you paint your car yourself?
- Which intercity taxi to choose?
- Popular services at Volvo stations
- Choosing a car: Mitsubishi Lancer X
- Winter automotive chemistry
- Range Rover Evoque
- KAMA tire products. A profitable solution for business…
Replacing the cabin filter Mazda 3 video
In addition to the basic instructions with photographs, we have also prepared for you a video of replacing the Mazda 3 cabin filter, which you can watch below. And if you have any more questions, we will be happy to answer them in the comments! And don’t forget that the Mazda 3 cabin filter can be purchased in our online store! See you again at ! We recommend reading the articles: Do-it-yourself partial oil change in a Mazda 3 automatic transmission Oil for the Mazda 3 engine. What kind and how much to fill? Recommendations and analogues Do-it-yourself oil change in a Mazda 6 automatic transmission - photos and videos of the process
