EngineOil
Author Artem
Date
Nov 3, 2017
886
Share
The internal combustion engine operates as a single complex mechanism. The effective interaction of the gas distribution and crank mechanisms and with the engine lubrication system is largely ensured by valve stem seals. The driver must not only be familiar with the functions of the parts, but also correctly diagnose wear and the need to replace oil seals.
- What are valve stem seals used for?
- How many are there and where are they located on the engine?
- Causes of wear
- How to determine the need for replacement
- Which caps are suitable: sizes and price
- Selecting a puller
What are valve stem seals used for?
The movement of the piston in the cylinder is facilitated by the splashing of oil under the skirt. But a thin film of lubricant is removed by oil scraper rings that are placed on the piston. On the other hand, in the gas distribution mechanism the contacting surfaces are lubricated.
WATCH THE VIDEO
A kind of oil suspension is created under the cylinder head cover. The valve stem seals are located at the boundary of the cylinder and the cavity above it. Their task is to prevent oil mist and oil from the valve stem from entering the cylinder combustion chamber.
It is easy to guess, given the constant contact with the valves of the gas distribution mechanism, that the caps are under constant load. Each valve makes hundreds of movements per minute, and the oil heats up to high temperatures.
- Google+
- LJ
- Blogger
How many are there and where are they located on the engine?
Based on the purpose and work performed, it is easy to determine where the oil seals are located. If we consider the engine assembly, the cap is placed on the valve stem. Structurally, the part is a plastic part in the form of a sleeve made of a special stable material and a metal base.
WATCH THE VIDEO
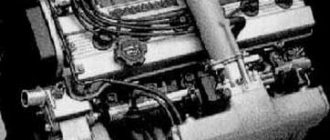
The location of the valve stem seals in the engine during its disassembly is determined as the cylinder head, at the point where the valves enter the working chamber.
If the engine has 8 valves and 16 valves
You won’t have to rack your brains about how many valve stem seals there are in a 16-valve engine. The number of these critical parts is exactly equal to the number of valves. Those. if in an engine with 4 cylinders it is indicated that there are 2 valves per cylinder, then there will be 8 caps. In more modern engines, where there are 4 valves per cylinder, the number of seals will be 16. Provided that the engine is 4-cylinder.
- Google+
- LJ
- Blogger
Toyota Corolla Auris manual
An external sign of wear on the valve stem seals is the short-term appearance of blue smoke from the exhaust pipe after starting the engine and when braking the engine after prolonged driving under load. In this case, constant smoking is usually not observed. Indirect signs are increased oil consumption in the absence of external leaks and oily spark plug electrodes. You can replace the valve stem seals without removing the cylinder head from the engine. You will need: “10”, “12” wrenches, pliers, a flat-blade screwdriver, a “12” wrench, tweezers (or a magnetized screwdriver) for removing crackers from the valve spring retainers...
...device for compressing valve springs
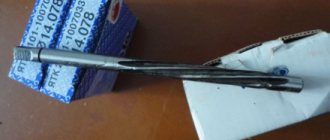
...or an inertial oil seal puller. At the other end of the puller shown there is a mandrel for pressing on the caps. If such a puller is not available, you will need pliers to remove the caps and a mandrel of a suitable diameter to press them onto the valve guides. NOTE. The procedure for replacing valve stem seals is shown using the example of a 1ZR-FE engine. The oil seals of the 1NR-FE and 4ZZ-FE engines are replaced in the same way. 1. Disconnect the wire from the negative terminal of the battery.
2. Remove the cylinder head cover (see Replacing the cylinder head cover gasket). 3. Set the piston of the 1st cylinder to the TDC position of the compression stroke (see Installing the piston of the 1st cylinder to the TDC position of the compression stroke).
4. Remove the camshaft from the side of the hydraulic compensator being replaced (see Replacing the camshaft) and remove the two bolts.
5. Remove the valve levers.
6. Remove the hydraulic compensators.
7. Use a screwdriver to pry...
8. and remove the camshaft bed of the gas distribution mechanism.
9. Remove the valve cups.
10. Install a device for compressing the valve springs by screwing the cylinder head mounting bolt into one of the holes in the cylinder head and hooking the device onto this bolt.
11. Compress the valve spring with the tool, remove the two cotters from the spring plate using tweezers or a magnetized screwdriver and remove the tool.
12. Remove the spring plate...
13….and valve spring.
14. Remove the valve. NOTE.
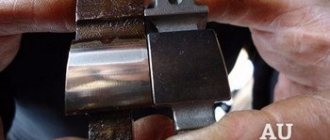
The valve spring support washer does not need to be removed, as it does not interfere with replacing the oil seal. 15. Press the valve stem seal off the valve guide. To do this, install the collet of the inertial oil seal puller onto the cap and sharply hit the collet bushing with the striker. Then, just as sharply hit the handle of the device with the striker, thereby pressing the cap off the sleeve.
16. If there is no inertial cap puller, remove the cap with a special pincer-type puller or pliers, applying force straight up and without turning the cap so as not to damage the valve guide.
17. Before installing new valve stem seals, we recommend removing the springs from them, otherwise the caps can be damaged when they pass through the grooves under the crackers on the valves. If the kit of new caps includes a plastic installation sleeve, the springs do not need to be removed. In this case, slide the bushing onto the valve stem. 18. Lubricate the inner surface of the valve stem seal with engine oil and slide the cap along the valve stem to the guide sleeve. 19. Install the mandrel for pressing the cap. Using light blows of the striker on the mandrel, press the cap until it stops. In the absence of a special device, you can select a cylindrical mandrel of a suitable diameter and press the cap through it with light blows of a hammer on the mandrel. HELPFUL ADVICE. You can use the long head from the tool kit as a mandrel. Select a head with twelve edges and a chamfer inside the hole so that the head contacts the cap in a continuous circle. 20. Remove the guide bushing from the valve stem or put the spring on the cap if it was removed. 21. Install the spring and valve plate in the reverse order of removal. Install the cotters using the tool so that they fit into the grooves of the valve stem. After installing the crackers, hit the end of the valve with a hammer through the metal rod so that the crackers sit in place. WARNING. If the crackers installed skewed remain unfixed, when the engine is started, the “uncracked” valve will fall into the cylinder, which will lead to a serious engine failure. 22. Replace the oil seals of other cylinders in the same way. 23. Install all removed parts in the reverse order of removal.
Causes of wear
Along with constant mechanical stress, the cap experiences the aggressive action of heated oil and impurities in it. Don't forget about the hot exhaust gases during the exhaust stroke.
Over time, natural rubber becomes rougher, the walls of the sleeve crack and wear out. Despite the fact that the technical maintenance regulations have not determined the exact interval for replacing the caps, if the corresponding symptoms appear, you should not delay replacing with new parts.
How to determine the need for replacement
Among the main criteria that directly indicate the need to replace valve stem seals are:
- Oiling of spark plug electrodes. Oil has the ability to leak into the combustion chamber.
- Increased oil consumption. Compared to the traditional “appetite” of 1 liter/10,000 km, the same consumption increases to a liter per thousand.
- The appearance of bluish smoke during the exhaust. Some of the oil has time to burn during the compression stroke.
- Google+
- LJ
- Blogger
Sometimes a dilemma arises as to what causes blue smoke from the exhaust pipe. By mistake, wear of parts of the cylinder-piston group is often cited as such a cause. To finally decide whether an engine overhaul or oil seal replacement is needed, just check the compression. The normal value of this indicator allows you to confidently point to the caps.
By the way, the problem of increased oil consumption can be resolved in the short term by using special products. A special additive for softening oil seals will restore the functionality of the parts for a couple of thousand kilometers. The additive takes effect 500-700 km after addition. Do not delay repairs; most likely, similar symptoms of engine wear will appear again soon.
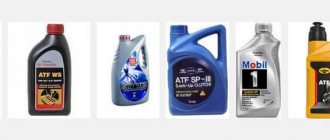
Additives for MSC
To avoid replacing consumables or delay it, you can use special additives. The additive for valve stem seals is designed to soften them, that is, to increase the service life of already worn MSCs. There are sealing additives that fill gaps formed over time through which oil passes.
Automotive chemicals of this kind are very popular due to their low cost compared to replacing MSCs. In addition, additives act on all rubber products, extending their service life.
How to check if the additive is working? If you have already used specialized auto chemical products, monitor your oil consumption. If it falls, the additive is effective. Wagner is considered the best manufacturer of automotive additives
.
Replacing MSCs is much more effective than using additives. In the end, the seals will still have to be changed. To avoid harm to the engine, contact a specialist.
How to choose everything you need for work
When contacting a service center, changing the oil seals is not difficult. However, this approach will mean for the car owner the option of performing work with removing the cylinder head, which implies replacing the gasket and mounting bolts. Yes, and the time investment here is large. This option means a significant overpayment.
The easiest option is to do the work yourself. To do this, you should prepare a tool for replacing oil seals and buy a set of consumables for one engine.
- Google+
- LJ
- Blogger
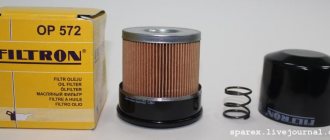
Which caps are suitable: sizes and price
When determining which valve stem seals are best for a particular engine, you should pay attention to the original kit. You will receive a quality product, and the price does not seem significant.
For example, a set of original spare parts for popular models costs from 1.3 thousand rubles. (Toyota Camry 2.4 l) up to 2.2 thousand rubles. (BMW X3 2.5 l). When compared with available analogues, changing valve stem seals costs less, ranging from 800 to 1200 rubles, respectively.
When choosing analogues, do not be lazy to check the parts correspondence to the VIN number, or ask for advice from the store manager.
Selecting a puller
To successfully replace the valve stem seals without removing the head, you will need to buy a special tool. As a last resort, you might be able to borrow such a set from your neighbor in the garage.
To do the job you will need a tool, better known as a desiccant. When choosing, you should pay attention to the equipment indicating its suitability for use with a specific engine. The use of universal devices is also allowed. However, some “station wagons” are still designed for a certain type of engine - with an HV or SOHS layout.
- Google+
- LJ
- Blogger
The tool is designed to clamp valve springs using mechanical pressure. After removing the crackers, access to the valve stem seals opens.
Main signs of valve seal failure
The following signs and deviations from the normal operation of the vehicle will indicate that this spare part has fallen into disrepair and requires replacement:
- Oil consumption in the engine lubrication system increases.
- A layer of soot appears on the car's spark plugs.
- When the engine is running, thicker smoke, gray or bluish in color, will come out of the exhaust pipe, which indicates that lubricant has entered the fuel mixture intended to ignite and ensure the operation of the internal combustion engine.
How to change valve stem seals on a VAZ 2109 Step-by-step instructions
Communities Garage Equipment and Tools Blog Spring Tensioner
- Heads with ratchet - just in case, a complete set;
- Medium size hammer;
- A rod made of tin or other soft metal with a cross-section of 8 mm;
- Pliers. It is advisable to use a collet for them, remove the caps, but you can only get by with pliers;
- Valve desiccant. If you haven’t purchased it yet, be sure to buy it – it will come in handy more than once;
- Tweezers - will go to the desiccant company;
- Mandrel – press in the caps;
- And more rags - everything will be covered in oil, and it needs to be wiped off with something;
- Guide to replacing valve stem seals: dismantling;
- To begin with, remove the terminals from the battery, only after that you can begin repairs;
- The belt is removed from the gas distributor;
- The toothed pulley is removed from the camshaft;
- The wiring is disconnected from the first fastening, the nuts are screwed together, and then the third mounting bolt. If the sealing ring is still there, it can be removed; if it is no longer there, do not forget to put in the purchased one during assembly;
- 4 nuts are unscrewed on the front cover, 6 on the back cover. The washers are removed, both covers are set aside;
- The next step is to remove the fastening key. But often it sits too tightly, then there is no need to distort it, remove it directly from the camshaft;
- The camshaft oil seal is removed, and the crankshaft is rotated so that on the cylinder where the oil scrapers are changed, the piston takes the highest position, the so-called dead position;
- The candle is unscrewed. A stored tin rod is inserted into the corresponding hole between the bottom of the piston and the valve plate;
- The desiccant is installed, the valve spring is pressed well, and the “crackers” are pulled out using tweezers prepared in advance;
- Now the upper valve plate is dismantled, followed by the springs;
- Worn caps are removed from the guide sleeve. It's easier to do this with a collet; you'll have to struggle with pliers. If a collet was used, to remove the old part from it, you need to sharply and briefly hit the striker of the tool, and then use pliers to grab and pull out the cap. If pliers were used, after removing the cap, you should carefully inspect the valve guides to make sure they have not been damaged by accidental clumsy movement.
- New parts are pressed all the way into the lower plate. This is where the mandrel comes in handy;
- When the cap is placed where it should be, the previously removed spring is attached to it;
- Everything that has been dismantled is reassembled in reverse disassembly sequence;
- The rod is pulled out of the spark plug hole;
- The factory instructions also require that you hit the crackers sharply, installing a metal rod - this way they will fit more tightly into the nest;
- Some car mechanics consider this unnecessary, but only personal experience can confirm or refute their opinion;
- The caps on all valves are changed in the same way;
- All areas affected by repairs are generously lubricated with engine oil;
- A support for the camshaft head is placed, and the head itself, where the outer support is located, must be treated with sealant;
- The camshaft is returned to its place, followed by the bearing housings. After putting on the washers, tighten the nuts, and this should be done evenly, gradually, and all the way. The last thing to install is the oil seal removed from the camshaft.
AutoFlit.ru
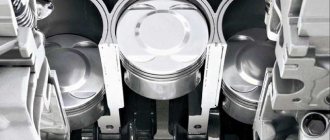
Decoking of piston rings using additives
This occurs due to wear of the oil seals.
In this case, decarbonization will improve compression for a short period of time. But it won't completely solve the problem.
Only replacing the caps themselves will help. Engine oil remains on the cylinder walls and burns. As a result, the piston rings, which are already worn out, also become coked.
Again, the result is a noticeable reduction in compression. The problem can be eliminated by decoking the rings. After which they will definitely need to be replaced. You can do decoking yourself.
You don't need to be an expert to do this. On the modern market there are products specifically designed for this. Decoking allows you to remove burnt deposits from the walls of the combustion chamber and piston rings. It must be carried out when the following signals appear: engine power has dropped; the engine starts with difficulty at negative temperatures
Changing the oil in a car
windigo.ru What coked (stuck) rings look like.
The main parameter for MSCs is their compliance with your Toyota model. The price starts from 60 rubles per piece depending on the engine model. Installing valve stem seals with your own hands is not a difficult procedure, but it requires care and experience.
What to do to decarbonize the rings. Video about a set of drugs that allow you to restore compression and reduce oil consumption due to waste without disassembly. About oil in an old engine, sharp moments and disputes about oil. Global flushing and oil change. Oil on. : https://kovsh.com/service Diesel engine malfunctions: https://kovsh.com/popular/engines_troubles Mechanical.
Good afternoon, today we will look at the main reasons for replacing the oil seals of an internal engine. What are valve stem seals and what are they for?
We recommend reading: Is it possible for Benetton to return an item to another store in the chain?
How often do they need replacing?
Does wear on the cap affect it? The result of decoking the oil scraper rings with acetone #oilrings #pistonrings #žibalas #oil scraper rings #Decoking #Decoking.
Save on orders from Aliexpress.
FROM 7% to 15% DISCOUNT on ALL Aliexpress products here - https://epngo.bz/cashback_index/9raibl Here.
Restoring the elasticity of valve stem seals
Important The main task of such an additive is to increase the service life of gaskets, soften them, and therefore return them to the ability to perform their function of sealing parts. Moreover, the oil additive affects even very hardened and heavily worn seals. Sealing additive But that's not all: additives for restoring valve stem seals help clean the soft properties in the channels and lubrication system, which certainly improves engine performance.
We recommend reading: Payment order included in the debit or credit reconciliation report
Attention As a result of this action, carbon deposits are neutralized, slag formations disappear, and oxidation products are removed.
The effect of the additive is also reflected in deposits, which become much smaller on engine parts.
What is the effect? Which
Engine decarbonization
Very relevant for German engines (VAG and BMW).
To cope with this task, you will have to study the list of popular means that allow you to do decarbonization, their characteristics, properties, reviews of actual use, as well as the instructions for which the procedure is carried out. The first logical question that novice car owners have is why bother decarbonizing the engine?
Secondly, how can you actually clean the CPG and CVS? Coking of the rings reduces their mobility, deposits on the piston reduce the volume of the combustion chamber, and carbon deposits on the valves do not allow them to work properly, which entails oil consumption, scuffing on the cylinder walls, a decrease in engine power, valve burnout, and as a result -. Therefore, the main task of decoking is to remove carbon deposits on top of the piston, loosen the rings and clean the oil drainage channels.
Such a regular procedure will eliminate malfunctions resulting from the appearance of deposits.