Engine oil filter replacement period
When replacing the filter, the engine oil usually also changes, although sometimes the oil is changed without replacing the filter. This usually happens if it is not possible to purchase or replace a filter, and the oil needs to be changed urgently. The filter and oil change interval depends on the following nuances:
- What kind of oil do you have (mineral, synthetic or semi-synthetic);
- Terms of Use;
- Engine load intensity.
The manufacturer recommends changing mineral oil after 7 thousand mileage, semi-synthetic oil after 10 thousand, synthetic oil after 15 thousand. The manufacturer recommends changing the filter along with changing the oil.
Common oil filter breakdowns
Deterioration in engine performance, black exhaust when accelerating, a drop or increase in oil pressure, the corresponding lamp on the control panel lighting up - all of these may be signs of a malfunctioning oil filter.
In addition to clogging of the filter element, the problem may be related to the loss of elasticity of the anti-drainage valve. This manifests itself in the periodic short-term activation of the controller on the dashboard, most often immediately after starting the engine. This happens because when parked with the engine turned off, oil flows out of the filter housing, and when starting it begins to work without proper lubrication.
The oil filter must be replaced during an oil change. During this line, it manages to get very clogged.
The solution to the problem is simple: you need to replace the oil filter
or a filter element if it is a collapsible model. If you suspect that the filter is not working properly, you cannot delay fixing the problem, because any deterioration in the quality of engine lubrication means accelerated wear and tear, which can lead to much more serious malfunctions and major repairs.
How to unscrew the oil filter without a key
the Kamaz air filter
using a special factory key, but not every car owner has this tool. However, it is possible to make a key yourself. For this you will need:
Video: Do-it-yourself oil filter puller (without welding)
- part of an old bicycle chain;
- a small piece of metal pipe (10-15 centimeters long);
- a large nail (100-120 millimeters) or a piece of thick wire;
- electric drill with a metal drill (diameter 5-7 millimeters).
The tool is made in a fairly simple way. A hole is drilled in the pipe at a distance of two to three centimeters from the edge into which a nail, pin or something similar can be inserted. The bicycle chain is folded in half and inserted into the pipe so that the loop created approximately corresponds to the size of the oil filter. Using a nail, the chain is secured in the pipe to the required length.
The resulting tool needs to be placed over the filter and pressed onto the pipe like a lever (to the left). This will allow you to unscrew the filter element without any problems. Such a wrench is considered a universal tool, suitable for any type of filter element. This is due to the ability to regulate the size of the loop.
2. The second method is to remove the oil filter using a leather belt or rope.
The method itself is simple to implement; it imitates the action of a special key, the manufacturing procedure of which is described above. Take a large width belt (leather or faux leatherette) or rope. Make a loop and tighten it on the filter to the left. Then, with a sharp, powerful jerk, rotate the device being removed. If the belt/rope slips, put some sandpaper in the loop and try again.
3. The third method is similar to the previous one, but instead of a rope and a belt, a VAZ car generator belt is used. It is inexpensive, non-slip, and convenient to use. The belt is put on in a loop and tightened. A screwdriver/rod/file is inserted into the loop. After this, a turn to the left is performed. Instead of a belt, it is possible to use part of a clothesline.
4. If there is enough space, you can use a special gas wrench. Once the housing is grasped with a key, it is easy to unscrew it. The long handles of the gas wrench will serve as a lever. This will make unscrewing much easier.
5. Using a screwdriver. This method is used by many motorists who do not have a key or other tools. The essence of the method is to completely pierce the filter with a screwdriver. After this, the screwdriver is used as a lever to unscrew the filter device. It is advisable to use a tool of great length and thickness. Do not forget that grease will flow from the housing after punching.
Punching must be through. Otherwise, when unscrewing, the filter element housing will rupture. Some motorists advise not to punch through, but to hammer a screwdriver into the fastening area. It is unsafe to do this, because if the screwdriver accidentally comes off, it can damage the motor parts. Be careful, the oil fluid may be very hot.
6. This method is suitable if none of the above methods helped you. Place a mark on the filter device. Place a chisel or screwdriver on it, knock down the filter with a hammer (hit it hard). After performing this procedure, the filter device can be easily removed manually. The disadvantage is that you can hit the motor block with a chisel. Therefore, it is best to use a screwdriver. In addition, you can get dirty when using this method.
Seal
Oil change intervals.
Fuel filter Lada Kalina
Several factors influence the choice of the most optimal oil change interval.
- Manufacturer's recommendations specified in the service book.
- Features of vehicle operation.
- The quality of the oils and other consumables used.
The second factor is of greatest importance, i.e. the conditions in which the engine has to operate. In most cases, manufacturers divide these conditions into two types: normal and severe.
Normal conditions are those that the manufacturer takes as a basis when designing an engine. The following parameters are taken into account here:
- type and class of car;
- quality of fuel and oils used;
- dust level and average air temperature;
- -regional features of transport operation.
For normal conditions, the recommended service interval is given. For example, for passenger cars it is considered optimal to change the oil every 12–15 thousand kilometers. Sometimes a recommendation may be given to perform such maintenance once a year, when the seasons change.
Severe operating conditions imply deviation from optimal conditions. Such deviations include the following.
- Air dustiness. The greater the amount of suspended particles in the atmosphere, the greater their number will penetrate the cylinders and be retained there by the engine oil, contaminating it and rendering it unusable.
- Constant use of the car only for short trips over short distances. This moment has a particularly serious impact in winter, when the engine simply does not have time to warm up to operating temperature and is operated in extreme mode.
- Long-term downtime or irregular use. Under such conditions, the engine oil has to wash out and accumulate the products of the reaction of engine components with the acid that appears after starting the engine with accumulated condensate.
- Frequently standing in traffic jams, where the engine is periodically subjected to maximum loads at the time of start, which leads to overheating of the oil.
- Constant high loads that occur when frequently driving on roads with large differences in elevation or when transporting the maximum permissible load. This also causes the oil to burn more intensely.
- Low quality fuel, due to which, when the latter burns, a significant amount of soot is formed, which is collected specifically by the engine oil.
Accordingly, if at least one deviation from the above list occurs, then the frequency of oil changes should be reduced by a certain factor, empirically calculated taking into account the operating characteristics of a particular vehicle.
In addition, when changing the oil, you should never neglect to simultaneously replace the oil filters. If new oil is poured into a system with a clogged and no longer working filter, it will become completely unusable much faster than planned.
Extended oil change interval.
The frequency of changing engine oil can be somewhat reduced by using special grades called motor oils with an extended service interval. The price of such oils is slightly higher, and they can be identified by the “Longlife” label. However, in practice, it is possible to increase the service interval only if three conditions are met:
- if the car is not operated in conditions that the oil manufacturer considers severe;
- if the car manufacturer allows the very possibility of using such “long-lived” oils;
- if the selected oil has certification for use in a given engine and on a given car model.
- Changing the oil in a newly purchased used car.
Most often, sellers of used cars at the time of concluding a transaction assure that little has been replaced just the other day. And it doesn't always turn out to be a lie. However, it is worth considering that the car has not always been recently operated and maintained in full compliance with the manufacturer’s regulations. It is quite possible that the oil and filters were changed much less frequently than necessary. Accordingly, a monstrous amount of carbon deposits could accumulate in the engine, which could instantly contaminate even fresh oil.
Therefore, in the first months, the oil change interval should be reduced to a minimum. Gradually, the engine will be cleaned and the replacement frequency can be brought to optimal.
Timely oil changes will help extend the life of any engine. Therefore, maximum attention should be paid to calculating the optimal service interval so that the car engine can operate in optimal conditions and with the highest efficiency.
Change frequency and oil volume in the Toyota RAV 4 engine
When to change engine oil - usually the interval is set at 10,000 km
. Along with the oil, the oil filter is also changed. If the car is used in difficult conditions (frequent trips over short distances, heavy dust, etc.), it may be worth changing the oil more often.
Clean the inner and outer bells. Insert a new oil filter. Attention to meaning, clips must be in the bell. Then lubricate the new seal with new oil. Take the new seal and dip your finger in the oil and then circle the knuckle with your finger.
Place a stamp on the bell. Place the bellhousing in place against the engine and then finger tighten. Finally, take your ratchet and tighten it carefully. The oil filter has changed, the old oil should have finished filling, we can fill the oil!
When all the oil is gone, wipe the outlet with a rag, then screw the drain plug back in, making a new seal. Tighten generally without force, with a flat wrench diameter. Before we place the engine guard under the engine and lower the car, we're going to do a leak test. Using a funnel, fill the housing with one liter or 2 new oil and check that it has leaked into the drain plug.
How much oil is needed - to replace it on a 2.5 engine you will need a 5 liter canister
fresh oil. Fill in the oil specified in the manual. Often, the manufacturer recommends the original oil viscosity according to SAE: 5W-40, 0W-30 or 0W-20. Synthetic oil TOYOTA MOTOR OIL 0W30 for 5 liters has the number.
It is worth remembering that these numbers indicate different temperature ranges of applicability, so it is worth using the one that best suits the climate of the region in which the car is driven.
With the help of an oil filter, we get 6 liters. If it displays the maximum level, replace the oil filler cap on the engine and start your vehicle, let the engine run for 2 minutes while the oil filter fills. Stop the engine and check the dipstick. Fill, checking the oil level frequently with the dipstick until it reaches its maximum level.
At the end of this emptying, the used oil should be placed in a container and placed in the garage or garbage disposal. Price for oil selection service. Outside Midas Grasse. As long as oil change intervals, manufacturer oil standards, filter changes, spark plugs, air conditioning gas and timing belt changes are followed. Electronic reading of calculators for cars after. Oil changes are limited to 5 liters. From the data collected about your vehicle, we can query the vehicle's technical database to determine the part that best suits it.
What you will need to change the oil:
- jacks and supports or car ramps;
socket wrench and heads for 16 and 24;
64 mm 14-point oil filter puller;
an empty container for old oil and a funnel;
new oil and oil filter.
Reasons why the oil filter is not dismantled
To unscrew the old filter, you need to place the car on a pit or lift the car using a lifting device. Then you need to unscrew the old filter, but difficulties may arise here. If it does not come off, this may be due to its sticking. The motor becomes very hot during operation. Because of this, parts that are not very heat-resistant melt. Such components include a rubber gasket, which is included in the design of the oil filter. It can melt and stick to the engine, especially if oil gets on the gasket.
Problems arise when the filter is twisted too tightly. When changing the filter element, you need to tighten it well so that the rubber band is pressed tightly against the motor. In this case, the oil filter is often screwed on too tightly, especially when using a wrench. If you take into account the melting of the gasket, it becomes clear that unscrewing the filter will be enough.
It is important that the oil filter is not located in the most convenient place, therefore, it becomes impossible to exert maximum effort to unscrew it. In addition, when unscrewing, your hands get dirty with oil and slip.
Reasons for the need to replace the filter device
Removing the old filter device
The need to change the oil filter without changing the oil arises in the following situations:
- The new oil filter turned out to be defective, and there were noticeable irregularities in the operation of the filter element. It is especially unpleasant when problems are discovered after installing a new filtration product on a car. In this case, there is a lubricant inside the engine that can be used for some time, but the filter must be changed.
- The moment to replace the engine fluid has already arrived, but it was not possible to get the necessary oil filter. For example, a filter has been ordered, but delivery is late (it is not possible to supply a duplicate product). After delivery of the new filter device, it will be necessary to install it on the machine, but there is no need to change the oil.
- Inattention. When changing the engine mixture, the mechanic forgot to replace the filter device.
We recommend: What to do if one low beam headlight does not light up
The main problem that arises when replacing the oil filter without changing the engine mixture is the possibility of a large amount of oil leaking out of the engine. Many car enthusiasts believe that when performing the above procedure, they will have to purchase a large volume of lubricant. This is a mistaken opinion; if the replacement procedure is done correctly, then you can get by with minimal losses of motor oil.
We recommend watching a video about the need to change the lubricant and oil filter:
Preparation for replacement and necessary tools
To correctly replace the oil filter, you need to prepare. To do this, you should perform the following steps:
- To avoid burning your hands from the hot lubricant, you should wear rubber gloves.
- To unscrew the oil pan plug and remove the oil filter, you will need a special tool:
- oil filter remover;
- a set of keys.
- Only those platforms that are equipped with an inspection hole or overpass are allowed to be used as a workplace.
- The car engine needs to be warmed up properly, as hot oil significantly reduces its viscosity, which will allow it to be drained quickly.
- You also need to read the technical documentation for your car. In it, the car owner will find information about what consumables are allowed in his car.
Oil filter replacement intervals
The key to how clean the oil enters the engine is the oil filter. The stability of the car owner’s car depends on how well it performs its function. Therefore, the choice of a new filter element, and thus the timing of changing the oil filter, should be approached with all responsibility.
As a rule, the oil filter has approximately the same service life as the lubricating fluid. As a result, every motorist must be able to change the filter element of the oil-engine system.
In addition to all of the above, the following factors influence the frequency of oil filter changes:
- type of lubricant: mineral;
- synthetic;
- semi-synthetic.
With mineral oil, the oil filter lasts about 11,500 kilometers, while with synthetic oil it lasts up to 17,500 kilometers.
- the environment in which the vehicle is operated;
- the quality of the lubricant used in your car's engine.
The process of changing the filtration element
After the car is prepared for updating the engine oil and oil filter, you need to place a container under the drain hole of the oil pan. Next, unscrew the oil drain valve. Then, while the used oil is draining, take the necessary tool, and then begin to remove the filter.
Step-by-step instructions for changing the oil filter:
- While the used lubricating fluid is being drained, you need to take the necessary keys and begin removing the oil filter. Depending on the oil filter model, it may be located in different places. Therefore, it is worth considering what type of oil cleaner is installed in your car.
- After dismantling the old oil filter, you should prepare a seat for the new engine lubricating fluid purifier. To do this, lubricate the rubber seal on the oil filter seat with a drop of oil (if the car has a dismountable oil filter, you need to wipe its inside dry before installing a new cleaning element).
- It is also necessary to wipe the oil drain valve plug dry, as particles of used oil along with dirt may remain on it. There are car models in which a sealant is applied to the oil drain valve plug. It serves as additional insurance against lubricant leaks. Therefore, when changing consumables, the sealant on the oil drain valve plug must be reapplied.
- After the oil filter has been changed, you can begin to fill in new lubricant for the engine.
- The last step in this procedure is to close the hood of the car and start the engine. During this time, notifications about changing the oil filter should appear on the dashboard (depending on the car model, notifications may be presented differently).
When changing the oil filter independently, the car owner spends no more than 1.5 hours on this procedure. At the same time, it saves quite a large amount of money. On average, this service costs from 5,000 to 15,000 thousand rubles. The price for this type of work depends on the price of the consumables, the car model, the year of manufacture of the car, and the lubricant mixture used in the engine.
All steps for changing oil on Largus “step by step”
Let's consider what to do before changing the oil in the Lada Largus engine if the number of valves is 16:
- Warm up the engine, turn off the ignition, drive the car into the pit;
- Remove the crankcase protection. You need a 10mm socket wrench - use it to unscrew the six screws from the bottom;
Fastening the crankcase protection
The protection is removed for one purpose - to get to the filter.
Draining waste (old engine oil)
There is no crankcase protection now. All that remains is to take the 8-sided socket and unscrew the drain plug.
Drain hole for plug
Make 1-2 turns with the key, then place an empty container and unscrew the cap by hand.
The time for draining used oil is at least 10 minutes. Be careful, the oil is hot!
After the waste has drained, the surface of the crankcase is wiped and the plug is wrapped. Thread tightening torque – 22 N*m.
Replacing the oil filter
It would seem that the old material has been drained and now is the time to complete the replacement. But you still need to change the oil filter.
Filter housing - put a puller on it
It is easier to access the filter housing from below. We take the puller and unscrew the filter by rotating the housing counterclockwise.
100-200 ml of waste will flow out of the old filter.
The new filter housing must be filled with oil, but not completely, but by a third. You will need 70-100 ml of material. The rubber seal is lubricated with the same oil.
Preparing the filter for installation
After wiping the engine crankcase, screw in the new filter until it stops. The tightening torque will be 15-17 N*m (by hand).
Pour in new oil
The oil volume in the Lada Largus engine, if the timing belt contains 16 valves, is 5 liters. You need to fill 4.8 liters through the neck. Then close the plug and start the engine.
The indicator light is now on
The point is to turn off the oil pressure light. We start, wait three minutes and turn off the engine.
Even if the control lamp did not light up, wait 5-6 minutes and check the level. The check is carried out using a dipstick, and you can find it near the power steering reservoir.
Read more: Front gas spring 53
Oil level dipstick
We remove the dipstick and look at the marks. If necessary, add oil. The main thing is to return the dipstick to its place, pressing it all the way.
The filler neck can also be used to pump out oil. Thin tubes and a bulb will help solve the problem.
Is it possible to determine the suitability of a filter?
It is impossible to do this by appearance. Mileage won't tell you anything either: the car can be used in different conditions. It would be fairer to take into account not only the number of kilometers traveled, but also the engine hours.
As mentioned above, riding style is also important. Drivers who prefer it are better off focusing on expensive products. This is due to the fact that during sudden acceleration or stopping the engine requires a large amount of lubricant. And expensive filters contain synthetic elements that cope well with high loads, temperatures and quickly remove the lubricant. If you are a fan of a quiet way of transportation, you can purchase less expensive products that have a felt base. The oil in them takes longer, but you don’t need it any faster.
Engine flushing
In some cases, car owners wash individual engine parts to remove oil deposits on their surfaces. In particular, flushing is recommended in the following situations:
- When switching from one brand of oil to another, depending both on their types (mineral, synthetic or semi-synthetic) and on their viscosity characteristics.
- After purchasing a used car, because you do not know or are only informed by the seller about the brand of lubricant and the frequency of replacement. This means that you cannot be absolutely sure that the car’s engine is in good condition.
- Under severe operating conditions, in order to better wash away carbon deposits.
- When the engine is completely overhauled as a result of overhaul.
Next, let's move on to the question of what washing methods exist and what means are used. So, currently there are five main ways to flush the engine:
- Manual cleaning on a disassembled engine.
- A fairly popular method of pumping diesel fuel through the engine (this is how contract engines are cleaned).
- Use flushing oil before adding new lubricant. This is ordinary mineral oil without additives and is often used when switching from one oil to another.
- Five minute wash. A special product is poured into the old oil before draining, after which it is “run” through the system for 5 minutes, then the slurry is drained. Remember that this washing method is the most aggressive!
- Flushing with regular engine oil (the cheapest). The idea is to let the engine run for about 500 km, drain it and fill it with the one that is planned to be used on an ongoing basis. Although such washing is gentle and does not harm the engine, the technique itself is expensive and largely pointless.
It is also recommended to perform flushing in case. if you used old oil much longer than its expected service life (for example, you simply forgot about the regulations). Or in the case when the oil has thickened greatly and turned into a jelly-like mass.
Engine oil change cost
Many car owners are interested in the question of how much it will cost to change the oil at a service center or do it yourself. In this section we will try to answer it and present to you the price of consumables and work of service station employees as of autumn 2020.
Let's start with a simpler option - changing the oil at a car service. Let us immediately clarify that the final value will depend on several factors - the model of the car, the brand and volume of oil used, prices directly set by the owners of the service station. We present for you average prices for Moscow and the Moscow region.
| Work performed | Price, rubles |
| Changing the engine oil (customer's oil is used) | 800 |
| Flushing the engine before changing the lubricant | 500 |
| Resetting the service interval | 200 |
| Installation/removal of crankcase protection | 200 |
Please note that some auto repair shops will perform oil changes for free if you purchase it locally.
Now let's consider a more complex option - changing the oil yourself. When calculating the final cost of the procedure in this case, it is also necessary to take into account the model of the machine and the price of the oil used, but also add to them the cost of all consumables used. Here are the average prices for autumn 2017:
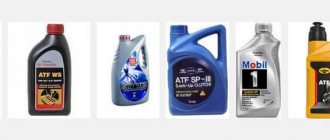
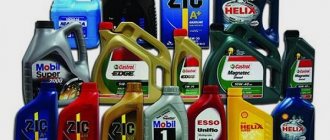
| Consumables and tools | Price, rubles |
| Motul Specific DEXOS2 5w30, synthetic motor oil, 5 liter canister catalog number - 102898 | 3700 |
| SHELL Helix HX8 5W/30, synthetic motor oil, 4 liter canister catalog number - 550040542 | 1500 |
| Lukoil Lux oil 5W40 SN/CF, synthetic motor oil, 4 liter canister catalog number - 207465 | 1300 |
| MOBIL Ultra 10W-40, semi-synthetic oil, 4 liter canister number - 152197 | 950 |
| ZIC A+, 5W30, semi-synthetic oil, 1 liter canister number - ZIC A 5W30 | 400 |
| Castrol Magnatec SAE 10W 40, semi-synthetic oil, 4 liter canister number - 156EB4 | 1200 |
| Oil filter VAZ 2110-12, Granta, Kalina, 2108 JS Asakashi art. C0065, Car make: LADA, Manufacturer: JS Asakashi | 160 |
| Oil filter Ford Focus II, Bosch art. 0451103363. Car make: Ford, Manufacturer: Bosch | 300 |
| Oil filter RENAULT LOGAN/CLIO/MEGANE/LAGUNA, Car make: Renault, Manufacturer: Knecht | 300 |
| Oil filter Hyundai Accent, KIA Cee`d, Rio II Filtron, art. OE6742, Car make: Kia, Manufacturer: FILTRON | 200 |
| Oil filter / filter assy-oil NISSAN art. 1520865F0E, Car make: Nissan, Manufacturer: Nissan | 350 |
| The oil filter puller is “crab” type, has 3 pins. | 600 |
| Belt oil filter puller JTC 4736. Type: belt; Grip diameter: 60-260 mm. | 1700 |
| Oil filter puller, belt grip - 55-100 mm AIRLINE art. ak-f-02 | 300 |
| Oil filter puller FIT, chain. Article - 64791. | 300 |
In one case or another, the car owner can use various consumables. This applies to both names and brands and models. Therefore, based on the information above, you can independently calculate the approximate cost of the procedure.
Results
As you can see, changing the oil yourself is not a difficult task, and most, even inexperienced, car owners can handle it. However, it is necessary to take into account the nuances and follow the above algorithm of actions. And do not forget to choose those consumables (oil and filters) that are recommended by the manufacturer of your car.
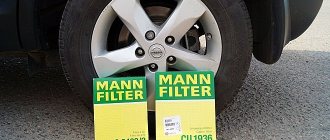
Using filters
Of course, it is recommended to always use the original oil filter that was originally installed by the manufacturer. It is not always possible to find these consumables, but no one forbids using analogues. One of the best brands that produces reliable filters is Bosch. MANN is very popular among car owners. Also, filters from Mahle, Union and Fenom manufacturers have proven themselves well. These manufacturers offer consumables that will suit a variety of vehicles. From the assortment you can choose oil filters for GAZ cars, domestically produced Ladas, and foreign cars from Japanese, Korean, American, and European manufacturers.
View gallery
If you don’t know what kind of filter you need, you can simply tell the store salesperson the make and year of your car, and he will select the correct consumable.
The process itself
How to change the oil filter when changing the lubricant in your car's engine? Let's look at this process step by step.
- For work, use a heated box or garage (especially in the cold season). Also remember that some parts may remain quite hot for a long time after you have turned off the engine. Then contact with them will lead to disastrous results, and possibly to burns. Therefore, it is necessary to let the car “cool down” after you have driven it onto a pit or a lift;
- You need to prepare in advance the oil that you will pour into the engine, the filter itself and a set of tools that may be useful to you;
- Of course, some craftsmen drain the oil without lifting the car, but simply by heavily jacking up one side of the front end. But, nevertheless, it is recommended to carry out this process either in a pit or on a lift in order to have good access to the bottom of the car;
- We climb under the bottom and find the oil drain plug
. We unscrew it and pour the old oil into a specially prepared container. Everything needs to be done as carefully as possible so as not to get caught in the stream of lubricant. We wait until all the oil runs out of the compartment. We remind you once again that the parts and the oil itself can be quite hot. So take care of your body parts. It is also necessary to handle the container where the oil is collected with the utmost care; - We unscrew the filter and clean the seat for it. Sometimes it can stick if the oil has not been changed for a long time. Some filters have a place where you can unscrew it using a wrench. And also - you can use the magic remedy WD-40 or something similar;
- After unscrewing the filter, throw it away. Be careful, residual lubricant may continue to drip out of the hole;
- Take the prepared new filter with gasket
. Apply a layer of lubricant to the gasket. We install the gasket on the base of the part, checking the reliability of the fastening. We begin to slowly screw the oil filter into the hole where it should be installed. Try not to damage the threads (especially for used cars if you recently purchased and are trying to change the oil). When the filter touches the gasket, you need to stop. After which, make another full turn for final fastening.
As already mentioned, some similar spare parts have a special nut at the top of the body, with which you can “tighten” the filter
However, the most important thing here is not to overdo it when making the last revolutions. Next, remove the bucket (or container) with old oil from under the bottom. It can, in principle, be recycled or used for lubrication
But many simply pour it out. We lower the car onto its wheels. We fill in new oil to the required level. Try not to overfill. Then you can add more, if necessary, if it goes away. Here, try to choose in advance the type and marking that is most suitable for your pet’s engine.
Close the lid and hood
. We start the car engine and let it run for a while. It will be better if you drive to a clean place (or you can put paper under the bottom) and turn the engine for about 10 minutes. After that, drive away a few meters, and on the spread newspapers it will be clearly visible whether there is a leak. A couple of drops does not count - these may be residual effects. Then we turn off the engine and check the oil level (add it if necessary). Now the question of how to change the oil filter and engine lubrication is considered closed. But keep an eye on the oil level for a few more days: it may change.
Why change the Toyota Rav4 oil?
If the Toyota RAV 4 oil is changed late, it absorbs dirt and ages. As a result, the engine suffers, creating a dangerous situation that threatens failure. In order to ensure the proper result, the operation is performed on an engine that has still retained operating temperature, which promotes better oil flow and complete removal of contaminants. Typically, changing the Toyota RAV 4 oil is recommended after a mileage of 50 thousand kilometers. The decent technical base of our car service allows us to carry out all operations at a high technical level, which is practically impossible to achieve by getting to work on our own.
Level of specificity: this criterion allows you to select, among oils with the same viscosity, the oil that will be most adapted to the vehicle. Existing synthetic oil with mineral oil through semi-synthetic oil, the choice should be set to an oil adapted to the engine and pipe type. For city driving with frequent restarts and short trips, it is recommended to choose a semi-synthetic oil that protects both cold and hot temperatures. Intense driving requires synthetic oil.
Why you should contact us
Our company’s technicians perform a wide range of services related to the repair, diagnostics and maintenance of Toyota RAV 4. We use modern equipment that allows us to quickly and efficiently carry out various repair and maintenance operations with a high quality guarantee. A team of experienced and highly qualified mechanics carries out all repair work using modern digital equipment. Professionally organized diagnostics allow you to quickly identify a breakdown and establish its true cause. If you change the Toyota RAV 4 oil in a timely and prompt manner, you will be able to avoid all the troubles associated with the operation of the automatic transmission. If these operations are not carried out regularly, the gearbox may fail, which will lead to vehicle breakdown and will become the main condition for extending the service life. We strictly adhere to all criteria when performing this operation, check the oil level and top it up if necessary, and also monitor oil leaks, completely eliminating the causes of their occurrence.
For road use, mineral oil is recommended. Its lubrication is satisfactory under normal operating conditions. To perform a drain, you must first have a waste oil container, new oil compatible with your engine and properties that suit your driving habits, and a drain seal, a new oil filter. You can also bring a voiding kit.
Here are several stages of emptying. Stop the car and secure. Bring a hopper under the crankcase. Remove the engine oil filler cap. This action opens the oil circuit and prevents partial bleeding of the oil. Remove the crankcase screw and let the oil pour into the tank. The crankcase screw is carefully unscrewed so that the oil does not splash out immediately.
Refueling volumes
Many owners are interested in the question of how much oil is needed to replace the engine of their car. Unfortunately, it is impossible to give a definite answer in this case, since each car model (and even each engine if the car is equipped with different motors) requires its own amount of lubrication.
Remember that you only need to measure the oil level with the engine not running!
However, on average, an infographic looks like this:
- Passenger cars with an engine capacity of 1.2…1.8 liters. The oil volume in this case will be from 3.5 to 4 liters. As stated above, you will find the exact data in the manual. If there is no reference literature, then experts recommend pouring about 3 liters in this case, and then checking the level using a dipstick. If necessary, add some more. The main thing is not to overfill the oil so that its level does not exceed the MAX mark on the dipstick.
- As for cars with an engine capacity from 2 to 2.4 liters, the volume of oil poured will be no more than 4.5 liters.
- If you have a powerful machine with a volume of 3 to 5 liters, then the volume of lubricant will be 5...6.5 liters.
Remember to check the engine oil level regularly. This procedure should be performed once every one to two weeks, or at least once a month. After all, if you miss the moment when the oil level drops critically, you risk facing oil starvation and expensive repairs caused by a critical level of lubrication.
Location
There is no universal location for the oil filter. Its installation location differs on different engines. In some models it may be located at the bottom, in others - at the top. But most often in front-wheel drive cars it is located on the front side of the engine. To be more precise, in the lower part. In rear-wheel drive cars, the filter is usually located on the left or right side, as well as at the bottom of the engine. In some engines, manufacturers have taken care of maximum user convenience by placing the oil filter directly under the hood. As you can see, it all depends on the motor.
View gallery
In any case, the vehicle's operating instructions should indicate where the filter is located.
Where is the oil filter located?
On each engine, the location where the manufacturer decided to place the oil filter is individual. But a general rule can be noted that in most cases it is located near the crankcase protection, that is, closer to the bottom of the engine.
Opening the hood, you can most often find the oil filter near the left headlight at the bottom, if we are talking about a car with front-wheel drive. In theory, you can replace it without lifting the car or driving it into a pit. But in practice, this is almost impossible, since often during operation the oil filter gets stuck, and to unscrew it you have to use special tools or, at least, conveniently get to it, that is, grab it from under the car.
Which oil filter is best for this car?
The purpose of the oil filter is to trap abrasive particles that are formed during engine operation and, when they enter the engine oil, increase wear on the parts of the power unit. The oil filter has to be changed more often than other consumables. The service life of the oil and the technical condition of the engine depend on its condition.
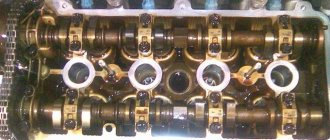
All modern oil filters have the same design and differ in the materials used and manufacturing technology. At the moment, there are two types of oil filters: assembled and insert filter. The first type consists of a filter element, a metal housing, a spring, valves, etc.
Assembly oil filter design
The second type is cheaper, less harmful to the environment and easy to change.
The main element of any filter is the filter element. In quality products, the filter material is a mixture of cellulose, synthetic fibers and other materials that provide the best cleaning of the lubricant and work at different operating temperatures.
When choosing an oil filter for a Hyundai Accent, whether it was produced at TagAZ or another plant, you need to take into account the design of the oil filter, the material of the filter element, the quality of lubricant cleaning and service life depend on this.
New consumables for Hyundai Accent
How to unscrew the oil filter
There are special keys for this that can be purchased at car dealerships. But it happens that it is impossible to get to the filter with such a tool due to limited space. Or another situation: instead of a standard product, you installed a higher quality element with larger dimensions. In such cases, the question arises: how to unscrew the oil filter without a key? But first it’s worth identifying the reasons why the product cannot be turned away by hand. There are two of them:
- during the previous oil change, the filter was tightened too tightly with a wrench (this is typical for car repair shops);
- the product just got stuck because it hasn’t been changed for a long time.
Below are all the popular ways to replace an old filter with a new one. However, this product must be unscrewed by hand. There is also a trivial situation: maybe you just don’t have enough strength. Then invite a stronger assistant.
Using a screwdriver
The tool must be long: longer than the diameter of the filter. You just need to pierce it, and right through it. The screwdriver here plays the role of a lever, which should be sharp and thick. Don't forget to drain the oil first: however, some of it will still spill out, so take care in advance and place a suitable container down. It is worth noting: all filters turn counterclockwise.
Using a leather belt
A regular trouser shirt will do. You need to make a loop out of it and throw it over the body. The free end is a kind of lever.
If the belt turns, place a piece of sandpaper under it. If you have an alternator belt from a VAZ or other car at hand, you can use that too. The filter must be unscrewed.
Using a gas key
Removal in this way is only acceptable if there is enough space in your car and the tool can easily fit there. The handle of the tool will be the lever. However, fanaticism is not needed! Be careful not to roll anything else along the way.
Using a chisel and hammer
Everything is clear here: take a tool (it should be sharp), place it on the rim of the filter, closer to the engine (this makes it easier to remove). The blows must be strong and sharp.
Using a homemade tool
It makes sense to make a puller yourself, similar to the factory product. To do this you will need a regular bicycle chain. If it has 30 links, then this is an ideal option for the VAZ classic. The chain must be connected into a ring using a rivet or a regular lock. Next, take your used 19 or 22 socket head: you need to make a cut in it, the width of which corresponds to the width of the chain. This is where you need to insert it. To make it more convenient to unscrew the filter, insert a wrench or ratchet into the square hole of the head. All that remains is to smoothly twist the homemade puller counterclockwise.
When the old filter is unscrewed in one way or another, thoroughly wipe the seat with a rag, removing all particles of dirt. Fill the new filter with oil and screw it in by hand. Try to do this with force, but not excessively! Only after this can the filter replacement procedure be considered complete.
Replacement sequence
Drive the car into a service pit (usually found in many garages), unscrew the pan hole from below and drain the used oil. First you need to let the engine idle for 10 minutes. This will warm up the lubricant, and thus it will drain faster. Also, warming up the engine will allow the oil to collect all the sediment. It will also come out along with the used lubricant.
So, unscrew the plug and drain the oil to the last drop. While it drains, you can dismantle the filter. First of all, try to unscrew it by hand. If that doesn't work, use an adjustable wrench. Removed? Now wipe the rubber band of the new filter with oil and screw it into place. Do not use an adjustable wrench to tighten the filter too tightly; hand effort will be sufficient.
View gallery
When replacing the filter, the used oil was most likely completely drained. Now you need to wipe the plug and pan dry. Many motors have washers that are also advisable to change. The plug needs to be screwed back on. Many experts recommend using a sealant between the plug and the pan to prevent oil leakage and prevent contact of the steel plug with the aluminum pan. If the plug and pan are made of the same material, the sealant does not need to be used.
Now that the plug is in place, you can fill in new engine oil. Here the opinions of experts vary: some say that lubricant should be filled to the maximum level on the dipstick, others - to the middle. Which is correct? It is advisable to fill the oil not to the highest mark on the dipstick, but close to it. If a change in the oil level has previously been observed, it is necessary to fill in more lubricant. However, the upper mark on the dipstick must not be exceeded. There is nothing good about having more oil in the engine than required, but it is even worse when there is less.
You need to pour oil into the engine in portions. We filled it in and looked at the dipstick. We topped it up and looked again. And so on until the dipstick area is at least 75% immersed in oil.