How to choose fog lights
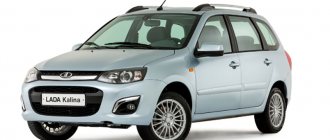
The manufacturer equips the PTF car with only one configuration - this is the maximum “Lux” equipment. Owners of other versions are forced to install fog lights on the Kalina with their own hands.
But first you need to know what these headlights are. They are distinguished according to three criteria:
- Manufacturer.
- Quality of production of optics.
- Equipment.
If we take these factors into account, then the best option is considered to be several headlights from different brands. Thus, Bosch optics are equipped with flat glass of high quality. Standard fog lights for the car in question are manufactured in Ryazan. The optics are equipped with flat glass.
A more affordable analogue is the Kirzhach product. This optic features convex glass. In it, through the use of a convex lens, the light flux is concentrated and directed where it is needed. According to the owners, this is a solid design. Luch produces high-quality fog lights for Kalina. But the headlights are not equipped with a defogging valve. This is an analogue of Bosch, which is produced by a domestic manufacturer.
If you need to install a PTF, but at the same time want to save money, there are a lot of Chinese products on the market. Among these products you can find quite high-quality headlights. One of the Chinese brands is ProSport. It is impossible to say anything about the quality of Chinese products. One copy may be good, but another will fail in just a few days. If you choose good foglights for Kalina, then it is either Bosch or Kirzhach. These are the most popular manufacturers whose products are in great demand among car owners. They will last quite a long time.
Which low beam lamps to choose for Kalina
As we already indicated above, H7 lamps are installed in the low beam. Today a large number of lamps of varying quality are offered with this type of base. We recommend installing only high-quality and proven lamps that have already proven themselves.
- PHILIPS H7-12-55 LONGLIFE ECO VISION (4x lifespan) lamp price from 400 rubles (lamp installed from the factory)
- PHILIPS H7-12-55 +30% Vision lamp price from 300 rubles (with increased brightness)
- PHILIPS H7-12-55 +130% X-TREME VISION 3700K set price from 1500 (considered one of the brightest halogen lamps)
- OSRAM H7-12-55 Ultra Life (3x resource) price from 400 rubles (just like Philips was sometimes installed from the factory)
- OSRAM H7-12-55 +30% Super lamp price from 300 rubles (lamp with increased brightness by 30%, similar to philips)
- OSRAM H7-12-55 +110% NIGHT BREAKER UNLIMITED set price from 1500 rubles (110% more light than a regular lamp)
- BOSCH H7-12-55 Pure Light lamp price from 250 rub.
- MAYAK H7-12- 55 price per lamp from 90 rubles (inexpensive Chinese equivalent)
- GE H7-12-55 (PX26d) (General Electric) price per lamp from 180 rub.
How to install fog lights on a Kalina car?
Installation is carried out without the need to dismantle the bumper. In order to perform installation, you only need to unscrew and remove the front parts of the fender liners. The bumper plug can be removed using a flathead screwdriver. The manufacturer often includes a special frame mount in the kit. It is installed instead of a plug in the bumper. The optics themselves are installed and secured last.
But there is an installation method where it is necessary to dismantle the bumper. To do this, first unscrew the screws and the mounting bolt, and then remove the sides of the bumper from under the wheel arches. Next, the plugs are removed and fog lights are installed. "Kalina" continues to stand still. From the inside, the PTF is secured to the bumper with three self-tapping screws. Outside, until it clicks, a decorative frame is installed in place of the plug.
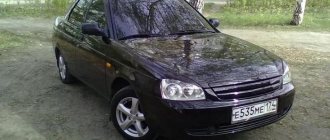
Lada Kalina wagon Sauvignon › Logbook › Installing PTF on Kalina 1 with your own hands
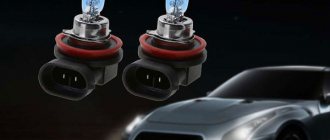
I happened to get into a very strong fog during a trip to St. Petersburg. After returning home I thought about installing additional light. At first I couldn’t decide for a long time which headlights to take, Bosch or Kirzhach. I went shopping, there aren’t really any Kirzhachs anywhere, and if there are, the price for one starts from 1500 - which is expensive. I decided to install Bosh ones, since my main headlights are also Bosch, and the price is nicer - 1500 per pair + unpainted masks with a narrow hole that covers part of the headlight (these masks, of course, were not useful to me). I found out that both Bosch and Kirzhach come complete with light bulbs (H11). But I decided to replace the light bulbs with white ones, which is why I didn’t need them either. Then I went shopping:
In order to install PTF I needed:
1) 2 fog lights Automotive Lighting (Bosh) (1500 RUR) 2) kit for connecting PTF (350 RUR) 3) button for turning on the automatic light sensor (150 RUR) 4) 3 hanging fuses (150 RUR) 5) corrugated cable for wiring (I don’t remember the price) 6) PTF masks in body color (RUR 300) 7) set of H11 MTF Palladium bulbs (RUR 850) self-tapping screws for attaching headlights to the bumper 9) long clamps
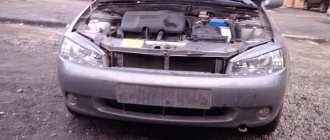
First, I removed the bumper and the front left fender liners. To remove the bumper, you will need to unscrew the screws that connect it to the fender liner in the arch (2 pieces on each side), then we climb under the car and unscrew all visible bolts and screws from the bottom of the bumper. Then we remove the radiator grille (there are also self-tapping screws on top under the hood, and at the bottom inside it is attached with latches, you can crawl there with a long screwdriver and pry them off, under it there will be another 3 or 4 bolts in the bumper. You also need to unscrew 2 screws from lower grille, and pull it towards you. Then all that remains is to remove the bumper from engagement with the wings (just pull towards yourself, but not too much, so that it doesn’t jump out and catch the paint on the wing) You don’t have to remove the bumper, then you will need to remove the fender liners , and work through the freed-up space, but I decided for myself that it would be more convenient to remove the bumper. Then you need to remove the factory PTF masks-plugs from the bumper, they are held on by latches, just press the latches from the back side, and in the same way insert new ones onto place.
p/s a little about PTF masks - I was tormented by the question of which headlights are suitable for masks with wide holes, in fact it turned out that they fit both Boshevsky and Kirzhach. The headlights themselves do not differ in size. And those masks that come with Boshevsky ones can be thrown away right away, the hole is narrow, it covers part of the headlight.
Next, I opened the wiring kit for connecting the PTF. My kit did not include fuses, so I had to purchase them separately. We begin to pull the wiring.
Next, we stretch all the wires parallel to the standard wiring harness that runs under the left wing; to do this, you will need to remove the fender liner. We attach the new corrugation to the existing one with clamps. The wires enter the interior in the same place; to do this, you will need to make a hole in the rubber seal and insert the wires into the interior through it. (After finishing the work, I recommend sealing the hole with sealant) Since I decided to take a permanent plus for the relay from the battery, I laid the wire in the same way. The wire from under the hood into the fender also enters through the factory wiring harness, through the seal in the body between the hood and the fender. If you decide to do the power supply in the same way, do not forget about the fuse (30 amps)
Next we go to the salon. If you have a Delphi mounting block (gray) installed, then you won’t find terminals for connection for it (mostly only on order), so I made it a hinged installation. I tied all the wires together with clamps so that nothing would dangle.
After connecting according to this scheme, the PTF will work only with the ignition on
p/s Before installation, I advise you to coat the edges of the PTF glass with black sealant to prevent moisture from getting in, and it would also be a good idea to apply an armored film to the glass (protection from small stones). I do not recommend turning on the PTF during rain, because the glass It gets very hot and may crack if it gets into a puddle.
#installakaptf #ptfkalina #ptfkalina1 #ptfkirzhach #ptfbosh #ptfbosh #mtf #mtfpalladium
Connecting fog lights
First of all, the wiring harness is carried out under the hood and connected using the supplied connectors to the left and right headlights. The “mass” is fixed to the body. “Plus” is connected to the battery terminal according to the diagram supplied by the manufacturer (one of them is shown in the photo below).
Next, the harness, which is located under the hood, is pulled into the cabin. It is better and more convenient to do this along the standard wiring harness, which is located in the left wing. It is more convenient to do this if you first remove the fender liner. Further all work will be carried out in the salon. The ashtray needs to be removed. To do this, remove four screws. The button covers are pushed through the opening.
There are two more screws under these plugs. They hold the trim on the instrument panel. Then remove the temperature control knobs. They can be easily removed by pulling them towards you. Next, carefully move the cover on the panel and at the same time push out the plug for the air conditioner button. A button that controls the fog lights will be installed in place of the plug.
How to replace the lamps yourself
Changing a light bulb in Kalina yourself is not difficult. The time spent on the work depends on the skill of the driver and the size of the hands. Some owners change light fixtures in 15-20 minutes without removing the headlight, while others suffer for more than an hour and ultimately dismantle the optics.
When replacing, cloth gloves are used. This helps protect the skin on your hands and also prevents contact with the bulb. When touched, fingerprints remain, which heat up when the light is turned on and after a while burn through the thin glass.
During work, the battery terminal is unscrewed to avoid a short circuit, which will lead to burnout of the fuse link in the fuse box.
Far module
Replacing the high beam lamp is easier than in the low beam module, since the cover is located closer to the radiator grille.
To perform the operation you will need:
- Turn off the Kalina engine.
- Open the hood lid.
- Remove the protective boot on the back of the flashlight.
- Carefully disconnect the plastic chip.
- Open the latch.
- Pull out the lamp.
Assembly is carried out in reverse order. When installing the terminal, you need to check the contacts and, if necessary, clean them using a flat-head screwdriver, sandpaper or a special chemical spray.
Low beam
Replacing a low beam lamp on a Lada Kalina depends on the experience of the owner and is divided into two types:
- Without removing the headlight.
- With module dismantling.
Most Kalina owners cannot replace the lamp in the left headlight due to limited space. In this case, you will have to ask a more dexterous friend or dismantle the lighting device yourself for convenience.
To change lamps on installed optics:
- Unscrew the filter housing near the left headlight and move it towards the engine.
- Disconnect the washer motor terminal, remove the screws and move the reservoir to the side.
- Open the light module seals.
- Remove the block with wires.
- Remove the spring clip.
- Remove the part.
Assembling the headlight with a new spare part is carried out in the reverse order.
To dismantle the headlights, you need to unscrew the grille, fasten the modules and disconnect the contact chip. Place the removed optics on a convenient surface and replace the light elements.
Dimensions and DRLs
In the first generation Kalina, the dimensions are installed under the cover of the near reflector.
Replacement is no different from work in the near headlight compartment, however, to disconnect the lamp, it is turned counterclockwise. Drivers often install a diode instead of the original light source, which has a bright glow and can work for more hours.
Replacing DRL lamps on second generation Kalina:
- Open the hood.
- Find the plastic retainer at the bottom of the lamp near the radiator grille.
- Turn left 90°.
- Pull towards yourself.
Daytime running lamps do not contain halogen in the bulb, so they can be handled by hand when installing. Parts without gas include reverse elements, which are changed by bending the trim in the luggage compartment. To replace the Kalina station wagon's brake light bulb, you will have to unscrew the plastic plug on the fifth door, disconnect the chip and pull out the old spare part.
Turn signal
If the marker light on Kalina is freely accessible, then it is more difficult to get to the turn signal module.
To install a new lamp, you need:
- Unscrew the screws holding the air intake barrel and washer fluid reservoir.
- Move the parts towards the engine.
- Feel for the plastic cartridge and turn it to the left.
- The lamp is removed from its seat by slightly pressing and turning it 90° to the left.
To install a new part, you need:
- Install it into the cartridge.
- Press and turn to the right until it stops.
The finished element is mounted in a standard hole. You can check the operation of the light by turning on the corresponding key on the Kalina instrument panel.
Fog lights
When replacing the fog lights, partial dismantling of the locker will be required. To do this you need:
- Turn the wheel towards the engine compartment.
- Unscrew the screws and unclip the clips where they are attached to the bumper.
- Bend the fender liner.
- Turn the light bulb to the left until it stops.
- Pull towards yourself.
- Disconnect the plug.
To install a new light source in the PTF, you must first snap the connector, insert the part into the lamp and turn it to the right.
After carrying out the work, you need to check the correct functioning of the light and adjust the angle of the reflector. A properly functioning car light ensures good visibility in all conditions and safety on the road.
PTF adjustment
To get the most out of your fog lights, you need to adjust the light. This is a simple procedure that even beginners can easily handle. Before you start setting up, you need to place the car on the most level surface possible. We need a wall or a solid fence in front of this area. It is in this place that the fog lights installed on the Lada Kalina will be adjusted. First of all, experts recommend checking the tire pressure. It is important that it is the same in all wheels. This is the only way the car will stand perfectly level. Then check the distance from the center point of the headlight to the ground. A line is drawn on the wall at the same height. According to GOST standards, it is necessary that the driver’s seat have a load of 75 kg.
The settings are performed in the dark. The machine is placed on a platform at a distance of 5 meters from the wall. Then the headlights are turned on. The setup process itself is performed using a special screw. It is located at the bottom of the plug. The process requires a Phillips screwdriver. Cover one of the headlights with any opaque material, and then use a screwdriver to adjust the luminous flux so that its center is on or below the drawn line. Then the same operation is carried out for another headlight.
Replacing the low beam bulb on a Lada Kalina: what you need to know
The Lada Kalina model is a popular and sought-after domestic car, which is not so difficult to service independently if necessary. Of course, often we are not talking about serious repairs of complex units.
However, changing the oil in the engine and gearbox, antifreeze or antifreeze of the cooling system, spark plugs or replacing the Kalina low beam lamp is quite within the capabilities of an ordinary car enthusiast in the conditions of an ordinary garage.
At the same time, such a procedure as selecting a lamp for Kalina and replacing low/high beam lamps is a problem that car enthusiasts encounter quite often (and this applies to both Kalina owners and many other Russian or foreign-made models). Next, we will look at how to change Lada Kalina lamps, which bulbs to buy, etc.
Preparations before installation
How to install headlights is one thing, and you need to prepare thoroughly before it. The peculiarity of the light beam of fog lamps is its straightness, which allows you to clearly identify other road users in conditions of poor visibility. In the Lada Kalina, the manufacturer installs “Lux” optics, although today’s market is represented by a variety of offers, among which any owner will be able to choose analog PTFs to suit his taste.
These products are divided into types depending on quality indicators and class.
Replacing fog lights with new analogs does not involve performing auxiliary work related to sawing or drilling the bumper surface. The manufacturer adds specialized plates to the optics kit, the shape of which exactly follows the contours of the cutouts in the bumper. All that is required is the removal of the standard plugs. Now is the time to start installing the headlights.
To quickly and efficiently carry out installation work, the owner will need to know how to install headlights and acquire the following set of materials and tools:
- a set of selected optics;
- relay, wiring and button for connecting new products with the on-board network;
- fuse together with its holder;
- tape measure to adjust the direction of the light beam;
- keys whose size is “8” and “10”;
- a piece of wire for pulling wiring;
- screwdrivers with different profiles;
- nylon clamps for fixing the cable line;
- wire cutters, electrical tape and soldering iron;
- hex wrench to adjust the direction of the light beam.
Armed with instructions and having taken possession of the entire designated list of available tools, we begin the process of installing headlights.
What to have on hand
To carry out the work, we will arm ourselves with the following items:
- keys 8 and 10;
- flat and Phillips screwdrivers;
- a 6-sided key that regulates the spread of light;
- electrical tape, wire cutters, pliers (possibly a soldering iron);
- ties for fastening the wiring and a piece of strong steel wire;
- actually, headlights;
- The most important thing you will need for repairs is a kit for connecting fog lights to Kalina.
Button, relay and wires with connectors
Although the plugs included in the package are usually black, you can paint them to match the body color whenever you wish. Philips bulbs that are quite good in their characteristics .
The kit, which includes a button for turning on Kalina's fog lights, as well as wires, connectors and connectors, and a turn-on relay will need to be purchased separately. However, if your car has an air conditioner, then the space for the button is automatically occupied.
Tip: In this case, purchase a rectangular button separately and install it in the corresponding hole next to the cigarette lighter.
Sequence of work
So, below are detailed instructions, using which you can easily equip your pet with fog lights:
- as in a number of other electrical works, our actions begin by disconnecting the power from the battery (minus terminal);
- Now you can start dismantling the bumper. We need to unscrew the screws and remove the black plastic grilles. It may be necessary to remove the license plate;
We begin work on installing the PTF
- the grilles and bumper are attached with screws and self-tapping screws - you can feel them with your hands, even without a hole. When you remove the bumper, you will see that the mounting points are indicated by arrows. This will allow such work to be completed much faster in the future;
- the wheel arches additionally hold the bumper with 3 self-tapping screws - do not forget to unscrew them as well;
- Now you can carefully begin to remove the sides of the bumper from under the arches, using rocking movements, and remove it entirely. Bend the plugs using a flat-head screwdriver;
- The fog lights themselves are attached to three screws each;
- now we need to extend the wiring into the cabin (as the video in this article shows). Many people recommend removing the driver's wheel and arch protection at this point;
- where the clutch pedal is located, we will find the place where the wires are collected in a bundle and push the seal outward;
- Now you can stretch the wiring using rigid steel wire. The idea is to tighten the wiring from the interior into the space under the hood. You can immediately provide wiring for connecting LED parking lights, alarms, remote hood opening and everything else that has not yet been installed;
PTF assembly
- Our new wire blocks will go along with the factory ones, after which they can be tied together with plastic ties like clamps. If there is a need, a wiring diagram for fog lights on Kalina can help with this;
Assembling the headlight completely
We continue our PTF installation algorithm:
- We maintain the required length for the foglights and begin to screw the negative terminals to the bolts. For this purpose, you can use any bolts located on metal parts of the body, except for the engine crankcase mounting bolts, since through them there is no normal contact between the protection and the car body;
- It will be more convenient to run the wire to the right headlight under the radiator grille;
- use a 15 Amp fuse;
- contacts from the relay are connected via wires with a cross-section of at least 0.75 mm to the wires of the fog lights and to the relay;
- After making all the connections, we need to check how we assembled our kit and whether there is power in the circuit. To do this, connect the ground of the car and check how the headlights shine when turned on by the button;
Bumper with headlight installed
- All that remains is to reassemble the bumper in reverse order, making sure that the wires do not get pinched anywhere. The price and degree of complexity of such repairs will be within the power of any Kalina owner. In order to adjust the headlight beam, there is access to the adjustment screw from below.
Installation methods and types of PTF
For the Lada Kalina model, different types of fog lighting devices are applicable. Headlights can be:
- double and rounded;
- square, recessed and oval;
- suitable for outdoor installation.
Not all devices from this list are equally suitable for installation in the model we are considering. The thoughtfulness of the purchase should be in the foreground here, so that the owner of the LADA Kalina does not have to frantically redo the standard fastenings in the future.
To avoid such an unpleasant moment, we recommend taking a closer look at the options and manufacturers below:
- "Bosch". An eminent German manufacturer, whose products, in particular PTF, boast high-quality optics and a long-range collected beam of light. Only available as a complete set.
- Option from . It is a kind of analogue of the above-mentioned German products, but the price is much more favorable than its competitor. The quality indicators of these PTFs are far from ideal.
- "ProSport" fog lights of Chinese origin. This manufacturer is also based on the supply of spare parts for Russian models.
- Products "Kirzhach". These PTFs have lens-shaped glass, which provides a bright beam with an enviable range.
Note that the fog lamp options indicated here are equally suitable for installation on LADA Kalina and do not require additional manipulations to fit them into standard places.
The entire list of manipulations in this case will be reduced to removing the “original” plugs and installing new fog lights in the seats.
Experience knows the two most common methods of installing fog lights.
- With the removal of the bumper (this is the method that will be described here).
- Without the need to remove this body component. This method is usually used by professional technicians who install PTF in a car.
If you are new to this issue, then the most suitable method of installing fog optics would be to do it yourself, which involves removing the bumper.
The photo shows the installation kit of the products.
Replacing low beam lamps
First you need to prepare for high-quality work. Prepare a new lamp (one or two as needed), the necessary tools (keys, screwdrivers, pliers), gloves (preferably cotton), a clean cloth and a bottle of alcohol.
Before you begin replacing the low beam lamp in a Kalina car, you must do the following. Firstly, it is advisable to place the car on a flat surface, turn on the parking brake, and for safety reasons, put blocks under the wheels of the car to prevent it from rolling. Next, open the hood of the car. After this, you should disconnect the wire from the negative terminal of the battery so that the wiring does not short circuit. To replace the lamp in the right headlight unit, you must remove the washer reservoir.
You can replace the low beam lamp after the entire optical unit of the headlight has been removed from the car, but we will look at how to replace the halogen lamp without removing the lighting fixture from the car body.
Procedure for removing the low beam lamp
- By pulling one of the petals of the rubber plug, remove it from the low beam headlight;
- We remember, or better yet, write down the correct location of the wires suitable for the halogen lamp, disconnect them;
- Carefully remove the spring clip holding the lamp. Press the protruding part of the latch and disengage it;
To avoid having to completely disassemble the headlight, the clamp should be handled gently so that it does not jump out of the mount due to a sudden movement and does not fall inside the optical device.
- Pull out the burnt out lamp.
Installing a new halogen lamp
It is advisable to carry out the process of installing a new halogen lamp with gloves, since contact of the glass bulb with the skin of the fingers will subsequently cause the lamp to darken and fail. If the glass surface of the lamp does come into contact with your skin, wipe it with a swab soaked in alcohol.
Lamp installation procedure
- By inserting a lamp into the headlight hole? make sure that the protrusion of the lamp fits into the grooved recess of the mounting socket, this way the lamp is secured against turning;
- Carefully install the lamp mounting clip into place. We take into account that the antennae of the latch lie near the center of the base, where the contact group is located.
- Hold the lamp fixing clamp until it snaps into place;
- We connect the wires, install a protective rubber cap, connect the battery and check the correct operation of the lighting fixtures.
Video help on replacing low beams
Replacing a damaged low beam lamp on a Lada Kalina car is easy to do. Follow the instructions carefully, and you will make sure that the occurrence of such a breakdown will no longer cause you panic or indignation. And having spare bulbs in your car will make your trips pleasant and safe at any time of the day.
Installation instructions
Here we consider a step-by-step algorithm of actions that will be required for execution so that the entire procedure is completed successfully.
1. First we remove the LADA Kalina bumper. To do this, unscrew the entire list of fastening components.
The screws are located on:
- lower bumper panel along the perimeter;
- in the wheel arches.
Now we remove the sidewalls of the element from the arched openings and completely remove the bumper from the car.
2. Next, remove the plugs by bending their latches. Here we use a flat screwdriver.
3. Unscrew the screws securing the fog lights. Each of the products is secured by three such fastening components.
4. We move inside the Lada Kalina salon. In the area of the pedal assembly we find a wiring harness. At this point we push out the sealing element and use a metal wire to pull out the wiring relating to the power supply to the fog lights. These cables are located next to the main trunk harness.
5. We connect the PTF wiring with the main wires.
6. Now we position and fix the power cables for the fog optics so that it is as convenient as possible to remove the connectors from the device terminals.
7. We attach the negative terminals to the screws of the LADA Kalina body.
8. The power consumed by anti-fog optics reaches 110 W, so we connect these devices using a relay with a button.
9. The button itself can be installed directly on the panel in the cabin, for example, next to the cigarette lighter.
10. To provide the lighting components with supply voltage, you will need to connect the pink wire to the relay. It is located in the safety block.
11. To protect the circuit of the headlights we are considering, you will need to use a fuse link with a rating of 15 A.
12. The power contact group of the relay with terminals “30” and “87” is connected to the cables leading to the fog lights.
13. Upon completion of all switching work, we check the correct installation and connect the battery power.
14. We press the button installed inside the cabin. If all connections are made correctly, then the fog lights illuminate the space, delighting the owner.
15. We install the bumper using the reverse algorithm of manipulations.
Do-it-yourself headlight installation is completely completed.
When and why to change
The factory light is adjusted during the production process, at the time of passing technical inspection. In the new car, the modules shine with maximum power and at the peak of their capabilities. The need for replacement is determined by the following main criteria:
- Reducing light intensity.
- The appearance of yellowness and cloudy areas on the cut-off strip.
- Complete shutdown of one of the light modules.
- Increased brightness after the suspension hits a pothole or has mechanical contact with the headlight.
Kalina lamps installed on the conveyor last no more than 4 years. Cloudiness, deterioration of visibility and the appearance of unlit areas appear after the filament burns and the bulb smokes. In this case, the light does not pass through the dirt well and does not reach the desired areas of the reflector. There are yellow spots of light and darkened areas on the road.
The thickness of the light module filament is calculated by production engineers. When struck, the lamp shakes and the spiral becomes thinner. An external examination reveals a large increase in beam power. This indicates that the halogen lamp will soon fail, since the thin filament heats up above the set temperature and begins to melt. The service life of a damaged part ranges from one minute to several hours.
Tail lights and lamps
The following elements are used as brake light lamps in Kalina-2: lamps with a P21W socket and a transparent bulb. Replacing such an element will not be difficult.
Brake light bulb, VAZ-2192/2194
The rear turn signals are equipped with the same bulbs as discussed above. Their bulb is colored yellow (type PY21W).
The reversing light in the hatchback is provided by a lamp of the following standard size - R10W. If we talk about the station wagon, they use lamps of a different type - W16W. They do not have a metal base.
These are the reversing lamps
In conclusion, we note the following: the light of the side and fog lights in the rear lights is provided by a combination lamp. Its standard size is P21/4W. Good luck with your choice!
It is important to know! When performing any actions with electrical equipment, you must first disconnect the negative terminal of the battery. The terminal fastening is unscrewed with a 10 mm wrench.