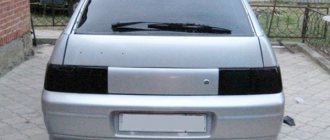
Since 2004, Lada Kalina has been equipped with block-type headlights. This type differs from standard headlights in that it combines, at the same time, low and high beam lamps, as well as turn signals and backlighting.
A characteristic feature of the Lada Kalina headlight is the presence of an electric remote lighting corrector. This function allows the driver to adjust the height and direction of the light flux directly from the car's interior. Such functionality is not found on every car of those years, which undoubtedly gives the Lada Kalina a great advantage.
Removing the headlight without removing the bumper
Not every driver has enough knowledge and experience to remove the bumper on their own the first time. Also, this stage takes a lot of time, so there is another way to remove the headlights from Kalina. The approach under consideration requires the following actions.
- Get rid of the coolant unit and air filter housing for a while.
- Use a screwdriver to remove the PTF plug.
- Find the lower fastener for the lighting element and unscrew the bolt in this area. After the manipulation, insert your hand into the PTF hole.
- Find the bolts on the top of the light block structure and remove them using a size 8 wrench. You can find them not far from the radiator.
- The element is secured to the wing of the car by a screw, which should also be unscrewed using a Phillips screwdriver of the appropriate size.
- Try to carefully move the part that is located closer to the radiator closer to the engine by rotating the block light. Remove the lower fasteners from the seats.
- Use a short socket to remove the bolts and lower headlight mountings.
- A slight pull towards you will allow you to remove the flashlight. Make sure that the paintwork is intact, as the light will now be very close to the fender and bumper.
How can I remove
headlight on Lada Kalina?
Many motorists are interested in how to remove a headlight
on Kalina.
Indeed, among all parts of the car, headlights in most cases become the subject of modification or replacement. The headlamp
itself is considered a normal source of directional light. Its main purpose is to illuminate the road and the surrounding area.
Features of headlights
As standard, Lada Kalina headlights are combined into blocks, which are divided into three sections, providing:
- low beam;
- side and high beams;
- turn indicator.
When turning on the nearby light, only light bulbs for it are used. If you turn on the distant lighting, a complex consisting of distant and near lighting
, with all this, the power of each is 55 W. In front of each section of indicators there are special transparent lenses.
The turn signals glow orange and have a power of about 20 watts.
The headlights are adjusted using a special corrector. The electric headlight corrector has an electromechanical drive. The standard adjustment system contains a device installed directly on the dashboard itself, and a special wire that connects the electrical wires in the headlights. To adjust the electric headlight corrector, you will have to disassemble them.
Replacement or removal of the lighting system occurs for various reasons. Among the more common ones are:
- headlight tuning;
- installation of a new set instead of the old one;
- need to adjust the electric headlight leveler.
Before you take it off
headlight, when it needs to be replaced, it is better to find the company that manufactured the part. To do this, you need to carefully examine the glass. If there are AL signs on it, this lighting system was manufactured by Bosch.
Removing a Lada Kalina headlight
We replace broken headlight glasses (old-style BOSH), on a LADA KALINA
.
Replacing headlight glasses on Kalina
Remove the headlight
without
removing
the bumper on
the viburnum
.
Some headlight models from this manufacturer are made of polycarbonate and do not have a low beam
. If the lamp used for low beam in a polycarbonate headlight is equipped with a cap, it is most likely made.
Adjustment features
Since Lada Kalina is a representative of the budget segment, it is equipped with a minimum of required lighting devices. Here we focus on head optical devices. Headlights allow the driver to have sufficient visibility when driving, and also serve to identify a specific car on the roadway.
This is interesting: What base is suitable for the VAZ-2106 low beam lamp, how to change it
Adjustment of the Lada Kalina headlight beam is carried out using a specialized device during a technical inspection. Mechanics advise owners to periodically check the correct beam and adjust the headlights (if necessary) and if necessary, know how to adjust the headlights yourself. The indicated procedure can be carried out independently.
The settings of the Lada Kalina lighting devices are interconnected with the condition of the load-bearing elements of the chassis, lamps and tire pressure. Before adjusting the lighting devices, it is recommended to check the points indicated here to ensure they are in good condition and that the indicator (pressure) is correct. If there are deviations from standard values, then the identified deficiencies should be eliminated immediately. For example, the pressure parameter should be the same on both sides of the car. Darkened lamps will also need to be replaced with new analogues.
To adjust the optics in the Lada Kalina, the owner will need the following tools:
- cardboard sheet;
- five-meter tape measure;
- "hexagon" (6 mm).
Adjustments should be made in a dark box or at the appropriate time of day. Also one of the main conditions is the presence of a vertical wall. We install the car on a level area five meters from the designated structure. We adjust the corrector to the zero position.
A cardboard sheet is required to periodically block the beam of headlights. The adjustment process itself is carried out using a hex key with a dimension of 6 mm. The light beam of each headlight is individually compared with a special circuit. Here it is necessary to achieve the correct direction of the beam, which will allow the driver not to dazzle oncoming traffic participants in the dark.
How do you remove headlights?
The lighting system in Kalina includes:
- glass or polycarbonate;
- frame;
- lamp plugs;
- the lamps themselves;
- reflectors;
- wiring;
- decorative inserts.
To replace and adjust the headlights, most often you have to remove the front bumper. Only after this all the screws from below, as well as from above, will become more accessible. Once they are dismantled, you can remove
the headlight itself, after removing all the wires and pads.
But not every car owner has enough experience to dismantle the entire bumper. In addition, a common problem is the lack of time to change the entire lighting system. That is why replacing lighting without complete dismantling is considered more popular.
To disassemble the headlight with your own hands, you need to prepare the following tools:
- one key for 8 and one for 10;
- Phillips and flathead screwdrivers;
- new lighting system component.
To modernize the lighting on Kalina, you need to take the following actions:
- Remove the air filter housing and the special coolant unit.
- Remove the PTF plug using a screwdriver.
- Using a 10mm wrench, unscrew the bolt located underneath the headlight.
- Remove the bolts located on top of the light blocks. They are located near the radiator. In this case, you need to use the key 8.
- Remove the screw that secures the light to the car's fender using a large Phillips screwdriver.
- Rotate the light block so as to move the part near the radiator a little closer to the car engine. This will allow you to remove the fasteners located below from their seats.
- Remove the lower iron fasteners. To do this, you need to unscrew several bolts with a short head.
- Remove the headlight by pulling it towards you. Try not to damage the varnish layer, because the lamp is located next to the wing and bumper.
Knowing how to disassemble a headlight, installing another device with your own hands will not be difficult. Install a new headlight by performing the steps in reverse order. Now all that remains is to figure out how to adjust the headlights so that the light from them is directed correctly and illuminates not only the road, but also shines on the sides of the car.
Car owners often wonder how to remove the headlight on Kalina in order to replace it with a new one, install a lens, LED eyelashes, or clean the reflector. To dismantle the optics, you need to remove the bumper, so you should prepare your tools and make sure there is enough space for work.
Optics for Kalina are manufactured at two factories:
- Bosch;
- JSC "Avtosvet"
Both types of optics have excellent characteristics and provide high-quality illumination of the road. You can recognize Bosch products by the missing cap on the lamp in the near module, as well as by the AL code on the glass.
The headlight design of the Lada Kalina is no different from most cars. The flashlight has low and high beam modules, blocks with turn signals and side lights. In the new Kalina body, the dimensions also play the role of running lights.
The following lamps are used in Kalina optics:
- low – H7, 55W;
- long range – H1, 55W;
- direction indicators – PY21W, 21W;
- Dimensions – W5W, 5W.
Light elements from the dimensions fit into the license plate lighting module on the trunk lid. Since 2013, modernized optics have been installed in Kalina, where part W21/5W is responsible for the clearance and daytime light. The fog lamps are equipped with H11 lamps with a power of 55W.
Conclusion
Of course, you can replace lamps or perform other operations on a lighting fixture without removing the bumper, but this will require additional time and skill. Also, when carrying out such a procedure, without removing the device from the car, it is necessary to disconnect the battery.
If you decide to dismantle the headlight, then its installation should be carried out in the complete reverse order. Also, do not forget to apply sealant before seating the device in the socket. Before leaving, be sure to check its functionality. If everything works perfectly, then your Lada Kalina is ready for use, and will delight you during night trips.
Which optics is better to choose
While using the machine, the lights are subject to sudden temperature changes, impacts from stones and small grains of sand. These factors negatively affect glass, reducing its transparency, worsening light characteristics.
High-quality headlights that meet safety requirements are installed from the factory. Unofficial replacements are equipped with xenon lenses, “angel eyes” and modified reflector geometry. These lights look beautiful, but wear out faster due to poor quality materials and can fog up in humid weather.
When choosing new optics, it is better to trust the official ones. When purchasing, it is important to clarify the modification of the body and the year of manufacture of Kalina. Depending on the configuration, there are darkened masks or improved lighting characteristics.
Low and high beam optics
Depending on the body type, Kalina has different parts installed:
- sedan, hatchback – standard optics;
- sport, station wagon - are equipped with a more elongated reflector with an increased area to increase the lighting area by 20%.
To connect improved optics to Kalina, you do not need to lay additional wires or change contact connectors. The optics are no different in mounting points and shape.
When purchasing flashlights, you should pay attention to original parts with improved performance. This will improve the characteristics of the beam without interfering with the wiring or altering the standard fasteners.
Fog lights
When buying new PTFs, it is better to choose from original parts. Standard lights are equipped with durable glass and a high-quality reflector that directs the beam in accordance with GOST.
Fog lights for Kalina are produced by:
- Bosch;
- "Kirzhach".
The models differ in the shape of the glass, but there is no difference in quality. The headlights are connected to the standard wiring and installed in the mounts on the bumper. There are no fog lights in the basic trim levels. To connect them, you will have to additionally purchase a button for the interior, a PTF relay, and remove the bumper plugs.
In stores you can find modernized flashlights with lenses for gas-discharge lamps or LED modules. Such products are not certified for use in Kalina because they do not meet transport safety requirements. For such parts you can receive a fine and an order to eliminate the malfunction within 10 working days.
Headlights
Replacing a headlight yourself will require preparation of the car and tools. To work you will need:
- set of wrenches;
- screwdrivers;
- rag;
- gloves to protect hands.
For ease of work, you need to wash Kalina in advance and clean the space in the garage. To replace the headlights, you need to remove the bumper and unscrew several mounting bolts.
Dismantling
Steps required to remove headlights:
- Open the hood lid.
- Disconnect the battery terminal.
- Pull out the clips from the front of the fender liner.
- Unscrew the radiator grille fasteners and remove it.
- Unclip all the clips along the contour of the bumper and unscrew the screws.
- Remove the bumper without scratching the corners of the fenders and headlights.
- Disconnect the optical power plug.
- Remove the two screws holding the light on top.
- Remove the lower headlight bolts.
- Carefully remove the part.
Before assembling and installing a new headlight, you should check the presence of light bulbs and their functionality. To do this, connect the flashlight to the connector and check all the functionality. When installing a new part, you should not rush; it is important to be careful and not damage the case or glass.
Repair
To disassemble the Kalina headlights, they will need to be dismantled. You can repair the Kalina headlight by polishing the glass, replacing it, washing the internal parts, or restoring the reflector.
To remove the glass you will need:
- Dismantle the part.
- Heat the headlights in the box using a hair dryer.
- Tear off the glass.
- Carry out all the required work and assemble the lantern using a special sealant.
To disassemble the headlight, it will take several hours, depending on the experience of the car owner. Replacing Kalina's headlight glasses will improve the exterior and increase light transmittance.
During operation, it is important to follow safety precautions, do not leave the hair dryer unattended and use gloves.
Installation
Before installing the lights, you should wash the mounting points and mounting space. Installation is carried out in the following order:
- The power plug is connected.
- The Kalina headlight mounts are aligned and secured with standard bolts.
- The bumper is hung from the front and screwed onto self-tapping screws.
- The radiator grille is installed.
- The left and right fender liner clips are being returned.
In versions with fog lights, you will have to additionally connect the connectors to the lamps when installing the bumper and disconnect them during removal.
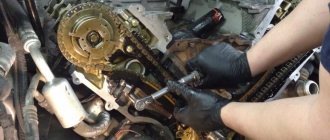
How to remove a headlight on a Lada Kalina in the traditional way
The traditional method is to remove the headlight along with the bumper. If you remove this part of the body, you will have access to all the screws, lower and upper. The dismantling instructions are as follows:
- Work begins with removing the bumper. Using a Phillips screwdriver, unscrew the screws securing the fender liners. There are 4 of them in total.
- Remove one more screw on the left and right.
- Remove the screws securing the bumper. They are located below.
- Remove the radiator grille. A few more screws will open in front of you, securing the bumper.
- Remove the license plate and dismantle the plastic grille to which it was attached. To do this, you will have to unscrew two bolts and pull it out with force. This sheathing is secured with clamps.
- In the area under the license plate, remove two more screws.
- Grasp the edges of the bumper and rip it off the latches with a sharp and strong movement. The weight of the bumper is small, so there is no need to involve an assistant - you can handle it yourself, it is only important to pull it smoothly, without distortions.
- Once the bumper is removed, you will be able to access the screws that secure the headlights. To do this, remove the lower bumper beam.
- Remove the screws from the bottom that secure the light block. If you do not find them right away, you need to bend the beam. To remove the feints you will need a ratchet with a size 8 head.
- The headlight block is also secured with two bolts on top. One is removed with a screwdriver, and the second is unscrewed with a ratchet.
- Now you need to disconnect the power plugs by first bending the latch.
- You can remove the headlight without damaging it with only two hands.
If you did disassembly to adjust the headlight, then you do not need to disconnect the power plugs. They help change the intensity of the light beams and their height.
After disassembling up to this stage, you can immediately begin adjusting. Once the setup is complete, you need to secure the headlight with screws and reassemble it.
Fog lights
PTFs for Kalina are installed only on expensive trim levels. However, all wiring is installed from the factory and there are “ears” for mounting on the bumper. To install headlights, you will have to purchase a power button, frames in body color and a relay.
Installation of fog lights:
- Use a screwdriver to remove the plugs under the PTF.
- Screw the lights into the standard recesses.
- Snap frames to hide excess cavity.
Lada Kalina Cross uses matte black plugs that do not require painting. When installing on your own, you should buy bolts for fastening the headlight in advance.
How to connect the electrical part
Connecting the PTF to the standard wiring does not take much time. To search for the braid, you should inspect the area of the spar at the entrance of the main beam. The PTF plug is taped to the wires with electrical tape.
Fog lights Kalina 2 are often equipped with detailed instructions and an additional switch that must be installed instead of the old module to turn on the light. Connecting to pre-laid wiring does not take much time and does not require laying additional contacts.
If there are no power cables in the braid, you will have to independently pull the wires into the cabin, connect them to the connector, fog lights with plus and minus, and connect them through a relay. A detailed description of the connection is included with the part in the form of a diagram.
During the installation process you will need:
- insulating tape;
- copper wires;
- corrugation;
- connectors suitable for lamps.
When installing wiring, disconnect the battery and strictly follow the instructions.
Maintenance and replacement of the rear light
To replace the lamps in the rear light of Kalina 2 station wagon and hatchback, you need to remove the entire headlight unit. To do this you need:
- Unclip the plug next to the seat belt bolt.
- Unscrew the nut.
- Open the seal window and unscrew the remaining fasteners.
- Pull out the flashlight.
- The lamps are pulled out by turning the base counterclockwise.
When replacing lamps in a hatchback body, carefully remove the nuts so that they do not roll under the trim. The missing part will rattle while driving and you will end up having to disassemble the entire luggage compartment.
The Kalina sedan has special compartments in soft upholstery for access to the nuts. There is no need to remove additional plugs.
To keep your car in excellent condition, you need to periodically replace lamps, clean optics, or install new ones. Removing front, rear headlights and foglights in Kalina does not require expensive tools or special knowledge.
In one of the previous topics I wrote about fogging of the front left headlight on my Kalina. So, today I decided to remove it and coat all the connections between the glass and the body with silicone sealant. I went to the car market, took an American-made tube for 80 rubles and started repairing it, which I will tell you about in detail below.
The procedure for removing and installing the headlight unit on Kalina:
- If on previous domestically produced models it was possible to perform this procedure quite quickly, then on Kalina you will first need to remove the front bumper. I wrote about this in a previous article, so read this first: .
- After this, you will need a 13mm socket and a wrench to unscrew the bumper power beam from the side where it is needed.
- The next step is to unscrew the lower headlight mounting bolts. To get to them, you need to bend the beam a little to the side and unscrew two bolts using a ratchet with a 8-mm head.
- Now you can proceed to the upper bolts, there are also two of them: one for an 8-point wrench, and the second for a Phillips-head screwdriver:
- And after that, you can disconnect the power plugs from Kalina’s front headlight: one of which is responsible for lighting, and the second for adjusting the height of the light beam. The electrical adjustment plug is secured with a latch, which must first be bent.
- We take the body with both hands and remove it from the seat.
- If it needs gluing, then it is necessary to apply silicone sealant around the entire perimeter of the junction of the glass and the body, wait at least an hour until it dries and install it back.
- If you replace the headlight with a new one, we immediately assemble everything in the reverse order, installing all the power wires in their places.
After I sealed everything with sealant, I haven’t driven it yet and I can’t say about the result. As soon as some time passes and there is no fogging, I will definitely write in the comments to the article. I spent at least 2 hours fiddling with my Kalina, but these are all little things - the main thing is that the result is positive!
The headlight unit on a car is removed in case of body repair, replacement or glass replacement. Catalog number of the headlight unit for the Lada Kalina car is 1118-3711011. The headlight unit for the Lada Kalina car is produced by authorized manufacturers Bosh and the city of Kirzhach. The main difference between them is the glass installed in the headlight block; for the Bosh manufacturer it is made of glass, while for the manufacturer it is made of plastic. In this case, the plastic is glued to the body of the headlight unit, that is, the headlight produced in Kirzhach is nominally considered non-separable.
To remove the headlight from a Lada Kalina car, you will need a 10mm socket wrench and a flat-blade screwdriver.
Tuning options
You can increase the attractiveness of your car for yourself and others by tuning the lighting system. Main options:
- tinting;
- installation of bilens;
- installation of LEDs in dimensions;
- creating angel eyes.
Many car enthusiasts choose tuning of headlights on Kalina, such as tinting - applying a special film over the entire surface of the glass of the device to give the car an original design. Another popular option is installing xenon. Almost all workshops offer this service, but only experienced craftsmen can carry out the installation efficiently.
Complexity
Tool
1 - 3 hours
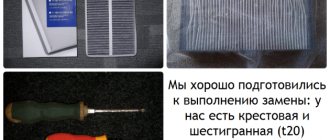
Tools:
- Medium Phillips screwdriver
- Small flat screwdriver
- Driver for socket attachment
- 8mm wrench attachment
Parts and consumables:
- Turn signal lamp
- Low beam lamp H7
- Side light bulb W5W
- High beam lamp H1
- Headlight glass
- Rags
- Alcohol
Note:
The work is shown on the right block headlight. The work of replacing lamps and removing the left headlight unit is similar. You can replace the lamps without removing the headlight from the car.
1.
Disconnect the wire terminal from the negative terminal of the battery.
2.
For clarity, the work is shown with the headlight removed. Turn the turn signal socket counterclockwise 45°.
3.
We remove the cartridge from the headlight housing.
4.
By pressing the lamp, turn it all the way counterclockwise and remove it from the socket. We install the new turn signal lamp in the reverse order.
5.
To replace the low beam lamp, remove the protective rubber cover from the headlight housing. By pulling one of its three petals, we disconnect the wire tips from the lamp terminals.
6.
We remove the spring clamp from engagement with the two hooks and move it away from the lamp.
7.
Remove the lamp from the headlight housing.
Warning:
High and low beam lamps are halogen. You should not touch their glass bulbs with your fingers, as traces from them will lead to darkening of the lamp when heated.
You can remove dirt from the flask with a clean rag soaked in alcohol.
.
8.
We install a new low beam lamp (H7) in the reverse order.
9.
To replace the side light lamp in the headlight, remove another protective rubber cover similar to the cover for the low beam lamp and remove the socket with the lamp.
10.
Remove the lamp from the socket. We install a new side light lamp (W5W) in the reverse order.
11.
To replace the high beam lamp, disconnect the wiring block from the lamp.
12.
By squeezing the ends of the spring clamp, we disengage them from the hooks and remove the clamp from the lamp.
13.
Remove the lamp from the headlight housing. We install the new high beam lamp (H1) in reverse order.
14.
To remove the headlight, press the latches. We disconnect the wire blocks from the connector on the headlight housing and the turn signal lamp socket (shown by the arrow).
15.
Remove the front bumper. Using a Phillips screwdriver, unscrew the screw for the top fastening of the headlamp, and use a wrench or an 8-point socket to unscrew three more bolts for fastening the headlamp (shown by arrows) and remove it.
16.
The housing of the right headlamp is marked “RE”; the body of the left headlamp is marked “LE”.
17.
Install the headlight in reverse order. If you need to replace the headlight glass, use a screwdriver to pry up and remove the six spring brackets that press the lens to the headlight seal.
18.
Remove the headlight glass. Remove the glass seal.
19.
Install the headlight glass in the reverse order.
The article is missing:
- High-quality photos of repairs
The headlight unit on a car is removed in case of body repair, replacement or glass replacement. Catalog number of the headlight unit for the Lada Kalina car is 1118-3711011. The headlight unit for the Lada Kalina car is produced by authorized manufacturers Bosh and the city of Kirzhach. The main difference between them is the glass installed in the headlight block; for the Bosh manufacturer it is made of glass, while for the manufacturer it is made of plastic. In this case, the plastic is glued to the body of the headlight unit, that is, the headlight produced in Kirzhach is nominally considered non-separable.
To remove the headlight from a Lada Kalina car, you will need a 10mm socket wrench and a flat-blade screwdriver.
Operations for removing the headlight unit Lada Kalina
1. Disconnect the “-” wire from the battery. 2. Remove the front bumper from the car, see the article “Removing the front bumper on a Lada Kalina car.” If you do not remove the bumper, it will not allow you to remove the headlight from the car. 3. Under the bumper there are two screws securing it, unscrew them.
4. Also unscrew the bolt and screw of the upper headlight mountings.
5. Disconnect the connectors of the electrical wiring harness suitable for the headlight unit and the turn signal on it. 6. Now you can remove the headlight from the car.
7. Install the headlight unit on a Lada Kalina car in the reverse order. To ensure uniform clearances between the headlight unit and the fender, loosen the fastening bracket nut.
Video “Installing a low beam light bulb on Kalina”
Detailed installation instructions are given in the video below (the author of the video is the Kalinin channel).
Since 2004, Lada Kalina has been equipped with block-type headlights. This type differs from standard headlights in that it combines, at the same time, low and high beam lamps, as well as turn signals and backlighting.
A characteristic feature of the Lada Kalina headlight is the presence of an electric remote lighting corrector. This function allows the driver to adjust the height and direction of the light flux directly from the car's interior. Such functionality is not found on every car of those years, which undoubtedly gives the Lada Kalina a great advantage.
The headlight of the Lada Kalina car consists of several main elements. One of them is a block cover with holes for light bulbs, and a glass headlight cover made in a corrugated style for better light dispersion.
Inside the block there is a plastic reflector with a mirror surface. It is tightly inserted into the block cover, and is covered with a glass headlight cover on top. Well, the main element of the whole device is light bulbs.
Each headlight of a Lada Kalina car has 4 bulbs: low beam, high beam, dimensions and turn signal. These light bulbs are tightly fixed in a plastic socket with grooves. This design allows you to easily replace light bulbs, without any additional fastening materials.
Replacement of glass in the headlight unit of a Lada Kalina car (for Bosh headlights)
1. Remove the headlight unit from the car, see the operations described above 2. Remove the six metal rivets that hold the glass. You can remove the rivets using a flat blade screwdriver.
3. Remove the glass. 3. Install new glass on the headlight unit. (The seal between the glass and the headlight housing is sealed with a rubber seal. If the rubber has lost its plastic properties, use a sealant. Apply a thin layer to the place where the glass contacts the seal. Replace the glass, remove excess sealant. 4 Install the metal clips in their places. Reinstall the headlight.