Publication date: September 22, 2020. Category: Automotive equipment.
If there is wind blowing inside the car, noises from the street are heard and a layer of dust is constantly forming, then most likely the doors and hood do not close tightly, forming small cracks through which dirt penetrates and a draft appears. Automakers equip vehicles with special rubber seals, but over time they lose their properties, wear out and crumble. They deteriorate especially quickly under the influence of temperature changes and lack of proper care.
Although outwardly such products do not look like anything special, the seals perform many useful functions, so it is worth replacing them in a timely manner (not necessarily at a service station; you can stick new rubber bands on the doors, hood and other parts yourself).
Advantages of rubber seals
These simple products:
- They prevent not only dust and dirt from entering the car, but also water and snow.
- Provides tighter closing of doors. Even if the car accelerates to high speed, the driver will not hear a piercing whistle. Water and snow will not get into the cracks.
- Allows doors to close more softly. This means that the car body will suffer less from passengers who like to slam doors.
- Prevent door frames from freezing to openings in severe frost conditions. If you coat the seals with special lubricants during the cold season, you will never have problems opening the doors and hood.
- Provide noise and heat insulation.
All these factors have a positive impact on the level of comfort of the driver and passengers. If you choose and install the seal correctly, the interior of the car will always have the optimal temperature, regardless of the time of year.
Repair and restoration of door seal
The car door seal has many protective functions: heat, noise, waterproofing, and also protects against drafts.
Under the influence of changes in temperature and humidity, the door seal may dry out . Also, mechanical impact causes abrasion and crushing of the material.
Restoration and repair of the seal can be done independently in the following ways:
- Using a soft silicone tube, restore the original volume.
- Partially replace the damaged area.
- Replace the seal with a new one.
Tip: To make the seal last longer, lubricate it regularly with silicone grease.
Restoring the volume of the seal
For repairs you will need the following materials:
- Silicone or rubber tube with a diameter of 7-8 mm. It must be soft so as not to tan in the cold. Experienced car enthusiasts use a silicone tube from a construction hydraulic level of 15 m - this is enough for 4 doors.
- Silicone grease or oil.
- Remove the protection from the car sills to get to the seal.
- Carefully pry off the seal.
- Gradually remove it along the contour of the doorway, pulling it towards you. If the seal is solid (closed in a ring), you will have to cut it.
- Pour or spray a little lubricant inside the seal.
- Insert the tube into the hole.
- After completing the repair, install the seal in place.
How to choose a seal
It is believed that the best seal is the one that was purchased for a specific brand of car. However, finding such products is very problematic. First of all, seals are a rare commodity, and their cost (if we talk about original products) can hit your pocket hard. Therefore, many people prefer universal models.
If you look at the image, you will notice that the rubber seals are very different. Therefore, we will consider the main types of universal models:
- 1 – a product of this type is most often used for trunks (but if there are vertical posts in the engine compartment, then you can use such an elastic band to seal the hood);
- 2 – for the trunk (thanks to the additional “bracket”, the gaps between the body and the trim are well closed);
- 3 – universal seal (best suited for Volkswagen Transporter series vehicles);
- 4 – universal model for doorways (the elastic band has an additional rubber edge that perfectly covers the joints and leaves no gaps);
- 5 – suitable for sealing the trunk (especially if we are talking about the French automobile industry);
- 6 – universal rubber band for doorways (can also be safely used for garage doors). If the engine compartment has horizontal ribs, then you can also use such a seal for small gaps between the hood and the body;
- 7 – a two-chamber type seal, practically no different from the original Transporter rubber bands.
- 8 – suitable for almost all foreign cars made in Europe.
The cost of such products can be from 150 to 500 rubles, depending on the model and quality of the elastic band. However, even if you purchase a high-quality “non-original” seal, there is always a chance that it will not fit. In this case, no matter how you glue it, creases and cracks will still form.
What to do? We go to any large household goods store or construction market and buy a regular self-adhesive seal (household or technical). It is best to give preference to the Redmontix model for profile type D (9 x 8 mm). Even unlike the standard rubber band, it will be much softer. At the same time, such a seal can be considered universal (it is, of course, better to choose in black).
Healthy! The entire car will require about 6 meters of elastic.
If we talk about the characteristics of ordinary household rubber bands, they are in no way inferior to automobile ones. For example, the same Redmontix operating temperature ranges from -40 to +65 degrees. It covers cracks of 3-14 mm in size well, does not crack and “calmly” tolerates the use of chemicals when washing. The service life of such a product reaches 10 years, so it is an excellent alternative to car rubber bands. If you care for it properly, you can forget about drafts and dust for a long time.
Plastic Covers for Car Doors - MasterOK
There are different types and types of moldings. How to choose one of them and stick it correctly on the car door? Description of process technology.
If you have ever had to pay a lot of money to repaint the doors and body after a scratch left by a careless owner of a car in an adjacent parking space, then you understand how sad it is. To prevent similar things from happening again, there is a special remedy: car moldings. They will not only protect your car, but also give some zest to its appearance. In addition, they are not at all difficult to install without resorting to outside help. All that is needed for this is to choose the right type of trim and the means to stick it to the car.
Why are car moldings needed?
The word “molding” comes from the British molding or molding, which translates as “cast part” or “molding”. The translation quite accurately explains the purpose of this part. It is used in almost all areas: architecture and construction, design and decoration, as well as the automotive industry. This is the category that interests us most.
In the auto industry, a molding is a multifunctional plastic or iron lining on any part of the car, which has two main functions:
As for the decorative function, everything is clear: what driver wouldn’t want to vary the appearance of his own steel stallion, highlight it in the middle of the traffic and attract the attention of people around him. The parts are made from different materials and come in a variety of shapes and colors. With their help, you can delimit the body into sections, make it visually more elongated or stockier. You can choose contrasting or close to the main colors. Often moldings cover scratches and chips of paint. By the way, by choosing a part in the color of the body, you will make it visually more streamlined. Therefore, while driving, the car looks quite beautiful with them.
But molding is not only an original decoration, but also a necessary part that can protect your car from external mechanical damage. If the owner of an adjacent car opens the door carelessly, it will hit this part specifically, and not the body itself. So, leaving your car in a cramped parking lot, you no longer have to worry about a further visit to the auto repair shop.
Installation is done on different parts of the car:
- bumper;
- front, rear and side windows;
- roof;
- wheel arches.
- rear and front doors
:
This part can be installed on both the rear and front bumpers. In this case, it will be protected from light impacts, for example, on a sidewalk curb, as well as chips and scratches.
Window moldings protect against dust particles and water droplets getting between the body and the glass. Usually these places are inaccessible for cleansing, so dirt accumulates in them. You can also seal car windows using window molding. The element is made mainly of rubber.
There are often cars with such a part on the roof. Their function is mainly decorative. On some car models, rubber moldings on the roof cover an ugly weld seam.
Moldings on the wheel arches are very useful in rainy weather, when there is a lot of dirt on the street, and also during frequent off-road trips. They limit the entry of debris and road vehicles into the wheel mechanism.
But the most popular type is the molding installed on the car door, because in most situations it protects the paintwork from scratches. You can install the part only on the front doors, but protecting the rear ones will also not be unnecessary. Such moldings can be made of rubber or plastic, but iron ones are considered to be of higher quality: iron and duralumin.
We will talk about this type of overlay specifically next.
Choosing molding for a car
There are different systematizations of moldings: by location of installation (we talked about it earlier), by material, method of use, originality of production, and even by appearance. In order to choose a part for your own car, you need to take into account the advantages and disadvantages of each type.
Let's start with the most common: originality of production. Based on this principle, they can be divided into two types:
- factory-made, supplied with the car or purchased for a specific model from official distributors;
- universal, suitable for all car models and differing only in length and appearance.
Obviously, it is better to purchase an unusual part, but this is not always possible. Well-known car brands often carry out restyling and remove old models from production and sale, and along with it all the accompanying parts. Molding from a more recent generation of the same model may not be suitable in length, width or other indicators.
That’s why many people prefer to get universal models right away. After all, their cost is even more attractive than that of industrial ones, and their appearance is virtually indistinguishable. In addition, when choosing a universal spare part, you have a greater variety of colors, materials and mounting methods. But you shouldn’t save on such molding: careless manufacturers can falsify the results of laboratory examinations and sell bad products. As a result, the purchased part, especially one made of rubber, will not fit tightly enough, move away in the corners and shrink at low temperatures.
Repair of fastening of a plastic lining (molding) of a VW Passat B3 car door
Installation of overlays
on
the door
of
car
Creation Official websites:..
Renault Duster Installing door trims
Change the pad
on the front
door of a
VAZ 2110 car is easy, and you don’t need to take a new
door
. I will show,…
According to the production method, there are different types: semi-hidden, encapsulated, with rain channels. But they are all used for auto glass. But expensive moldings are usually installed on the doors.
Now let's talk about the production material. In most cases, the following are on sale:
- plastic;
- rubber;
- duralumin;
- iron;
- moldings with a combination of metal and rubber;
- moldings with a combination of rubber and plastic.
The strongest ones, obviously, are steel linings. Directly behind them are duralumin ones, which are distinguished not only by their highest strength, but also by their lightness.
Rubber products have a much lower degree of protection, so in most cases they are used as a decorative element or to protect the upper part of the car from dirt flying from below. If you can’t afford moldings made entirely of metal, pay attention to models with partial addition of rubber. It reduces the price of the product, adds elasticity and maintains strength. This item will serve you for many years to come.
But the combination of rubber and plastic, as well as 100% plastic parts, are not particularly wear-resistant. They will quickly become unusable, and you will have to replace them with higher quality elements. Nevertheless, such parts are in demand on the market because their cost is quite low.
Please note that special markings are used on car moldings. It provides information about the type of part and material of production.
PVC Mld. This marking indicates that the product is made of PVC or other synthetic polymer material.
TPR. Designation of thermoplastic rubber included in the product. Such parts are characterized by increased resistance to certain chemical substances. These include, for example, gasoline and motor oil.
With Butyl Mld. A similar mark indicates that the product contains butyl.
EPDM. Labeling of a combination of rubber and ethylene-propylene. Molding with this mark does not withstand temperature changes, but is resistant to ultraviolet radiation and certain chemical reagents. But gasoline or oil can harm the material.
Cavity Mld. The part marked as such has a gutter for draining water.
Underside Mld. Designation of covered type molding.
With Detail Strip Mld. The molding has a decorative stripe.
Encapsulation Mld. An encapsulated part, which is made at the factory together with glass.
One cannot ignore another function of molding - decorative. Based on external features, parts are divided into the following categories:
Most models of moldings have a monochrome grayish color, which can be painted in any desired color. In this case, you no longer have to worry that it will not accurately match the body color. But shiny moldings are now more popular.
You can also find moldings with additional functions on sale:
- Reflective, made from a combination of rubber and metal. Such inserts reflect the light falling on it from the headlights, which allows drivers of other cars to see your car perfectly, even if their headlights are not on.
- LED. They are very popular among sports car owners because they can emit light of different colors, which gives the car an unusual look.
What to stick on the door
It’s especially nice that to install the molding you don’t have to drill holes in the body or other parts of the car. These elements are simply installed in place using adhesives.
But you should not use ordinary Moment glue for these purposes. It does not hold “non-breathable” surfaces together well. Such a molding will fall off very soon. And it’s great if you notice this before you go quite far from the place of loss.
Special cyanoacrylate adhesives have proven themselves to be the best in this regard. They firmly hold the expensive elements of the car. The only negative: if you were careless during the installation process and spilled a few drops of product on the paintwork, it will be quite difficult to remove them. Most likely, you will have to resort to the help of special removing compounds or even the services of auto repair shops. Therefore, be as careful as possible while working.
Ordinary auto sealants can serve as candidates for adhesives. Typically, they are used when installing parts on windows, and they are also great for other parts of the car.
Another option is the introduction of “liquid nails”. However, when using them, you will have to hold the molding tightly pressed against the door for a long time. Think in advance about how you will fix the part.
Some motorists use double-sided tape. This method has a right to life, but it is better to play it safe and add a couple of drops of glue. This way you will be sure that the molding will not blow off during fast driving.
How to install
If you have already decided on the type of molding and even got it, and also found a suitable adhesive, it’s time to start installing the part. Fortunately, this process is not at all difficult.
- Wash your own car well. You should not limit yourself only to the area where the molding will be attached. Dust from adjacent parts may accidentally fall into the cleaned area and ruin everything for you.
- Determine in advance the place where you will install the molding.
- In order to ensure the best adhesion between the surface of the door and the adhesive layer, degrease this area of the door by wiping it with microfiber soaked in a special product.
- In the same way, degrease the side of the molding that will be attached to the car.
- Apply a thin bead of glue to the molding. You should not use too much of the product: excess glue squeezed out from under the glued part can spoil the appearance of the doors.
- Place the molding evenly on the selected area and press. Some types of products require long-term fixation. The instructions for use will tell you about this.
- If drops of product still appear from under the molding, remove them before the glue has time to harden.
Do not touch the degreased surface with your bare hands, even if they are completely clean! To be on the safe side, you can wear silicone gloves.
Video: how to stick molding on a car door
That's all! A protective and decorative cover, selected in accordance with your preferences and principle of use, is installed on the car.
Installing a molding is such a common process that it’s just fun to go to a special auto repair shop for it. The only thing you can do incorrectly is to glue the part not completely straight to the ground, but with a slight bevel. So that your eye does not let you down, make inconspicuous notes or call an assistant. Even if something goes wrong, the cover can be removed. This is done under the influence of hot air, which dissolves the adhesive layer. And if the fate of your paintwork is not indifferent to you, do not delay the process of installing moldings.
arosw.ru
Seasonal care of car seals
Depending on the time of year, you need to monitor the rubber elements:
- In summer, it is best to treat seals with products containing talc. Thanks to this, it will be possible to avoid squeaking, melting and sticking of the rubber to hot metal parts. However, there is no need to split hairs here either. It is enough to buy talc for children (ordinary powder) at the pharmacy and treat the gum with it.
- In winter, rubber elements require much more attention, as they can crack. To prevent this, it is necessary to periodically wipe the elements with a dry, clean cloth and treat them with special compounds that will prevent freezing.
Healthy! In winter, it is recommended not to leave the car so that the driver's seat is on the leeward side. This way you can avoid problems with opening doors in cold weather.
Silicone compounds are the best for caring for seals in winter (they are inexpensive and have a long lifespan, up to 2-3 weeks). They are available in several types.
Types of silicone grease for seals
Today there are several varieties of these compositions:
- Pastas. Such lubricants should be applied with a napkin to previously cleaned rubber bands. The main disadvantage of such products is the difficulty of using them in hard-to-reach places.
- Gels. They are also problematic to apply to small or remote parts. But the gel has a thinner consistency, so the application process will be a little easier. One of the advantages is that those parts that do not require processing remain clean. However, some gels spread too much.
- Aerosols. Such liquids are considered the best. They are easy to use and allow you to process all the necessary elements. But, due to spraying, they can contaminate the surfaces adjacent to the seals (greasy stains will appear on them). To solve this problem, it is enough to purchase aerosols that are equipped with special long “spouts”.
It is also important to decide on the manufacturer. There are many products on the market today. Let's look at the most popular of them.
The best means
Car owners identify several high-quality compounds:
- StepUp (USA). Excellent water and dirt repellent (also contains WetOut moisture displacer). The operating temperature of the product is from -50 to +220 degrees. The product is suitable for seals of any vehicles (including snowmobiles and even jet skis). The composition is made on the basis of silicone, isopropanol, propane-isobutane and additional additives. The canister is equipped with a convenient thin tube. The cost is about 400 rubles.
- Very Lube (from the Ukrainian company XADO). Silicone spray for plastic and rubber elements costs about 220 rubles. The composition has excellent insulating properties, penetrates well into chips and cracks, preventing their contamination. The lubricant contains no fatty components, it has a water-repellent effect and prevents freezing to metal elements. Very Lube can withstand temperatures from -62 to +250 degrees. The composition is not washed off with hot or cold water.
- Eltrans (Russia). This is a universal lubricant that can be used to treat rubbing parts (including rubber seals). The cost of the composition is in the range of 160-190 rubles. After treatment, a thin protective water-repellent layer is formed on the surfaces. The operating temperature of the liquid ranges from -30 to +60 degrees, so this product may not be suitable for regions with harsh winters.
- NanoProTech (Russia). The cost of this penetrating lubricant is 300 rubles. For this money, the car owner receives a composition that is capable of displacing moisture up to 100%. The validity period of the lubricant (as stated by the manufacturer itself) is at least 3 years. After treatment, the seals stop squeaking. A protective layer is formed on them, which penetrates deeply into the structure of the elastic band. The composition retains its working qualities at temperatures from -80 to +140 degrees.
It’s also worth paying attention to a few more good formulations.
Seasonal recommendations
Since climatic conditions differ significantly in summer and winter, rubber door seals also require appropriate care measures.
There is nothing complicated or impossible here, but it will be better if you remember a couple of important points.
When the machine is operated in the hot summer period, it is recommended, in addition to washing, to treat the rubber bands with special means. They are based on talc. Thus, the rubber will not melt and burn to the metal. And for the safety of the product this is extremely important.
If you wash your car in winter, do not forget to wipe the seals with dry rags. Then auto chemicals, liquids and various lubricants are used. Silicone grease is very popular. It is easy to apply with your own hands. There are winter products that have a defrosting effect and protection against freezing.
The products are inexpensive, do not destroy the glue, and one can is enough for more than one winter season. So buy it, you won’t regret it for sure. After treatment, the effect lasts for several weeks. Therefore, there will be no need to reapply daily.
It is only extremely important to treat the surfaces of rubber door seals in the form of a silicone aerosol strictly according to technology. Each manufacturer has its own, but in many ways they are all similar. The most important thing here is to apply the product only after thoroughly washing and drying the rubber.
When you apply a layer of silicone, do not rub it with a rag. The liquid component of the product will evaporate naturally, and a thin layer of silicone material will harden, forming a protective film of sufficiently thick thickness.
As you can clearly see for yourself, there is absolutely nothing complicated in the matter of extending the service life of rubber door seals. You just need to remember the basic rules of care, keep them clean, and also periodically use special products. In frosty weather they are one thing, but in hot weather they are completely different.
How are things going with rubber seals? Are there any secret tricks to make them last longer and prevent them from drying out, cracking or losing elasticity? Leave your comments with your answers.
When do you need to replace seals?
The seal is a rubber band that is placed on the edge of the door or on the edges of the body in the place where the door is pressed against the opening. This tape may not be one, sometimes it is part of two seals at once to enhance the sealing properties.
The role of seals in the automotive industry is as follows: they provide sealing of the interior and create a certain climate in the vehicle interior. For example, when using a heater in winter, the heat should not be allowed to escape outside the cabin.
This often happens if one of the seals fails - the cabin immediately becomes cold. The problem of two seals instantly creates a draft in the cabin, which has a detrimental effect on the health of everyone in the car. The same can be said about the use of seals during hot periods. When operating a car in the summer, we often use air conditioning, which makes it necessary to keep cool air inside the car. To prevent it from leaving, it is necessary to maintain the seals in good condition.
Seals should be replaced in two cases: when they fail and during seasonal maintenance. In the first case, the failure of the seals can be determined both visually and by the effect of its poor performance: when using a heater, the car interior practically does not warm up, the same can be said when using an air conditioner.
What is the name of the plastic under the side doors on a car?
or rather decorative sill trims
Are there any other doors besides the side ones?!?!
Threshold trim.
I don’t know, I just know what it’s called under the front and rear doors xDDDDDDDDDDD Door sill trim, Mukhtar answered you. From now on, think about what you write, “side doors” damn
Regarding the doors, there is also a back door (for your information)... And they are called moldings.
Everyone has already answered, all that remains is to join.
moldings or side plastic decorative
touch.otvet.mail.ru
How is a car seal replaced?
You must purchase the product before replacing it. Extreme care is required here. The fact is that for each car model, seals are made individually, which means that you cannot use a rubber band from another car. It is important to remember this when purchasing new seals!
A very important point concerns the thickness of the seals. To improve tightness, their thickness can be increased. It is worth considering here that the higher the thickness of the seal, the harder it is to close the car door. If the seal is too thick, then more force will have to be applied to close the door, and this increases the load on the lock mechanism. Remember that when the door is closed strongly, the wear of the lock increases significantly.
To change the seals, you need to remove the old ones. To do this, find the end of the tape, and if there is one, simply pull it so that it comes off the body or door. If there is no such end, then it can be created. To do this, the seal is cut in any place with a knife, and the resulting end is pulled by hand in the direction opposite to the body. Thus, we get rid of the old product.
Installing a new seal is much more difficult. The fact is that its shape is adjusted to the shape of the doorway and does not allow any other installation, and as you know, rubber is soft and does not allow the seal to take the correct shape, which makes it difficult to choose a place to start installation. Therefore, first apply the seal to the opening with the help of a partner, and then put on the approximate part of the seal. As soon as it is in place, gradually put the seal on the entire door opening. Try not to put on everything at once; gradualness is important here. Improper installation of the seal can lead to it simply stretching or tearing, and then you will have to buy another product.
If the other ends of the seal do not match the geometry of the body, then you are putting it on incorrectly. To do this, remove it in reverse order and try installing it again. This cycle can be repeated until the seal sits evenly along the entire length of the door. If this cannot be done, then the car has probably already been involved in an accident and the geometry of its body is seriously damaged, which creates big problems for installing the seal.
After installing the product, check the reliability of its fastening. If necessary, it must be pressed in the place where it came off. After all, the reliability of fastening plays a very important role in the performance of the sealant’s main function.
In winter, many motorists immediately treat the seals with silicone grease after replacing them. It is recommended to do this in any case. Firstly, this way you will retain all the properties of the rubber throughout the entire season of operation of the car, and secondly, this will ensure increased tightness of the interior. Therefore, adding an extra portion of lubricant will not do anything wrong.
Car door trims
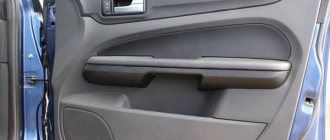
Car door trims, or moldings as they are also called, are necessary so that when the door is opened, they cannot be scratched by a nearby car or any other object. The presented situation constantly occurs in large and cramped parking lots, for example, near large shopping centers.
If you have door trims installed, then this situation will not be scary for you, since thanks to the door edge protector you will not be able to scratch your door or the door of another car.
Door trims
Door edge protectors come in three colors – white, gray and black. That is, thanks to this device, your car will not be afraid of scratches. That is why the main topic of today’s article will be door edge protector. So, in this article you can easily find answers to these frequently asked questions:
- What are car door trims?
- What are the main functions of car door trims?
- Methods for installing linings on car doors;
- How to properly install car door trims?
basic information
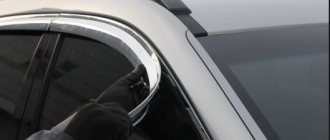
If you feel like your car isn't distinctive or sophisticated enough, it's easy to fix that with chrome trim. Most car enthusiasts try to distinguish their car from other vehicles, so they constantly come up with something new in order to make their car individual. Chrome trims are installed on almost all parts of the vehicle. Today, there are chrome trims on door handles, grilles, turn signals, gas tank caps, mirror trims, moldings on doors, sills and car headlights.
Thanks to them, you can focus attention not only on some individual parts of the car, but also on the entire vehicle as a whole. Car covers look very nice on all parts of the car.
With their help you can transform car arches, sills, taillights, headlights and much more.
Car linings perform not only a decorative function, but can also provide protection to the most vulnerable areas. That is, you can use overlays to protect body elements or hide existing flaws in the paintwork of your car. In addition, if you decide to sell your car in the future, it won’t take you much time, since chrome moldings add some newness to the vehicle.
The trims give the vehicle a sportier appearance and also combine all the tuning parts into a more harmonious look. They are usually made from plastic, which after production is repainted to match the color of the vehicle. These devices are usually installed on a standard bumper and secured using ordinary self-tapping screws. Covers on car doors give the car greater aggressiveness and individuality.
Do you even need to install moldings on the doors of your vehicle or not? The main function of the overlays is to change the appearance of the vehicle and visually reduce the side of the car.
But the disadvantage of the linings is the accumulation of dirt under the sills, and this can sooner or later lead to rust. Today, moldings are made that fit even better to the edges, and this makes it possible to even better protect the thresholds from dirt.
The door linings look like thin protective material that is located on the outside of the vehicle. The main function of the overlays is to protect the paintwork of car doors from scratches.
Another option for tuning car doors is windshields. Wind deflectors or, as they are also called, glass deflectors are linings on the side windows of a vehicle that protect the car interior from moisture penetration, as well as sunlight. Also, thanks to them, the distribution of air flow, ventilation and the elimination of drafts are significantly improved, and proper air circulation prevents car windows from fogging up and reduces their pollution. Another important property that the linings have is that they make it more difficult to break into a car, since the chances of opening the vehicle using any thin or long object are reduced to almost zero.
Self-installation
Car tuning allows you to transform the appearance of the vehicle and add sporty and even slightly aggressive features. In addition, today there are high-quality parts for car tuning and various accessories on sale. That is, now absolutely every driver can install a foreign audio system, sound insulation or air conditioning in his car. In principle, you can eliminate any external shortcomings of the presented car brand or add a more aggressive look to it by updating the linings, rear and front bumpers, spoilers, sills and many other tuning elements. Car tuning is the ideal way to transform your vehicle.
Today, there are several ways to install car door trims, such as gluing and mounting. Gluing is done using double-sided tape.
We immediately warn you that securing the presented device is not something very difficult, so you can easily secure it yourself. The only thing worth paying attention to is that car linings should be fixed only at temperatures above +10⁰С.
First, let's look at installing car linings using the installation method. So, how to properly install door sill trims on a car? In order to install car sill covers you will need:
- Thresholds;
- Key to 7;
- Key for 10;
- Phillips screwdriver;
- Plastic clips;
- Latches;
- Movil.
Algorithm for installing overlays:
- Treat the thresholds with Movil;
- Place the trims on the threshold;
- Tighten the three screws that secure the lining in the door opening;
- Tighten the fastening screw;
- Install the bracket that secures the trim trim.
Now let’s look at the algorithm for installing chrome trim on a car using the gluing method, which is performed in five stages:
- Degrease the surface on which the car trims will be glued;
- Remove the mounting film from the tape;
- Carefully place the chrome trim on the surface of the car that was previously prepared and press it well over the entire surface;
- Remove the tape;
- Press the chrome trim well over the entire surface so that the tape adheres well.
In most cases, chrome linings finally adhere to the surface of the car only on the second day after gluing, so it is not recommended to use high-pressure equipment to wash the vehicle before this.
A small recommendation:
When using chrome trim, try not to overload the vehicle with unnecessary decorative elements, otherwise it will simply not be aesthetically pleasing.
autodont.ru
Why does the seal in the refrigerator wear out?
Seal requiring replacement
You can tell that it’s time to replace the old tape with a new one by the ice that forms on the freezer door. Due to the fact that warm air gets inside, the temperature in the refrigerator will not be low enough. Over time, in older models that are used for a long time, the elastic band dries out, cracks and becomes less elastic. The tape may become unusable if the equipment is handled carelessly. The reason that the rubber band will have to be changed may be sagging of the door due to its own weight, as well as a malfunction of the sensor that is responsible for opening it. In case of partial or complete wear, you need to replace the rubber bands on the refrigerator door.
The rubber seal is a simple and rather weak part. It performs an important task, ensuring tightness. When the belt is deformed and destroyed, this immediately affects the operation of the unit. Cold air flows out, while warm air flows in. All systems are overloaded.
If the seal is slightly damaged, it can be repaired. A test will help you decide. A flashlight is placed inside the refrigerator. If the seal is poor, light will show between the seal and the housing. This means there are gaps.
They check it in another way. To do this, take a sheet of paper. Bring it to the body and close the door tightly. They pull on the peeking edge. If the paper is easily pulled out, then the seal must be replaced. They also check the places at the bottom and top of the door. The elastic band should fit snugly along its entire length. The fact that the tightness is broken can be judged by the following on it:
- dents;
- chipped;
- cracks;
- bends.
Repair with improvised means
This method does not require replacing the worn part. This is its advantage. It is also worth noting that since you will solve the problem yourself and with the help of available materials, the percentage of successful repairs is much lower than if you contact professionals
But material costs are also much lower, which is important
There are several methods that became popular during the Soviet Union, when due to the shortage of certain things and materials, it was still not customary to throw them away. Well, let's look at the methods for repairing the refrigerator seal with our own hands.
Using boiling water
First, remove the rubber band from the refrigerator door. This process can be quite difficult. More precisely, there can be 2 ways:
Modern refrigerator manufacturers attach this part to foam, in which case it will be easy to remove. In Soviet units, the elastic band is screwed on with nails; it is quite difficult to remove it
Therefore, you should remove it very carefully so as not to deform it. Otherwise, you will have to buy a new one.
So, let's move on to the actual processing of the material. Everything is extremely simple. You just need to scald it with boiling water and leave it in hot water until it cools completely. This way you can restore the rubber band on the refrigerator.
Dry it well and hang it back. After this treatment, the part will begin to fit tightly to the door and its tightness will not be compromised.
Using paper or other available materials
This method will only work if the deviation from the door does not exceed 2 mm
Therefore, first you should measure these discharges (this is important)
After this, you can take a piece of paper, cardboard or other similar materials and place it under the place where the elastic comes off.
Change door location
You can try moving the door to the other side. This will help you hide the damaged rubber band and use the good one.
Just be sure to prematurely pay attention to the location of the furniture in the kitchen. Will it be convenient for you to open the door if you change its direction? After all, it may happen that you have re-hung the door, and now you realize that it is inconvenient to open it and you need to change the location of all the kitchen furniture
